Thursday, May 30, 2019

WOOD BURNING PIZZA OVENS: THE WOOD MASTER’S GUIDE

The Wood Burning Pizza Oven with our Ash Wood glowing with great flavor
We specialize in products for Wood Burning Pizza Ovens!

For those that have followed us for years, you know we are proud that almost from the start of our Company, we were committed to providing a guide for equipment to cooking wood product match.  We refer to our guide affectionately as Match Your Cooker”.

In this article, we are covering our recommendations for Pizza Ovens, whether made of ceramic, clay, brick, steel or any combination, that are wood burning or a combination of wood burning and gas.

As there are always new equipment lines and models released, our plan is to provide regular updates on this listing.  We also encourage you to send us a message when you don’t see a manufacturer or model listed to ensure it is added to the list.

For now, we introduce you to our Wood Master’s Guide to SmokinLicious® culinary woods for Pizza Oven.

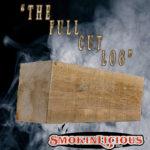
Smokinlicious Full cut log 

Barrel Smoker Logs


The following equipment/models would be suitable for the SmokinLicious® Barrel Smoker Log/ Full Cut Log which are only designed for the largest pizza oven’s cooking area.  These logs would also be suitable with the commercial-grade wood-burning pizza ovens:

Braza Brick Wood Fired Pizza Oven

Forno Bravo: Primavera 60 Outdoor Oven, Napoli Commercial Pizza Oven

Forno Classico: The Colosso, Fiamma Square

Mugnaini: Medio 110, Prima 120


¼ Cut Wood Barrel Logs

Our Quarter cut logThe following equipment/models would be suitable for the SmokinLicious® Barrel Smoker Log ¼ Cut Wood Log which we also call Pizza Legno:

Alfa Pizza 5 Minuti

American Barbecue Systems model: “The Judge”, “The Smokehouse 6042”

Authentic Pizza Ovens: Portable Maximus Oven, Traditional Brick Famosi Wood Fire Oven,  Traditional Brick Lisboa Wood Fire Oven, Stone Domed Pizza Oven, Traditional Brick Pizziaoli Wood Fire Oven, Traditional Brick Braza Wood Fire Oven

Bella Outdoor Living: Medio Wood Burning Pizza Oven

Bull Outdoor Products: X-Large Outdoor Wood Fired Pizza Oven, Large Pizza Oven

Californo: Garzoni Pizza Oven, Verona Pizza Oven

Chicago Brick Oven: Wood Burning Pizza Oven Kit CBO-500, CBO-700, CBO-1000; Americano Chicago Counter Top Brick Oven; Mobile Wood Burning Pizza Oven

Deeco: Aztec Allure Pizza Oven

Dome Ovens: Tudor Model Pizza Oven, Model Pizza Oven

Earthstone 90-PA Wood Fired Oven

EcoQue Wood Burning Pizza Oven and Smoker

Fontana Forni: The Small-Est Outdoor Oven, Toscano Margherita Outdoor Oven

Fornetto: Wood Fire Oven and Smoker built-in or freestanding

Forno Bravo: Primavera 60 Outdoor Oven, Bella Grande C36, Bella Ultra C40, Giardino Outdoor Pizza Oven Kit, Casa Home Pizza Oven Kit, Premio Home Pizza Oven Kit, Artigiano Italian Brick Pizza Oven, Andiamo Pizza Oven, Vesuvio Tiled Pizza Oven, Napolino Tiled Pizza Oven, Toscano

Forno Classico: Napoli, Cupola, Square, The Colosso, Fiamma Square

Forno Venetzia: Pronto 500 Outdoor Pizza Oven, Pronto 300 Outdoor Pizza Oven, Pronto 200 Counter Top Wood Burning Oven, Torino 500 Pizza Oven, Torino 200 Pizza Oven, Bellagio 300 Pizza Oven, Bellagio 500 Pizza Oven, Bellagio 200 Counter Top Wood Burning Oven

Gardeco: Pizzaro Pizza Oven

ilFornino: F-Series Mini Professional Stainless Steel Wood Fired Pizza Oven, Platinum Series Wood Fired Pizza Oven, Piccolino Wood Fired Pizza Oven, Professional Plus Wood Fired Pizza Oven, Professional Series Wood Burning Pizza Oven, Elite Plus Wood Fired Pizza Oven, Grand G-Series Wood Burning Pizza Oven

LaToscana: Forno Easy Pizza Oven

Mugnaini: Medio 110 Barrel Outdoor Oven, Masonry Oven Kits Piccolo 80/Medio 100/Medio 110/Prima 100/Prima 120/Piccolo 60

NXR Professional Ranges: Burning Wood Dome Pizza Oven

Pizza Party Pizzone

Preto Beleza Wood Fired Oven

Prime Portable Pizza Oven

Renato PR/310 Outdoor Oven

Ravenna: Talavera Tile Pizza Oven, Rustic Liso Pizza Oven

Rustic Natural Cedar Furniture: Rustic Wood Fired Oven, Wood Fired Pizza Oven

Sunjoy: Wood-Fired Pizza Oven

Valhinos Natural Wood Burning Oven

Wood Stone: Bistro Home Ovens 3030/4836/4343/4355, Mountain Home Ovens Mt. Chuckanut 4’ & Mt. Adams 5’


Charwood


Our Charwood product is a partially charred hardwood that still has the core of the specific hardwood’s flavoring intact.  In other words, the outside is carbonized while retaining a hardwood core.  For those ovens that specify using an anthracite coal only which is a hard, mineral coal, charwood would not be an alternative.  Also, any residential oven that requires gas assist, should not use charwood.

The following equipment/models would be suitable for the SmokinLicious® Charwood:

Authentic Pizza Ovens

Braza

Chicago Brick Oven

ilFornino

Mugnaini

Pit Boss Charcoal Pizza Oven

Wood Stone: Coal Fired Pizza Ovens
Double Filet Wood Chunk

The following equipment/models would be suitable for the Double Filet Wood Chunk:

Uuni Pro (Ooni Pro)


We hope you view this guide as a helpful resource for selecting the perfect culinary wood for your wood-fired oven.  As always, our Wood Guide Team is ready to answer your additional questions and further assist you for the perfect wood-fired experience!
Thursday, May 23, 2019

CHOCOLATE WAR CAKE BAKED ON THE GRILL

The classic Chocolate War Cake baked on the Grill- cut in pieces
The classic Chocolate War Cake Baked on the Grill

I’m going to show you how easy it is to cook a cake on the gas grill using wood chunks for added flavor.  I simply love how chocolate reacts to smoke vapor and this chocolate recipe of mine is simply outstanding for the grill.

The gas grill was originally intended to provide for a quick cook method but I view this as an extension of the indoor kitchen as the grill really is an oven.  I’m going to turn my grill into a wood-burning oven by incorporating a smoker box that I’ve added cherry wood chunks too.


Why is this referred to as a “war” cake?  During World War I and II, eggs, butter, and milk were rationed.  Although I am including one egg in this recipe, I still consider this a variation of the “war” cake.  You certainly can make any variation you find as there are lots of options available online.
simple ingredients for this recipes
Let’s gather our simple ingredients, heat up the grill, and make perfection in a chocolate cake!


Two-Zone Cooking

If you follow my gas grill recipes, then you know I am a fan of the two-zone cooking method.  By lighting the burners on only half the grill and placing the food on the unlit side, I can guarantee controlled temperature that allows me to walk away like I do with my indoor oven.

I start by adding two cherry wood chunks to a metal smoker box.  I place this box under the grill grate, directly on a burner heat shield.  Next, I turn those burners on to medium and allow the grill to warm up while I make my cake batter.


The Unusual Batter


First, I butter an 8-inch square cake pan and set aside (you can use the non-stick cooking spray if you prefer).  I start with the dry ingredients: 1-1/2 cups (7-1/2 ounces) unbleached all-purpose flour, 1 cup (7 ounces) sugar, ½ teaspoon baking soda and ¼ teaspoon table salt.  Whisk all this together in a large bowl and set aside.

The Chocolate Batter mixed and ready for bakingWith the dry ingredients prepared, it’s time to start on the wet.  In a medium bowl, combine ½ cup (2 ounces) Dutch-processed cocoa powder and 2 ounces high quality, bittersweet chocolate, chopped fine.  Pour over the chocolates 1 cup of hot coffee, whisking to aid melting.  Allow cooling then whisk in 2/3 cup mayonnaise, 1 egg, and 2 teaspoons of vanilla extract.

Tasting Notes: Whenever you bake on the grill, it is important to use a two-zone cooking method rather than direct heat cooking.  This will reduce the risk of burning the batter or producing off flavors, especially if you use a charcoal grill.


Grilling the Cake

grilling two zone with wood chunksWith the beautiful chocolate batter finished, it’s time to pour this into the prepared dish.  Note you can use disposable pans or glass, ceramic – any high heat pan works just fine.

I check the cake about ½ way through the 35-minute cooking time.  If I see that there is some uneven cooking occurring, I simply rotate the pan and position where there are no cold spots.  An infrared thermometer will help locate any cold/hot spots.


After grilling until firm to the touch or, you can do the toothpick test – insert a toothpick in the center and if it comes out clean, the cake is done – I remove the pan from the grill and let cool for 2 hours untouched.  After the cooling time, I invert the cake onto a cutting board.  At this point, you can sift some powdered sugar over the top of the cake or serve with a side of whipped cream.  Any way you serve this, it is going to be loved, with the serving plate cleaned quickly.  Baked on the Grill is fun!

Tasting Notes:  This cake can also be served with some additional fruit flavoring pairings like cherries, figs, raspberry, pear, and strawberryYou still will maintain a 350°F grilling temperature.

Thursday, May 16, 2019

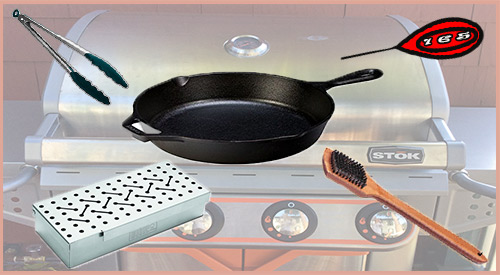
USEFUL COOKWARE OPTIONS FOR YOUR GRILL

logo and grill introducing our USEFUL COOKWARE OPTIONS FOR YOUR GRILL
Enjoy our USEFUL COOKWARE OPTIONS FOR YOUR GRILL

If you’ve followed my writings for some time now, you’ve likely learned that I believe outdoor equipment is the same if not better than the traditional indoor options.  You literally can make anything on the outdoor equipment that you make inside your home.

Knowing this, I have received many questions regarding the type of cookware that I use when grilling and/or smoking on said equipment.  Today, I’m going to discuss the preferred cookware materials and the potential issues that can arise if you use a material that is not considered ideal for high heat temperatures.


Material #1: Cast Iron

This is my first choice and many other cooks, and the only material I use when I coal cook with cookware. Why? It is durable, it is relatively inexpensive, it is unbelievable at heat retention, and you can cook almost anything in it.   Literally, it never wears out!

Downside?  It is a material that needs to be maintained meaning oiled consistently.  It is heavy!


Material #2: Carbon Steel

Carbon steel is a beast at retaining heat and it can be used on any cooking surface.  Although lighter in weight than cast iron it is still heavier than stainless steel.  Similar in many attributes to cast iron, it also requires frequent seasoning and the base of the pan will become discolored from the high heat exposure.   Plus, it is not dishwasher safe so you need to love this material and be willing to put some work into maintaining it.  If you’re lucky enough to find a piece you love, you will make magic in it whether near or in the fire.


Material #3: Stainless Steel Combo

I’m sure every one of us owns at least one piece of stainless steel.  This is a very attractive piece of cookware from the aesthetic view.  However, on its own, stainless steel is not the best heat conductor.  This is the main reason why it often is combined with another material to improve its heat retention properties and keep it light in weight.  Suitable pairs you’ll find for stainless steel include copper and aluminum.  All three of these materials on their own, are not ideal.  Cooper and aluminum heat very quickly which means they can burn very quickly as well, while stainless steel on its own can take forever to heat up.  But combine copper and aluminum or aluminum and steel and you have an ideal heat conductor and safe high heat material.  Rule of thumb: never use aluminum and copper cookware on their own for high heat cooking.


Material #5: Enameled Cast Iron

Know as the “pretty” cookware, enameled cast iron is cast iron at the heart-and-soul but with beautiful ceramic enamel outside surfaces.  It has fabulous heat conductivity and retention but it is not non-stick which can cause some issues.  I find it works really well when I use more of a two-zone cooking set up rather than direct coal or heat cooking.


Material #5: Non-Stick

Teflon is a non-stick, promoted material, that should be avoided.  It has no ability to be used for high heat and in fact, excessive heat can melt this material.  Also, Teflon is documented to flakes off after extended use, moving these flakes into your foods.  At higher temperatures, the material produces toxic fumes that have been proven to be a health risk.


What Are High Heat Levels?

Now we know what materials are optimal for high heat cooking but what are the actual temperatures that can be handled?

Cast iron and stainless-steel combos can tolerate 1500°F, with stainless steel excelling to 2200°F.  Although copper has a melting point of 1984°F and aluminum at 1221°F, cast iron, and steel materials in cookware still perform the best.

Now you have the education behind your choice of cookware.  My last piece of advice is to always think about how you plan to use the cookware.  If you love to nestle in the coals or be as close to the flame as you can, the items that may not look as pretty are likely the best choice.  Take our tips in this blog USEFUL COOKWARE OPTIONS FOR YOUR GRILL and expand you cooking/Grilling skills and techniques!

Thursday, May 9, 2019

ROSEMARY INFUSED SMOKED BEEF SHANKS FROM THE GRILL


Look how juicy our Rosemary infused Smoked Beef Shanks are after we removed them from the grill!

I’m back with another recipe for beef shanks that takes advantage of seasonal herbs with a simple smoking technique that can be done on your gas or charcoal grill.  I’ve been busy in the kitchen with another seasonal harvest so I’m going to cook my beef shanks on the gas grill using my favorite two-zone cooking method that allows me to step away from the grill.  Of course, I want some wood flavoring in these shanks so I’ll be using cherry wood chunks in a standard metal smoking box.


Simple Seasoning


Rosemary on top of the Beef Shanks for flavoringIt is considered one of the ideal flavor pairings for beef: rosemary.  Similar to sage, it contains more pine and floral notes and is sweeter than other herbs.  You will find many varieties that have some variation to the traditional rosemary flavor.  Here are some of the characteristic flavors: lemon-pine, clove and nutmeg, and even a smoky character in a variety called Sissinghurst Blue.

Beef is predominately a salty flavor with some sweetness.  If the animal is grass-fed than the flavor of the meat will be much fuller.

I’ve placed a grill rack in a disposable foil pan, added some rosemary sprigs from my garden to the rack and then applied a drizzle of avocado oil, salt, and pepper to the shanks on one side, laying the seasoned side on the rack.  Then I repeat the oil, salt, and pepper on the exposed side and apply some rosemary sprigs on top.  That’s it!  These are now ready for the grill.

Tasting Notes:  

Other seasonal herbs that are perfect for using in place of rosemary include: mint, parsley, dill.  Although I used avocado oil, since you are not grilling over direct heat, you can use other oils such as olive, almond, walnut, grapeseed, coconut, sesame, etc.


Smoking on the Gas Grill


I prepare my LP/Gas grill by lighting only half the burners.  I set these burners to medium heat to start.  Next, I place my metal smoker box containing two SmokinLicious® wild cherry wood chunks on the hot burners, right under the grill grate.  Allow this to heat up and start smoking.  The radiant heat capture in the grill will cook my beef shanks without them having to be exposed to the direct heat.  Perfect way for me to be able to walk away from the grill.  When I’m ready to grill, I check the temperature readout to try to hit between 300-325°F for cooking, as to me, this is the heat level that tenderizes my beef shanks to where I like them.  If the temperature reads higher, I just turn down the burners slightly.  Below, just a tweak up.

beef Shanks with the Bone Marrow ready for the stock pot

I leave the beef shanks untouched for about 35 to 40 minutes at which time, I may need to swap out the charred wood pieces for some fresh in the smoker box.  That’s when I give the beef a turnover.  Just one turn is all you will need.  I like to pull my beef off the grill at about 135°F so that when I get it to the table, it will be at a perfect medium-rare.   I also prefer to slice the beef off the bone and serve the marrow bone with some toasted bread – which can be done on the grill as well – that I’ve merely rubbed with some fresh garlic clove or smoked tomato.  So simple yet so unforgettable in flavor.  The season’s best beef shank and rosemary infused in less than 75 minutes.


Tasting Notes:

Don’t forget to save the bones to make our smoked beef broth.

If using a charcoal grill, still use a two-zone cooking set up meaning charcoal on only one side of the grill.  Be sure you only cook with hot coals, no flames.  Slow cooking these Rosemary infused smoked Beef Shanks will reward your guest and yourself with a wonderful meal!

Thursday, May 2, 2019

TOP TOOLS NEEDED FOR GAS GRILLING

Smokinlicious teams top tools needed for gas grilling
Smokinlicious® teams top tools needed for gas grilling

There is no question that LP/Gas grills have changed tremendously over the past 10 years and now include some features standard that for many years, were options.  Then there is the development of dual or multi-fuel options on a grill so you can have one unit that performs as a gas grill, charcoal grill, wood grill, and even electric or pellet grill, all in one unit.

Today, I’m focusing on the standard LP/Gas grill, independent of any other fuel source.  This guide will focus on the basic tools that will provide for a better grilling experience and make you more efficient at the grill.

Tool #1

I’m starting with a grill brush since most of us have the habit of thinking about cleaning off the grill grates when we start the grill for cooking, not when we finish.  This tool is to ensure clean up the residual food bits and grease left from your previous grilled foods.

Now I’m aware of the controversy over the use of metal bristles but most of these brushes are made well.  Simple inspection of the brush bristles each time you use it will allow you to identify if the bristles have come loose and have the potential to be transported to your foods.  I prefer a brush with metal bristles, with a long handle to keep my arm away from the heat, as often you want to clean the grill when it’s hot.  Remember, most of these brushes are under $10 so think about purchasing one a couple times per season to ensure the bristles stay put.

Tool #2

There are times when the grill grates and lid will become super coated in grease and pieces of food. 
You’ll need to break out the cleaning agents to ensure these surfaces are ready to go for the next grilling event.  Two of my favorites are CLR BBQ Grill Cleaner and Mr. Clean MagicEraser.  As a non-toxic, non-flammable, biodegradable product, CLR BBQ Grill Cleaner is not something you have to leave on for hours at a time.  It quickly breaks through the issues and allows you to wipe clean to an almost new state.  Keep in mind, the CLR brand also makes a stainless steel cleaner for the outside as well.

Tool #3

Long-handled tongs.  Your standard tong length for the traditional kitchen just won’t work at the grill, as you need to keep some arm distance from the hot grill surfaces.  I like the 20-inch length with silicone grips as well as silicone tips, as silicone can tolerate extremely high heat.  If you grill multiple food items at the same time, think about purchasing tongs with different colored tips and/or handles as that will ensure use of one color for a specific food so there’s no transfer of flavors.

Tool #4

Like the tongs, a must have is long-handled spatula for those food items that need to be flipped.  I prefer one that is made of solid steel and has a bit of a beveling to the edge.  Again, the longer the handle the better for keeping away from high heat.

Tool #5

An easy to read, digital thermometer.  It is a must when you grill or smoke.  Look for one that has a longer probe for when your grilling larger roasts and thicker cuts of meats and poultry.  Be sure the readout is easy to see and if you grill a lot at night, get one that has a back-lite to see more clearly.  If you cook a lot of different animal proteins at the same time, try to have a thermometer dedicated to each food so you don’t cross-contaminate while bacteria may still be an issue.  There are assorted colors available making it easy to dedicate one to red meat, pork, poultry, and fish.   Most of the digital thermometers on the market today are under $18 with even more under $10.

Tool #6

 If you’ve always been a person that cooks directly on the grill grates and only does the standard fare – hamburgers, sausage, chicken, perhaps ribs – you need to get out of that rut and learn to do more with your grill.  Start by investing in one piece of quality cast iron.  Able to withstand intense heat, cast iron can take you from the average griller to someone with skill.  Now, you can enjoy recipes normally done on the indoor stove outside in the fresh air, with your cast iron skillet.  Remember, there’s a whole line of cast iron cookware so as you expand your skills, you can add to your outdoor cookware.

Tool #7

Although I am a fan of the standard steam table disposable foil pan, any size, shape foil pan will do.  These are perfect for use as a drip pan to prevent render juices from spiking flames and as water pans for a two-zone cooking set up.  I won’t deny, that I also use these to cook in especially fragile items like fruit and specific vegetables.  You certainly can invest in a grill pan but clean up becomes a snap with the disposable pan.

Tool #8

Although the smoker box was originally intended for use with wood chips on the grill, I always use small wood chunks in mine.  I prefer a box made from high-grade stainless steel and one that has a hinged lid.  My smoker box holds three Double Filet Wood Chunks from SmokinLicious® perfectly and provides for extended smoke vapor as compared with wood chips.  Used directly on the grill grate or set under the grill grate on the heat shield, it produces smoke for hours.  Although you can place wood chunks directly on the heat shields, as I’m known to do myself sometimes, they will become permanently marked from the wood ash and eventually need replacing.  The smoker box allows you to avoid this.

There you have it!  My TOP TOOLS NEEDED FOR GAS GRILLING for better results and help in extending the life of your investment!