Thursday, June 30, 2022

Wood Grilled Romaine Lettuce

Wood grilled Romaine lettuce- Scrumptious!

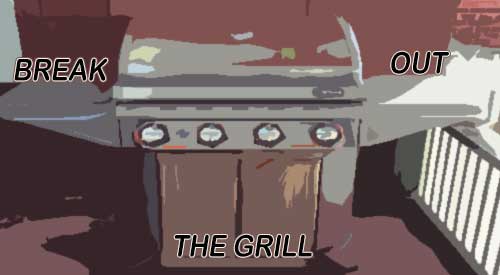
It’s time to bring your vegetables into grilling season! Nothing beats the smell of fresh vegetables roasting over wood even on an LP/gas grill. Any time of the year works fine for this technique to get a great char wood flavor in your seasonal or store-bought fresh vegetables.

All you’ll need for this easy cooking experience is an LP or gas grill – any brand or size will do, double filet wood chunks from SmokinLicious®, and a head or two of fresh Romaine lettuce!

Grill Preparation

If you want to add special wood flavoring to your LP/Gas grill there are easy steps to follow:

Make sure your grill is clean from any significant grease build up. Remove the grilling grates and determine how much space is between the diffuser and the grilling grate. The diffuser is the plate covering the unit’s gas burner(s). Don’t remove the cover.

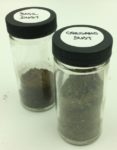
Once you have the sizing computed, then select the SmokinLicious® wood chunk size that will fit – Single Filet which is ~4 inches or the Double Filet which is ~2 inches.

Wood Preparation

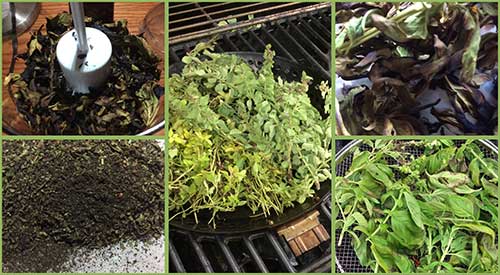
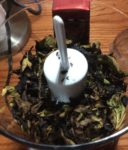
Now, let’s set up the wood on the grill. Remove the cooking grates from the grill then strategically place the wood chunks over the heat diffuser. This is the metal piece covering the actually gas burners. If the SmokinLicious® wood chunks are fresh, then you can add them directly to the unit without pre-soaking them. If not, you may want to consider a lite soaking of about 15 minutes. Because I’m cooking lettuce, I am using the chunks in their natural state. However, feel free to consider a pre-soak in liquid with flavorings such as beer, wine or juice.

Wood chunks above the diffuser

Now replace the grill grates back on the unit, over the SmokinLicious® wood chunks! Make sure the grates are securely seated back on the unit. If there is a lot of space on your unit between the diffuser and the grate you may want to consider a SmokinLicious® single filet or block item. Now light the unit, set the dials to a low heat setting and bring the unit up to temperature. Say around 180 degrees. Do not overheat the unit.

Preparation

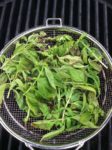
In preparing my Romaine lettuce for this cook, I slice it vertically from stem to head creating two equal size halves. After pre-heating the grill to around 180 degrees, I place the two slices of the lettuce head directly on the grill grates. Let the wood infusion flavor begin!

"Two halves are better than one head"

Roasting Process

I position the two halves of the Romaine over the hot spots created by the SmokinLicious® “Double” filet wood pieces which are under the grilling grates. The wood will ignite and begin the charring stage. I recommend bunching the wood pieces together to produce a hot spot on the LP/gas grill to allow for a direct char technique. While I am not using the smoke from the wood, I am still infusing great natural grilling flavor with the wood.

My cooking is taking place with an open lid because I want to char not smoke! It’s important to keep turning the heads so the flavour will be even. At about 1/3 of the time cooking on the grill, I turn the gas completely off and let the flaming wood chunks on the diffuser finish up the final cooking. In this last stage of charring, I brush my clarified butter with chopped parsley and mint baste to the lettuce halves for final flavour and presentation. And, if desired, feel free to drizzle any remaining melted butter mixture to the finished product for a little extra taste kick.

Remember this is a delicate vegetable, not meat so there is no grease to flare up the LP/gas grill. This is another example of why using SmokinLicious® wood chunks on the diffuser and under the grill grates of your LP/gas unit can generate such exceptional wood-fired flavour. Now, get to your grilled Romaine lettuce and ENJOY!


Thursday, June 23, 2022

TIPS ON INCLUDING THE GRILL IN STAYCATION PLANS

Our Grill drawing for breaking out on your staycation
Including the grill in staycation plans is a flavor rich must this year!

The reports are in and all point to one common theory: people are likely to cancel previous plans to vacation away, especially those considering foreign travel, and instead opt for a staycation.

What does this mean for the economy? Of course, there will be negatives with this decision not to travel but one potential positive is the soar in potential grill sales as people begin to ponder ways to keep home cooking interesting.

Options of Including the Grill in Staycation Plans

Likely the first assessment for most considering a staycation is what do we do for food. People often have dining out plans built into their weekly schedule but due to concerns with visiting populated locations like a restaurant, food truck, or even street vendor, these locales will likely be one of the first voluntary bans. That means, cooking at home just moved to the front of the line. Cooking on the stove top or in the oven are certainly options, but given you want to keep your body from getting bored you’ll likely want to branch out to the outdoors and start grilling, especially if the weather makes that enticing.

Here’s where the lesson needs to be learned. Don’t just settle for cooking direct heat method like you do with hamburgers, hot dogs and sausages. Learn how to grill with indirect heat and you’ll be in great position to put a variety of foods including vegetables, animal proteins, and even fruits and nuts on the grill.

The starting point, however, is to assess your current outdoor cooking equipment and decide the following:

► Is the equipment in good working order to be used frequently?

► Are there any components of the grill that need replacing? For example, the grill grates, heat shields, ignitors, wheels on a portable unit, charcoal pan, water pan, etc.

► Is the current equipment of adequate size to feed your family all at once?

► Is the equipment easy to operate meaning it won’t burdened you with constant supervision?

► Does the equipment have an option for a dedicated fuel set up like LP gas conversion to natural gas which will allow you full use without having to worry about filling LP tanks?

► If you want to up the flavor of your grill foods, can you easily add wood to the unit?

If you’re in the market for a new grilling unit, assess the frequency of its use and what you want to be able to cook on it before making the purchase. The more frequent use the higher quality the materials that make up the grill need to be, to keep the grill functional for a very long time.

In the end, you not only will have piece of mind in knowing you can feed your family great tasting foods, but you’ll likely have a great opportunity to bond in a great outdoor environment.

Do you plan to take a staycation? Leave us a comment and subscribe to get our latest tips, techniques, recipes and the science behind the fire and smoke, for all live fire cooking methods. That’s SmokinLicious!


Thursday, June 16, 2022

Guacamole asado

Guacamole asado hecho con aguacates asados para un toque único. ¡En una manera sencilla, impresione a sus invitados!

Aguacate está lleno de grasas saludables, 4 gramos de proteína y 975 miligramos de potasio que es casi el doble que un plátano. Con 18 de los aminoácidos recomendados en el consumo diario, aguacate es una fruta súper.

Pensamos que tomaríamos este favorito de frutas y añadiríamos un nivel de sabor para sus recetas de aguacate por asado de madera el aguacate.Este sencillo paso aportará todos los beneficios nutricionales de la fruta con un nuevo sabor audaz.

Guacamole Asado- Ingredientes frescos

Una vez que haya asado de madera sus aguacates en una parrilla de gas o carbón (consulte nuestra publicación en esta técnica), debe recoger los siguientes ingredientes:

  • 3 aguacates asados
  • 1 diente de ajo finamente rallado
  • 1 pimiento serrano o jalapeño finamente picado
  • 1/4 de cebolla blanca, finamente picada
  • 2 cucharadas de jugo de lima recién exprimido
  • 1 cucharada de cilantro picado
  • 1 cucharadita de sal kosher

Además de los ingredientes,necesitará una licuadora o la mano y el mortero. Prefiero el mortero y la peste para poder controlar el nivel de puré que se produce a cada ingrediente.

Guacamole Asado- Poniendo en capas el sabor

Primero, es necesario triturar la carne de aguacate asado. El mejor guacamole tiene algo de calidad gruesa, así que tenga esto en cuenta cuando estés triturando la carne. Cuando el aguacate está machacado, agregue la pimienta y combínelo también. Puede seleccionar cualquier pimienta si desea calor o no. Si prefiere un guacamole que no tiene sabor picante, añade un pimiento dulce.

Después del aguacate y la pimienta se mezclan, es hora de agregar los otros ingredientes. Agregue primero la cebolla picada seguida de jugo de lima, cilantro y sal. Combine todo bien, asegurándose de que los trozos no sean demasiado grandes para cualquiera de los ingredientes.

Guacamole Asado- ¡Prepáranse para servir el guacamole asado!

La mejor parte del guacamole asado es como simple que es hacerlo, sin embargo, los sabores son tan frescos e intensos. Después todos los ingredientes se combinan, recoger todo el contenido del mortero o licuadora y colocar en el plato de servir o tazón. Me gusta rematar mi guacamole con un poco de pimentón ahumado para que tenga un poco de color. Ten en cuenta que no necesita usar esto con chips de tortilla. Este es un excelente ingrediente para una hamburguesa o sándwich de pollo asado y aun funciona bien con ensalada de verduras. Encantará cómo el sabor de la madera añade otra dimensión a esta comida favorita.

Esperamos que hayas encontrado inspiración con esta receta. Nos encantaría ver sus fotos de esta receta. Deja un comentario y suscríbelo. Sigue siguiéndonos mientras lo traemos consejos, técnicas y recetas innovadoras sobre cómo trabajar con madera para cocinar, asar a la parrilla y ahumar.


Thursday, June 9, 2022

SMOKED HERBS FLAVORS WITH SMOKED HERB DUST

Our preparation of smoked herbs, from picking, smoking and grinding to make smoked herb dust. Adding great flavor to dishes.

Don’t make the mistake of thinking fresh herbs are to be used in dishes as, well, fresh only. Although you may have dried your fresh herb harvest before, we are bringing another alternative to you, smoked herbs.

We hot smoke the fresh herbs on the grill then turn them into a dust for use in all types of dishes. The smoking process will bring a depth of flavor that you’ve likely never experienced before. Go to the herb garden and pick your favorite varieties and let’s get making smoked herb dust!

Smoke Vapor Infusion

Fresh herbs on the grill using a grilling cage

One thing about this smoked herb technique is you can do the smoke infusion by a variety of equipment methods.

For those with a gas grill, add wood chunks either directly to the heat shields on one side of the grill or add wood chunks to a metal smoker box that can be placed on the heat shields or the grill grate. For charcoal grill owners, light your charcoal and allow to reduce to hot coals only. Add a piece or two of hardwood chunks or a handful of hardwood chips to the hot coals. If possible, push the hot coals to one side of the grill. For both grill types, you want to use a two-zone cooking method so the herbs don’t catch fire.

For those that don’t own grilling equipment or who simply don’t want to bother lighting up the grill, you can use a handheld food smoker. Simply place micro wood chips in the bowl of the unit, place the herbs in a storage bag with the tubing of the smoker unit, cinch the end of the bag around the tubing, and light the chips. I like to leave the smoke in the bag for maximum smoke vapor infusion.

I used both my gas grill and charcoal grill for the smoke process by placing my herbs in a vegetable basket and grilling with the herbs on the unlit side of the grill. Within the first 5 minutes, you’ll see how the herbs lose moisture and begin the drying stage.

Tasting Notes: I find the handheld food smoker will produce the boldest smoke flavor to the herbs. The intensity of flavor rated from lightest to boldest based on equipment would be a gas grill, electric smoker, pellet smoker, charcoal grill, handheld food smoker.

Grinding Process

smoked herbs in the food processor for reduction into smoked herbs dust

Once the herbs have charred and dried, it’s time to remove them from the grill and bring them to the food processor. I have a mini processor that only has two settings: chop and grind. I prefer to use this appliance to bring the smoked herbs to dust level but a spice grinder works just as well.

First, remove all the herb leaves from the stems and place a small quantity in the food processor bowl. You can remove the leaves by placing the entire herb sprig in a colander and pressing the leaves through to parchment paper. Secure the lid and grind until you get as fine a dust as the appliance will allow. Both the appliance and the herb will determine how fine the herb dust will get. As you will see, basil dust becomes finer than oregano. This technique will work for just about any herb you can grow or locate at the market. Store the herb dust in glass or metal jars for up to a year.

Tasting Notes: Smoked herbs are much stronger in flavor than the standard dried herb. Adjust the amount used in recipes as needed. It is often best to start with less, taste, and then add more as needed.

So Many Uses

finished herb bottles of smoked Basil and Smoked oregano

Experimentation is key when it comes to #herbdust. Most often, herbs will be applied to meats and poultry, perhaps rice and pasta dishes, but there are so many more foods that are good pairings for herb dust. Let’s take parsley as an example. Commonly used with fish and beef, parsley is a great pairing for sweet items as well. This includes banana and cream. It’s important that you look beyond the traditional side dishes and entrees and explore the sweet side of what herbs can offer. By doing so, you’re sure to find endless combinations that will tickle your palate and give you more pleasing menu experiences.

The Culinary Crew wants you to know …

… that the two-zone method is certainly a practice that you will want to master and prioritize in your wood cooking toolkit, especially when grilling and smoking delicate fresh consumables like herbs. Not only will two-zone cooking avoid those acrid tastes associated with flare ups, it will infuse your food items with a nice balance of wood smoke flavoring.


Thursday, June 2, 2022

A RHUBARB FOOL

Our Finished Strawberry Rhubarb Fool with a Smokey Twist!

Strawberry Rhubarb Fool–Fresh rhubarb means great recipes most of which consist of dessert! This one is no exception. Not only am I going to use smoked rhubarb but I’m including smoked strawberry as well.

This is the SmokinLicious® version of the Strawberry-Rhubarb Fool a popular dessert in late Spring and Early Summer. Our creamy version is taking on a new flavor as we add another element: smoked components. That means you need to smoke the rhubarb and strawberries first, before you make our recipe. You can find our tips on smoking the strawberries and the rhubarb on our Tips and Techniques Blog. Don’t be scared! These are simple techniques you can do on any type of equipment including with a hand held food smoker.

Get smoking your fresh strawberries and rhubarb and then, let’s make the sweetest, creamiest strawberry-rhubarb fool smoker’s style!

Our Finished Smoked Strawberry on a try
Tame Those Flavors

I find it easiest to work with rhubarb and strawberries when they are cut down in size after the smoking. For me, rhubarb cut into 3-inch lengths and strawberries sliced thin work best for this recipe. Don’t forget to keep any of the juice that comes off the smoked strawberries both during the smoking process and as you prepare the strawberries.

The combination of the tart rhubarb and the sweetness of the strawberry plus the smoky quality from both will produce a perfect balance. Let’s get these two flavors combined to make the perfect fool.

Since rhubarb borders on the bitter, it needs to have some additional sweet added to it. Place your smoked rhubarb cuts which equal about one pound, into a saucepan and add a ½ cup of sugar. Heat on medium high. While that is sweetening and tenderizing, place the smoked strawberries (about 8-10 ounces depending on the size) into a bowl and add ¼ cup sugar, allowing this to dissolve completely. This process will take about 30 minutes. Feel free to adjust the level of sugar in the strawberries based on the sweetness you feel the raw strawberry already presents with as well as your own personal preference.

Our Rhubarb in the pot with sugar added

Once the sugar has dissolved in the smoked strawberries and the rhubarb has begun to shred apart, it’s time to remove the rhubarb from the heat. Stir in the sweetened smoked strawberries and transfer to a bowl. Refrigerate this compote uncovered until cold. This will take about 1-1/2 hours though I prefer to leave this overnight. Once the compote is in the refrigerator, place a metal bowl in the refrigerator as well. You will need this to produce the trademark cream-base for our fool dessert.

Tasting Notes: Some find the texture of tenderized rhubarb to be too stringy. If that’s the case, feel free to process the rhubarb in a food processor or blender before combining with the macerated strawberries. Also, depending on the size of the strawberries, you may prefer to leave larger chunks, by halving the berries rather than slicing.

 Making a Fool for Me!

Time to remove the chilled metal bowl from the refrigerator and add ¾ cup heavy cream and 1 tablespoon confectioner’s sugar. Whisk this together until soft peaks form. Be sure you don’t over beat the mixture or you will lose all the air that makes this whipped cream. Set aside 1/3 cup of the cold smoked compote which will be used for topping the finished dessert servings. Take the rest of the compote and fold into the whipped cream just until the mixture looks streaky. Spoon into serving glasses or bowls and refrigerate at least 1 hour or overnight.

Folding the ingredients into a fool
Whenever I need a simple and quick dessert that looks elegant, I love to make a fool. If I’m serving a more formal event, I prefer to serve these in stemmed glasses like a martini glass. For a family barbeque or daily dessert, small bowls work well or even clear throw away cups or bowls. Once the cream and compote mixture are spooned into the serving vessel, top with about a tablespoon of reserved compote. I prefer to add mint leaves to finish this off. Strawberry-Rhubarb Smoked Fool – a simple yet elegant looking treat that everyone is going to love!

Tasting Notes: Here’s a tip: this can be served cold or you can freeze it for a super cold treat on a really hot day. The frozen rendition will remind you of a semifreddo or frozen yogurt treat.

What’s your favorite fool recipe? Leave us a comment to opine and subscribe to get all our postings on tips, techniques and recipes. Bringing innovation to wood fired cooking with recipes, techniques and the science behind the fire, smoke, and flavor. That’s SmokinLicious®.