Thursday, October 31, 2019

THE NOT-SO-SMOKEY SMOKED TURKEY

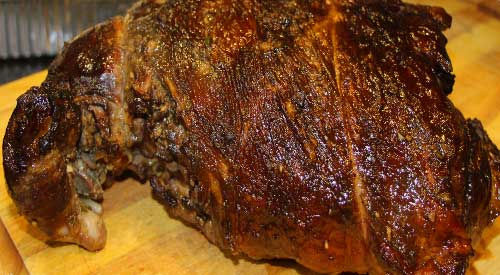
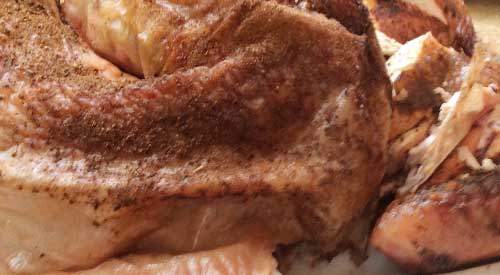
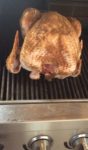
Our not so smokey Smoked Turkey is from cooking this on the gas grill, not on a smoker. We selected this photo because of the great color- not dark like a traditional smoker can impart!

Turkey is one of those items that is generally made for a special event – Thanksgiving, Christmas, New Year – and not associated with everyday cooking.  I’m here to tell you that it’s easy to enjoy turkey any time of year when you use a gas grill for the cooking and smoke infusion.  All you need is a turkey (preferably one under 15 lbs.), 6 wood chunks, a water pan with hot water, and your favorite gas grill.

Turkey 101 Prep


Preparing the TurkeyI’m fortunate to have a local fresh turkey farm, Sprague’s Turkey Farm in Portville, NY, close by so I’ve ordered one that is under 14 lbs.  
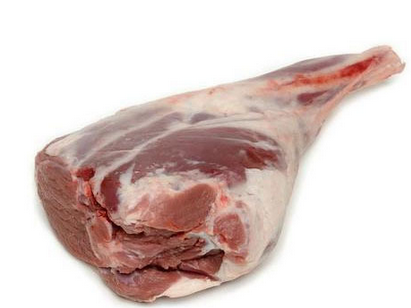
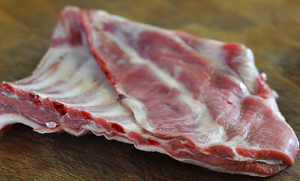
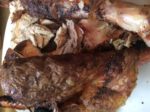
Before preparing the turkey for marinating overnight, I first need to remove the parts that are commonly found inside the turkey.  This includes the neck, heart, liver, and gizzard which is part of the turkey’s digestive tract.  These parts do make for great stock so if you 
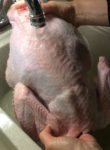
can, save them to add to a stockpot down the road.

Once the organs and neck are removed, it’s important to wash the entire turkey under running water.  After a thorough wash, pat dry with some paper towels and place in a shallow pan for the rub application.

Herb and Spice Rub


Gently placing the rub on the outside of the Turkey After washing and patting dry the turkey, I trim the excess skin from the neck area and then begin applying the rub.  I’ve combined an assortment of herbs and spices for my rub as I tend to like a potent mix of ingredients to balance the fresh meat and smoke.  My rub includes: allspice, clove, basil, cumin, cardamom, coriander, cinnamon, celery salt, garlic and onion powder, oregano, orange and lemon peel, paprika, and ancho chili powder.  I make sure to cover the entire surface of the bird.  I add a few drops of avocado oil and then apply additional rub.  This will be refrigerated overnight to allow the flavors to marry and penetrate to the meat.

Tasting Notes: Feel free to incorporate different herbs and spices in your rub as there are no rules when it comes to combinations.  

Smoking on the Gas Grill

Placing the Turkey on the grill 
As you can see in some of the photos, this was a cold day at the grill, with a temperature below 25°F.  I prepare my LP/Gas grill by first removing one of the grill grates, exposing two of my burner shields.  To one of the shields I place 3 double filet wood chunks from SmokinLicious®.  Now I lite only two burners; the one with the wood chunks and the one directly next to that.  I set these burners to medium heat to start.    Just before I’m ready to grill, I check the temperature readout and adjust my heat setting until I hit my target temperature of 325°F.

Time to add the rubbed turkey to the unlit side of the grill and my water pan right next to the bird.  I insert a thermometer and close the lid.  Basically, for the next couple of hours, I just need to monitor that the water pan has enough hot water in it and the bird gets spritz with water to keep the skin moist.

Tasting Notes: Although I’ve placed my water pan to the side of my turkey, between the lit and unlit sides of the grill, you can use this as a drip pan and place this directly under the turkey.  I elected not to do this today due to my low outdoor temperature.

Time to Serve!

Our not so smokey smoked turkey on the table for all the guests to enjoy 
If you’ve maintained the steady temperature of 325°F and hot water in the drip pan, you won’t need to stay with the grill during most of the turkey’s cooking time.  My skin has crisped up thanks to maintaining moisture both on the bird’s skin and in the cooker with my water pan.  I remove the turkey and take it to the kitchen where I cover it for about 30 minutes prior to carving.  It’s super tender, moist, with a crunch to the skin.  The best part is that the smoke is subtle and does not over power the fresh meat.

That’s why the two-zone method of smoking is perfect when your feeding a variety of tastes.  Those that tend to avoid smoked foods will find this full of flavor that is well balanced due to our rub and consistent cooking temperature.  My turkey of 13-1/2 pounds took just about 4 hours to finish with very little effort on my part, even with a 22°F outdoor temperature and wind chill.  The best part is my oven was free to cook a bunch of side dishes so everything was timed perfectly for the table.

What’s your favorite preparation for turkey?   Bringing innovation to wood fired cooking with recipes, techniques and the science behind the fire, smoke, and flavor. That’s SmokinLicious®.

Thursday, October 24, 2019

BARBECUE SAUCE BROKEN DOWN

Barbecue Sauces come in many different size, shapes and colors, our primer can assist you in understanding their use ages.

Barbecue is a cooking method that includes smoke vapor for flavoring.  This is my pure definition.  I won’t go into the controversy over whether grilling is part of barbecue or not.  Just know that some type of plant material must combust to produce smoke that produces flavor to what is being cooked.

The resulting food whether an animal protein or some other item,  can be finished with various methods.  By far, the most popular finish is with a sauce, more commonly known as barbecue sauce.

Let’s dive into what comprises a sauce used for barbecue and how regions are influenced by the ingredients chosen for the sauce.


I’m Talking Sauce Not Mop!

For those that aren’t familiar with the difference, we are talking only about sauces today and not mops.  A mop is a thinner liquid that is applied while meats are cooking to keep the protein moist during the cooking process.  These are commonly used for open pit barbecue and grilling and are applied while the meat is raw all the way through the cooking process.  Like a marinade, once a mop is used for a cooking event, any leftovers need to be discarded to prevent cross contamination of bacteria.  The tool used to apply the mop looks like a miniature floor mop.

Sauce is a glazing liquid that is much thicker than a mop and usually contains ingredients that provide a balance of sweet, salty, savory, and spicy.  Generally, a sauce is either applied near the end of the cooking or left as a side to be applied by the guest enjoying the barbecue meats.

There are a lot of variations to a sauce which are generally based on regional ingredients and cuisine.


Carolina Sauces

The Carolina states revolve around mustard and vinegar-based sauces.  Since pork ribs, whole hog, and pork butt dominate in these regions, the acidity of these ingredients blends perfectly to bring the meats to perfection.

South Carolina: the sauce is yellow, sweet with a tartness commonly found in central South Carolina to the coast of Charleston.  The sweetness comes from cane or standard sugar and the tartness from standard yellow mustard paired with a little dried mustard powder.

The western portion of South Carolina tends to lean toward ketchup-based sauces while northwest you’ll find tomato sauce added.

North Carolina: Although commonly associated with North Carolina, vinegar-based sauces are really a central to eastern North Carolina preference.  These locations often use the vinegar sauce as both a mop and sauce, starting with naked meat; no rub.  Commonly white distilled vinegar is the choice rather than the apple cider variety and this is paired with a little sugar, salt, red pepper flakes or crushed Chipotle, black pepper and hot sauce.

The western portion of the state is more prone to a tomato-based sauce or “dip” as it is called.  Like their eastern counterparts, they apply this as a mop and sauce to naked meat.  Ingredients generally include distilled white vinegar, ketchup, sugar, hot sauce, red pepper flakes, black pepper, and a bit of juice, usually apple.


Alabama White

Used for chicken, this is a mayonnaise-based sauce that has no sweetness at all.  Other ingredients include apple cider vinegar, lemon juice, apple juice, garlic powder, horseradish, dry mustard, cayenne pepper.


Kansas City Red

This is likely what most of the sauces sold in grocery stores can be compared to.  It is very thick, very sweet, and ketchup or tomato based.  Its common ingredients include onion, cayenne pepper, hot sauce, chili powder, spicy mustard, molasses, apple cider vinegar, Worcestershire, and ketchup.


Texas Style

With beef being king in the state of Texas, their sauce also tends to serve as a mop as well.  This sauce tends to be very dark and similar in consistency to gravy.  Due to their proximity to the Mexican border, chiles are common in the sauce.  As beef takes a long cooking time, this sauce/mop penetrates deep into the meat making it seem less like a sauce.


Kentucky Black

Known to include vinegar and Worcestershire, this is often referred to as Western Kentucky-Style Barbecue Sauce.  It is quite thin due to the amount of water added with only a little bit of ketchup and seasonings that include paprika, dry mustard, onion and garlic powder, and red pepper.


Memphis Style

When in Memphis, learn how to order your ribs.  They serve them two ways – dry and wet.  Dry is just that – dry rubbed only.  Wet will give you a saucy rib.  Oh, yes, Memphis is all about ribs.

The sauce tends to be a balance of sweet and spicy as they use both vinegar and ketchup in most recipes.  Other ingredients include: onion, garlic, Worcestershire, butter, molasses, mustard, paprika, brown sugar, oregano, thyme.

Keep in mind, most natives only like dry ribs but are known to indulge in sauce on their pulled pork and chicken.


Other Finds

Certainly, you will find other sauces available during your travels in North America.  Some will be soy sauce based like Hawaiians use while others are fruit rich.  I love smoking various fruits while in season and then using their rendered juices in a sauce.  Strawberry, raspberry, peach, and cherry work great for this purpose.

To me, a sauce should compliment the protein your serving and not cover it up.  It should not be the only flavor you taste.  If you can’t decipher the meat under the sauce, then the balance of ingredients is not there.

If you step into the arena of sauce making, here’s some additional information to keep in mind.  Always include some level of vinegar, salt, sugar and spice as these have preservative properties that will allow your sauce to stay fresh for a while.  Use glass jars for storing your sauce and try to get the sauce in the jars while still hot.  Get them to the refrigerator quickly after jarring.

Unopened sauce will last many months while open jars should be used within a month.

Keep in mind that when cooking with hardwood as in traditional hot smoking, it is the ingredients, cut of meat, age of the wood that all factor in to how the wood flavonoids reveal themselves.  Don’t let anyone tell you that a fruitwood will always produce a sweet flavor to smoked meats.  That is for you to determine through the additional ingredients you use in the meat’s preparation.

Thursday, October 17, 2019

10 THINGS YOU DO THAT RUIN YOUR SMOKING & GRILLING EXPERIENCE

Don't ruin your Smoking & Grilling Experience by making simple mistakes!
Don’t ruin your Smoking & Grilling Experience by making simple mistakes!

We’ve all had those moments when the food comes off the smoker or  grill  and we wonder, What went wrong??

Sometimes the event is so bad you want to swear off  outdoor cooking  for good.  I’m here to ask you to step away from the ledge and think about whether you do any of the following things.  The more items on the list you engage in, the more likely you can benefit from my suggestions.

#1 Resting Meat

This tends to be the common practice for roasts and steaks/chops.  You’ve managed to get a nice crisp skin to the roast or steak and then you let it sit or rest, thinking it will make the outcome juicier.  You end up with a soft skin, a wet outside, and waxy fat.  These are meat cuts that don’t require resting.  In fact, they will rest enough on your dinner plate so they are best served hot of the grill or smoker, without a rest period.

#2 Using Too Much Wood

You know that charcoal and gas are the fuels used to reach and maintain temperature while you’re cooking, and that hardwood is what flavors your food.  You want to ensure there is adequate smoke flavor so you add 10 pieces of  wood chunks  to the hot coals when you start cooking.  Then after the first hour, you add another 6 pieces of wood.  STOP!  That is way too much and simply put, a waste of a tree. On average it takes just 6 ounces of wood to start flavoring meat.  My rule of thumb is to add 3-4 wood pieces for a full chimney of charcoal plus a couple of pounds of unlit.  Only when those pieces are fully combusted (black and ashy) do I add a couple more pieces.  Depending on what and how long I’m cooking, I may only use 6 pieces total.

#3 You Soaked Your Smoking/Grilling Wood

I know this is one of the biggest controversies out there when it comes to smoking with wood.  To soak or not.  I take the stand that you should never soak the wood as adding water will only fluctuate your cooking temperature and take more energy away from the fire to steam the water from the wood.  Remember, the wood cannot start to combust until the excess water has been vaporized.  Work with a wood that has at least 20% moisture for the best flavor.

#4 Room Temperature Meat

It is well documented that when you want to attract smoke vapor from burning wood, colder temperatures are like a magnet.  Don’t take the meat out of the refrigerator until right before you’re ready to place it on the grill.  In addition to attracting smoke vapor, colder temperature meats will warm up faster in your equipment than if you left them out on the kitchen counter.

#5 Searing to Lock in Juices

This is the one item even well-known restaurants can get wrong.  Searing meats before finish cooking does not lock in the juices.  What it does do is brown the outside of the meat and firm up the outer surface, giving a distinct pleasant flavor.  The meat fibers do not get sealed by this method or produce any additional juiciness to the meat.

#6 Marinating Overnight or Longer

As marinades tend to contain oil and meat is made up mostly of water, the two tend to compete against each other.  Here’s the thing with marinades.  Marinating for long periods of time do not allow the marinade to penetrate any deeper than if you marinate for just one hour.  In fact, you have an increased risk of breaking down the meat fibers too far with a marinade, producing a soggy outer layer.  Stick to short marinade times and understand most of that flavor will penetrate only to the outside layer.

#7 Don’t Trim the Fat Cap

Just like meat being made up of mostly water, fat is made up of oil.  Again, water and oil don’t mix.  Leaving a fat cap on meat only allows it to melt and drip into the equipment you’re using.  This can produce some additional flavors to the meat but allow too many drippings into the fire area, and you’ll cause flare ups that will deposit soot onto your meat.  Don’t forget, most of us have a habit of trimming fat off meat before we consume it.

#8 It’s Done When There’s No Pink Meat

I’m not sure how many ways I can say this so I’ll be blunt.  YOU NEED AN EASY READ DIGITAL THERMOMETER WHEN YOU COOK!!  That is the only way to know when various meats and poultry are fully cooked.  Follow safe temperature guidelines and don’t go by the color of the meat.  Remember, bone marrow reveals itself differently in animal proteins which causes variation in pink, red and even purple coloring near bone.

#9 Steak Should Always Have Grill Marks

Grill marks are not the mark of a great  steak !  A uniform brown coloring on the meat’s surface is what your goal should be.  That means a deep sear was achieved and great flavor is hidden underneath.  The only way to achieve that is to learn how to direct cook the steak with a higher cooking temperature and frequent turning.  This allows for maximum radiant heat and even coloring and cooking.

#10 You Use Something Other Than Water in the Water Pan

There are all kinds of justifications for why liquids like beer, juice, wine, etc. should be used in a water pan while cooking.  It produces better flavor, it penetrates deeper, it produces more moisture.  Let me be clear.   It’s called a water pan for a reason.   It is designed to hold water and hot water at that.  By starting with hot water, you allow the energy of the fire to go directly to cooking the meat not heating up the water.  Water evaporates which produces a moisture rich environment keeping meats from drying out.  Other liquids will not evaporate and could even burn in the pan due to sugar alcohol levels.

Even if you’ve checked off a lot of these items as practices your guilty of engaging in, it’s easy to turn around your outdoor grilling and smoking skills.  In the end, it will be safer for your guests, better for your meat investments, and an overall more pleasurable experience doing the cooking.

Do you have a bad habit you turned around when you grill and smoke?  Leave us a comment to let us know.  We welcome all types of questions and encourage you to follow and subscribe to our social channels so you don’t miss anything.  We look forward to providing you with tips, techniques, recipes, and the science for all things wood-fired cooked.

Wednesday, October 9, 2019

GRILLED LAMB

Our Finished grilled Lamb resting before slicing!


I’ve been pleasantly surprised at how lamb has slowly been gaining greater popularity in North America.  Normally associated with Easter, I’ve had many followers indicate that they love to cook lamb in the summer on the grill as well as for holidays like Thanksgiving (yes, there are some that don’t do a turkey or add this protein to the dinner) and Christmas.

My intention today is to provide some guidance on the cuts of lamb, which work best for wood-fired cooking methods, and provide some flavor pairing suggestions to consider for your recipes.  Know that my definition of lamb is a young sheep of fewer than 12 months of age.


Primal Cuts

There are eight basic cuts of lamb: neck, shoulder, breast, ribs, loin, leg, foreshank, and shank.  Immediately, I want you to understand that there is much less meat harvested from a lamb than on some other common animals.  The reason is that lamb tends to be quite fatty and the fat is not something consumable like the current rage with pork.  Once a lamb is harvested, trimmed of its fat, had non-edible parts removed, there is about 40% of its weight remaining in viable meat.  Thus, lamb can be very expensive.

Let’s look at each of the cuts and provide some insight into the best methods of cooking each.

Neck:  Then neck contains some of the most marbled meat of the lamb making it ideal for longer cooking methods.  Because of the fattiness of the cut, it is best to marinate it for about 4 hours prior to cooking.  This is a cut that is generally sliced, marinated, and then cooked casserole-style.  This can be done on a grill set up with a two-zone cooking method to allow the wood to be added to the hot side of the grill which can infuse the contents of the casserole if left uncovered.  This cut also works well when ground to produce lamb burgers and sausage.

Shoulder: This is by far one of the most flavorful cuts, is less expensive as it contains more connective tissue and bone producing a tougher cut and can be cooked a variety of ways.  This section can produce bone-in and boneless roasts, shoulder chops, and stew meat.  It is ideal for a slow and low method of cooking which includes traditional smoking.  As such, preparations can include brining, dry and wet rub, and marinating.

Foreshank and Shank: As the name implies, the foreshank is attached to the front legs of the lamb while the shank is connected to the rear legs.  These cuts are ideally braised and presented as individual servings.  Again, these can be done like the neck cut in a casserole on the grill with wood for flavoring.

Rib: Containing what is called the rack and crown, this is the section of the lamb that would be the equivalent to prime rib roast of beef.  It is the most expensive cut and is ideal on the grill.  Always use a two-zone cooking set up to prevent overcooking of the outside.  Chops can also be produced from this cut but note that they cook quickly.  I prefer to still use a two-zone cooking setup so I can move the chops from direct heat to indirect as needed.

Loin: This muscle of the lamb is the most tender and resembles miniature versions of T-bone steak.  It can also be cut into the tenderloin and top loin chops, which is the filet mignon of lamb.  Don’t think you can roast that tenderloin, however, as the size is too small for this method but it works perfectly when grilled.

Leg: Unlike other animals, the leg of lamb is very tender and versatile, producing boneless roasts, sirloin steaks, and kabob meat.  This cut can be butterflied if deboned and grilled or left whole for grilled lamb.

Breast: This tends to be a small cut that you can use bone-in or deboned.  If bone-in, treat like a rack of ribs and plan to slow cook.  The ideal is on the grill after marinating overnight.  A temperature of 225°F is recommended and again, using a two-zone cooking method will keep this moist if you include a water pan.  There are many recipes for stuffed lamb breast as well that a roasting method can be used.  Certainly, grilling two-zone method will make these moist, tender and flavorful.


Flavor Pairings

One characteristic of lamb is its ability to stand up to other strong flavors whether in spice or herb form.  Here are the top flavor pairings for lamb:

Almond: incorporate into a stuffing with rice

Anchovy: cuts slits into a leg or shoulder and insert drained anchovy into each cavity

Anise: a perfect addition to a casserole for infusion to the meat

Apricot: preferably used dry this is perfect with cinnamon, cumin, coriander

Cabbage: add potatoes and let it simmer with the meat

Cherry: adding onions, saffron, almonds, pomegranate, feta, mint, parsley, pistachio

Cumin: add chili and put on the grill

Eggplant: perfect if done kabob style over the hot coals

Goat Cheese: add spinach or kale and this is the perfect pairing for lamb burgers

Mint: likely the most well-known pairing which reduces the funkier undertones of the meat

Peas: add butter, onion, and tomato

Saffron: use this spice in rice to accompany the meat

With all these great flavor pairings, lamb should continue to grow in popularity and maybe will surpass one of our more common animal protein choices.

Do you have a favorite cut and preparation of grilled lamb?  Share your thoughts and photos. 

Bringing innovation to wood-fired cooking with recipes, techniques and the science behind the fire, smoke, and flavor. That’s SmokinLicious®.