Thursday, January 27, 2022

SMOKED PEACH RELISH

Our perfect Smoked Peach Relish which is perfectly paired with Shrimp for a tasty dish!

Peach season! One that lends so many different options to your food experience. Whether consumed raw or used in entrees or desserts, I aim to bring another flavor level to this much anticipated seasonal fruit by adding wood-fired flavoring. Then I’ll take these flavorful peach halves and introduce you to a peach relish that is perfect for topping fish and seafood.

Visit your favorite farm stand, fresh market, or your own peach tree and pick three firm, fresh peaches and bring them to the kitchen for preparation before hitting the wood-fired grill. Oh, and we have plans for additional recipes with smoked peaches so do some extras while you have the grill or smoker going.

Easy Prep for the Grill or Smoker

Skinning our freshly harvested peaches

Although yellow is the most common peach available, know that there is a white variety as well. Both have easy to remove pits that make them easy to prepare for your favorite recipes.

Start by peeling the skin from the peaches, you’ll need 3 for this recipe, though I’m doing a full sheet pan for additional recipes. Once peeled, using a paring knife, slice thru the center of the peach along the pit. Gently separate into two halves then remove the pit. Place the pitted and peeled peach half cut side down on a sheet pan. Continue with the remaining peaches. I’ll be using my gas grill set up with a smoker box of wood chunks to bring a smoky flavor to the fruit. I’ve placed my smoker box directly on my heat diffuser to get the wood hot and smoldering quickly. My pan of peach halves is placed on the unlit side of the grill. Lid down on the grill and allow these peaches to tenderize slightly and infuse the smoke flavor. I’ll check on them in about 15 minutes.

our tray of smoked peaches on the gas grill using a two zone cooking method to add wood smoke flavor.

 Tasting Notes: Keep in mind, flavors from wood on a gas grill will not be as intense as those on a charcoal unit. Keep this in mind when you select the equipment to infuse the smoke flavor into the peaches.

Relish Ingredients for Smoked Peach Relish

Adding our wet ingredients to the pepper mix

While the peaches are absorbing all that great hardwood flavor on the grill, let’s get started on the base for our peach relish. To begin, I’ll get my mortar although you can also use a mini food processor. Place one minced garlic clove into the mortar. Add one chili pepper (serrano, jalapeno, & Hungarian make good choices) that has been seeded and minced. To that, add 2 tablespoons of light brown sugar. Using your pestle or the processor, pound or pulse until a paste is formed. Remember, fresh ingredients will make for the best relish flavors.

With the base paste made to our peach relish, it’s time to add the liquids to balance the spicy and sweet flavors. Start by adding 2 tablespoons of water, 2 tablespoons of lime juice and 3 tablespoons of oyster sauce. Transfer the relish base to a large bowl. Now return to the grill and remove the peach halves. These should be browned from the smoke infusion. Remove 6 halves and dice each. Add them to the bowl with the base. Let’s get ready for the final flavors.

The Ultimate Relish Flavors

Adding fresh herbs added to our rice

The final flavors are the fresh herbs that need to be added right before serving. This includes ¼ cup of fresh, chopped cilantro and 2 tablespoons of fresh mint. As peaches tends to be a delicate fruit meat, it’s important to gently mix everything together; don’t over combine. Serve immediately with your favorite fish or seafood. In fact, this is even great with just some toasted bread. I’ve served mine today with brown rice and simple seasoned shrimp with a side of yellow waxed beans. Delicate yet full of balanced flavors that will surprise you coming from a smoked fruit.

What’s your favorite recipe using smoked or grill peaches? Leave us a comment to opine and subscribe to get all our postings on tips, techniques and recipes. Bringing innovation to wood fired cooking with recipes, techniques and the science behind the fire, smoke, and flavor. That’s SmokinLicious®.


Thursday, January 20, 2022

SMOKEY BLT SALAD

Our homemade smoked bacon, lettuce and fresh tomatoes for our smokey BLT Salad

We know smoked bacon is a favorite which is why we wanted to include a great recipe for fresh produce you may have available. This is our take on the BLT salad featuring smoked bacon, homegrown lettuce and tomatoes, as well as a homemade dressing and Naan croutons. Don’t forget to check out our technique on smoking pork belly which is super easy and fast for the ultimate homemade smoked bacon.

Dressing First

I believe a salad is only as good as the dressing you top it with. That is why homemade is so much better than any store bought, even those with limited ingredients and a claim to freshness. Make it yourself and you can guarantee freshness and flavor.

To start our dressing for the smoked BLT salad, add 4 tablespoons of sour cream to a medium size bowl. Now add 3 tablespoons of your favorite mayonnaise, a healthy grind of fresh ground pepper, a ½ teaspoon of minced garlic and ¼ cup of freshly diced chives. To dilute the dressing so it can be poured, start with 3 tablespoons of milk or cream and whisk well. Add additional milk or cream until you reach the consistency you prefer.

Crispy Bacon & Croutons

With the creamy chive dressing made, place in the refrigerator to chill while you begin the next steps for the smoked BLT salad.

If you have your smoked bacon ready, slice to the thickness you prefer. Place the slices on a sheet pan and crisp in the oven at 350°F. Timing for the bacon will depend on how crisp you want the outcome; plan 15 minutes for less crisp and 20-25 minutes for crispy.

While the bacon is cooking, take Naan and slice into small squares. Coat the cut pieces with a bit of oil and toast in the oven with the bacon until crisp as well; about 15 minutes. Remove both the croutons and bacon and allow to cool until they can be handled.

Tasting Notes: Feel free to change to any favorite bread for the croutons. Just be sure to toast in a single layer with a little oil until crunchy

Assembling & Plating the Salad

Once the dressing, Naan croutons, and crisp bacon are ready, it is time to assemble the other ingredients for our salad. This starts with our homegrown lettuce. I am using three types of lettuce: romaine, butter-crisp and red leaf. Gently tear or cut into ribbons. Add these to the center of a serving platter. Along one side of the lettuce, place your Naan croutons and cut tomatoes. For my tomatoes, I’m using homegrown cherry which only need to be sliced in half. To the other side of the lettuce, I place the smoked crispy bacon which I diced.

As you can see, the components of the Smoked BLT Salad are very simple but highly flavorful. Using fresh produce and herbs makes a big difference. I prefer to plate the salad after mixing individual portions in a bowl and tossing with dressing. Start by adding lettuce, smoked bacon, tomatoes, and croutons in a medium bowl. Add the desired dressing – usually 2-3 tablespoons is perfect- and toss with tongs. Then plate. Tangy, smokey freshness is all yours! Enjoy!


What is your favorite salad recipe featuring a smoked component? Leave us a comment to opine and subscribe to get all our postings on tips, techniques and recipes. Bringing innovation to wood fired cooking with recipes, techniques and the science behind the fire, smoke, and flavor. That’s SmokinLicious®.

Thursday, January 13, 2022

SMOKED CHEESE & BACON QUICHE

The photo of our golden brown smoked cheese & bacon quiche was prepared with our homemade smoked cheese and baked at 350 degrees for 40 minutes.
Smoked cheese & bacon quiche was prepared with our cold smoked cheese. This golden brown beauty looks appetizing.

We’re putting a new flavorful twist to traditional quiche by adding a cold smoked cheese combination that’s perfect with this egg and cream based recipe. Be sure to see our previous series on cold smoking cheese on the stove top, then bring your favorite cheeses to this easy, basic recipe. We’re making smoked cheese & bacon quiche!

Our arrangement of 5 different textured cheeses put through our stove top cold smoking process. This method imparts great color and smoky flavor

Smoked Cheese & Bacon Quiche- Simple Ingredients Are Best

Quiche is one of those recipes that doesn’t have a lot of rules. The base is eggs, cream and pie shell or pastry. The fillings are yours to experiment with. For our Smoked Cheese and Bacon Quiche, you’ll need the following ingredients:

Sweating the Onions

We start off our recipe by first cooking the onion. Taking 1 yellow onion, peel the skin and dice this. Add 1 tablespoon of butter to a hot skillet. When melted, add the diced onion. Let this sweat for about 3 minutes until translucent, then stir. Cook until the onion browns and crisps slightly. This should take less than 6 minutes. Remove from heat and set aside while you begin to prepare the wet ingredients.

In the glass mixing bowl we have all of the ingredients for the basic recipe measured and ready to blend into a wonderful, creamy, smooth batter.

Basic Quiche Batter

After cooking the onion, it’s time to assemble the other ingredients to our quiche. Start with 6 large eggs in a large bowl. Add the ¾ cup of heavy cream and whisk until combined. Add the cooked onion, followed by the bacon that has been precooked and chopped. If you’re short on time, feel free to use precooked bacon strips commonly available in most grocery stores. Whisk all these ingredients together until well combined.

The final ingredients are your favorite smoked cheeses. In my version, I’m using Swiss, muenster, and fresh mozzarella, which have been previously cold smoked for about 4 hours. My technique was a stove top smoking application using a cast iron pan. You can visit our previous series on this technique. Once all the ingredients are combined, it’s time to pour the batter into the prepared pie shell. This recipe will make one 9-inch quiche. Now place in to a preheated 350°F oven for 40-45 minutes.

Smoked Cheese & Bacon Quiche- Golden, Creamy, Smoked Goodness

After cooking in a 350°F oven for about 45 minutes, a golden crust will form on the top. Allow the smoked cheese & bacon quiche to cool slightly before cutting it into serving slices. Loaded with the saltiness of the bacon, the creaminess of the smoked cheese, and the sweetness of the cooked onion, this is a great dish for brunch or dinner, or even served as an hors d’oeuvre. If you want to add more smoke flavor, feel free to ember cook the onions or smoke the bacon. Smoked Cheese & Bacon Quiche – soon to become your favorite quiche recipe!

Did we inspire you to make your own quiche? We need your comment and rating, so subscribe and follow us so you don’t miss a thing. Suggestions are always welcome as well on recipes and techniques you want to learn about. We are your source for all things wood-fired, providing tips, techniques, recipes, and the science behind the fire.


Thursday, January 6, 2022

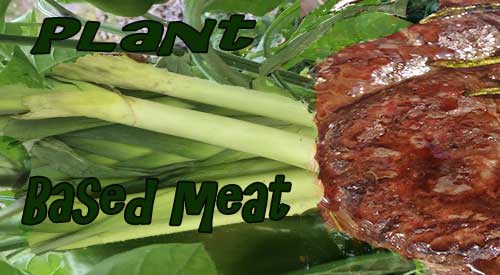
HOW TO FLAVOR YOUR PLANT-BASED BURGER!

Plant-based burger taste better when cooked with wood chips or wood chunks for added flavor!

Plant-based burger taste better when cooked with wood chips or wood chunks for added flavor!

What is a plant-based burger?  There is no question that this has become the new rage.  Plant-based burgers have been introduced not only to the grocery meat case in over 8000 locations but to thousands of restaurant locations world-wide.

It is a genetically modified version of heme, the iron containing molecule in soy plants, which is what accounts for a “meat” flavor.  It also incorporates coconut oil and potato starch to give a more burger-like texture, something that has been a complaint with vegetarian or vegan patties.  Brands like Impossible Burger® use a braiding of minerals, fats, and proteins to keep the burger from falling apart. 

To compare an animal protein burger with a plant-based burger from a nutritional view, you’ll find that the plant-based burger may not always be the better choice.  It really depends on the brand but know you should look at the saturated fat level and calories as the plant-based burger is not always lower than the traditional beef patty or even a poultry patty.  Sodium levels should also be monitored.

Plant-based Burger- Make It More Like A Burger Experience

You may know that many people accept that there are two camps for cooking burgers: grill grates whether on a gas grill or charcoal, and a griddle whether on a stove top or on a griddle insert of a grill.

I would argue, however, that there is another camp.  Those of us who believe in live fire with wood for cooking common items like burgers and dogs.  This is how you take an average burger and maximize the experience of eating while creating a newness to a very popular American item. 

The influence of plant material combustion and release of the flavonoid composition of this material is what can take your average burger to the next level.  I don’t know how many times I’ve had dinner guests inquire how I made something like a burger taste so high quality.  It’s only then that I reveal my use of hardwood, whether chunks in a smoker box, chunks directly on hot charcoal, or a sprinkle of wood chips on a griddle or plancha.  Wood takes even the most basic food item and brings out umami. 

Plant-based Burger- Grill Set Up

For the easiest cooking of your plant-based burger, start by setting up an outdoor grill with a two-zone cooking set up.  That means one half of the grill has no burners lit for the gas grill, or no hot coals on one half of the charcoal unit. 

Start the burger cooking by placing the plant-based burgers on the indirect side (no direct heat) and adding wood to the direct side.  This is where a smoker box comes in handy on the gas grill, which I fill with small wood chunks.  Close the lid and cook for about 7 minutes, unless the burger is particularly thick which would call for 10 minutes cooking.  Open the lid and turn the burgers over still using the indirect side for cooking and allow to cook for another 7 minutes (or 10 for thicker cuts). 

If you’re going to medium finish which is 145°F, then at about 125°F internal temperature, move the burgers to the direct heat side of the grill and cook leaving the lid up.  This will sear the outside.  Be sure to keep flipping the burgers every minute to ensure a perfect sear and not an overdone burger. 

To me, this makes a plant-based burger even more of an authentic burger flavor with the simple addition of hardwood on the grill of your choice.

Have you tried and loved a specific brand of plant-based burger?   Leave us a comment to state your preference and follow us or subscribe for more great recipes, techniques, tips, and the science behind the flavor.  That’s SmokinLicious®.