Thursday, August 25, 2022

CHEF WATERS’ GOAT CHEESE SALAD

 Posted by Donna Grant
Read other related stories:
Cheese , Gas Grill Techniques , indirect cooking , Salad
No Comments 

Print Now!
The finished- WOOD GRILLED VERSION OF CHEF WATERS’ GOAT CHEESE SALAD

listen to this blog
listen to- A WOOD GRILLED VERSION OF CHEF WATERS’ GOAT CHEESE SALAD
 
 Audio Player
00:00
00:00

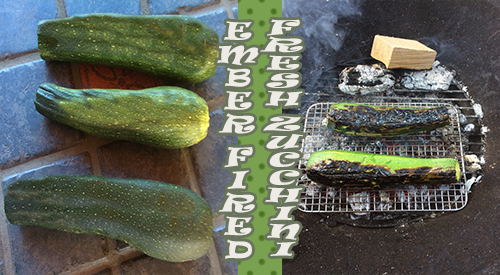
Taking a page from Chef Alice Waters, we are making our version of the baked goat cheese salad by wood baking the goat cheese rounds on the grill using a two-zone cooking method and wood chunks for smoky flavor. Then making garlic crostini for the croutons on the charcoal grill to serve alongside this fabulous salad dish. A recipe that can be a salad course or an entrĂ©e on its own, we also give you an easy way to make this into an appetizer. Purchase 12 ounces of quality goat cheese in log form and let’s get grilling.

Goat Cheese

Chef Waters’ Goat Cheese Salad- Marinate to Start

This dish requires at least 8 hours of marinade time though I like to do mine overnight. It’s the marinade of oil and fresh herbs that give the goat cheese great flavor. Cut the goat cheese log into ½-inch rounds. In the bottom of a glass dish, sprinkle chopped fresh herbs of your choice; today I’m using oregano but most any fresh herb will do. Place the goat cheese rounds into the dish and pour over a ¼ cup of olive oil. Turn the cheese rounds over to coat both sides. Place fresh herb sprigs over the top of the rounds, cover with wrap and marinate in the refrigerator.

Fresh herbs

Tasting Notes: Other fresh herbs work great with this recipe but note that stronger herbs like thyme and rosemary likely don’t need the layers of chopped herbs at the bottom of the dish. Simply lay the fresh herb springs on top of the goat cheese rounds and marinate in the refrigerator.

Chef Waters’ Goat Cheese Salad- Grilling with Wood Chunks

Trays of goat cheese on the grill!

Once the goat cheese has marinated, it’s time to coat it in a mixture of ½ cup plain breadcrumbs and two teaspoons dried herb of your choice. I’ll be using oregano but other good options include thyme, basil, marjoram, rosemary. Once coated on both sides, place the cheese rounds on a lightly greased shallow pan. I’m using mini sheet pans as they work well on the grill, even for a two-zone cooking method.

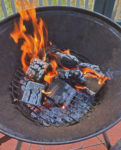
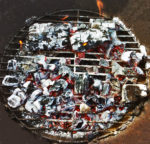
As this is a cheese dish it is important that a two-zone cooking method is used which means the cheese will be going on the unlit side of the grill. I’m using a smoker box with three hardwood chunks to provide the smoke flavor to the cheese, with the box placed on the hot side of the grill. Total time to cook will be about 20 minutes. You’ll know the cheese rounds are ready once browned and bubbly.

While the cheese is on the grill, prepare the vinaigrette by combining ¼ cup red wine vinegar, salt, and fresh ground pepper. Whisk in ½ cup of olive oil and set aside.

Chef Waters’ Goat Cheese Salad- Greens and Garlic Crostini

Crostini with garlic butter

To go with the goat cheese rounds and salad vinaigrette, I’m making garlic crostini on the charcoal grill. Using ½-inch slices of a day-old baguette, brush both sides of each slice with melted butter. Place on a high heat tolerant sheet over hot coals only, no active flames. Allow the slices to brown and slightly char before turning over. Once browned on both sides, remove from the grill and brush with the cut side of a garlic clove. I cut these crostini slices in half at the diagonal to go with the salad.

Tasting Notes: An assortment of fresh greens can be used for the salad though I like to use a combination of bitters with more savory greens.

Chef Waters’ Goat Cheese Salad- Assembling to Enjoy

With all the components made its time to assemble our salad. Start by mixing the vinaigrette with the greens. I like to place the garlic crostini on the outside of the salad and the wood-baked cheese rounds in the center of the greens. This is best served while the cheese is warm. Here’s another suggestion: this can make for the perfect appetizer if you cut each round in half so they fit on a garlic crostini. For that recipe, prepare the same but place a few leaves of salad on the garlic crostini and top with a wood baked goat cheese half round. There you have it! A super easy salad or appetizer with that signature wood flavor that takes Chef Waters’ recipe to a new level.

SmokinLicious® products used in this recipe:

Wood Chunks: Double & Single Filet

For more reading related toRelated recipes:

-FIRE ROASTED PEPPER MAKE THE PERFECT SALAD

-THE EASY METHOD TO COLD SMOKED CHEESE

-RASPBERRIES GO TO THE GRILL– FOR THE ULTIMATE MINI TART APPETIZER

-SMOKED CHEESE & BACON QUICHE FEATURING COLD SMOKED CHEESES

Dr. Smoke- try this-WOOD GRILLED VERSION OF CHEF WATERS’ GOAT CHEESE SALAD on your next party!

Thursday, August 18, 2022

FROM FOREST TO SMOKE GENERATOR: TRACEABILITY PROTECTS YOUR INVESTMENT

 Posted by DrSmoke
Read other related stories:
General Smoking Information , Smokinlicious Products , Wood Science
No Comments 

 Our forest Fresh products to your smoke Generator

Our traceability of forest fresh products to your smoke generator

listen to our blog
Listen to our blog

 Audio Player

00:00
00:00

Our view of wood – it is not simply what produces vapor or being a smoke generator. It is THE ingredient that provides for colour, aroma, flavour and even texture to food.

Just like the other ingredients used in your operation, you need peace of mind knowing that if questions arise, you can produce the documentation to show where the wood came from and how it was handled.

Tracing from Mill to You- A Key Factor for Wood to Be a Smoke Generator

First, when you partner with SmokinLicious®, you’ll be using fresh forest hardwoods from Western New York and Northwestern Pennsylvania. Second, all our hardwoods arrive at our facility de-barked. Third, we only use pure heartwood for the log. This is considered the purest part of the tree and one that is resistant to decay, pests, and fungi.


Hardwood Growth Rings

We trace every piece of wood we manufacture and have information on:

  • the harvest date
  • what mill processed the raw wood
  • our heat treatment date and data
  • ship date

That is forest to oven.

Why is Traceability Important?

Without it, your operation could be interrupted.

Any time your company’s standards are reviewed, we have the data on the wood. That means, it’s at your fingertips. Plus, our commitment to a higher heat treatment level (75°C for a minimum of 75 minutes) ensures Thermal Death Time. Potentially dangerous organisms like fungi spore, mold spores and listeria can’t survive with our heat level!

75 degrees C for 75 minues

This extra step ensures potentially fatal bacterium cannot enter the food chain. Plus, research shows that E. coli and E. faecium can be eliminated or substantially reduced in risk through this higher heat treatment level.

Join Us!

It’s time to work with a friction log manufacturer that understands what part of the tree is the most stable and beneficial to your food process. We know what it takes to gain the perfect essence from the wood. Learn why SmokinLicious® is the perfect partner for your food process and explore the world of hardwood as an ingredient!

Products discussed in this Blog:

Wood Chunks- Double & Single Filet

Wood Chips- Grande Sapore®

Smoker Logs

More Related reading on "What Wood for Smoking" and other great smoking and grilling tips and techniques
For more related reading on this topic, check out these articles

Forest Grown Hardwoods

Cooking Wood Purchasing- Are You Getting What You Paid For?

Why Forest Hardwoods Make a Difference

Dr. Smoke try minuto® and Piccolo® chips for your smoke generator
Dr. Smoke says, "Try Minuto® and Piccolo® chips for your smoke generator!"


Tuesday, August 9, 2022

SWORDFISH A LA PLANCHA

Posted by Donna Grant
Read other related stories:
Fish , Plancha cooking , Seafood
[2] Comments 

Print Now!
Discover a great taste with wood chips by cooking Swordfish Al A Plancha

Discover a great taste with wood chips by cooking Swordfish A LA Plancha!

SWORDFISH A LA PLANCHA

Listen to our blog

Audio Player
00:00
00:00

Colder weather can often end your outdoor cooking but it doesn’t have to take away your desire for wood fired foods. I’m going to show you an easy method of keeping wood fired flavors going even in the coldest, snowiest weather by taking the indoor plancha to my stove top. I’ll prepare a tasty swordfish using wood chips for flavoring to the fish and finishing with a ginger-garlic butter sauce. Purchase some fresh swordfish and let’s bring authentic wood flavoring to this great cut of fish.

Swordfish A La Plancha- Preparing the Plancha

Adding wood chips to the plancha

#plancha #minutowoodchips

I love my stove top plancha pan but you can easily use a standard griddle with a heat safe pot lid.

To start, get a supply of Minuto® wood chips and prepare your plancha or griddle by first placing a ¼ cup of chips in the center of the griddle, then placing the grilling racks on the surface. Turn a medium-high heat on and place the cover on the unit to allow it to reach temperature. We want a high temperature of about 375-400° F. Once the plancha is hot, you will smell the wood chips combusting and releasing aromatic flavor. That tells you it’s time to add the fish.

Swordfish A La Plancha- Cooking & Sauce Making

making the sauce in the pan

#sauces # fishsauces

Place the fish fillets on the grill racks of your plancha griddle. Cover and allow to cook and infuse with wood flavor for 4-5 minutes on one side.

With the fish on the plancha, you can start to prepare the butter sauce that will go on the finished fish. You’ll need:

  • 3 tablespoons butter at room temperature
  • 1-1/2 cloves garlic minced
  • ¾ teaspoon grated fresh ginger
  • ¼ teaspoon crushed red pepper
  • lemon peel- ¾ teaspoon
  • 1 teaspoon olive oil
  • 1 tablespoon citrus balsamic vinegar

Place all these ingredients in a small saucepan and bring together over low heat.

After 4-5 minutes of cooking, turn the swordfish fillets and cooked for another 4 minutes. Then remove the fillets to a plate and clean out the combusted chips to a heat safe container. Place the hot plancha back on the heat but reduce it the heat to low and leave the grill racks off.

Put the fillets back on the hot surface of the plancha to sear the outside. It will only take a minute per each side. Once seared, remove to a serving plate and pour the hot butter sauce over the top. That’s it! Great wood-fired flavor done on the stove top with a hot plancha or griddle.

What’s your favorite fish to add wood flavoring to? Leave us a comment to opine and subscribe to get all our postings on techniques and recipes. Bringing innovation to wood fired cooking with recipes, techniques and the science behind the fire, smoke, and flavor. That’s SmokinLicious®.

SmokinLicious® products used in this recipe:

Wood Chips- Minuto®

For more reading related to

For more reading related on Swordfish Al A Plancha and other plancha cooking from Smokinlicious.

Related reading:

-HOT SEARED SCALLOPS!

-WOOD FIRED LOBSTER TAILS CHILI

-STUFFED SQUID COOKED ON THE PLANCHA WITH SMOKINLICIOUS®

Dr. Smoke- Swordfish Al A Plancha with wood chips adds a great smoky taste to this wonderful fish!

Dr. Smoke- Swordfish Al A Plancha with wood chips adds a great smoky taste to this wonderful fish!

  1. What great timing! Just today I was out purchasing fruitwood chips and hickory chips. (I already have mesquite chips and am an avid fan of tea smoking in a wok with tea, rice and brown sugar.
  2.  I grew up learning how to smoke eels and everything else! Your post suits me to a tee although I don’t use swordfish very often(too expensive. here….Like crayfish tails and yabbies it tends to be exported to foreign markets in much the same way as orange ruffy and abalone in New Zealand.[Economists would cite the balance of trade agreements that exist regarding trade on the international markets]

Thursday, August 4, 2022

EMBER FIRED FRESH ZUCCHINI

Zucchini is a great vegetable to not only grill but ember cook. It has the density to hold up over the high heat. Add a distinct char taste to this abundant vegetable either as a side dish or an ingredient by making ember fired fresh zucchini.

I love thick-skinned vegetables that come in season during Summer. They are the perfect items to light a fire and make some hot coals to ember fire flavor into them.

We’re getting ready to coal roast one of my favorite vegetables – zucchini! This is so simple to do and produces an extraordinary flavor for zucchini to be eaten on its own or to be used in your favorite recipe. Clean out the fire pit, charcoal grill or outdoor fireplace and prepare to roastember fired fresh zucchini” directly on the hot coals.

Building A Small Fire

Starting the fire to burn down the wood into coals

Know this from the start – You do not need a large fire! A small fire is best to accomplish your cooking in about an hour’s time. For my fire, I am using ten SmokinLicious Single Filet Wood Chunks in Ash with a couple of pieces of charwood that were left over from a previous cook. Why Ash hardwood? Because it is hands down, the best hardwood to produce an even bed of coals which is what you want when you coal roast.

I stack the wood so there is quite a bit of air space between the pieces. This ensures I have good oxygen flow to produce combustion quickly. My technique is to stand the wood pieces on their end and make a circle. I try to have a couple of pieces in the center kind of tipped on to each other. Remember, you want to produce hot embers quickly so it only requires a little wood and a lot of oxygen to burn things down. I light my wood using a small butane torch. Leave the torch in place until I’m sure the wood has ignited. I keep the lid off my charcoal grill so I can push the combustion process through completion and get those ash covered, hot embers.

Red Means Hot

Red Hot coals is the goal before adding the zucchini

You will know when the coals or embers are ready for cooking when you have uniform coals and they are glowing red from the bottom and gray on top. I keep a couple of larger coals banked to the side to maintain heat and for reserved hot coals. Just in case I need to rake more to the cooking side. I like to nestle a high heat metal cooking rack on the hot coals and then place my whole zucchini on the rack. This allows for little ash to accumulate on the skin. Remember, those coals are very hot so the zucchini will take less than 20 minutes to tenderize and char.

Turn For Full Char

Zucchini on the grilling rack over the hot fire coals

With the zucchini and coal rack in place, I give the embers about 8 minutes to char and cook the first side of the zucchini. After that time, I gently turn the zucchini so that each side gets an even char. Once the first 8 minutes are done, there will be less time needed for each of the other sides as the zucchini will hold heat. I’ve added one additional wood piece to my banked fire just to be sure I have enough heat in the coal area. I will not put the lid on the unit during the entire cooking process as this is open fire cooking. My total coal cooking time is approximately 16 minutes.

Perfection In Smoke & Char on Ember Fired Fresh Zucchini

Dr. Smoke's clock for the cooking time required

After placing my ember fired fresh zucchini on hot coals for about 16 minutes total, turning several times to get an even char, this spectacular vegetable is ready for eating. You will see, there is very little coal bed left following this technique so remember, if you are cooking more than a couple of zucchini, you will need a larger coal bed.

For those of you thinking that the black, charred skin will be bitter and not appealing to eat, think again. Most of the char will rub right off but the flavor will be infused throughout the ember fired fresh zucchini. I’ve sliced mine about ¼-inch thick as I plan to make a galette of ricotta, garlic oil, and basil.

The Culinary Crew wants you to know

… that ember roasting is ideal to boost up the bland, delicately flavored zucchini and will add a rich, wood-fired taste dimension to any dish featuring this exquisite summer squash. So, be prepared to enjoy a rich, char-smoked variation of your ratatouille, quesadillas, stuffed zucchini or soups from ember cooked zucchini!

Check in soon for our post on that recipe. Did you love this wood-fired technique? Leave a comment and subscribe as we continue to bring you new ideas, tips, techniques and recipes for all things wood-fired, smoked, and charred!