|
| Our gorgeous color on our Grilled Prime Rib with wood on the gas Grill- Yum! |
Yes, prime rib is expensive and
likely the reason so many are fearful to take this cut of beef to the
grill. I’m going to take away that fear and show you just how your
grill will respect this cut and produce the tender, buttery, crusty
outside roast you want.
Although there are different opinions on
whether to make a roast with the ribs intact or removed, I am someone
who prefers to cook with the ribs in. I’ll give you tips on doing a
boneless version as well if that is your preference.
For now,
purchase an 8 lb. or 3 rib roast, get your favorite wood chunks, and get
ready to fire up your gas grill using a two-zone cooking method for a
prime rib roast you won’t soon forget.
Meat Preparation
For
the most part, my butcher has done most of the trimming. I will just
remove any remaining fat and ensure all the silver skin is gone. You
should see meat all the way around the roast. In the end, I’ve removed
about a pound of additional fat.

At this point, I want to add salt
to the meat to reduce the amount of water before cooking and tenderize
the inner fibers. For every pound of meat, I sprinkle a ½ teaspoon of
kosher salt. This is called
dry brining
and will require that the meat be refrigerated for 24 hours after the
salt is applied. I simply salt and wrap the meat in plastic wrap to
prevent liquid from leaking, and place in the refrigerator. Or, you can
salt and place in a non-reactive container and leave uncovered.
Char Crust Rub
While
the meat is tenderizing with the dry brine, we want to prepare a char
crust to be rubbed all over the outside of the roast just before it goes
on the grill. Combine 2 tablespoons fresh rosemary, 1 teaspoon dried
rosemary leaves, 2 tablespoons fresh ground black pepper, 2 teaspoons
dried oregano, 1 teaspoon garlic powder, 1 teaspoon onion powder, 1
teaspoon paprika, ½ teaspoon chipotle chili powder, and 2 tablespoons
prepared horseradish. I combine all my ingredients with a mortar and
pestle. If it is a bit too thick, just mix in a little water so more of
a paste is formed. Apply the
char rub just before cooking and you’re ready to good.
Tasting Notes:
Feel
free to incorporate different herbs and spices in the char crust rub.
Some considerations include: thyme, cinnamon, chili powder, clove,
ginger, even cocoa powder.
Smoking on the Gas Grill
I really enjoy cooking a prime cut of beef roast on the gas grill as the
two-zone set up
makes this low stress. I prepare my LP/Gas grill by first placing a
disposable foil pan under the grill grate on the side I plan to cook
on. This will be my water/drip pan. I add about ½” of hot water to the
pan and place my metal smoker box containing three
SmokinLicious® wood chunks
on the side I plan to cook on, right under the grill grate. Now I lite
only the burners under the smoker box. I set these burners to medium
heat to start. Just before I’m ready to grill, I check the
temperature readout and adjust my heat setting until I hit my target
temperature of 225°F.
 T
Time to
add the char crusted rubbed roast to the unlit side of the grill,
directly above the drip/water pan. I insert a thermometer and close the
lid. Basically, for the next couple of hours I just need to monitor
that the temperature holds to 225°F and that the water pan has enough
water in it. Only as I get closer to 110°F internal temperature of the
meat, do I start to babysit the grill. This is when I like to brush a
bit of butter on the outside of the meat. It produces great color to
the crust.
At 115°F internal temperature, I remove the water/drip
pan, meat string ties, and the meat thermometer. I’m now going to
finish the cooking to 130°F internal temperature by
direct searing the
roast
on all sides. As soon as it reaches or approaches that internal
temperature, I immediately get the meat off the grill and serve.
 Tasting Notes:
We
all have a guest who insists they want their meat cook further. If
that is the case, you can add a slice directly to the grill for just a
minute or two, turning constantly, to give them what they want. Yes,
you will have someone who wants the meat at 145°F or possibly above.
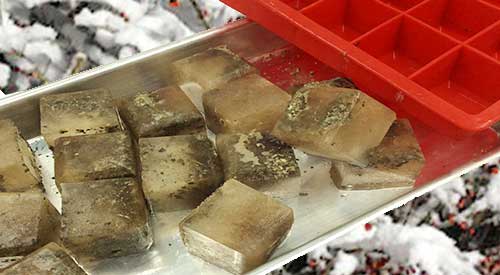
And don’t forget to save the bones to make our
smoked beef broth. If
using a charcoal grill, still use a two-zone cooking set up meaning
charcoal on only one side of the grill. Be sure you only cook with hot
coals, no flames.
For those
looking for a boneless version of this roast, feel free to request a
boneless roast from your butcher, or you can remove the bones yourself
and cook separately on the grill for tasty riblets.
Essentially, the
preparation is still the same as is the overall cooking temperature and
finished meat temperature.
What’s your favorite preparation for
prime rib? Bringing innovation to wood fired cooking with recipes,
techniques and the science behind the fire, smoke, and flavor. That’s
SmokinLicious®.

 Before
we can make the actual cocktail, the serving glass must be prepared.
Collect your favorite glasses, some finely shredded coconut, and light
corn syrup. With a paper towel, apply a thin coating of corn syrup to
the rim of each glass.
Before
we can make the actual cocktail, the serving glass must be prepared.
Collect your favorite glasses, some finely shredded coconut, and light
corn syrup. With a paper towel, apply a thin coating of corn syrup to
the rim of each glass. 
 Do you have a favorite smoked cocktail
? Leave us a comment to let us know and subscribe to our channel to
get all the tips, techniques, and recipes we bring your way. Always
eager to share our expertise on all things wood fired, that’s SmokinLicious®!
Do you have a favorite smoked cocktail
? Leave us a comment to let us know and subscribe to our channel to
get all the tips, techniques, and recipes we bring your way. Always
eager to share our expertise on all things wood fired, that’s SmokinLicious®!