|
| Barbecue Sauces come in many different size, shapes and colors, our primer can assist you in understanding their use ages. |
Barbecue is a cooking method that
includes smoke vapor for flavoring. This is my pure definition. I
won’t go into the controversy over whether grilling is part of barbecue
or not. Just know that some type of plant material must combust to
produce smoke that produces flavor to what is being cooked.
The
resulting food whether an animal protein or some other item, can be
finished with various methods. By far, the most popular finish is with a
sauce, more commonly known as barbecue sauce.
Let’s dive into what comprises a sauce used for barbecue and how regions are influenced by the ingredients chosen for the sauce.
I’m Talking Sauce Not Mop!
For those that aren’t familiar with the difference, we are talking only about sauces today and not mops. A
mop
is a thinner liquid that is applied while meats are cooking to keep the
protein moist during the cooking process. These are commonly used for
open pit barbecue and grilling and are applied while the meat is raw all
the way through the cooking process. Like a marinade, once a mop is
used for a cooking event, any leftovers need to be discarded to prevent
cross contamination of bacteria. The tool used to apply the mop looks
like a miniature floor mop.
Sauce is a glazing liquid that is much
thicker than a mop and usually contains ingredients that provide a
balance of sweet, salty, savory, and spicy. Generally, a sauce is
either applied near the end of the cooking or left as a side to be
applied by the guest enjoying the barbecue meats.
There are a lot of variations to a sauce which are generally based on regional ingredients and cuisine.
Carolina Sauces
The Carolina states revolve around mustard and
vinegar-based sauces.
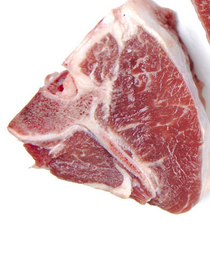
Since pork ribs, whole hog, and pork butt dominate in these regions,
the acidity of these ingredients blends perfectly to bring the meats to
perfection.
South Carolina: the sauce is yellow,
sweet with a tartness commonly found in central South Carolina to the
coast of Charleston. The sweetness comes from cane or standard sugar
and the tartness from standard yellow mustard paired with a little dried
mustard powder.
The western portion of South Carolina tends to lean toward ketchup-based sauces while northwest you’ll find tomato sauce added.
North Carolina:
Although commonly associated with North Carolina, vinegar-based sauces
are really a central to eastern North Carolina preference. These
locations often use the vinegar sauce as both a mop and sauce, starting
with naked meat; no rub. Commonly white distilled vinegar is the choice
rather than the apple cider variety and this is paired with a little
sugar, salt, red pepper flakes or crushed Chipotle, black pepper and hot
sauce.
The western portion of the state is more prone to a
tomato-based sauce
or “dip” as it is called. Like their eastern counterparts, they apply
this as a mop and sauce to naked meat. Ingredients generally include
distilled white vinegar, ketchup, sugar, hot sauce, red pepper flakes,
black pepper, and a bit of juice, usually apple.
Alabama White
Used for chicken, this is a
mayonnaise-based sauce
that has no sweetness at all. Other ingredients include apple cider
vinegar, lemon juice, apple juice, garlic powder, horseradish, dry
mustard, cayenne pepper.
Kansas City Red
This
is likely what most of the sauces sold in grocery stores can be
compared to. It is very thick, very sweet, and ketchup or tomato
based. Its common ingredients include onion, cayenne pepper, hot sauce,
chili powder, spicy mustard, molasses, apple cider vinegar,
Worcestershire, and ketchup.
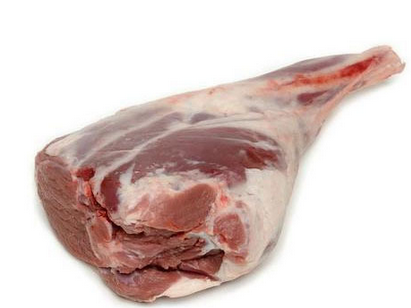
Texas Style
With
beef being king in the state of Texas, their sauce also tends to serve
as a mop as well. This sauce tends to be very dark and similar in
consistency to gravy. Due to their proximity to the Mexican border,
chiles are common in the sauce. As beef takes a long cooking time, this
sauce/mop penetrates deep into the meat making it seem less like a
sauce.
Kentucky Black
Known
to include vinegar and Worcestershire, this is often referred to as
Western Kentucky-Style Barbecue Sauce. It is quite thin due to the
amount of water added with only a little bit of ketchup and seasonings
that include paprika, dry mustard, onion and garlic powder, and red
pepper.
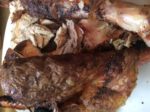
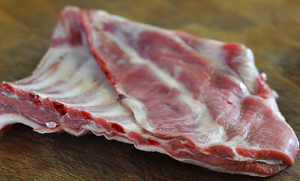
Memphis Style
When in Memphis, learn how to order your ribs. They serve them two ways –
dry and wet. Dry is just that – dry rubbed only. Wet will give you a saucy rib. Oh, yes, Memphis is all about ribs.
The
sauce tends to be a balance of sweet and spicy as they use both vinegar
and ketchup in most recipes. Other ingredients include: onion, garlic,
Worcestershire, butter, molasses, mustard, paprika, brown sugar,
oregano, thyme.
Keep in mind, most natives only like dry ribs but are known to indulge in sauce on their pulled pork and chicken.
Other Finds
Certainly,
you will find other sauces available during your travels in North
America. Some will be soy sauce based like Hawaiians use while others
are
fruit rich.
I love smoking various fruits while in season and then using their
rendered juices in a sauce. Strawberry, raspberry, peach, and cherry
work great for this purpose.
To me, a sauce should compliment the
protein your serving and not cover it up. It should not be the only
flavor you taste. If you can’t decipher the meat under the sauce, then
the balance of ingredients is not there.
If you step into the
arena of sauce making, here’s some additional information to keep in
mind. Always include some level of vinegar, salt, sugar and spice as
these have preservative properties that will allow your sauce to stay
fresh for a while. Use glass jars for storing your sauce and try to get
the sauce in the jars while still hot. Get them to the refrigerator
quickly after jarring.
Unopened sauce will last many months while open jars should be used within a month.
Keep
in mind that when cooking with hardwood as in traditional hot smoking,
it is the ingredients, cut of meat, age of the wood that all factor in
to how the wood flavonoids reveal themselves. Don’t let anyone tell you
that a fruitwood will always produce a sweet flavor to smoked meats.
That is for you to determine through the additional ingredients you use
in the meat’s preparation.

 To get our Harvest Smoke & Sparkle cocktail started, we need to make the sweet syrup
to balance the boldness of the smoked whiskey. In a small saucepan
over medium heat, whisk together ½ cup of honey, ¼ teaspoon ground
ginger, ¼ teaspoon ground cinnamon, 1/8 teaspoon ground clove and 1 cup
of orange juice until it starts to bubble. Remove from the heat and
allow to cool.
To get our Harvest Smoke & Sparkle cocktail started, we need to make the sweet syrup
to balance the boldness of the smoked whiskey. In a small saucepan
over medium heat, whisk together ½ cup of honey, ¼ teaspoon ground
ginger, ¼ teaspoon ground cinnamon, 1/8 teaspoon ground clove and 1 cup
of orange juice until it starts to bubble. Remove from the heat and
allow to cool.
 Now,
for those that like it hot, simply whisk together the smoked whiskey
and cider honey syrup in a saucepan or heat in the microwave for 45
seconds in a mug. This is one smoked cocktail that will take away any
chill in the air!
Now,
for those that like it hot, simply whisk together the smoked whiskey
and cider honey syrup in a saucepan or heat in the microwave for 45
seconds in a mug. This is one smoked cocktail that will take away any
chill in the air!