Thursday, May 26, 2022

Seguridad de la madera- ¡Nuestros esfuerzos para protegerte!

Seguridad de la madera

Usted probablemente está pensando en muchos más huéspedes potenciales para el covid-19 en un esfuerzo para mantener a todos los importantes para usted seguro y saludable.  Sin duda, todo lo que toca tiene el potencial de ser huésped para el virus que se está propagando tan rápidamente por todo el mundo.  Es sin duda, un momento de miedo. Es posible que usted no sepa que SmokinLicious® siempre se ha comprometido a proteger a nuestros clientes de la transferencia de contaminantes potenciales.  

No cualquier proveedor de madera 

En nuestro artículo publicó anteriormente titulado “Términos clarificar utilizados para la venta de madera para ahumar y asar,” intentamos explicar lo que las diferentes palabras utilizadas para describir la preparación de la madera vendida para asar a la parrilla y ahumar realmente significaba.  El punto importante para tomar de este artículo es que esas “etiquetas” diversas no se relacionan con lo que puede asegurar de que la bacteria y los agentes virales no sobrevivan si se agarran a la madera para actuar como huésped para los dos.  Al final, somos el único proveedor actual que no sólo vende madera dura con el fin de cocinar, sino que utiliza un proceso de tratamiento térmico que está en un nivel para garantizar que ninguno agente microbiano ni viral pueda aferrarse a la madera e infectar al usuario.   

Aunque utilizamos un nivel de calor intenso de 75 oC/167 oF, desarrollamos un método para garantizar que la madera no se seca al punto de leña, algo con lo que nunca queremos ser comparados. 

Sabemos que algunas esporas fúngicas sólo mueren a 60 oC/140 oF, esporas de moho a 56 oC/133 oF y listeria a 74 oC/165,2 oF. Aunque no hay datos confirmados sobre el nivel de calor que matar covid-19, si sabemos que la luz del sol hace que el agente viral sólo sobreviva unas horas, dada la intensidad de los rayos ultravioleta.  Esto sugiere que el calor tenga un papel importante en la reducción de la supervivencia del virus.  

La normativa vigente para la madera simplemente no garantiza la seguridad.  Nuestros esfuerzos refuerzan que la bacteria potencialmente mortal no puede entrar en nuestra cadena alimentaria.  Puede manejar nuestros envases y cocinar con nuestros productos sabiendo que hemos hecho nuestra parte para garantizar que no haya transferencia de bacterias ni agentes infecciosos. 

¿Puede su leña local u otro proveedor de madera hacer la misma afirmación?  SmokinLicious® – la marca pura, limpia y segura para cocinar.   

¿Planea asar a la parrilla o ahumar más en casa con el susto reciente de covid-19? Déjanos un comentario y suscríbelo para obtener nuestros últimos consejos, técnicas, recetas y la ciencia detrás del fuego y el humo, para todos los métodos de cocción contra incendios en vivo.  ¡Eso es SmokinLicious!


Thursday, May 19, 2022

Snow Pea Cucumber Salad

Our Snow Pea Cucumber Salad kissed by smoke adds a delicious flavor to this spring salad.

With four select ingredients readily available throughout the year, you can make this flavorful and healthy salad anytime of the year. Perfect on its own for lunch or as a side dish to beef, pork, poultry, and fish, you’ll find your own variations to keep it unique.

Nothing But the Most Fresh Ingredients

Ingredients:

Dressing:

  • 2 tablespoons of fresh lemon juice
  • 2 tablespoons of extra virgin olive oil
  • 1 teaspoon of lemon zest
  • Salt & fresh ground pepper

Preparing the Salad:

Add the smoked snow peas to a salad bowl. Stir in the cucumbers, tomatoes, and dill. Be sure you stir gently to prevent breaking up the cucumbers and tomatoes. Stirring will allow some of the char flavor of the peas to reach the juices of the cucumber and tomato.

Adding A Pop of Red Color to the Cucumbers and Peas

Preparing The Dressing:

Thickening the Dressing

In a small bowl, whisk together the lemon juice, olive oil, and lemon zest until smooth. You will see the dressing thicken as you whisk. Season with salt and pepper, to taste. Pour the dressing over the salad and toss until coated.

The Finish

I simply love this salad for a healthy lunch, snack, or as a side to dinner. Feel free to add some additional crunchy items like pumpkin seeds, dried fruits, or even tortilla shell strips. And DON’T FORGET to take a picture of your masterpiece and send along to us at SmokinLicious®. Hope you try this recipe Smoked Snow Peas With Cucumber Salad.


Thursday, May 12, 2022

ADDING WOOD FOR FOOD SMOKING?- OUR GUIDE WILL HELP

our food scale demonstrates Grande Sapore® and Double Filet wood chunks as a guide to adding wood flavoring with our Smokinlicious® products.
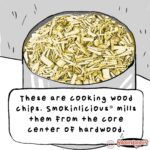
Our food scale demonstrates guidance on adding wood for food smoking.

Let’s break this down by equipment and method of smoking so you have a good place to start in answering the above questions.

Get A Food Scale- Step #1 in Adding Wood for Food Smoking

As a reminder, wood should not be sold or referenced by weight so I always recommend you keep a food scale handy to weigh pieces of wood or handfuls of wood chips until you get comfortable with eyeballing your needs. After practicing on your specific equipment, you’ll develop a sense of how much will produce a smoke infusion level you and your food guests like.

To make easier understanding of the amount of wood needed, I will be referencing by ounces in my breakdown lists.

Adding Wood for Food Smoking in The Traditional Smoker

SmokinLicious® wood chips are milled from the heartwood

If you adhere to the basic rule of low temperature cooking on a smoker, then you’ll likely be cooking between 225° and 250°F. You will also likely be using lump charcoal or traditional charcoal known as briquets, for the fuel or heat. That is the material that keeps the smoker at a steady temperature.

Regardless of whether you use the snake method, minion method, or simply dump the charcoal in the smoker’s charcoal area, adding wood for food smoking will be needed in some form to provide the actual smoked flavor to the foods. Why? Because it is what gives foods that smoky flavor and distinct texture and appearance.

For the smoker, here is a guide on the quantity based on food being smoked and for using wood chunks. Note, you can smoke different foods at the same time with small adjustments to these amounts.

Guide

Fruits/Vegetables Turkey/Chicken Ribs Pork Shoulder/Brisket
2-4 ounces 4-6 ounces 8 ounces 10 ounces with additional needed during cooking

For placement of the Double Filet chunks, these can go directly on the hot coals with some banked to the side to catch as the hot coals spread.

Adding Wood for Food Smoking Using the Charcoal Grill

Essentially, you will be doing the same steps as above for the traditional smoker. The main difference between these two units is that smokers are for hot smoking and generally don’t do well when used for grilling. In fact, I would highly recommend you never try grilling on a smoker. Charcoal grills, on the other hand, can do both but you will have to make some airflow adjustments with the unit’s venting to ensure that you can maintain a low temperature consistently for smoking. You also may find adding a heat insulator like bricks or stones works well to attract and use radiant heat.

Here is the guide on quantity based on food being smoked as well as type of wood product. Remember, a wood chip product will combust faster so you will need more chips on hand when hot smoking.

Wood Fruits/Vegetables Turkey/Chicken Ribs Pork Shoulder/Brisket
Chips 2 ounces 6 ounces 10-12 ounces 16 ounces
Chunks 2-4 ounces 4-6 ounces 8 ounces 10-12 ounces

For placement of the wood chunks, these always go on top of the charcoal. You should have a piece on the hot coals and then stage some on unlit coals that will ignite during the cooking process and keep the flavor going.

SmokinLicious® wood chunks
Adding Wood for Food Smoking Using the LP/Gas Grill

 I think the key misnomer is that LP/Gas Grills can only use smoker chips if you want to attempt to do wood-fired cooking. That has certainly changed with the advent of dual fuel or multi-purpose grills on the market today, as well as the development and design of diffusers over the gas burners for traditional grills. The heat covers on burners are the perfect place for wood chunks.

Even if you don’t want to add chunks directly to a component of the grill, you can use a standard chip smoker box and simply put chunks in the box versus chips. Usually these boxes will hold 3-4 small chunks of Double filet. The box also aids in capturing ash.

Here are the options for placement:

  • smoker wood chips in a foil pouch placed over a hot burner or directly on a heat bar/diffuser
  • smoking wood chips in a smoker box placed on the grill grate with the heat under it
  • smoking wood chunks in a smoker box (these will be small pieces about 2×2-inches) place on a grill grate with the heat under it
  • smoker wood chunks directly on a heat bar/diffuser (3-4 pieces) with the heat on medium

Here is a guide on the quantity based on food being smoked as well as type of product. Remember, a wood chip product will combust faster so you will need more of it on hand than wood chunks when hot smoking.

Type Fruits/Vegetables Turkey/Chicken Ribs Pork Shoulder/Brisket
Chips 2 ounces 6 ounces 8 ounces with replenishment needed as they reduce to ash 8 ounces with replenishment needed multiple times
Chunks 2-4 ounces 4-6 ounces 8 ounces – may need to add an 1-2 pieces 8 ounces with replenishment needed at least once

Also, keep in mind that if you’ve purchased a “green” wood or air-dried wood, it likely holds more moisture than a kiln dried products. This will change the weight. Pieces of wood that fall into the “green” category, even if they are the same size, will weigh differently. Work with wood long enough and you’ll develop a feel for what is just about at the perfect weight for smoker or direct-fired cooking.

Adding Wood for Food Smoking to Dual Fuel or Hybrid Grills

With technologies advancing in the grill world you now have so many more options for using charcoal and wood in the convenience of a gas fired grill. For those looking to have that level of ease but the flavors of charcoal and wood at your fingertips, those equipment manufacturers are to be considered. Just get ready to make a substantial investment as these models do not come cheap.

We hope this article provided you with new information about adding wood for food smoking. Leave a comment and remember to follow us on social media for additional tips, techniques, recipes, and great photos. As always, your suggestions on other article topics are always welcome. Hope you can use our blog.

Our Readers Are Asking…

How often should I add wood to my smoker?

There is no fixed rule. The quantity/quality with the right kind of wood, wood that is “moisture managed” produces the best smoke possible. With a consistent cooking fire or heat source, the familiar phrase “less is more” is your guide on adding wood for food smoking, especially when using chips or chunks. When smoke diminishes, add a bit more.


Thursday, May 5, 2022

PEA MASH- FRESH PEAS WITH SMOKY FLAVOR

Our Fresh peas get all smokey for a terrific pea mash


With the arrival of Spring on the East Coast, we have an opportunity to get some fresh vegetables and one of my favorites to locate are peas. Today, I’m going to remove fresh peas from their pods and wood-fire them using wood chunks on the gas grill. Then I’ll produce a tasty pea mash that I plan to serve on toasted bread for a healthy snack or appetizer. The time consuming part of this recipe is the removal of the peas but this task will be worth it.

Time to get to the store and locate about 2-1/2 pounds of fresh peas and fire up the grill for our flavorful take on pea mash.

The Longest Prep

Fresh peas ready for the grill

Without question, removing the peas from their pod is the hardest part of making pea mash so be sure you allocate enough time for this task. My technique includes using a small paring knife inserted in the seam of the pod. After breaking the seam, simply use your finger to break the growth connection of the pea to the pod. Place the fresh peas in a colander until all the peas are ready, then rinse, pat dry and place in a vegetable basket or vegetable grill pan designed for grilling temperatures. Be sure the peas are in a single layer so each pea can get infused with smoke flavor. Now, we’re off to the grill!

Tasting Notes: Although I’ve elected to use fresh peas, you can make this recipe using frozen. Simply reserve about 1-1/2 cups of frozen peas for the recipe and start with the peas frozen.

Two-Zone Grill Smoking

on peas on the cold side of the grill with the flame under our smoker box providing the smokey flavor

Peas are delicate so it’s important that you only use an indirect method of cooking to smoke the peas. First, I’ve preheated my grill to 325°F using just ½ the burners. For wood flavor, I’ve added three wood chunks to a metal smoker box that’s placed on the half of the grill with the burners on. Once the grill is holding temperature and the wood chunks have started to smoke, it’s time to add my grill basket of fresh peas. Since these are so small, there is no need to rotate the basket. In about 20 minutes, these will be ready to be made into mash.

Tasting Notes: When it comes to selecting the wood type to use for the smoke vapor infusion, there are no rules. Feel free to use what you like just be sure it is hardwood and not softwood. I’ve used a combination of cherry, white oak and sugar maple.

Making Mash

our smokey peas and other ingredients in the blender

Once the fresh peas have been wood fired on the grill, remove them and start on the ingredients for the mash. Add ½ cup water to a saucepan and one garlic clove that has been quartered. Place on medium heat and add ¼ cup flat leaf parsley leaves, one tablespoon of extra virgin olive oil, and a pinch of salt. Allow the mixture to cook and marry the flavors, then add the smoked fresh peas. Give this a couple of additional minutes of cooking time, then remove from the heat and drain the mixture using a sieve over a bowl, collecting the liquid for later use. Place the solids into a food processor and pulse until a coarse paste is formed.

Tasting Notes: If you don’t have access to fresh peas and will be using 1-1/2 cups of frozen, leave the peas in their frozen state when they are added to the saucepan and extend the cooking time to 8 minutes.

With our mixture pulsed, it’s time to add additional flavors to balance our pea mash out. Start by adding 2 tablespoons chopped fresh chives, ½ tablespoon of finely chopped lemon peel or jarred lemon peel, ¼ teaspoon of Aleppo pepper or crushed red pepper flakes, 1 tablespoon fresh lemon juice, and 2 tablespoons of extra virgin olive oil. Mix everything together and add a tablespoon at a time of the reserve cooking liquid until you have a thick but spreadable mash. Season with salt, fresh ground pepper and additional lemon juice. Be sure to taste and adjust these elements as you see fit.

Serve!

When serving on toasted bread, start with a hearty bread or ciabatta. Next, drizzle the bread slice with olive oil and spread on the mash. If desired, sprinkle with additional spicy pepper and lemon peel and top with a drizzle of oil.

Don’t stop at just using this as a spread. This is perfect as a pesto for pasta or rice, topping for fish, chicken and pork, and even a stuffing for mushroom caps, spring roll wrappers, or pork chops. Spring wood fired pea mash – that you can enjoy all year long.

What’s your favorite use for fresh peas? Leave us a comment to opine and subscribe to get all our postings on tips, techniques and recipes. Bringing innovation to wood fired cooking with recipes, techniques and the science behind the fire, smoke, and flavor. That’s SmokinLicious®.