Thursday, November 25, 2021

Smoked Butternut Squash by Stove Top- A Hearty Delicacy

You can do it! Stove top smoked butternut squash!

It’s squash season and that means you have a tremendous variety of product available to do many styles of cooking. How about trying your hand at stovetop smoking? Today, I’m featuring the very popular butternut squash. You’ll need a stovetop smoker or a cast iron skillet or Dutch oven with an insert pan and lid, Minuto Chips® in Size #4 from SmokinLicious®, and about 1 hour of time. Be sure you also have a hood vent where you will be using the stovetop smoker. Now let’s gather our ingredients and get ready to infuse great wood-fired flavor!

Ingredients- Smoked Butternut Squash

I’ve decided to add a little spice to this smoked butternut squash so here are the ingredients you will need to do this flavor:

  • Curry powder
  • Cinnamon
  • Unsalted butter
  • Coarse salt
  • Fresh pepper
  • And 1 medium-size butternut squash

Cast iron does take a bit of time to heat up, so you can start the medium-high heat under the stove top unit made of cast iron as you are preparing the squash, so by the time you have everything cut, cleaned and seasoned, the smoking pan will be ready to go.

Peeled Squash with Seeds Removed

Smoked Butternut Squash- Preparation

In addition to the food ingredients, you’ll also need a small saucepan for melting the butter or you may use a microwave safe bowl and melt the butter in that manner. A chef’s knife, cutting board, and vegetable peeler are also needed. First, I cut both ends of the squash off so that I have two flat ends to work with. I then peel all the skin and white skin beneath the peel from the squash until the yellow/orange meat is revealed.

Once all the peel and white skin are removed, I cut the squash in half lengthwise revealing the seeded inside. With a spoon, I remove the seeds and membrane strings. I like to pat the squash dry with a few paper towels to remove the excess water as once this vegetable hits the heat, it will start to steam out the water held in the cell membranes. Now, we’re ready to start slicing the squash into ½” slices. Taking each half, I like it on the flat side on a cutting board and slice into ½” pieces. I add these to a bowl in preparation for the flavor ingredients.

Spicing Things Up

Now it’s time to add the spices to these beautiful slices. I take about a tablespoon of cinnamon, 1-2 teaspoons of curry powder, a ½ teaspoon of coarse salt and ¼ teaspoon of fresh ground pepper. I then melt 3 tablespoons of unsalted butter. Be sure you simply melt the butter and do not let it go to the brown stage. I then pour the melted butter over my spiced butternut squash slices and mix well. I like to do this part with my hands to ensure everything is mixed well. Now, we are ready to get these beauties on the grill grate of our pre-heated stovetop smoker.

cast iron stove top smoker

Stove Top Pan Preparation

Be sure your smoker base pan is clean of any previous wood chips or food scraps. Add the SmokinLicious® Minuto® Wood Chips in the base of the unit, about a handful is needed. I’m using Sugar Maple Minuto® Chips in Size #4 to bring a balance to the squash with my other flavor ingredients. Because I plan to use my smoked squash as an ingredient in other recipes, and squash has a large amount of water naturally in it, I’m using the stovetop smoker unit without soaking my chips. This is commonly how stovetop smokers are used as the chips will combust easier in the dry state and provide perfect smoke infusion. I also make sure to turn my hood vent “on” to help reduce the smoke aroma.

Fueling Up the Stove Top Smoker with SmokinLicious® Minuto® Wood Chips

Smoking

I gently lay each squash section on the grill pan doing the best I can to keep everything from being too crowded. A medium sized squash will fill the pan easily. I then cover the pan and let it cook for about 20 minutes without lifting the lid. Remember, squash contains 94% water weight so once you lift the lid to check the squash slices, you will see the accumulated condensation on the inside of the lid. Do the best you can not to allow the water to pool into the lid and go back into the smoking pan.

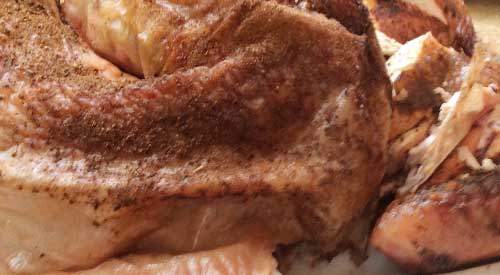
You will see the squash slices take on a shiny appearance and soften from the water vaporization and smoke vapor infusion. Depending on what you will use the squash slices for – using them as is as a side dish or in another recipe such as a soup, pureed side dish or even a sauce – will determine how long and how tender they need to be. I like mine to be knife tender but not to the point where they fall apart if picked up with tongs. Notice the condition of my Minuto® wood chips when I finish – perfectly carbonized. In fact, I likely could use them for another batch of squash!

Beautiful Grill Marks on the Smoked Squash


The Finish- Smoked Butternut Squash

With just a handful of Minuto® wood chips in size #4, 1 medium butternut squash, and 1 hour of time, I produced golden, rich flavor with a gently touch of smokiness. Notice the grill marks I still achieved by not fussing with my squash. Using cast iron units allow you peace of mind in knowing the chips are safe so you can walk away and not open the lid. That allows that 94% water to vaporize and give gently crusting to the squash. I’m ready now to take these slices into a recipe that will be extra special and memorable. Find out for yourself how easy it is to smoke on the stove top smoked butternut Squash

Bon Bar B Que!


Thursday, November 18, 2021

SMOKED TURKEY- NOT-SO-SMOKEY!

Our not so smokey Smoked Turkey is from cooking this on the gas grill, not on a smoker. We selected this photo because of the great color- not dark like a traditional smoker can impart!

Turkey is one of those items that is generally made for a special event – Thanksgiving, Christmas, New Year – and not associated with everyday cooking.  I’m here to tell you that it’s easy to enjoy turkey any time of year when you use a gas grill for the cooking and smoke infusion.  All you need is a turkey (preferably one under 15 lbs.), 6 wood chunks, a water pan with hot water, and your favorite gas grill.

Smoked Turkey- Turkey 101 Prep

Preparing the Turkey

I’m fortunate to have a local fresh turkey farm, Sprague’s Turkey Farm in Portville, NY, close by so I’ve ordered one that is under 14 lbs.  Before preparing the turkey for marinating overnight, I first need to remove the parts that are commonly found inside the turkey.  This includes the neck, heart, liver, and gizzard which is part of the turkey’s digestive tract.  These parts do make for great stock so if you can, save them to add to a stockpot down the road.

Once the organs and neck are removed, it’s important to wash the entire turkey under running water.  After a thorough wash, pat dry with some paper towels and place in a shallow pan for the rub application.

Herb and Spice Rub

Gently placing the rub on the outside of the Turkey

After washing and patting dry the turkey, I trim the excess skin from the neck area and then begin applying the rub.  I’ve combined an assortment of herbs and spices for my rub as I tend to like a potent mix of ingredients to balance the fresh meat and smoke.  My rub includes: allspice, clove, basil, cumin, cardamom, coriander, cinnamon, celery salt, garlic and onion powder, oregano, orange and lemon peel, paprika, and ancho chili powder.  I make sure to cover the entire surface of the bird.  I add a few drops of avocado oil and then apply additional rub.  This will be refrigerated overnight to allow the flavors to marry and penetrate to the meat.

Tasting Notes: Feel free to incorporate different herbs and spices in your rub as there are no rules when it comes to combinations. 

Smoked Turkey- Smoking on the Gas Grill

Placing the Turkey on the grill

As you can see in some of the photos, this was a cold day at the grill, with a temperature below 25°F.  I prepare my LP/Gas grill by first removing one of the grill grates, exposing two of my burner shields.  To one of the shields I place 3 double filet wood chunks from SmokinLicious®.  Now I lite only two burners; the one with the wood chunks and the one directly next to that.  I set these burners to medium heat to start.    Just before I’m ready to grill, I check the temperature readout and adjust my heat setting until I hit my target temperature of 325°F.

Time to add the rubbed turkey to the unlit side of the grill and my water pan right next to the bird.  I insert a thermometer and close the lid.  Basically, for the next couple of hours, I just need to monitor that the water pan has enough hot water in it and the bird gets spritz with water to keep the skin moist.

Tasting Notes: Although I’ve placed my water pan to the side of my turkey, between the lit and unlit sides of the grill, you can use this as a drip pan and place this directly under the turkey.  I elected not to do this today due to my low outdoor temperature.

Time to Serve Your Smoked Turkey!

Our not so smokey smoked turkey on the table for all the guests to enjoy

If you’ve maintained the steady temperature of 325°F and hot water in the drip pan, you won’t need to stay with the grill during most of the turkey’s cooking time.  My skin has crisped up thanks to maintaining moisture both on the bird’s skin and in the cooker with my water pan.  I remove the turkey and take it to the kitchen where I cover it for about 30 minutes prior to carving.  It’s super tender, moist, with a crunch to the skin.  The best part is that the smoke is subtle and does not over power the fresh meat.

That’s why the two-zone method of smoking is perfect when your feeding a variety of tastes.  Those that tend to avoid smoked foods will find this full of flavor that is well balanced due to our rub and consistent cooking temperature.  My turkey of 13-1/2 pounds took just about 4 hours to finish with very little effort on my part, even with a 22°F outdoor temperature and wind chill.  The best part is my oven was free to cook a bunch of side dishes so everything was timed perfectly for the table.

What’s your favorite preparation for turkey?   Bringing innovation to wood fired cooking with recipes, techniques and the science behind the fire, smoke, and flavor. That’s SmokinLicious®.


Thursday, November 11, 2021

Storage of Cooking Wood- As Fall and Winter Approach

<strong>As Fall approaches think about the storage of cooking wood.</strong>
As Fall approaches think about the storage of cooking wood.

It seems every year as we approach the Fall, weather predictions are made on how severe the winter will be. This includes predictions on subzero cold in our area of the Northeast USA. In preparation for whatever Mother Nature brings our way, we thought this would be a good time to remind you about the storage and maintenance of your cooking wood products. Storage of wood is necessary to keep the flavor essence at its best which makes your foods taste great!

Wood and Water

As you have learned, wood is hygroscopic. That’s just a fancy word for saying wood can attract and absorb water. When you hot smoke, moisture is a friend to the wood because smoke is attracted to moist surfaces. To make sure your wood will produce a good quality smoke vapor, you need some water in the wood.

When wood “drinks” or takes in moisture, the molecules expand. Throughout the seasons, all hardwood will expand and contract as moisture and climate conditions change. Think temperature and humidity levels. Hot summers keep trees conserving water. Wet springs cause trees to swell and limit water intake.

What you may not know is some species of hardwood are more hygroscopic than others. This can bring some challenges at different times of the year and in various locations throughout North America. So,what can you do?

A Few Easy Tips for the Best Storage of Cooking Wood

Here are some suggestions to stabilize cooking hardwoods you may have purchased from us:

• purchase smaller quantities of wood that will meet your immediate cooking needs; a quantity you can use within a month’s time

• don’t store the wood directly on a concrete floor or in plastic containers. Hardwood will seek out the moisture found in concrete. Plastic containers can often make the wood sweat resulting in mold development

• try to maintain the hardwood in a storage location that has a temperature which doesn’t go above 55-60 degrees F. Relative humidity should be in the range of 40-50%

• for larger quantities of wood, try rotating or shaking the wood that is located at the bottom of the storage container to the top so you can ventilate the pieces equally

• if you should see signs of surface mold developing, mix 1 part vinegar (I prefer white) to 10 parts water and place in a spray bottle. Then spray the mixed solution on the wood pieces to halt and reverse any growth. For wood that is showing more severe mold, you can mix the same formula in a soaking bucket and place the pieces in the solution to soak for about an hour.

Select Hardwoods That Store Easier

A final point: denser hardwoods are more prone to instability because moisture variations can trigger more stress in these woods. To help understand what are the denser hardwoods, here is the order of our hardwoods from most dense to least: Hickory, Oak, Beech, Ash, Maple, Cherry, Alder.

With a little planning, you can continue to enjoy our premium cooking woods during all seasons of the year with little to no additional work. Don’t forget, Fall and Winter are two perfect seasons to fire up the grill and/or smoker and start experimenting with the seasonal foods available in your area!


Thursday, November 4, 2021

Roasted Onions in Fireplace Ashes

Our Roasted onions in fireplace ashes!

 Our Roasted onions in fireplace ashes!The one vegetable we can pretty much get all year long is … the onion! So, why not give this common vegetable a special, no, fabulous flavor infusion. The way to this end? Ember cooking in an outside fireplace or cooking pit.

Ingredients:

  • An outside fireplace or cooking pit that has been cleaned of ash
  • If you prefer, you can use a cast iron skillet within the embers though I prefer to nestle my onions directly in the embers!
  • Grande Sapore® Chips from SmokinLicious® – I recommend Ash wood.
  • Sweet Onions approximately 10-12

Fire Preparation

In preparing to roast onions on the embers in a fireplace I need to first clean out the fire box from any ash and debris. Then I select the hardwood for the actual cooking. Today, I’ve selected Ash for its great coaling ability and uniformity of coal size while it combusts.

Preparing the bed of embers, keeping extra wood to add during the cooking process

Preparing the bed of embers, keeping extra wood to add during the cooking process

I will begin building the bed of coals with the SmokinLicious® Grande Sapore® Ash wood chips. Since wood chips are already in a pre-ground state, the process of setting up the fire will be quicker than with just wood pieces or lump charcoal. It is key to keep a large supply of the chips on hand in order to reach the 2-3” depth of embers needed for the cooking process.


Preparing the Roasted Onions in Fireplace Ashes

While allowing the coal fire to build, I begin preparation of the onions, which is rather simple. Wash and clean the onions leaving on the outer skin covering as it will be needed to protect the heart of the onion during the ember cooking process.

Ember Roasting Process

After building up a bed of coals to 2-3” in depth, we’re ready to add the onions to the coals! As I position each onion, I gently push down on them to seat them into the coals. This will allow the coals to completely cover the bottom of the onion as well as allow the heat to radiate completely through the onions.

As the onions cook, you’ll start to see the tops turn brown because I left the outer part of the skin on for protection. Remember, the outer skin of the onion will char during this process. I want to protect the inner core of the onion as I plan to use them in my recipes.

It’s important to remember that the coal bed will need to be replenished during the cooking process so a perimeter of additional wood chips should be going at all times up to the halfway point of the cooking process. Generally, it’s best to keep the additional chips burning at the sides of your ember bed. You can then easily scoop in additional hot embers to the bed to maintain the heat level and flavor infusion.

The onions are seated into the coals as they begin to cook from their bottoms

The onions are seated on the coals as they begin to cook from their bottoms

Unlike other vegetables like peppers, the onions don’t need to be turned but rather simply rotated so there is even char and cook. Onions, like most vegetables, have a high water composition. Don’t be alarmed by the steam trail coming up thru the top of the onions. This is a sure sign of the convection process occurring. Once cooking is about ¾ finished, you may want to pierce the tops of the onions to allow the release of the steam.

Scrumptious Ember Roasted Onions in Fireplace Ashes

You simply won’t believe how flavorful and tender ember roasting makes the average onion. We were able to build the bed of coals by using SmokinLicious® Ash hardwood. Remember, we left the outer skin on the onions to protect the inner core while we developed that exceptional char. Once the outer skin is peeled back you will see the perfectly cooked onion core that is infused with a mild wood char flavor.

Nicely charred onions over a bed of embers adds a great natural flavor

Nicely charred onions over a bed of embers add a great natural flavor


Now, get ready to use these Roasted/Toasted Onions over Embers in a fireplace and highly flavored onions in the recipes of your choice and prepare for all the questions on what you did to give the dish such fabulous flavor!