Thursday, December 30, 2021

CORNISH GAME HEN MEETS SMOKE IN THE ORION COOKER

CORNISH GAME HEN MEETS SMOKE IN THE ORION COOKER and turns very golden brown
CORNISH GAME HEN MEETS SMOKE IN THE ORION COOKER

Often, when it comes to smoking poultry, many people become quite nervous as they may have had a previous experience that resulted in a dry outcome.  Or, they may have read how difficult it is to maintain moisture when you smoke poultry.  Today, I’m going to show you how to smoke Cornish game hens on the Orion Cooker.

Why does the Orion Cooker make a difference?  Because this isn’t a traditional smoker.  This is a convection cooker that you can smoke with.

Preparing the Orion Cooker

One difference with the Orion Cooker is it requires about 13lbs. of charcoal briquettes to produce enough heat to sustain cooking.  I recommend you start the charcoal for the unit first, especially if using a chimney starter, which is my preferred method.  I like to line the drip pan with foil to reduce the amount of clean up once the hens have cooked.  There is no need to add water to the pan.  I also add SmokinLicious® Minuto® Wood Chips in a blend of Sugar Maple and Wild Cherry to the area around the drip pan.  These chips will smolder and give off great wood flavoring while the hens cook, producing a beautiful finished color and flavor.

Preparing the Hens

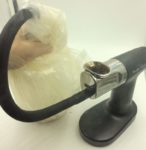
The preparation for our hens is very simple.  First, as with any poultry item, you want to remove the giblets, wash off the hens, and pat dry.  There is no need to truss these birds as the Orion Cooker will cook every part evenly. Once cleaned, it’s time to decide how you want to enhance the flavors of the hens; dry or wet rub, brine, etc.  I like to put a dry rub on the birds first then drizzle with a bit of oil to make the skin crispy.  Feel free to apply whatever rub ingredients give you the flavors you prefer.  Mine contains brown sugar, pepper, red pepper flakes, coriander, cayenne, curry, cumin.  Apply the rub generously and then drizzle with oil – mine is almond oil.

Once the hens are ready to go on the grill, I add a softened butter that’s been mixed with a couple of tablespoons of orange juice all over the skin.  This will contribute flavor as well as aide in the crisping of the skin.

Cooking Perfection

With a dry rub, orange butter, and a little oil, these Cornish game hens cook using convection heat from the Orion Cooker.  Great smoke flavor is added using Minuto® Wood Chips from SmokinLicious®. In just 75 minutes, you will have the most moist, flavorful, tender hens you could imagine.  With a crispy skin and great bronzed color, you couldn’t ask for anything more.  Remember, the Orion Cooker can hold comfortably about 8 hens so make it a party. We hope you enjoyed our blog CORNISH GAME HEN MEETS SMOKE IN THE ORION COOKER


Thursday, December 23, 2021

SMOKED COCKTAILS- HOW TO MAKE THEM GREAT!

Smoked Cocktails are the best way to bring in the smoky flavors during the cold wintry nights! Or to just add a pre-taste to your upcoming BBQ!
Smoked Cocktails are the best way to bring in the smoky flavors during the cold wintry nights! Or to just add a pre-taste to your upcoming BBQ! Learn the easy steps

An easy way to give your guests or yourself for that matter, a change from the old cocktail is to smoke the entire drink or a component of the cocktail.  I’m going to provide you with some examples of how to take any  cocktail recipe  and advance its flavor to something spectacular.  Once you see how simple it is to build a balanced cocktail with smoke infusion as one component, you’ll be ready to upgrade your cocktail recipes to include smoked cocktails as your hidden talent.

SMOKED COCKTAILS- What to Smoke

The easiest method to achieve the  smoked cocktail  is to smoke the finished drink.  However, depending on what cocktail ingredients your using, this may result in a drink that is too strong.  Generally, speaking, a sweeter drink can tolerate more smoke vapor.

Here are some options for you to consider when contemplating a smoked cocktail: you can smoke the entire drink, you can smoke one ingredient of the drink, or you can smoke the water to make the ice for the drink. One of my rules is the more ingredients in the cocktail, the more likely you can smoke the entire drink.

For ingredients, any one or a combination of ingredients can be smoked.  Simple syrup, cream, citrus, etc. are all good options.  Keep in mind that smoke is attracted the most to  cold items  so if you want an intense smoked cocktail, chill the ingredient first prior to smoking.

Tasting Notes: Keep in mind, when you cold smoke using a handheld food smoker, the intensity of the smoke can be high.  Due to the immediate ignition of the micro chips, the smoke production is great.  You can control the level of smoke by only trapping a small quantity of smoke for a lighter infusion versus allowing the container to fill completely with smoke vapor.

The breville handheld smoker

#handheldsmoker

SMOKED COCKTAILS- Balancing Smoke with Other Flavors

Whether the cocktail contains fruit, hard liquor, or cream, you can make a flavorful and desired cocktail.  For a drink like the Jack Frost which contains lots of sweet juice and cream of coconut, smoking the entire drink provides great balance.  For a drink like the Harvest Sparkle, smoking the simple syrup works well.  Our Cranberry Bourbon cocktail goes hardy whether served hot or cold when we cold smoke the whiskey.  And the Winter Wonderland enjoys a smoky layer to the cream of coconut for a luscious take on this four-ingredient cocktail.  Never forget, when in a pinch, consider simply  smoking the water  to make the ice cubes for a no-fail option on the smoked cocktail, that will remain subtle for most any guest who is served.

Do you have a favorite smoked cocktail?  Leave us a comment to let us know and subscribe to our channel to get all the tips, techniques, and recipes we bring your way.  Always eager to share our expertise on all things wood fired, that’s SmokinLicious®!


Thursday, December 16, 2021

GRILLED PRIME RIB THE ULTIMATE WITH WOOD

Our gorgeous color on our Grilled Prime Rib with wood on the gas Grill- Yum!

Yes, prime rib is expensive and likely the reason so many are fearful to take this cut of beef to the grill.  I’m going to take away that fear and show you just how your grill will respect this cut and produce the tender, buttery, crusty outside roast you want.

Although there are different opinions on whether to make a roast with the ribs intact or removed, I am someone who prefers to cook with the ribs in.  I’ll give you tips on doing a boneless version as well if that is your preference.

For now, purchase an 8 lb. or 3 rib roast, get your favorite wood chunks, and get ready to fire up your gas grill using a two-zone cooking method for a prime rib roast you won’t soon forget.

Meat Preparation

Trim off the excess fat and season with Salt! Let site overnight to season

For the most part, my butcher has done most of the trimming.  I will just remove any remaining fat and ensure all the silver skin is gone.  You should see meat all the way around the roast. In the end, I’ve removed about a pound of additional fat.

At this point, I want to add salt to the meat to reduce the amount of water before cooking and tenderize the inner fibers.  For every pound of meat, I sprinkle a ½ teaspoon of kosher salt.  This is called dry brining and will require that the meat be refrigerated for 24 hours after the salt is applied.  I simply salt and wrap the meat in plastic wrap to prevent liquid from leaking, and place in the refrigerator.  Or, you can salt and place in a non-reactive container and leave uncovered.

Char Crust Rub

While the meat is tenderizing with the dry brine, we want to prepare a char crust to be rubbed all over the outside of the roast just before it goes on the grill.  Combine 2 tablespoons fresh rosemary, 1 teaspoon dried rosemary leaves, 2 tablespoons fresh ground black pepper, 2 teaspoons dried oregano, 1 teaspoon garlic powder, 1 teaspoon onion powder, 1 teaspoon paprika, ½ teaspoon chipotle chili powder, and 2 tablespoons prepared horseradish.  I combine all my ingredients with a mortar and pestle.  If it is a bit too thick, just mix in a little water so more of a paste is formed.  Apply the char rub just before cooking and you’re ready to good.

Tasting Notes:

Feel free to incorporate different herbs and spices in the char crust rub.  Some considerations include: thyme, cinnamon, chili powder, clove, ginger, even cocoa powder.

Smoking on the Gas Grill

two zone cooking with the smoker box on the right over the heat and rib roast on the left

I really enjoy cooking a prime cut of beef roast on the gas grill as the two-zone set up makes this low stress.  I prepare my LP/Gas grill by first placing a disposable foil pan under the grill grate on the side I plan to cook on.  This will be my water/drip pan.  I add about ½” of hot water to the pan and place my metal smoker box containing three SmokinLicious® wood chunks on the side I plan to cook on, right under the grill grate.  Now I lite only the burners under the smoker box.  I set these burners to medium heat to start.    Just before I’m ready to grill, I check the temperature readout and adjust my heat setting until I hit my target temperature of 225°F.

Time to add the char crusted rubbed roast to the unlit side of the grill, directly above the drip/water pan.  I insert a thermometer and close the lid.  Basically, for the next couple of hours I just need to monitor that the temperature holds to 225°F and that the water pan has enough water in it.  Only as I get closer to 110°F internal temperature of the meat, do I start to babysit the grill.  This is when I like to brush a bit of butter on the outside of the meat.  It produces great color to the crust.

At 115°F internal temperature, I remove the water/drip pan, meat string ties, and the meat thermometer.  I’m now going to finish the cooking to 130°F internal temperature by direct searing the roast on all sides.  As soon as it reaches or approaches that internal temperature, I immediately get the meat off the grill and serve.

Oue finished roast showing great color and a wood flavoring for and add delite!

Tasting Notes:

We all have a guest who insists they want their meat cook further.  If that is the case, you can add a slice directly to the grill for just a minute or two, turning constantly, to give them what they want.  Yes, you will have someone who wants the meat at 145°F or possibly above.

And don’t forget to save the bones to make our smoked beef broth.

Tasting Notes:

If using a charcoal grill, still use a two-zone cooking set up meaning charcoal on only one side of the grill.  Be sure you only cook with hot coals, no flames.

For those looking for a boneless version of this roast, feel free to request a boneless roast from your butcher, or you can remove the bones yourself and cook separately on the grill for tasty riblets.  Essentially, the preparation is still the same as is the overall cooking temperature and finished meat temperature.

What’s your favorite preparation for prime rib?   Bringing innovation to wood fired cooking with recipes, techniques and the science behind the fire, smoke, and flavor. That’s SmokinLicious®.


Thursday, December 9, 2021

SMOKED HAM ON THE GRILL

Smoked Ham On The Grill Made Easy By Following a Few Tips

Whether you’re preparing ham for a holiday like Easter, Christmas or New Year, for a formal brunch or even for a family special event like a reunion, Christening, or engagement party, you can take this average protein and make it so much more. Even if the ham you purchase has already been smoked, you can take away the factory flavor and truly make it your own with our simple technique for smoking on a gas grill using a two-zone cooking method. Plus, I’ll give you a ham glaze recipe that will make you forever throw away a prepackaged glaze.

Get your gas grill ready, purchase a ham, and bring your game as I give you the easy steps to smoking a ham on the gas grill with wood chunks.

Great Ingredients for a Great Glaze

Today’s hams now come with a variety of labels so let’s cut to the chase to ensure you know what some of them mean. Wet Cured Hams are already smoked but still need to be cooked to kill microbes if they are labeled ‘cook before eating” or need some cooking if labeled “cooked”. These are usually for purchase as a whole, half or bone-in shank ham. Dry Cured Hams have been cured in a lot of salt and usually need to be soaked in ice water before cooking, which removes a great deal of the salt so it’s more edible. Fresh Ham is uncured and uncooked.

for smoked ham on the gas grill

No matter what ham you select, you’ll need a glaze to bring greatness to the meat. For my ham, I’m making an apricot-Dijon glaze that is so flavorful and simple. For my glaze you’ll need the following ingredients:

  • ½ cup apricot preserves
  • ½ cup honey
  • 2 tablespoons brown sugar
  • 1 tablespoon Dijon-style mustard
  • 1-1/2 teaspoons Worcestershire sauce
  • soy sauce – ½ teaspoon
  • paprika – ½ teaspoon, preferably Spanish-style
  • cayenne pepper – ¼ teaspoon
  • black pepper – ¼ teaspoon
  • ¼ teaspoon cinnamon
  • 1/8 teaspoon ground cloves

In a medium bowl, combine the glaze ingredients and mix well. Refrigerate until you need it.

Smoke First

All our apricot glaze ingredients mixed together and ready to baste our ham.

I’ve discussed the different types of ham and the fact that most sold in grocery stores are precooked and often smoked. Don’t let this stop you from doing your own smoking. To start, you’ll need to trim the fat that is still present on the pre-smoked ham. That means, trim to within a 1/4 inch. Remember, smoke vapor will not penetrate through fat. After trimming, you’ll need to score the meat in the traditional checkerboard pattern. Knife cuts measuring ¼ inch in depth are produced first vertically and then horizontally, leaving about 1-inch spacing between cuts.


Preparing the Gas Grill

For this recipe on our as grill, we used a two zone approach; heat applied below the SmokinLicious Single Filet smoker wood chunk and no heat underneath the ham.Once trimmed and scored, it’s time to prepare the gas grill. Light the burners on one side of the grill and set to medium-high heat. We want to maintain a cooking temperature of about 275°F. Leave the other half of the burners off as that will be the cooking area for the ham. This technique is the two-zone cooking set up. Place 2 single filet wood chunks from SmokinLicious® directly on the heat shield of the lit burner. These will heat and release the smoke vapor and add flavor to our ham. Total time cooking the ham in this manner will be about 30 minutes. The ham is placed on the cold half of the grill with the flat side of the ham on the grate.

After 30 minutes, take two long sheets of heavy-duty foil and place the ham on the foil. Take your pre-made glaze and cover the ham with about half of the glaze mixture. Now, fold the foil around the ham sealing at the top. Place the foil-wrapped ham back on the cold side of the grill and insert a meat thermometer in the meat at least 1-inch away from the bone if you have a bone-in cut of ham. Let cook until the thermometer registers 130°F. Every 15 minutes, brush the ham with glaze dripping that have collected in the bottom of the foil. Once cooked to 130°F, remove the ham from the foil, drain the residual glaze back into a saucepan with remaining uncooked glaze you had reserved and allowed to heat on low.

Final Step to Crisp Skin

Place the unwrapped basted ham on the hot grill to crisp the outer skin. Be careful not to over cook!After removal from the foil, there is one final step before serving. The skin requires just a bit of crisping which will be done on the hot side of the grill. Place one side of the ham on the hot side of the grill allowing the glaze sugars to caramelize for just a few minutes per side. Do not do the flat side of the ham and do not allow the sugars to burn. Once the three sides are done, remove to a cutting board and slice. Serve the residual glaze on the side. Now you must try Smoked ham on the gas grill!


Thursday, December 2, 2021

BEST GINGERBREAD MEETS THE GRILL

We served our Best Gingerbread from the Grill as a dessert! The grilled smoky flavor was too good for a Gingerbread house!
We served our Best Gingerbread from the Grill as a dessert! The grilled smoky flavor was too Tasty for a Gingerbread house!

Gingerbread is one of those terms that are generic in the definition for a broad category, in this case, something made from ginger, cinnamon, clove, and a sweetener like molasses and sugar.  Although “bread” is in the name it can produce great cakes, cookies, bars, and of course, bread.

One of the reasons gingerbread is ideal for cooking on the grill is because it contains bold flavors of spices and molasses.  I’ll be taking a traditional recipe for gingerbread and introducing the cooking to the grill that I’m equipping with wood chunks for a unique wood flavoring.

You’re going to love the dense, flavorful result that is the perfect recipe to keep on hand for those unexpected and expected guests.

Smoke coming from our wood chunks! Using a two zone cooking method

#Two-Zone Cooking

If you follow my gas grill recipes, then you know I am a fan of the two-zone cooking method.  By lighting the burners on only half the grill and placing the food on the unlit side, I can guarantee controlled temperature that allows me to walk away as I do with my indoor oven.

I start by preheating my grill by lighting the burners on just one side.  I want a cooking temperature of 325°F so I’ll set the dials to low.  On the lit side, I also add a metal smoker box that contains 3 wood chunks.  By the time my batter is mixed, the wood chunks will be smoking for the cooking of the gingerbread.

Our Batter ready for the baking pan

Quick Batter

First, I butter and flour an 8-inch square cake pan and set aside (you can use the non-stick cooking spray if you prefer).  There is only one mixing bowl needed for this recipe to combine the following ingredients and beat until combined well, scraping down the sides of the bowl as needed:

  • 2-1/3 cups all-purpose flour
  • ½ cup shortening
  • 1/3 cup sugar
  • 1 cup molasses
  • ¾ cup hot water
  • 1 tablespoon crème Fraiche
  • 1 teaspoon baking soda
  • 1 teaspoon ground ginger
  • 1 teaspoon ground cinnamon
  • ¾ teaspoon salt
  • 1 egg

Once mixed, pour the batter into the prepared cake pan and get ready to put it on the grill.

Tasting Notes: My non-traditional ingredient is the addition of the crème Fraiche.  I use this only when making a cake or loaf as if used for cookie batter, this would be too thin.  Remember, there are many variations to a gingerbread recipe.  Bolder flavors can be produced through the addition of ground clove and nutmeg.  For sweeter versions, adding honey or condensed milk.  Remember, molasses was used in baking centuries ago as a means of saving money due to the high cost of sugar.

Gingerbread Grilling

Our Batter on the grill cooking and absorbing smoke

With the batter poured, we are ready to wood grill the cake.  Place the prepared pan on the unlit side of the grill, making sure that the grill’s temperature is close to 325°F.  Now you can walk away for about 35 minutes.   Return at that point to simply rotate the cake pan and ensure the cake is cooking evenly.  If the wood chunks are completely black, you may want to add a couple of more.  Total grill-baking time will be 50-55 minutes.  Remove from the grill and cool the cake on a wire rack.  Cut into squares and serve warm or cold.

Tasting Notes:  I prefer to serve this version of gingerbread with butterscotch sauce and whipped topping but other choices include melted semi-sweet chocolate, orange sauce, and even a cream cheese frosting.