Thursday, April 29, 2021

HOW TO STORE WOOD CHIPS

Tom did pay attention to our tips on how to store wood chips!

 It is one of our top questions. Wood storage. Where to store wood, how to store wood, temperature ideal for storing wood, shelf life of stored wood. If you are an avid follower of our readings, you are likely familiar with our two cartoon characters, Tom and Bert. Thru these characters, SmokinLicious® has been able to guide millions of home grilling and smoking enthusiasts on techniques and tips to make every wood-fired cooking event a success.

Here are some great lessons to learn from Tom’s wood storage mistakes.

Tip #1

Tom having issues lighting his fire

Tom is using a traditional charcoal grill. One of the first tips concerns the charcoal. Be sure it is super hot (gray in color) and that once you add the wood chunks or chips to the hot coals, you have your lid ready to go on.

This is when the difference between hardwood that has some measurable moisture versus one that is too dry to register determines if smoke vapor will be produced. No moisture means no smolder. That in turn means no smoke vapor to infuse your foods.

Tip #2

image of wood chips on the open picnic table

Tom admits that he did nothing special to store his extra wood chips. He made the mistake of leaving the leftover chips exposed to the elements – sun, rain, air. These elements can cause the wood to lose moisture much faster, especial when the product is a wood chip.

Moisture depletes much faster in chips than in chunks. All wood needs to be stored under proper conditions regardless of the size of the pieces. Cooler temperatures like those in your refrigerator are best which is why many people find garages and basements to be ideal.

Tip #3

Chef Bert upset that Tom left his wood chips outside

Tom’s friend, Bert, is quick to point out that wood does require proper storage. If you want to be sure any extra wood will be good material for your next grilling/smoking event, take the time to store it properly.

A cool, dark, dry location is ideal. If you are considering a garage or basement, be sure the wood is not set directly on any cement flooring or additional moisture can be drawn in from the cement making the wood too wet. That is when mold can set in!

You can use just about anything to store the wood: cardboard box, plastic crate with air holes, metal crate or basket, wood box.

Tip #4

Chef Bert discussing how to store wood chips properly

When you want to use hardwood for flavor essence infusion, moisture is important. Without any measurable water level in the hardwood, what was intended to be used as a flavor enhancer literally becomes a fuel wood.

Just like the seasoned firewood used in the home fireplace or wood stove, wood that dries out too much produces more heat with less aromatic. Dry wood added to charcoal equipment will become fuel, just like the charcoal. No long burst of smoke will result as the dry wood burns up too quickly. This is not the outcome you want when hot smoking food.

Learn from Tom’s mistakes and properly store your hardwood chunk and/or chip investment. By taking the time to store the wood correctly, you get the longest value from your purchase.

Thursday, April 22, 2021

THE SCIENCE OF MEAT COLOR INCLUDING THE INFAMOUS SMOKE RING

Learn how the science of meat color affects our appetite through our sense of sight!

Barbecue is one of those methods of cooking that is loved by many but not truly understood by those who love it!  I’m always entranced by the fact that barbecue gets mingled with the word grilling when the reality is, these two methods of cooking mean very different things.  One common denominator though is the meat used for these cooking methods that simply becomes a variant of color so completely different from traditional cooking methods like the frying pan, slow cooker, and oven.

Let’s take a closer look first, at what meat is and then how color develops when cooked.

Meat Defined

You likely define meat as an animal protein that is derived from an animal like cattle, pig, chicken, lamb, goat, etc., and you would be correct in a very abbreviated definition.  But there is so much more to meat that most don’t understand. 

Meat is mostly the muscle tissue of an animal which is made up of 75% water, 20% protein, and 5% fat, carbohydrates, and various other protein.  The muscles themselves are made of bundles of cells called fibers.  Each cell is comprised of thread-like fibers made of two proteins: actin and myosin.

The purpose of these protein fibers is to make muscles contract and relax, which requires an immense amount of energy, which the fibers derive from the energy-carrying molecule ATP -adenosine triphosphate.  To produce ATP there must be oxygen which muscles get from circulating blood.  When an animal is killed, blood circulation stops resulting in all muscles exhausting their supply of oxygen.  When oxygen is halted it halts the production of ATP, resulting in the sugar stored in muscles known as glycogen, to be broken down without oxygen support.  The result is the production of lactic acid that builds up in the muscle tissue.  If this acid level is too high, the meat loses its water-binding ability and becomes pale and watery.  Too low, and the meat will be tough and dry.  Add to this the calcium release that occurs when the lactic acid builds up, and the myosin and actin proteins become fixed.  It’s important not to freeze animal meat too soon after slaughter or the meat will become tough.  The meat needs to age to allow the enzymes in the muscle cells to break down these overlapping proteins and produce tender meat.

Why We Cook Meat

Denaturing is the process of breaking, unwinding, and coagulating the protein molecules when meat is heated.  When heated, muscle fibers release water.  Remember, meat is roughly 75% water when raw.  You can retain moisture or water content of meat by using some specific techniques including brining, steaming, braising or poaching, and tenderizing using acid.

Here’s a summary of what happens at specific cooking temperatures to meat:

105°F/40°C - 122°F/50°C: blanch or sear meat first kills surface microbes then allow the proteins to denature at these temperatures giving an aging effect to the meat

120°F/50°C: meat has a white opacity as the myosin protein denatures.  Red meat begins to turn pink.  This is known as the “rare” stage of meat cooking and when sliced, the juices will break through the weak spots in the connective tissue.

140°F/60°C: Red myoglobin begins to denature and turns tan colored.  Myoglobin is another protein store in muscle that is water soluble.  You would know this protein as the red juice in meat packaging when you purchase store bought product.  It’s not blood but it does receive oxygen and iron from hemoglobin in blood.  At this temperature, meat releases a lot of juice, shrinks in size, and becomes chewy.  It is known as “medium” in doneness.

160°F/70°C:  Connective tissue is what binds muscles to bone.  Throughout the muscle is a softer connective tissue called collagen.  When cooked, collagen dissolves or melts and becomes gelatin.  This melting is what gives meat a silky texture and moisture.  Collagen starts to accelerate the melting stage at 160°F and continues rapidly until 180°F.  Despite the meat drying out at this temperature, melted collagen is what makes meat seem more tender.  Just remember, lean meats as well as chicken and turkey don’t have much collagen so don’t over-cook them.

The Smoke Ring

Before we discuss the smoke ring, I need to mention the Maillard reaction.  This is the reaction that occurs between amino acids and reducing sugars in meat that is exposed to dry heat such as a frying pan.  What results is that beautiful, brown exterior that gives meat a rich, deep flavor.  This only occurs with a temperature above 300°F and with dry heat.

Now to the pink ring that commonly occurs just under the surface of a smoked meat. The smoke ring is caused by gases in the smoke that preserve the myoglobin and interact with the nitric oxide (NO) and carbon monoxide (CO) in combustible material like charcoal and wood.  The gases react with the iron in myoglobin and result in the telltale ring of pink just under the surface, while the rest of the meat will turn gray due to the NO and CO only having limited penetration ability in the meat.  This chemical reaction is similar to what happens to meats exposed to curing salts which also produce a pink coloring.  The ring stops growing when the meat hits about 170°F and myoglobin loses its oxygen retaining ability.

If you want a smoke ring then you must incorporate cold meat into a low-temperature equipment.  This will allow the meat to remain below 140°F for a longer time which is the temperature at which myoglobin begins turning brown.

As a final note, keep in mind that any meat that goes to black in color is never good.  That means the meat’s surface has essentially turned to carbon and the ingestion of carbon laced foods has been proven to be a carcinogen.  If you take your meat to this stage, do everyone a favor and throw it away.   No one needs to know you took the meat too far!

What is your preferred finished cooked meat method and color?  Let us know in the comments and don’t forget to follow us on all platforms.  Providing tips, techniques, recipes, and the science behind the flame and fire to improve your skills with wood-fired cooking! That’s SmokinLicious®!

Enjoyed this blog? Please spread the word.


Thursday, April 15, 2021

HOW TO TURN YOUR CHARCOAL GRILL INTO A SMOKER

How to turn your charcoal grill into a smoker

 Let’s be honest.  When you bought that charcoal grill you were likely thinking that you could both grill and smoke without needing to add anything.  Soon, you realized, that just wasn’t the case.  Now, you’re contemplating whether you need to purchase a smoker.  Well, hold on the shopping trip until you read this.

  You can turn your charcoal grill into a smoker with these simple steps!

 Any Charcoal Unit Will Smoke

 Obviously, if you own a little tailgate model of a charcoal grill, you won’t be doing multiple slabs of ribs or a full packer cut brisket on that unit.  But you can smoke on any charcoal grill if you follow some simple steps and afford yourself enough time to do it right.

 How To Add Smoking Woods to the Charcoal Grill

Essentially, when you smoke on a charcoal grill you are roasting outdoors like you do in your conventional oven.  If you use a good quality hardwood charcoal, you will get some flavor from that product but not like true smoked foods you may have experienced in your favorite barbecue restaurant.  That bolder flavor only comes from unprocessed hardwoods.

 Picking Your Fuel and Smoke Flavor

There are three primary fuel types you can use in your charcoal grill: briquettes with instant lite, briquettes, and lump hardwood charcoal.  Right off the bat, I’m going to tell you to eliminate the briquettes with instant lite.  That is a product that contains an accelerant or petroleum product to make it quick lighting.  Unfortunately, it adds a very distinct, unpleasant component to the cooking process that can transfer off-flavors to your foods.  Stick with plain briquettes or lump hardwood charcoal.  Just note, that you likely will find a bit more ash developing faster with lump hardwood charcoals than you would with briquettes.

 Picking the wood for smoke flavor has a few rules you should adhere to: only use hardwoods, try to limit the bark on the wood or go bark-free for the best temperature control, find woods that have some measurable moisture level so they smolder – around the 20% level is ideal, and use chunks of wood versus chips.

 Indirect Cooking Method

What truly makes for barbecue and not just grilling is using the indirect method of cooking.  There are many ways to set up a two-zone cooking method which is also referred to as indirect cooking.  Often, what you are cooking and the quantity will determine the setup of the fuel.

 There are two popular methods that work the best: banking the charcoal to one side of the unit with the food going on the unlit side and putting the charcoal on each side of the unit with the food going in the middle where no charcoal is present.

For those that need a bit more help keeping everything where it’s supposed to go, there is an accessory called the Slow “N Sear that works well with kettle grills and includes a trough that holds water.  This allows you to place foods on the upper grates as well as below on the opposite side of the charcoal.  It certainly will give you ample room to cook many pounds of meat.

Water Keeps Everything Moist

To ensure that any protein cooked on the grill remains moist and tender, include a water pan in your set up.  This is easily done by purchasing readily available disposable foil pans from the discount store.  The shape and size will be dependent on your actual grill.  I like to add warm water to the water pan so the grill does not have to exert energy to heat up the water, which takes heat away from the unit.  Remember, the water will be evaporating during the cooking process so have additional water available if it depletes before the cooking is complete.  Water pans are set in the base of the unit on the charcoal free side, directly under the food.  This will also act as a drip pan, catching all those juices as well.

Chimney Starter for Easy Lighting

Once you have your charcoal set up, the water pan laying in the charcoal free section, it’s time to light the charcoal.  The easiest way to do this and ensure that the grill gets hot pretty fast is to light a chimney starter.  These are portable containers made of metal that allow you to pour a couple of pounds of charcoal into and light from vent openings at the base.  Usually these devices require you to place newspaper at the base which is then lit with a lighter to ignite the cold charcoal.  I skip the newspaper step and simply use a MAP gas canister with easy operating torch head to lite the charcoal.  The best part is I can leave the torch under the chimney starter on a safe surface such as concrete, while I finish the grill set up.  Once the charcoal at the bottom of the chimney starter is lit, I remove the torch and allow it to burn up through the rest of the charcoal.  Once the pieces are grayed over and showing hot embers, it’s ready to pour into the grill’s charcoal area.  I carefully pour the hot coals on top of the unlit coals.  This will ensure plenty of 
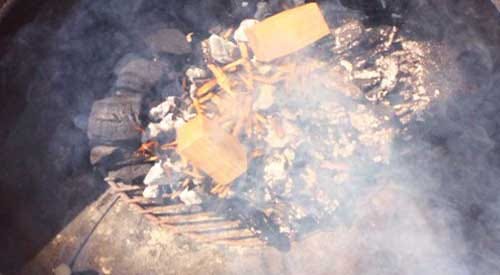
fuel during the cooking process.  Next, 3-4 wood chunks are placed on the hot coal area.  I usually disperse these with a couple of inches between pieces.

Moist Cold Surfaces Attract Smoke Vapor

With the grill set up complete, the hot coals going and the wood chunks beginning to smolder, it’s time for the meat.  Always take the prepared meat directly from the refrigerator to the grill COLD!  Cold foods will attract smoke vapor faster, allowing the vapor to condense on the food’s surface.  The water pan will ensure that moisture remains within the grill which also will ensure attraction of the smoke vapor.

Vent Settings Guarantee Temperature Control!

Although charcoal as a fuel also aides in temperature control, I’m going to speak about air control.   To sustain fire or combustion, you need oxygen flowing into the grill, stimulating the hot coals.  This is the intake damper.  Close it completely, and you’ll put the fire out and lose all temperature.  Open it wide and you’ll increase the temperature as the coals get stimulated for more heat.

On the opposing end is the exhaust damper also called a vent or flue/chimney.  This vent is what pulls in the oxygen through the lower intake damper.  Yes, smoke is expelled through the exhaust vent but heat as well as the gases that are derived from the combustion of the fuel material including the hardwood chunks are also vented.  The exhaust vent needs to be partially open all the time.  If the temperature starts to fall, open the intake damper wider.  If the temperature is too high, reduce the oxygen to the fire by closing the intake damper.

 Now, make your shopping list for your favorite foods to smoke and set up that charcoal grill for a fabulous flavorful day.  It’s really that simple!

 Did we get you motivated with this article?  If so, leave a comment as we’d love to hear from you.  Don’t forget to let us know what other questions you have, as we always design our postings after the needs of our followers.  As always, subscribe and follow us, so you don’t miss a thing!


Thursday, April 8, 2021

SMOKED HUNGARIAN PEPPER SPREAD PREPARED 2 WAYS

Peppers are one vegetable most anyone can grow, whether in a full garden, raised bed, or even a garden container.  Hungarian peppers are one variety that is particularly easy and plentiful.  Be sure to view our technique for smoking Hungarian wax peppers as this spread recipe features a smoked pepper as the key ingredient.  Once you have your smoked peppers, you are ready to learn two options for a Smoked Hot Pepper Spread that have so many uses. 

 Both recipes are super easy and fast to make which allows you to keep smoked peppers on hand in the freezer and whip this up at any time.  Perfect as an appetizer or as a flavor smear for proteins, this hot pepper spread will be a favorite.  Plus, it makes for the perfect small gift when jarred and tied with a simple ribbon bow.

 Smoked Hungarian Pepper Spread Recipe #1

For the first version of our Smoked Hot Pepper Spread, the following ingredients will be needed: 1lb. smoked Hungarian pepper, ½ cup mayonnaise, ½ cup sour cream, 2 tablespoons prepared horseradish, ¼ cup ketchup, and fresh ground pepper. 

 Start by adding the smoked peppers that have been de-seeded and membranes removed to a food processor bowl.  Pulse these until small chunks form.  Measure out the sour cream and mayonnaise as these two cream items will balance out the spicy, smoked flavor of the peppers.  Add them to the food processor bowl. 

 Following the addition of the smoked peppers, sour cream and mayonnaise, time to add 2 tablespoons of prepared horseradish, ¼ cup of ketchup and fresh ground pepper. Blend until combined.  This makes approximately 2 cups. 

 Transfer to a container or individual jars depending on what you intend to do with the spread, and refrigerator.  Remember, if you prefer this a bit hotter, leave the seeds and membranes intact in the peppers before you pulse.  Now on to our 2nd smoked hot pepper spread option.

 Smoked Hungarian Pepper Spread Recipe #2

Our second recipe for Smoked Hungarian Pepper Spread starts again with 1 lb. of smoked peppers, seeded and membranes removed if you want to control the heat level, or left intact with just stems removed for the hotter version.  Placed in a food processor bowl and add 8 ounces of goat cheese, softened, and 1 tablespoon of Coconut Liquid Aminos.  This will provide the creamy balance to the heat of the peppers.

Once the goat cheese and coconut liquid aminos are added to the smoked peppers, time for the final 2 ingredients.  Take a ¼ cup of feta cheese and 1 tablespoon of milk or cream and place in the food processor bowl.  Start the processor on pulse first, then blend on low.  Depending on how thick or thin you want your spread to be will determine the exact amount of milk or cream.  Be sure to only add liquid in small amounts to prevent this spread from thinning too much.  That is it! 

 Lots of Uses!

For both recipes, this can be use spread on toasted bread, used as a condiment on grill chicken sandwiches or hamburgers.  It even works well as a smear under pork, beef, chicken and fish.  There is really nothing it cannot be used with including as a dip for vegetables.  Smoked Hungarian Pepper Spread.  Smoke the peppers in batches and freeze so you’ll always have them available for making one or both of the spreads super fast.

 What is your favorite recipe featuring smoked peppers?  Leave us a comment to opine and subscribe to get all our postings on tips, techniques and recipes.  Bringing innovation to wood fired cooking with recipes, techniques and the science behind the fire, smoke, and flavor. That’s SmokinLicious®.

Thursday, April 1, 2021

AN EASY GUIDE TO COMBINING HARDWOODS FOR BALANCED SMOKED FOOD FLAVORS


There is misinformation out there that you may have been victim to.  When cooking with hardwood, you may have been under the impression that only certain woods can be used with certain foods.  For instance, hickory is reserved only for pork shoulder and brisket.  Cherry for chicken, etc.

But that is hardly the truth. 

Hardwood used for cooking must be viewed as another ingredient.  As a key ingredient, it needs to be balanced with the food item and other ingredients used in preparation before grilling and smoking.

The intent today is to provide a guide on combinations of hardwood that work well for specific foods.  Essentially, the ingredients of a rub, glaze, sauce or marinade will dictate what hardwoods will maximize all the flavors to become a finished masterpiece.

Hardwood Selection as a Compatible Ingredient

The goal when using hardwood is balance of the flavor outcome.  You never want the hardwood to produce an ashy or burnt flavor.  The essence of the wood should simply add to the beautiful flavor outcome for a memorable eating experience.

 Here is SmokinLicious® rating on boldness of flavor for the hardwoods we offer:


                                   Mild                              Eastern Alder

                                                                      Ash

                                                                      Wild Cherry

                               Medium                           Sugar Maple

                                                                          Beech

                               Bold                               Hickory

                                                                         White Oak

                                                                         Red Oak

When I design wood recipes for specific foods, I like to think about balancing out a medium or bolder flavor with one that is lighter.  For lighter fare items like vegetables and fish, two wood combinations are generally used while longer cooked animal proteins can tolerate three hardwoods well. 

In the chart that follows, reference is provided to various foods that benefit from exposure to the specified hardwoods.   Use the color blocks indicated under each food group to guide you on combinations.  Find the same color blocks in that group, and you have the balanced combination of hardwood.   For instance, under Fruit, there are two red squares for an alder and cherry combination.  Under the Fish column, there are 3 options: Alder and Maple represented by the pink square, Beech and Cherry represented by the orange square, and Ash and Maple represented by the gray square.  These combinations are balanced by the essence they produce in the smoke vapor.  Just use equal parts of each wood and remember, always start with a small quantity of hardwood as it does not take much to produce great flavor.

 TIP: if you are using a spicy rub, default to combinations that includes mild to moderate flavor intensity.  Using sweet ingredients, include a bolder hardwood flavor.


Fruit

Veggie

Fish

Pork

Beef

Poultry

Game

Alder


Ash

Beech


Hickory


Red Oak


Maple

White Oak


Cherry

 Experiment to find your favorite combinations of hardwood and soon you’ll have your own personal, detailed guide!

Do you have a favorite combination of hardwood?  Leave us a comment and subscribe to get our latest tips, techniques, recipes and the science behind the fire and smoke, for all live fire cooking methods. That’s SmokinLicious!