Tuesday, November 8, 2022

THE NOT-SO-SMOKEY SMOKED TURKEY


Turkey is one of those items that is generally made for a special event — Thanksgiving, Christmas, New Year — and not associated with everyday cooking. I’m here to tell you that it’s easy to enjoy turkey any time of year when you use a gas grill for the cooking and smoke infusion. All you need is a turkey (preferably one under 15 lbs.), 6 wood chunks, a water pan with hot water, and your favorite gas grill.

Turkey 101 Prep

I’m fortunate to have a local fresh turkey farm, Sprague’s Turkey Farm in Portville, NY, close by so I’ve ordered one that is under 14 lbs. Before preparing the turkey for marinating overnight, I first need to remove the parts that are commonly found inside the turkey. This includes the neck, heart, liver, and gizzard which is part of the turkey’s digestive tract. These parts do make for great stock so if you can, save them to add to a stockpot down the road.

Once the organs and neck are removed, it’s important to wash the entire turkey under running water. After a thorough wash, pat dry with some paper towels and place in a shallow pan for the rub application.

Herb and Spice Rub
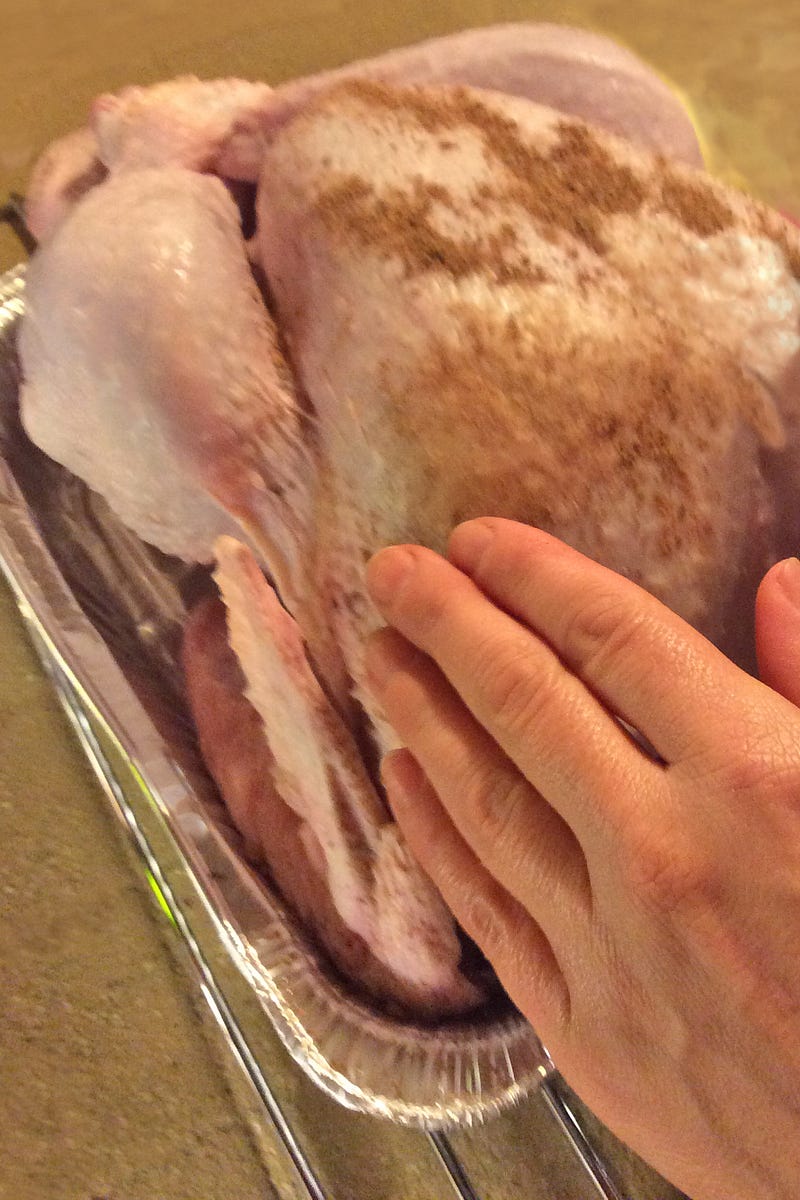
Adding the dry rub before refrigerating overnight

After washing and patting dry the turkey, I trim the excess skin from the neck area and then begin applying the rub. I’ve combined an assortment of herbs and spices for my rub as I tend to like a potent mix of ingredients to balance the fresh meat and smoke. My rub includes: allspice, clove, basil, cumin, cardamom, coriander, cinnamon, celery salt, garlic and onion powder, oregano, orange and lemon peel, paprika, Ancho chili powder. I make sure to cover the entire surface of the bird. I add a few drops of avocado oil and then apply additional rub. This will be refrigerated overnight to allow the flavors to marry and penetrate to the meat.

Tasting Notes: Feel free to incorporate different herbs and spices in your rub as there are no rules when it comes to combinations.

Smoking on the Gas Grill
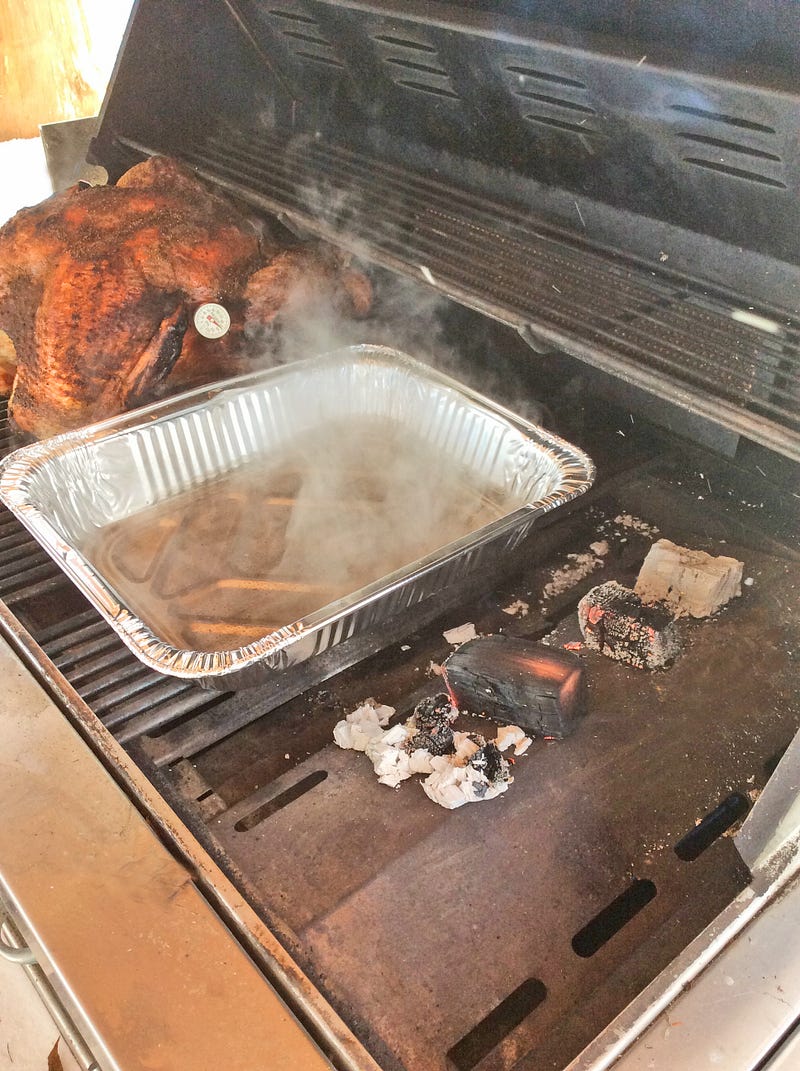
Two Zone Grilling let’s you walk away during the cooking process.

This was a cold day at the grill, with an outside temperature below 25°F. I prepare my LP/Gas grill by first removing one of the grill grates, exposing two of my burner shields. To one of the shields I place 3 double filet wood chunks from SmokinLicious®. Now I lite only two burners; the one with the wood chunks and the one directly next to that. I set these burners to medium heat to start. Just before I’m ready to grill, I check the temperature readout and adjust my heat setting until I hit my target temperature of 325°F.

Time to add the rubbed turkey to the unlit side of the grill and my water pan right next to the bird. I insert a thermometer and close the lid. Basically, for the next couple of hours, I just need to monitor that the water pan has enough hot water in it and the bird gets spritz with water to keep the skin moist.

Tasting Notes: Although I’ve placed my water pan to the side of my turkey, between the lit and unlit sides of the grill, you can use this as a drip pan and place this directly under the turkey. I elected not to do this today due to my low outdoor temperature.

Time to Serve!

If you’ve maintained the steady temperature of 325°F and hot water in the drip pan, you won’t need to stay with the grill during most of the turkey’s cooking time. My skin has crisped up thanks to maintaining moisture both on the bird’s skin and in the cooker with my water pan. I remove the turkey and take it to the kitchen where I cover it for about 30 minutes prior to carving. It’s super tender, moist, with a crunch to the skin. The best part is that the smoke is subtle and does not over power the fresh meat.

That’s why the two-zone method of smoking is perfect when your feeding a variety of tastes. Those that tend to avoid smoked foods will find this full of flavor that is well balanced due to our rub and consistent cooking temperature. My turkey of 13–1/2 pounds took just about 4 hours to finish with very little effort on my part, even with a 22°F outdoor temperature and wind chill. The best part is my oven was free to cook a bunch of side dishes so everything was timed perfectly for the table.


Tuesday, November 1, 2022

SEASONAL SMOKEY BAKED APPLES WITH SWEET STUFFING


 Apple season is here and I’ve found some beauties to make a simple but super sweet and flavorful recipe.    And of course, I’m taking it to the grill to let the apple get a kiss of smoke while tenderizing.  With so many varieties of apples available, you can pick your favorite and use this filling for the perfect stuffed apple.

In my home state of New York, there are over 25 varieties of apples.  Since these can be cold stored, they are available year-round but there is nothing like the fresh harvest.  In fact, controlled atmosphere storage was pioneered in New York State.

Whether served as the dessert or a sweet side dish is up to you but either way, you’re going to love the ease of making this dish and consuming all its seasonal goodness.  Pick your favorite variety of apple and get ready to stuff them with goodness everyone is going to love!  Smokey baked apples done on the grill, cleanup is a breeze!

Apple Preparation

Smoke coming from our wood chunks! Using a two zone cooking method


I’ll be using my gas grill for this recipe so I start by lighting only half the burners on my grill which I’ve added a smoker box that contains 3 hardwood chunks.  This will provide for the great smoke flavor to the apples.  While the grill heats up to about 375°F, I prepare the Macintosh apples.  First, wash and pat dry the apples.  You can use an apple corer to remove the core but note you do not want to produce a clean hole through the entire apple.  We want to produce an opening for adding the stuffing but we don’t want it to run out of the apples.  I like to use a small, sharp knife, cut into the apple stem end about ¾-inch from the stem making a circle.  Remove the core membrane and seeds leaving a firm base to the apple for filling.

Tasting Notes: Although I’ve selected Macintosh apples to know any variety will do.  Just note, if the apples are significantly larger, you will need to make an additional filling.

Sweet Stuffing

our sweet stuffing in the mixing bowl

With our apples cored, it’s time to make the sweet filling before heading to the grill.  First, know I like to use a disposable foil pan to make clean up a breeze.  In that pan, I place a roasting rack so the apples will be exposed to radiant heat all the way around the apple.  I’m making ten stuffed apple but I will give you the ingredients needed for making eight apples.

Place 1 stick of softened butter in a bowl.  Add 1 cup of light brown sugar, ½ cup chopped pecans, and 1-1/2 teaspoons of ground cinnamon.  I prefer to mix this with my hand to ensure good distribution of the ingredients.  Taking a small amount of the mixed filling, I form a log shape and insert into the apple opening, pressing down to make sure this is filled to the top of the apple.  Once all the apples are filled, I head to the grill with my pan.


Tasting Notes: The stuffing for this apple recipe can be easily modified.  Feel free to swap the pecan for another nut like walnut, hazelnut or almond.  For spices, consider adding ginger, allspice, and clove either in addition to or in place of the cinnamon.

No Fuss Grilling

Our Smoker box with wood chunks for smokey flavor

Once at the grill, I check to ensure my wood chunks are smoking well.  I place my pan of prepared apples on the unlit side of the grill and pour enough water into the pan to coat the bottom by about 1-inch.  This will allow moisture into the cooking area to get the apples very tender in a short amount of time.  I usually check the apples after 45 minutes and rotate the pan if needed.  When the apples are tender and the filling browned, these are ready and can be removed from the grill-#grilledapples.

Tasting Notes:  Note that if you elect to use a charcoal grill the smoke infusion produced will be stronger.  You are encouraged to still use a two-zone set up on the charcoal grill to keep the sugars from burning.

  Serve ‘Em Up

Once the apples are tender and the filling browned, it’s time to remove the apples and prepare to serve them.  There are many options for an accompaniment to the apples.  Today, I’m using a vanilla bean ice cream that I’ve sliced into wedges.  Certainly, the apples can be served with whipped topping, another flavor of ice cream, a vanilla custard or pudding, or even a slice of hard or rind cheese.    These are best if served warm.  Don’t forget, if any filling is left, add to a pureed squash for another great recipe.  That’s why I always make extra!