Turkey is one of those items that is generally made for a special event — Thanksgiving, Christmas, New Year — and not associated with everyday cooking. I’m here to tell you that it’s easy to enjoy turkey any time of year when you use a gas grill for the cooking and smoke infusion. All you need is a turkey (preferably one under 15 lbs.), 6 wood chunks, a water pan with hot water, and your favorite gas grill.
Turkey 101 Prep
I’m fortunate to have a local fresh turkey farm, Sprague’s Turkey Farm in Portville, NY, close by so I’ve ordered one that is under 14 lbs. Before preparing the turkey for marinating overnight, I first need to remove the parts that are commonly found inside the turkey. This includes the neck, heart, liver, and gizzard which is part of the turkey’s digestive tract. These parts do make for great stock so if you can, save them to add to a stockpot down the road.
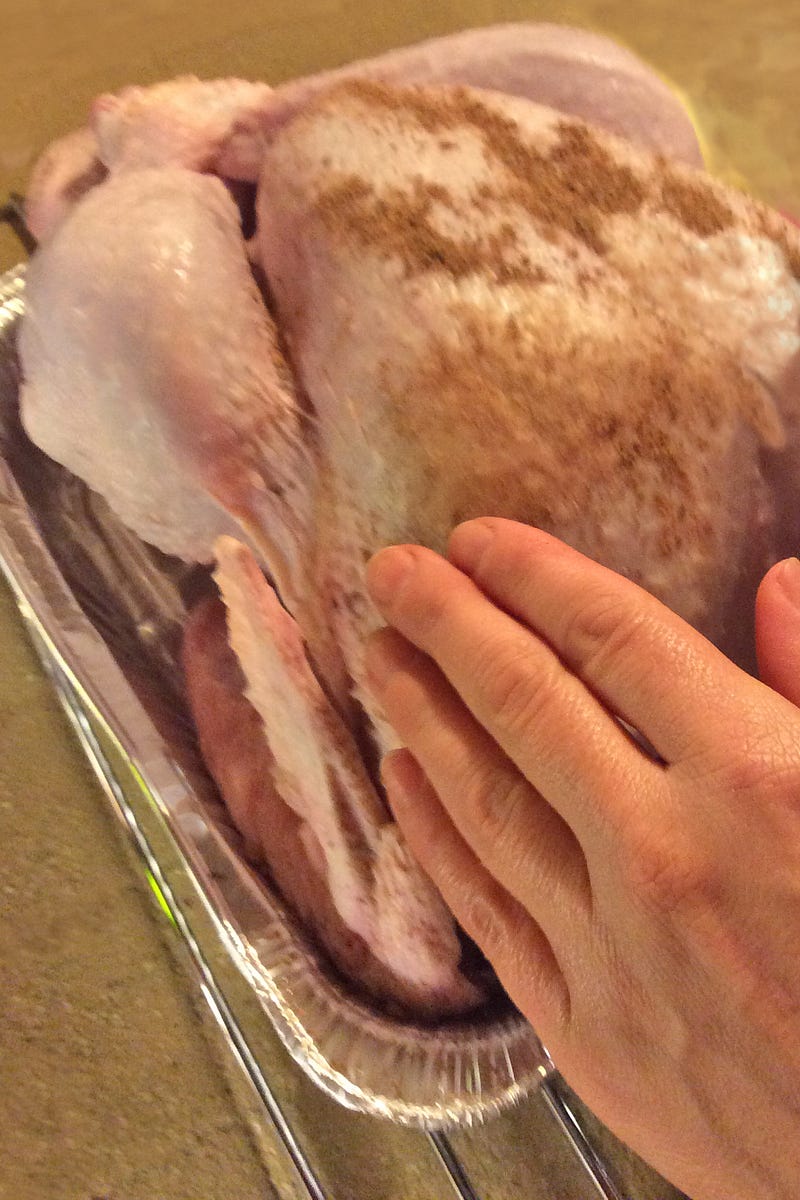
Once the organs and neck are removed, it’s important to wash the entire turkey under running water. After a thorough wash, pat dry with some paper towels and place in a shallow pan for the rub application.
Herb and Spice Rub

After washing and patting dry the turkey, I trim the excess skin from the neck area and then begin applying the rub. I’ve combined an assortment of herbs and spices for my rub as I tend to like a potent mix of ingredients to balance the fresh meat and smoke. My rub includes: allspice, clove, basil, cumin, cardamom, coriander, cinnamon, celery salt, garlic and onion powder, oregano, orange and lemon peel, paprika, Ancho chili powder. I make sure to cover the entire surface of the bird. I add a few drops of avocado oil and then apply additional rub. This will be refrigerated overnight to allow the flavors to marry and penetrate to the meat.
Tasting Notes: Feel free to incorporate different herbs and spices in your rub as there are no rules when it comes to combinations.
Smoking on the Gas Grill

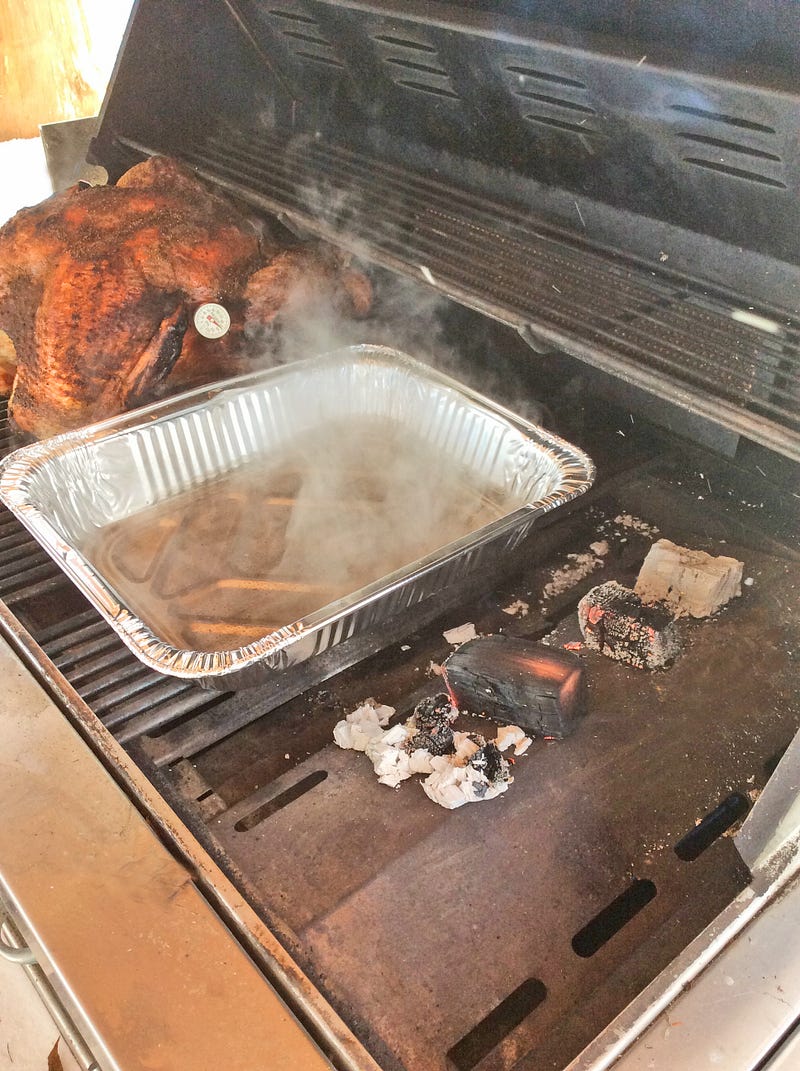
This was a cold day at the grill, with an outside temperature below 25°F. I prepare my LP/Gas grill by first removing one of the grill grates, exposing two of my burner shields. To one of the shields I place 3 double filet wood chunks from SmokinLicious®. Now I lite only two burners; the one with the wood chunks and the one directly next to that. I set these burners to medium heat to start. Just before I’m ready to grill, I check the temperature readout and adjust my heat setting until I hit my target temperature of 325°F.
Time to add the rubbed turkey to the unlit side of the grill and my water pan right next to the bird. I insert a thermometer and close the lid. Basically, for the next couple of hours, I just need to monitor that the water pan has enough hot water in it and the bird gets spritz with water to keep the skin moist.
Tasting Notes: Although I’ve placed my water pan to the side of my turkey, between the lit and unlit sides of the grill, you can use this as a drip pan and place this directly under the turkey. I elected not to do this today due to my low outdoor temperature.
Time to Serve!
If you’ve maintained the steady temperature of 325°F and hot water in the drip pan, you won’t need to stay with the grill during most of the turkey’s cooking time. My skin has crisped up thanks to maintaining moisture both on the bird’s skin and in the cooker with my water pan. I remove the turkey and take it to the kitchen where I cover it for about 30 minutes prior to carving. It’s super tender, moist, with a crunch to the skin. The best part is that the smoke is subtle and does not over power the fresh meat.
That’s why the two-zone method of smoking is perfect when your feeding a variety of tastes. Those that tend to avoid smoked foods will find this full of flavor that is well balanced due to our rub and consistent cooking temperature. My turkey of 13–1/2 pounds took just about 4 hours to finish with very little effort on my part, even with a 22°F outdoor temperature and wind chill. The best part is my oven was free to cook a bunch of side dishes so everything was timed perfectly for the table.


