Showing posts with label ember cooking. Show all posts

Thursday, September 29, 2022

WOOD EMBER COOKING!

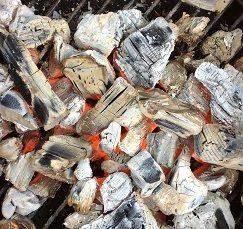
Our coals showing their hot glow and ready for direct wood ember cooking!

THE GLOW OF WOOD EMBER COOKING!

So what exactly is wood ember cooking and why is it suddenly gaining attention as a method of cooking? Well, first, it’s most certainly not a new cooking concept. Cooking over a fire and hot coals have been around for thousands of years. Recently, some Chefs and well-known restaurants have taken to returning to this method of cooking because they know where great flavor can come from and they know how to manage the heat from hot wood embers.

An ember is a glowing, hot coal made of greatly heated wood, coal or other carbon-based material that remain after a fire. The heat radiated from hot embers can be as hot as the fire which created them. You can see this first hand, by placing new wood pieces on hot embers and watching a full fire develop. An ember is usually formed when a fire has only partially burnt a piece of fuel and there is still usable chemical energy in that piece of fuel. It continues to stay hot and does not lose its thermal energy quickly because combustion is still happening at a low level. The small yellow, orange, and red lights are often seen among the embers are actually combustions. There just is not enough combustion happening at one time to create a flame. Once the embers are completely ‘burned through’, they are not carbon as is commonly believed (carbon burns, and is not normally left behind), but rather various other oxidized minerals like calcium and phosphorus. At that point, they are commonly called ashes. But why cook on the embers versus over a live fire? Because embers radiate a more constant form of heat, as opposed to an open fire which is constantly changing along with the heat it radiates (think water trapped within the wood and you’ll understand why there is heat fluctuation).

Ember cooking techniques include placing thickly skinned food items directly into the embers (i.e. garlic, onion, peppers, eggplant, steaks, etc.), placing a cast iron skillet into the embers that can hold any food items from vegetables, meats, poultry, fish – really anything. The results produced from this method are super moist, super flavorful, and the aromas are exceptional.

Peppers being cooked over wood embers
Sweet Peppers over direct wood ember cooking
Dr. Smoke- You don't need a flashy grill, a simple fireplace with enough room, just like Asado, you can do direct wood ember cooking.
Dr. Smoke- You don’t need a flashy grill, a simple fireplace with enough room, just like Asado, you can do direct wood ember cooking

Thursday, August 4, 2022

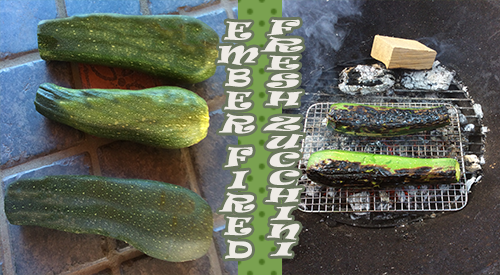
EMBER FIRED FRESH ZUCCHINI

Zucchini is a great vegetable to not only grill but ember cook. It has the density to hold up over the high heat. Add a distinct char taste to this abundant vegetable either as a side dish or an ingredient by making ember fired fresh zucchini.

I love thick-skinned vegetables that come in season during Summer. They are the perfect items to light a fire and make some hot coals to ember fire flavor into them.

We’re getting ready to coal roast one of my favorite vegetables – zucchini! This is so simple to do and produces an extraordinary flavor for zucchini to be eaten on its own or to be used in your favorite recipe. Clean out the fire pit, charcoal grill or outdoor fireplace and prepare to roast “ember fired fresh zucchini” directly on the hot coals.

Building A Small Fire

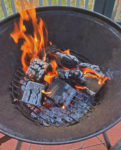
Starting the fire to burn down the wood into coals

Know this from the start – You do not need a large fire! A small fire is best to accomplish your cooking in about an hour’s time. For my fire, I am using ten SmokinLicious Single Filet Wood Chunks in Ash with a couple of pieces of charwood that were left over from a previous cook. Why Ash hardwood? Because it is hands down, the best hardwood to produce an even bed of coals which is what you want when you coal roast.

I stack the wood so there is quite a bit of air space between the pieces. This ensures I have good oxygen flow to produce combustion quickly. My technique is to stand the wood pieces on their end and make a circle. I try to have a couple of pieces in the center kind of tipped on to each other. Remember, you want to produce hot embers quickly so it only requires a little wood and a lot of oxygen to burn things down. I light my wood using a small butane torch. Leave the torch in place until I’m sure the wood has ignited. I keep the lid off my charcoal grill so I can push the combustion process through completion and get those ash covered, hot embers.

Red Means Hot

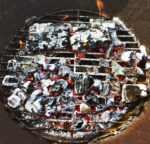
Red Hot coals is the goal before adding the zucchini

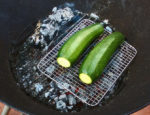
You will know when the coals or embers are ready for cooking when you have uniform coals and they are glowing red from the bottom and gray on top. I keep a couple of larger coals banked to the side to maintain heat and for reserved hot coals. Just in case I need to rake more to the cooking side. I like to nestle a high heat metal cooking rack on the hot coals and then place my whole zucchini on the rack. This allows for little ash to accumulate on the skin. Remember, those coals are very hot so the zucchini will take less than 20 minutes to tenderize and char.

Turn For Full Char

Zucchini on the grilling rack over the hot fire coals

With the zucchini and coal rack in place, I give the embers about 8 minutes to char and cook the first side of the zucchini. After that time, I gently turn the zucchini so that each side gets an even char. Once the first 8 minutes are done, there will be less time needed for each of the other sides as the zucchini will hold heat. I’ve added one additional wood piece to my banked fire just to be sure I have enough heat in the coal area. I will not put the lid on the unit during the entire cooking process as this is open fire cooking. My total coal cooking time is approximately 16 minutes.

Perfection In Smoke & Char on Ember Fired Fresh Zucchini

Dr. Smoke's clock for the cooking time required

After placing my ember fired fresh zucchini on hot coals for about 16 minutes total, turning several times to get an even char, this spectacular vegetable is ready for eating. You will see, there is very little coal bed left following this technique so remember, if you are cooking more than a couple of zucchini, you will need a larger coal bed.

For those of you thinking that the black, charred skin will be bitter and not appealing to eat, think again. Most of the char will rub right off but the flavor will be infused throughout the ember fired fresh zucchini. I’ve sliced mine about ¼-inch thick as I plan to make a galette of ricotta, garlic oil, and basil.

The Culinary Crew wants you to know…

… that ember roasting is ideal to boost up the bland, delicately flavored zucchini and will add a rich, wood-fired taste dimension to any dish featuring this exquisite summer squash. So, be prepared to enjoy a rich, char-smoked variation of your ratatouille, quesadillas, stuffed zucchini or soups from ember cooked zucchini!

Check in soon for our post on that recipe. Did you love this wood-fired technique? Leave a comment and subscribe as we continue to bring you new ideas, tips, techniques and recipes for all things wood-fired, smoked, and charred!

Thursday, November 4, 2021

Roasted Onions in Fireplace Ashes

Our Roasted onions in fireplace ashes!

 Our Roasted onions in fireplace ashes!The one vegetable we can pretty much get all year long is … the onion! So, why not give this common vegetable a special, no, fabulous flavor infusion. The way to this end? Ember cooking in an outside fireplace or cooking pit.

Ingredients:

  • An outside fireplace or cooking pit that has been cleaned of ash
  • If you prefer, you can use a cast iron skillet within the embers though I prefer to nestle my onions directly in the embers!
  • Grande Sapore® Chips from SmokinLicious® – I recommend Ash wood.
  • Sweet Onions approximately 10-12

Fire Preparation

In preparing to roast onions on the embers in a fireplace I need to first clean out the fire box from any ash and debris. Then I select the hardwood for the actual cooking. Today, I’ve selected Ash for its great coaling ability and uniformity of coal size while it combusts.

Preparing the bed of embers, keeping extra wood to add during the cooking process

Preparing the bed of embers, keeping extra wood to add during the cooking process

I will begin building the bed of coals with the SmokinLicious® Grande Sapore® Ash wood chips. Since wood chips are already in a pre-ground state, the process of setting up the fire will be quicker than with just wood pieces or lump charcoal. It is key to keep a large supply of the chips on hand in order to reach the 2-3” depth of embers needed for the cooking process.


Preparing the Roasted Onions in Fireplace Ashes

While allowing the coal fire to build, I begin preparation of the onions, which is rather simple. Wash and clean the onions leaving on the outer skin covering as it will be needed to protect the heart of the onion during the ember cooking process.

Ember Roasting Process

After building up a bed of coals to 2-3” in depth, we’re ready to add the onions to the coals! As I position each onion, I gently push down on them to seat them into the coals. This will allow the coals to completely cover the bottom of the onion as well as allow the heat to radiate completely through the onions.

As the onions cook, you’ll start to see the tops turn brown because I left the outer part of the skin on for protection. Remember, the outer skin of the onion will char during this process. I want to protect the inner core of the onion as I plan to use them in my recipes.

It’s important to remember that the coal bed will need to be replenished during the cooking process so a perimeter of additional wood chips should be going at all times up to the halfway point of the cooking process. Generally, it’s best to keep the additional chips burning at the sides of your ember bed. You can then easily scoop in additional hot embers to the bed to maintain the heat level and flavor infusion.

The onions are seated into the coals as they begin to cook from their bottoms

The onions are seated on the coals as they begin to cook from their bottoms

Unlike other vegetables like peppers, the onions don’t need to be turned but rather simply rotated so there is even char and cook. Onions, like most vegetables, have a high water composition. Don’t be alarmed by the steam trail coming up thru the top of the onions. This is a sure sign of the convection process occurring. Once cooking is about ¾ finished, you may want to pierce the tops of the onions to allow the release of the steam.

Scrumptious Ember Roasted Onions in Fireplace Ashes

You simply won’t believe how flavorful and tender ember roasting makes the average onion. We were able to build the bed of coals by using SmokinLicious® Ash hardwood. Remember, we left the outer skin on the onions to protect the inner core while we developed that exceptional char. Once the outer skin is peeled back you will see the perfectly cooked onion core that is infused with a mild wood char flavor.

Nicely charred onions over a bed of embers adds a great natural flavor

Nicely charred onions over a bed of embers add a great natural flavor


Now, get ready to use these Roasted/Toasted Onions over Embers in a fireplace and highly flavored onions in the recipes of your choice and prepare for all the questions on what you did to give the dish such fabulous flavor!


Thursday, September 2, 2021

EMBER FIRED FRESH ZUCCHINI

Zucchini is a great vegetable to not only grill but ember cook. It has the density to hold up over the high heat. Add a distinct char taste to this abundant vegetable either as a side dish or an ingredient by making ember fired fresh zucchini.

I love thick-skinned vegetables that come in season during Summer.  They are the perfect items to light a fire and make some hot coals to ember fire flavor into them.

We’re getting ready to coal roast one of my favorite vegetables – zucchini!  This is so simple to do and produces an extraordinary flavor for zucchini to be eaten on its own or to be used in your favorite recipe.  Clean out the fire pit, charcoal grill or outdoor fireplace and prepare to roast “ember fired fresh zucchini” directly on the hot coals.

Building A Small Fire

Starting the fire to burn down the wood into coalsKnow this from the start – You do not need a large fire!  A small fire is best to accomplish your cooking in about an hour’s time.  For my fire, I am using ten SmokinLicious Single Filet Wood Chunks in Ash with a couple of pieces of charwood that were left over from a previous cook.   Why Ash hardwood?  Because it is hands down, the best hardwood to produce an even bed of coals which is what you want when you coal roast.

I stack the wood so there is quite a bit of air space between the pieces.  This ensures I have good oxygen flow to produce combustion quickly. My technique is to stand the wood pieces on their end and make a circle. I try to have a couple of pieces in the center kind of tipped on to each other.  Remember, you want to produce hot embers quickly so it only requires a little wood and a lot of oxygen to burn things down.  I light my wood using a small butane torch. Leave the torch in place until I’m sure the wood has ignited.  I keep the lid off my charcoal grill so I can push the combustion process through completion and get those ash covered, hot embers.

Red Means Hot

Red Hot coals is the goal before adding the zucchiniYou will know when the coals or embers are ready for cooking when you have uniform coals and they are glowing red from the bottom and gray on top.  I keep a couple of larger coals banked to the side to maintain heat and for reserved hot coals. Just in case I need to rake more to the cooking side.  I like to nestle a high heat metal cooking rack on the hot coals and then place my whole zucchini on the rack.  This allows for little ash to accumulate on the skin.  Remember, those coals are very hot so the zucchini will take less than 20 minutes to tenderize and char.

Turn For Full Char

Zucchini on the grilling rack over the hot fire coalsWith the zucchini and coal rack in place, I give the embers about 8 minutes to char and cook the first side of the zucchini.  After that time, I gently turn the zucchini so that each side gets an even char.  Once the first 8 minutes are done, there will be less time needed for each of the other sides as the zucchini will hold heat.  I’ve added one additional wood piece to my banked fire just to be sure I have enough heat in the coal area.  I will not put the lid on the unit during the entire cooking process as this is open fire cooking.  My total coal cooking time is approximately 16 minutes.

Perfection In Smoke & Char on Ember Fired Fresh Zucchini

Dr. Smoke's clock for the cooking time requiredAfter placing my ember fired fresh zucchini on hot coals for about 16 minutes total, turning several times to get an even char, this spectacular vegetable is ready for eating.  You will see, there is very little coal bed left following this technique so remember, if you are cooking more than a couple of zucchini, you will need a larger coal bed.

For those of you thinking that the black, charred skin will be bitter and not appealing to eat, think again.  Most of the char will rub right off but the flavor will be infused throughout the ember fired fresh zucchini.  I’ve sliced mine about ¼-inch thick as I plan to make a galette of ricotta, garlic oil, and basil.

The Culinary Crew wants you to know…

… that ember roasting is ideal to boost up the bland, delicately flavored zucchini and will add a rich, wood-fired taste dimension to any dish featuring this exquisite summer squash.  So, be prepared to enjoy a rich, char-smoked variation of your ratatouille, quesadillas, stuffed zucchini or soups from ember cooked zucchini!


Thursday, August 12, 2021

SUCCULENT WOOD FIRED STUFFED TOMATO WITH HERB RICE

Wood fired stuffed tomato with Rice!

 It’s tomato season! Boy, do we have a great technique for you to try on your charcoal grill as well as a tasty recipe to make- wood fired stuffed tomato.

Bring 8 large tomatoes in from the garden or purchased at the fresh market, clean out the charcoal grill, fire pit, or fireplace, and give a few hours to a great cooking experience and exceptionally flavorful recipe.

Lighting a Fire for Hot Embers

Coal cooking can be a very easy method of cooking foods once you know how to make and manage the fire. First, I am going to use only hardwood for my fire as I want to produce as much flavor as I can into the cooking area. For tomatoes, I am using Beech hardwood in the SmokinLicious® Single Filet Wood chunk. Once lit, I let the wood burn down to hot embers before even thinking about cooking. Oh, and the lid stays off my grill – I’m using a kettle from Stok®, while the wood burns down. I wait until the coal bed shows gray embers on top with hot red spots on the bottom. I’ve used a mesh screen in the charcoal area, to keep all my coals from ending up in the ash collection area, since many will get to be quite small.

Preparing the Tomatoes for Hot Coals

With our tomatoes washed, it’s time to prepare them for the coals. First, I cut about ¼ of the way around the top. I’ll be cooking both the body of the tomato as well as the tops. Next, I add a high heat roasting rack to my raked coals. Try to make the coal bed as even as possible to keep the tomatoes balanced. First cooking time will be about 12 minutes before any turning needs to be done. You will see bubbling juices in the tomatoes which will makes these red beauties even more flavorful.

Coal Firing to Unbelievable Flavor

After placing the tomatoes on the coal rack and leaving for about 12 minutes, it’s time to turn them. You’ll see how the outer skin will start to flake. When I get some cooking time on the entire tomato, I separate the cut top from the body and coal roast the tops separately to get a nice char. Once cooked through, which takes a total time of about 22 minutes, I remove the tomatoes to a cooling rack. Once cooled enough to handle, it’s time to take all the wood fired pulp out of each tomato leaving the charred skins as the base to my wood fired stuffed tomato recipe.

Fresh Recipe Ingredients

With our fresh tomatoes coal fired over hardwood, it’s time to start on our recipe. First, we need to remove all the tomato pulp from the charred tomatoes. You can do this with a spoon or the way I like to do it – with my fingers. Place the pulp only in a blender keeping as much of the shell of the tomato as possible for our base in the roasting pan. Then blend until a puree is formed. Meanwhile gather the other ingredients needed to make wood fired stuffed tomatoes:

  • 1 teaspoon Kosher salt
  • 1 cup brown rice
  • 8 medium to large tomatoes
  • 2 anchovy fillets mashed
  • 2 tablespoons unsalted butter, softened
  • ¾ cup grated Parmesan
  • 1 small red bell pepper, diced (feel free to use hot pepper as well)
  • 2 tablespoons chopped basil
  • 2 tablespoons flat leaf parsley
  • Fresh ground pepper

Herb Rice Mixture & Anchovy Butter

This recipe allows you to use any rice you prefer. I like the texture of brown rice for this dish. As you cook the rice according to the package directions, you can start on the flavor mixture for the cooked rice. First, combine the 2 anchovy filets with the 2 tablespoons softened butter. I use a mortar and pestle. This will be added to the hot rice as soon as it is cooked. In a bowl, combine the tomato puree, diced pepper, parsley, basil, Parmesan cheese, and fresh ground pepper. Mix until just combined.

With all the ingredients combined, it’s time to put it all together. First, to our anchovy butter, brown rice, I add the tomato puree mixture combining well. Taking the tomato shells, I place them in a roasting pan that has been coated with oil. Next, comes the rice mixture, layering it in making sure all the tomatoes are covered. Last, top the rice mixture with the coal fired tomato tops. Now this pan is ready for a 350°F oven to bake for about 30 minutes.

Preserve the Flavors

After cooking our beautiful tomatoes over hot coals made from 100% beech hardwood, we removed the wood flavored pulp and produced a tomato puree. To that, we added Parmesan, basil, parsley, red pepper, and fresh ground pepper. Infusing anchovy butter into hot brown rice, we pour the tomato puree into the rice. Our wood fired stuffed tomato is made by layering the tomato shells in a roasting pan, then topping with the tomato puree-rice mixture, and the charred tomato tops. Then bake for 30 minutes in a 350°F oven, this is the perfect dish to serve with rustic bread. Stock up on your coal fired tomatoes – they can well – so you can enjoy your take on this wood fired stuffed tomatoes.

Now that we spurred your imagination with this recipe, we need your comment and rating, so subscribe and follow us so you don’t miss a thing. Finally, suggestions are always welcome as well on recipes and techniques you want to learn about. We are your source for all things wood-fired, providing tips, techniques, recipes, and the science behind the fire.


Thursday, July 29, 2021

ZUCCHINI & RICOTTA GALETTE- Ember Fired!

Ember roasted zucchini & Ricotta Galette is a superb recipe to entertain your guests palette
Ember fired zucchini & ricotta galette is a superb recipe to entertain your guests palette

We are going French with a zucchini & ricotta galette that is simply out of this world. With ember fired zucchini we previously cooked on our charcoal grill with straight wood, this is one recipe worth making any time of year. Get 2 zucchini ember cooked and prepare yourself for the ultimate in wood fired flavors featuring summer zucchini!

Gather the Ingredients

For our zucchini & ricotta galette, there are two separate ingredient lists needed; one for the pastry and one for the galette’s filling.

For the pastry:

  • 1-1/4 cups flour, chilled in the freezer for 30 minutes
  • 1/8 teaspoon salt
  • 8 tablespoons cold butter, cubed
  • ¼ cup sour cream
  • 2 teaspoons lemon juice
  • ¼ cup ice water

For the zucchini & ricotta galette filling:

  • 2 ember fired zucchini sliced into ¼ inch thick rounds
  • 1 tablespoon + 1 teaspoon olive oil
  • 1 garlic glove, minced
  • Ricotta cheese- ½ cup
  • Grated Parmesan- ½ cup
  • Shredded mozzarella- ¼ cup
  • 1 tablespoon slivered basil leaves

Egg Wash:

  • 1 egg yolk and 1 teaspoon water combined

Don’t Let the Word Pastry Scare You

Pastry is the first step and our recipe is very simple, so no need to get scared by the word “pastry”. For the pastry dough, combine the flour, salt, and then cut in the butter. My technique is to use 2 butter knives to produce even mini chunks of butter.

Mix the sour cream, lemon, and water in a separate bowl, then add to the flour mixture until just combined. Be sure not to overwork the dough. Now refrigerate for 1 hour.

Cheesy, Creamy Goodness

While the dough chills, let’s get the filling ingredients ready that include our ember fired zucchini rounds.

First, we’ll need to combine the olive oil and garlic so we have an infused oil to add to our cheese filling. Next, mix the ricotta, Parmesan, and mozzarella cheeses together. Add one teaspoon of the garlic oil and season with salt and pepper. You can set this mixture aside as you wait on the dough to finish chilling.

Next up, get the rolling pin at the ready, as the dough will be rolled into the galette shape.

Perfect Balance Comes Together

With our dough chilled and then rolled into a 12-inch round, it’s time to start assembling our galette. Place the dough on parchment lined baking sheet. Spread the ricotta mixture over the dough leaving a 2-inch border. The ember fired zucchini slices are next, which I add in a layered “wheel” formation, followed by a generous drizzle of garlic oil. It’s important that everything stay even for our dough to fold over and hold in all that fabulous filling.

With the cheese filling, ember fired zucchini and garlic oil added, the final ingredient of fresh basil strips is placed on top. Time to fold over the dough to trap all the filling inside the pastry while it cooks. A brushing of egg wash to the pastry will ensure everything gets golden during the 40-minute cook time. Into a 400° oven, setting the timer for 25 minutes to rotate the baking tray. That will guarantee a consistent color to our galette.

So Good, You May Not Want to Share

With the smoky, char flavor of our coal fired zucchini, the creamy filling of 3 cheeses plus basil and garlic oil, it doesn’t get any better than this! Our buttery galette pastry adds that sweet undertone that perfectly balances out the flavors.

Whether you serve this as an appetizer, snack or even a lunch or entrée, you’ll love how the zucchini becomes the star without tasting overly smoked. Feel free to add a side of marinara sauce for an acid kick.

We would love to hear about your version of this recipe or even learn what you do with coal fired zucchini! Leave a comment, like us, and subscribe, as we bring you recipes, tips, techniques, and science behind wood fired cooking technique.


Thursday, August 9, 2018

SMOKING-GRILLING WOOD SELLING TERMS -DEMYSTIFIED


Package labeling.  It is the key to drawing attention to a product, to reduce interest in other similar products, and to make someone buy a specific product.  Let’s be honest.  Not everything printed on a label necessarily provides ALL the information.  Use certain words and an “implied” thought will occur.

When it comes to packaging wood for smoking and grilling purposes, there are a lot of terms floating out there that certainly can be deceiving.  Let’s see if I can provide clarity on what specific terms and wording mean when it comes to purchasing wood for cooking, smoking, and grilling. SMOKING-GRILLING WOOD SELLING TERMS


100% Natural

The intended meaning of 100% natural implies that it has not been touched by human hands.  As such, with wood, this would refer to the fact that a tree is a plant designed by nature and other than cutting the tree down, it is not modified in any way.

However, we do know that trees, like flowers, can be manipulated when it comes to their genetics.  Genetically modified trees are quite common in the growth of orchard woods, especially those seeking to develop dwarf varieties or specific blossom colors or hybrids.  Keep in mind, genetically modified trees will have a reduction in the lignin compound which is responsible for the flavor the wood gives when it burns and gives off smoke vapor.

Currently, it is not legal to genetically modify forest trees but there is a lot of allowances when it comes to plantation and orchard/nursery trees, which often have chemicals applied to make up for the weak lignin which makes the wood susceptible to decay and pest infestation.


Kiln-Dried

Wood that is dried in a closed chamber in which the temperature and relative humidity of the circulated air can be controlled is called “kiln drying”.  There are three types of Kiln Drying methods: low-temperature drying which is below 130° F, conventional electric dehumidification drying, and conventional steam-heated drying which have temperatures up to 180° F.

For the most part, when a smoking or grilling wood product lists “kiln-dried” on the packaging, it does not state the type of method being employed.  Also, many that use this term do so without providing any information on what compliance record keeping is in place to attest that they are doing what they say.

There is one company who states that they adhere to the protocol designed by the United States Department of Agriculture (USDA) but quote a core temperature and length in minutes of the heating process that is not the standard written by the USDA.  Their compliance agreement is provided by the state in which the business is located, which may have a different standard in place than the USDA.


Air-Dried

The process of drying green wood by exposure to prevailing natural atmospheric conditions outdoors or in an unheated shed is known as air drying.  There are three dominate Air Drying methods: open yard, shed, and forced-air shed.  The first is not held in high regard as the wood is exposed to all the elements making it the longest method of depleting moisture content from the wood.  The second has the addition of a roof covering to maintain a precipitation-free environment, while the third option is mostly used by traditional lumber companies as it produces quicker results meaning products can be sold quicker.

Here’s the issue when you see “Air-Dried” on package labeling of grilling and smoking woods: you don’t know what method is used and no one is saying how long the wood was air-dried for.  You don’t know how old the wood is, what method of air drying was employed, how long it took to “dry” it, and you likely won’t know what moisture content is left in the wood.  Remember, dry out a piece of wood too far, and it is simply firewood designed for heat output only.


Naturally Cured

This is another term that floats out on the packaging that implies it is different from air drying techniques.  It is not different.

Naturally curing wood means the wood is stacked in a manner that allows air to flow around the wood pieces usually in an outdoor setting.  It may be left exposed, covered with a tarp or have a roof structure overhead.  Naturally curing wood for fireplace use is recommend for 365 days but there is no benchmark for the timing used to dry the wood for the use of smoking or grilling.  Some suppliers will use moisture levels of 20-30% as their benchmark but 10% is a large variable in moisture when it comes to wood.

Here is the biggest challenge with a natural curing method: dry the wood too quickly and you will find cracks, splitting, honeycombing, and/or warping.  Dry too slowly and the wood will stain and suffer decay.  Remember, decay attracts pests as that is what they feed on. SMOKING-GRILLING WOOD SELLING TERMS


Selecting

I won’t lie to you – there are a lot of choices out there for wood.  How do you go about selecting from the limited information on the packaging?

Some decisions you’ll have to make on your own: do you want to cook with bark or do you find that bark indeed fluctuates the temperature of your equipment too much?  Do you want to use a kiln-dried product even if you don’t know what temperature and for how long that product was heated?  Would you want to use a product that hasn’t had any heat application applied to it meaning there may be pests, larvae, mold, and spores that haven’t been eliminated by a heat process?  Do you want to use a product from a supplier that provides no information on the moisture of the wood?  Do you want to go with a “natural”, “air dried” product that may have been exposed to anything that could access the wood: animal feces and urine, insects, chemical contaminants from the ground or another source?
In the end, I think the selection can be easy by simply looking at the wood for purity and cleanliness, looking at the packaging for evidence of air exchange meaning its likely not completely dried out and looking at the packaging information for claims that don’t seem to match the product that is packaged inside.

Most of all, you should be able to gain valuable information from any supplier’s website on the wood they are selling to you.   If not, be cautious that they may not know anything about the manufacturing process of the wood and/or what is needed in wood to qualify it as cooking ingredient.  We hope that our discussion of smoking & Grilling Wood Selling Terms adds clarity to your selection process.
Thursday, March 1, 2018

THE HISTORY OF FIRE COOKING PART I

The history of fire cooking part I

For thousands of years, it was the only way to cook.  Many believe that this discovery separated man from the other animals.  Fire.

Estimated to have been discovered some 2 million years ago, the discovery of fire and more importantly, the discovery of how to tame fire, resulted in man’s brain development, value of food, changes in our body, and social structure.  It gave us survivability.  It extended our life by improving daily calories and nutritional needs by allowing us to cook poisonous plants and meats.

So how did fire cooking get discovered?  That is the million dollar question.  Here are some of the hypotheses out there regarding the discovery of fire for cooking:

Nature Provides Ignition

There are some scientists who believe that fire cooking was found by accident.  A lightning strike or grass fires that sprung up due to the excessive dry conditions exposed to the hot sun.  Many don’t feel man did anything to “discover” fire other than observe the characteristics of fire: it produces abundant heat, light, and when it traps an animal within its flames, it produced a more tender meat, easier to digest food source, and more pleasing aroma to the meat.

Tool Construction

There are others who believe that early humans realized the importance of tools.  By sharpening stones to produce spears, cutting tools, etc., these early beings observed spark.  Either through intention or perhaps with Mother Nature’s assistance, these sparks caught twigs, brush, fruit, and/or grains on fire.  Remember, early human life did not involve a developed brain.  A discovery of fire, however, would help advance not only our brains, but our bodies into the erect beings we are today. 

The Earliest Cave Cooking

In South Africa’s Northern Cape province, a dwelling known as Wonderwerk Cave, contains the earliest evidence that our ancestors and apelike ancestors were using fire.  Compacted dirt showed evidence of ashes, carbonized leaf and twig fragments, and burnt bits of animal bones.  Scientists were then able to analyze this material and determine that the fragments were heated between 750 and 1300°F, which is the heat level of a small fire made of twigs and grasses.

If indeed our earlier species learned to harness fire for cooking, this would account for the advancement of our brains and our ability to become erect beings walking on two legs.  Cooking on fire allowed for easier chewing and digestion and produced extra calories to fuel our brains. Fire also warded off nighttime predators, allowing for sleep on the ground or in caves rather than in the trees.

It’s All About Energy

Raw food diets have been popularized as a method of losing weight and of being healthier.  However, only a fraction of the calories in raw starch and protein are absorbed by the body via the small intestine.  As a result, the remainder passes into the large bowel, where it is broken down by the organ’s high population of microbes, which consume the majority for themselves.  However, cooked food is mostly digested by the time it enters the colon. For the same amount of calories ingested, the body gets roughly 30 percent more energy from cooked oat, wheat or potato starch as compared to raw, and as much as 78 percent from the protein in an egg.  In experiments, animals given cooked food gain more weight than animals fed the same amount of raw food.

Cooking breaks down collagen (connective tissue in meat) & softens the plants’ cell walls to release their storage of starch & fat.  The calories to fuel the bigger brains of successive species of hominids came at the expense of the energy-intensive tissue in the gut, which was shrinking at the same time.  If you look at early imagery of apes, you’ll see how we morphed into narrow-waisted Homo sapiens.

Coming up in The History of Fire Cooking: Part II, learn more about why cooking foods by fire made us who we are today.  In conclusion, did we provide you with new information you didn’t know?  Additionally, leave us a comment and subscribe as we bring recipes, tips, techniques, and the science behind the fire and smoke.
 

Thursday, December 14, 2017

OPEN PIT COOKING FIRE BUILDING: PART I

Open Pit cooking fire We built by using Smokinlicious ash wood to develop great coals for our ember cooking of Peppers
Build an open pit cooking fire for grilling and ember cooking! Is easier than you may think follow our steps below!
SmokinLicious® receives a lot of questions about wood-fired cooking and one of the most repetitive concerns the building of the fire for cooking.  We’ve developed this series to address how to build the  fire by equipment and technique.  For Part I, we cover the open pit cooking fire.

Get Organized

The first step is to know where you will build the fire.  Are you planning on using an outdoor fireplace, a fire pit, or will you construct a temporary fire location?

When using an existing fireplace located outdoors, you must ensure that the firebox is clean of previous ash and wood.  The same is true for a open pit cooking fire pit.  If you will set up a temporary location for the fire, consider what you will use for materials to secure the area.  It is never recommended to use your patio, paved driveway or lawn because a hot fire is sure to damage them or, at the very least, mar their appearance (thin charcoal black coating the surface).  Using large stones, interlocking bricks, or a metal fire ring work great at securing the area to contain your fire.

Once you’ve decided on the location, you’ll need to collect some supplies to make the cooking safe and fun.


picture of Smokinlicious Double filet wood chunks make a perfect source for developing the perfect cooking fire▪ material to contain the fire like stones, bricks or a cast iron/wrought iron ring.  You can use an outdoor fireplace or open pit cooking fire pit whether permanent or portable


▪ water, shovel, dirt, and/or fire extinguisher to deal with potential fire spread or wayward embers


▪Smokinlicious® smoking wood chips for quick lighting


▪ small twigs or small pieces of hardwood to create a tepee around the wood chips (we like our Smokinlicious® smoking double or single filet chunks)


▪ larger hardwood pieces to create a 2nd tepee around the first (Smokinlicious®1/4 cut logs work great for that)
 

▪ rolled newspaper or fire starters


▪ have additional hardwood for producing more coals for cooking as needed


▪ a coal rake, fireplace tongs for moving and relocating wood pieces, spray bottle of water to tame flames near food, instant read thermometer (you can also use a traditional wrought-iron log holder to make the fire – the hot coals will fall through and then you rake them to the cooking side)

The Perfect Fire

Always take note of the day’s temperature, wind conditions/direction, and conditions of your wood (dry or wet, fresh cut or aged) before you start.  You want to be sure you set up and start the fire where the wind direction won’t cause smoke to enter house windows or the dining area.  Keep those locations upwind.
stack the wood into a teepee shape to maintain the flame and burning processIn your fire safe area, pile up a few handfuls of hardwood chips (you can use newspaper but I like to try to stay with wood in its natural state).  Make a small tepee around the wood chips using small wood pieces (our single filet wood chunks work great) or twigs.  Make a second tepee of larger wood pieces around the first one.  You’ll see that you’re graduating from small wood pieces to larger as you build but you’re also ensuring good oxygen pockets to help feed the fire to the next level.  This is what ensures even combustion and even coals.  Now, light the wood chips at the center and allow everything to ignite.  Don’t add any additional wood until you see the outside wood ablaze.

Fire for Fuel, Coals for Cooking

The purpose of your shovel other than as protector of wayward fire, is to take those hot coals and move them to the cooking area.  Remember, the fire area is not where you are going to cook.  That location is nearby but not with the flames.  You should never cook over direct flame as it will overcarbonize the foods and result in bitter tastes.

Ideally, you want to cook over coals that have a white colored ash over them.  Now, here’s how to determine temperature of those coals: hold your hand over the coals the distance your foods will be.  If you can only hold your hand for a count of 2 seconds before you need to pull it away, that is high heat.  3-4 seconds is medium-high, 5-6 seconds is medium and 7-8 seconds is low heat.

Bring on the Food!

We have burnt down the ash single fillet into a bed of hot coals. Ash wood is a perfect coaling wood to useOnce your coals are at the perfect temperature for the foods you want to cook, it’s all about cooking!  Remember, you can set up different heat areas to cook different foods.  That’s what makes the experience with wood cooking, specifically with coals, so exhilarating.

Thursday, November 30, 2017

EMBER FIRED EGGPLANT & FETA TARTS

Ember Fired Eggplant on the rack cooking above a bed of hot coals. This technique provides the heat for cooking and the aroma of the wood smoke


You’ve heard me mention before how great it is to ember or coal fire certain foods, with a good majority of those items falling in the fruit category.  One of the best fruits to use this technique with is eggplant.

we selected two nice and plump eggplants for our ember cooking Not of Nutritional Value

Eggplant, also called aubergine, is part of a flowering plant grown for its edible fruit.  This is a thick-skinned fruit that has a meaty quality to its flesh.  In fact, it can make for a filling meal.  Eggplant contains a lot of water – 92% to be specific!  It is not known to be a contributor for daily nutritional intake.  Despite all that, Eggplant remains a favorite ingredient to cook with.

Nestling is Key

When cooking in the coals, it is best to use medium sized eggplant.  It doesn’t matter what variety you select, the technique for cooking in the coals will remain the same.

Starting the fire

preparing the hot coals for the eggplant. you want these to burn down leaving only the heat and no flame to burn the eggplant. Ember cooking is only over hot coals.First, you need to start with a good wood fire, using clean hardwood.  In order to do this technique successfully, you need to ensure that there are no flames left in the fire, just hot coals.  You’ll know the coals are ready for the cooking when they are completely grayed over.  If your grilling area is large enough, you can stage a couple of burning wood pieces to provide additional heat to the area.  Just don’t cook directly in those flames.
When the coals are ready, make sure the embers are in an even layer and then place the eggplants side by side in the embers.  I like to use a fine screen in the bottom of my charcoal area to aide in heat retention.  Now, leave these untouched for about 10 minutes.  After that time, you can turn the eggplant to ensure all sides get evenly charred.  If you make a large enough fire, you can bury the eggplant completely in the hot coals and not have to do any turning.  That technique will require about 30 minutes of cooking time.

Blackened, Charred Skin Makes It Ready

Once the Ember Fired Eggplant has tenderized in the coals, it’s time to carefully remove it. Cool the eggplant, so it won’t burn and can be handled.  Then, slice each eggplant open from end to end, and gently scoop out the flesh.  Be sure to leave all the charred skin behind.  If you’re ready to use this in a recipe, then no need to do anything more to the eggplant.  If you plan on using it later, you must prevent the eggplant flesh from turning dark by incorporating 1 tablespoon of lemon juice and enough water to cover the flesh.  When finished, it’s best to store the Ember Fired Eggplant in a glass jar, bowl, or other container.

6 Needed Ingredients

To make the Ember Fired Eggplant with Feta Tarts, you’ll need a muffin pan and the following food ingredients:
  • Flesh from 1 medium size coal-fired eggplant
  • ¾ cup crumbled feta cheese (about 3 ounces)
  • ¼ cup roughly chopped pistachios, plus 2 tablespoons for topping the tarts
  • ¼ teaspoon ground coriander
  • ¼ teaspoon red-pepper flakes
  • 1 tablespoon fresh mint leaves, finely chopped
  • 5 sheets frozen phyllo dough, thawed
  • Extra virgin olive oil for brushing dough and preparing muffin pan

removing any char from the fire and then chopping up the eggplant to be added as the tart fillingWood Flavored Eggplant Mixture

Roughly chop the wood fired eggplant.  Then transfer to a medium bowl and add feta, 3 tablespoons chopped pistachios, coriander, red-pepper flakes, and mint.  Season with salt and fresh ground pepper and stir gently to combine.

Making the Tarts

showcasing the finished product! Our ember roasted eggplant within the feta tart- yummyLightly oil the muffin pan cups.  Lay 1 sheet of phyllo dough on a board and lightly brush with oil.  Stack 4 more phyllo sheets on top, brushing each with oil.  Cut the stacked sheets into 6 equal squares.  Carefully, pick up each square and place in a muffin cup, gently pressing in place.  Fill each dough cup with about ¼ cup of eggplant mixture.  Gently fold over the corners of the dough to enclose the filling as a tart.  Brush tops with oil and sprinkle with crushed pistachios.  Then Bake until golden brown, about 30 minutes.  Let cool for 5 minutes, then serve.


Tuesday, November 21, 2017

EMBER FIRED FRESH ZUCCHINI

Zucchini is a great vegetable to not only grill but ember cook. It has the density to hold up over the high heat. Add a distinct char taste to this abundant vegetable either as a side dish or an ingredient by making ember fired fresh zucchini.
I love thick skinned vegetables that come in season during Summer.  They are the perfect items to light a fire and make some hot coals to ember fire flavor into them.
We’re getting ready to coal roast one of my favorite vegetables – zucchini!  This is so simple to do and produces an extraordinary flavor for zucchini to be eaten on its own or to be used in your favorite recipe.  Clean out the fire pit, charcoal grill or outdoor fireplace and prepare to roast “ember fired fresh zucchini” directly on the hot coals.

Starting the fire to burn down the wood into coals Building A Small Fire

Know this from the start – You do not need a large fire!  A small fire is best to accomplish your cooking in about an hour’s time.  For my fire, I am using ten SmokinLicious Single Filet Wood Chunks in Ash with a couple of pieces of charwood that were left over from a previous cook.   Why Ash hardwood?  Because it is hands down, the best hardwood to produce an even bed of coals which is what you want when you coal roast.

I stack the wood so there is quite a bit of air space between the pieces.  This ensures I have good oxygen flow to produce combustion quickly. My technique is to stand the wood pieces on their end and make a circle. I try to have a couple of pieces in the center kind of tipped on to each other.  Remember, you want to produce hot embers quickly so it only requires a little wood and a lot of oxygen to burn things down.  I light my wood using a small butane torch. Leave the torch in place until I’m sure the wood has ignited.  I keep the lid off my charcoal grill so I can push the combustion process through completion and get those ash covered, hot embers.

Red Hot coals is the goal before adding the zucchiniRed Means Hot

You will know when the coals or embers are ready for cooking when you have uniform coals and they are glowing red from the bottom and gray on top.  I keep a couple of larger coals banked to the side to maintain heat and for reserved hot coals. Just in case I need to rake more to the cooking side.  I like to nestle a high heat metal cooking rack on the hot coals and then place my whole zucchini on the rack.  This allows for little ash to accumulate on the skin.  Remember, those coals are very hot so the zucchini will take less than 20 minutes to tenderize and char.

Turn For Full Char

With the zucchini and coal rack in place, I give the embers about 8 minutes to char and cook the first side of the zucchini.  After that time, I gentle turn the zucchini so that each side gets an even char.  Once the first 8 minutes are done, there will be less time needed for each of the other sides as the zucchini will hold heat.  I’ve added one additional wood piece to my banked fire just to be sure I have enough heat in the coal area.  I will not put the lid on the unit during the entire cooking process as this is open fire cooking.  My total coal cooking time is approximately 16 minutes.

Perfection In Smoke & Char on Ember Fired Fresh Zucchini

After placing my ember fired fresh zucchini on hot coals for about 16 minutes total, turning several times to get an even char, this spectacular vegetable is ready for eating.  You will see, there is very little coal bed left following this technique so remember, if you are cooking more than a couple of zucchini, you will need a larger coal bed.

For those of you thinking that the black, charred skin will be bitter and not appealing to eat, think again.  Most of the char will rub right off but the flavor will be infused throughout the ember fired fresh zucchini.  I’ve sliced mine about ¼-inch thick as I plan to make a galette of ricotta, garlic oil, and basil.

Thursday, July 20, 2017

TOP 10 VEGETABLES TO COOK IN HOT EMBERS

Ember cooking can be done in a cask iron plan, fire box and even in a Hibachi! Try this unique cooking method to add a flare and unique tastes to your outdoor grilling and cooking!
I want to be perfectly clear – this is not cooking over hot flame or direct flame.  This is cooking after the wood and/or charcoal has burned down in to very hot coals; when the coals develop a white-gray ash coating. THIS is the time to ember or coal cook these select vegetables.


The Rules of Ember and Ash Cooking

The essence of using all that the wood can give for cooking. That it was ember or coal cooking is.   I want to be sure there is no misunderstanding on what is needed to do this type of cooking safely and effectively.

Rule #1: If going with all wood for the coals, only use hardwood and clean hardwood at that.  You’re going to lay foods into this material so I believe it should be clean and mold free with moisture level 15-20%.  If higher, it will simply take longer to get to the coal stage.

Rule #2: Again, if using all hardwood, try to limit the bark or go bark-free if possible to reduce the potential for mold spores that can be released into the air.

Rule #3: Have everything ready before you start.   You’ll need an ash-coal hoe, fire gloves, and small coal shovel at the ready.  I would also have tongs for those times when you don’t bury your foods completely in the coals but rather lay them which requires turning of the vegetables.

Rule #4: Equipment wise, you can use a charcoal grill that has fire brick added for insulation, a clean fireplace (I prefer an outdoor unit), a clean fire pit, or an open pit built in a safe area with brick or gravel as the base to protect the fire from spreading.


Hot Embers Birthed in One Hour

On average, it will take about an hour to move a small fire from flame to hot ember.  Depending on whether you elect to use charcoal or wood will determine the amount of time the fire needs to burn down – an all charcoal fire will be 30-45 minutes; all hardwood fire about 45-60 minutes.  Remember, charcoal produces heat and little smoke, whereas hardwood, produces heat, smoke and specific aromatics and flavorings in that smoke.  At the ember-coal level, both have equal carbonization and act similar for this method of cooking.

Using approximately 8 lbs. of charcoal or 10 lbs. of hardwood, or any combination of the two, light a fire in the equipment of your choice.  Let the fire completely burn down until only hot coals remain.  Rake the coals to produce a thick even bed.  Then select your favorite vegetables from the ones listed below, and you’re on your way!  Always keep a small fire going for additional hot coals if doing large amounts of vegetables.


Vegetables That Love Hot Coals

Here are the top 10 vegetables to introduce to the hot embers for fantastic flavor:

Asparagus         Broccoli          Cauliflower        Eggplant

Garlic        Leeks         Gourds (squash, pumpkin)

Onion       Peppers       Potato

If you want minimal monitoring to the actual cooking process, then place the selected vegetables into the bed of coals and then shovel hot coals and ash over the top so that the entire vegetable surface is covered in embers.  Leave untouched until tenderized, which will be 45-60 minutes depending on the vegetable selected.   Otherwise, you can set vegetables within the coal bed and turn them during the cooking process to ensure even char.