Thursday, May 28, 2020

3 METHODS OF SMOKING BOSTON BUTT FOR AUTHENTIC BARBECUE FLAVOR

The Three ways we smoked-wood flavored our Boston Butts!


It should come as no surprise that majority of grill owners invest in a gas grill for their outdoor cooking with over 80% of these owners investing in multiple accessories for that grill.  Often, many of these grill owners will venture to make an additional purchase of a second type of grill like a charcoal or pellet grill/smoker, in order to be able to cook more barbecue or smoked food options.

My intent is to demonstrate to you that you can produce authentic flavors, colors, textures, and aromas of favorite barbecue proteins with a variety of equipment, all outfitted with hardwood for the authentic wood flavoring.

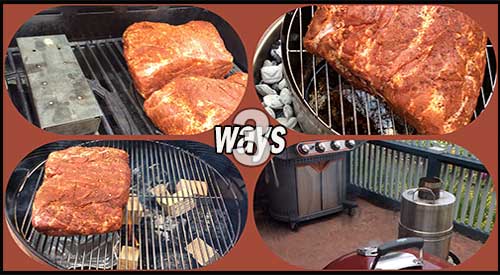
I’ll be taking Boston butt to a traditional gas grill, a kettle charcoal grill, and a convection-style grill to demonstrate just how easy it is to cook this popular animal protein while giving you a bit of education on how these units are different when hardwood is incorporated.

Set Up Similarities and Differences


When it comes to setting up the grills for smoking, there are some obvious differences.  First, let me name the equipment brands I’ve included and the intended set up of each for cooking and smoking the Boston Butt cuts, all of which approximate 8 lbs.
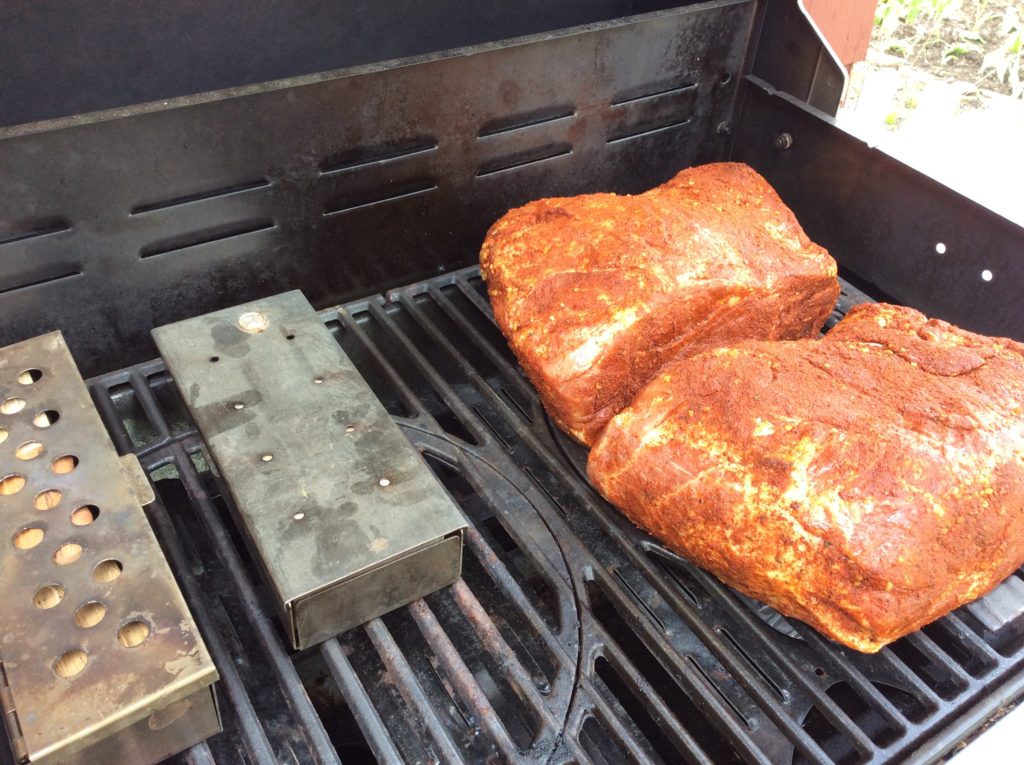
Our Boston Butt (s) on the Stok Gas Grill with accompanying Smoker boxes
Boston Butt on the Stok Gas Grill with Smoker boxes

The Stôk Quattro 4-Burner Grill:

If you are not familiar with this grill, it is equipped with an insert system to allow you to use a standard grilling grate, a griddle, grill basket, vegetable tray, pizza stone, Dutch oven, Wok, and other inserts that easily pop in and out of the cast iron grates.  Despite this feature, you can do traditional smoking using wood chunks without the need for the smoker/infuser insert.

Whenever I smoke on a traditional gas grill, I always set up a two-zone cooking method.  This means, on my 4-burner Stôk, I will ignite just two of the burners on one side.  You can either place wood chunks directly on the heat shields of the unit or use a metal smoker box.  My Boston butt will cook on the unlit side of the grill with a metal smoker box containing 3 wood chunks on the hot side.  I’ve also included a second smoker box to make it easier to swap out the first when the wood becomes completed charred.  My temperature is 225°F for the actual cooking.
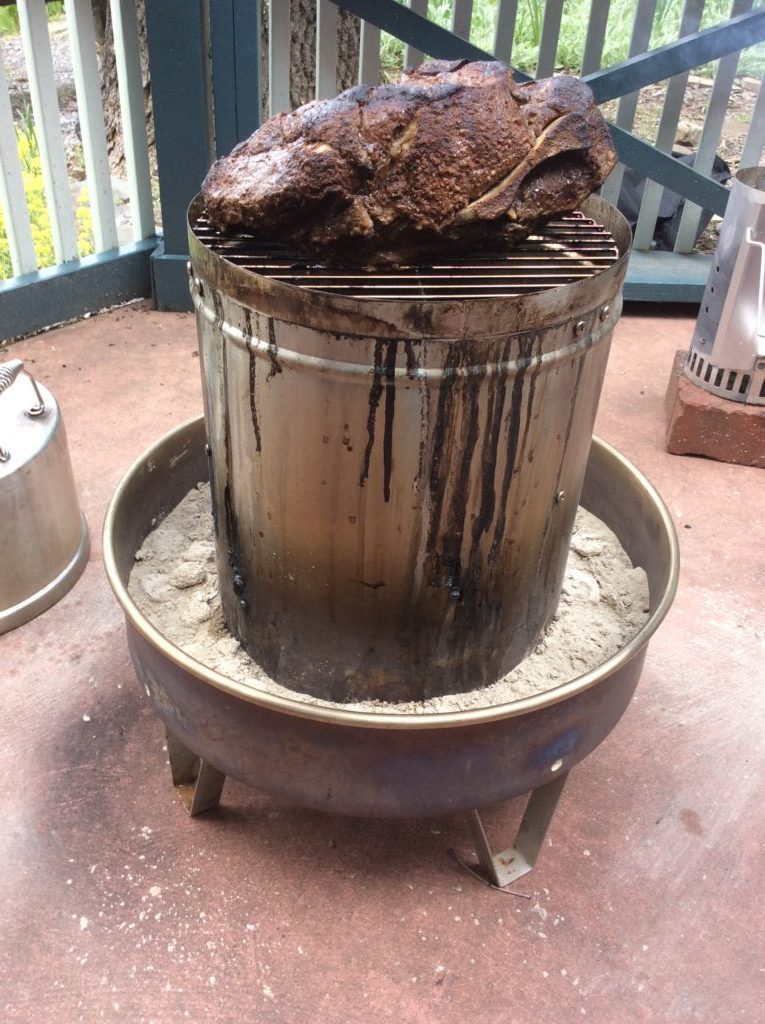
Our Boston Butt on the Orion Cooker with Minuto® wood chips in the inner ring
Boston Butt on the Orion Cooker with Minuto® wood chips in the inner ring

Orion Cooker:

This is an outdoor convection unit that uses briquets for the heat and Minuto® Wood Chips placed around the drip/water pan for the wood flavoring.  This unit will be the fastest to cook the Boston Butt, with an anticipated timing of 4-1/2 hours total.  This is a direct cooking method that uses the radiated heat of the stainless-steel body to trap and circulate the heat for faster cooking time.

There is no ability to replenish the wood chips with this unit due to the high heat level.  About 15 lbs. of briquet and 4 ounces of Orion Custom Wood Chips is all that is needed to smoke, plus some water in the water/drip pan for a moist outcome.

Weber® Kettle 22” Charcoal Grill:
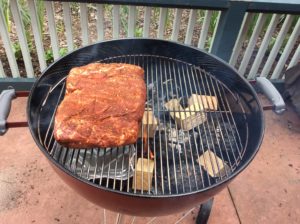
Our Boston Butt on the Weber® kettle Grill with double filet wood chunks
Boston Butt on the Weber® kettle Grill with double filet wood chunks
 Likely one of the most popular charcoal grills, the Weber® kettle provides for the opportunity to cook with charcoal and hardwood.  I’ll be setting up my grill using a two-zone method; charcoal/wood on half the fire area and the meat placed on the indirect side.

Due to the length of time Boston butt takes to cook, you likely will need to replenish the charcoal for maintenance of heat level.  I prefer to maintain a temperature around 250° F.


For similarities: both the Weber® and the Stôk grill were set up with a two-zone cooking method. 
Both included use of the SmokinLicious® double filet wood chunk.  The length of cooking time between the charcoal unit and the gas unit are very similar, taking close to 10 hours.

For differences: temperature maintenance is easier with the gas and convection units.  The charcoal unit requires much more supervision to ensure that the fuel (charcoal) is replenished prior to the temperature of the grill decreasing significantly.  You are also able to check on the meat’s coloring and evenness of cooking with the charcoal and gas units while the convection unit is generally left alone until closer to the recommended cooking times.  Though you can check on the doneness of the meat at any point with the convection unit, generally there is no need to do anything but wait.

Regarding cooking variations, let’s discuss color, bark formation, moisture of the meat.

Barbecue By All Methods


With all four of the Boston Butt (s) prepared in the same manner – excess fat trimmed to ¼-inch or less, a dry rub applied on all sides, and marinated for 24 hours – this is a fair comparison of how each grilling and smoking method produces the barbecue results commonly looked for.

Bark:

Without question, bark or the outer crust that develops from exposure to a lower temperature, long cook time, and smoke vapor infusion was greatest on the Boston butt cooked on the Weber® Kettle 22” Charcoal Grill.  The gas grill produces the least amount of bark which is dominate on the outer edges and top surface.

Color:

The darkest coloring to the bark and the most obvious smoke ring was on the meat cooked on the charcoal grill.  The Orion Cooker produced a brown hue to the meat’s exterior while the meat cooked on the gas grill retained a red hue that was indicative of the dry rub color.  Charcoal grills will produce a black hued coloring due to two combustible materials: charcoal or charred wood and hardwood.

Moisture: 

The meat that produced the greatest amount of rendered juice was from the charcoal cooking method.  Second, the convection grill method followed by the gas grill.  However, the greatest internal moisture level was obtained from the indirect cooking method on the gas grill, followed by the charcoal method and lastly the convection method.

Final Notes:

What we’ve set out to accomplish with this multi cook segment is to prove that no matter what equipment you have, you can produce authentic flavor, aroma and texture to Boston butt.  This can be invaluable for those times when you may not have a lot of time to supervise the smoker or grill but still want authentic barbecue.  Or, when you must make a lot of meat meaning you must use all the equipment options you have available.
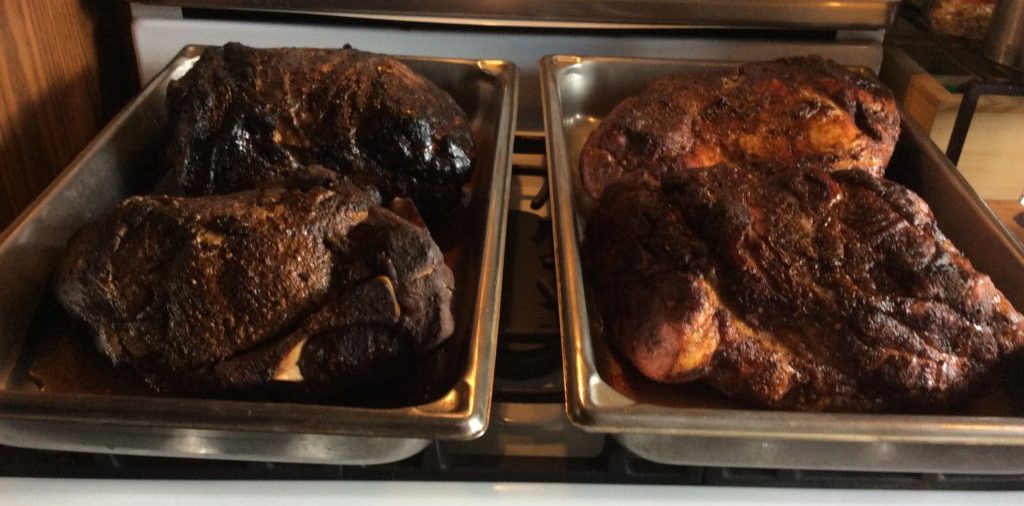
All four Boston Butt (s) one done on charcoal with the Weber, another in the Orion with wood chips and two on the gas grill with wood chunks- the coloring is not much different!
From a taste perspective, our sampling group indicated that the strongest smoked flavor was from the charcoal unit, followed by the convection grill and lastly, the gas grill.  Keep this information in mind when you’re cooking for others, as boldness of the smoke flavor can be controlled not only by the amount of time exposed to the smoke vapor, but also with the equipment used for the cooking and the amount and type of hardwood used in the process.

This certainly is a clear example of how anyone can produce authentic barbecue on the equipment they have even if it’s not a traditional smoker.

Making you an informed consumer through valuable articles like this one.   Leave us a comment and follow us or subscribe for more great recipes, techniques, tips, and the science behind the flavor. That’s SmokinLicious®.

Thursday, May 21, 2020

A GRILLING TECHNIQUE THAT MAKES GRILLED PARSNIPS TASTE LIKE FRENCH FRIES

Our Grilled Parsnips with added wood smoky flavor taste almost like French Fries!

Your diet likely doesn’t consistent of many root vegetables and I can guarantee that if you have kids, they may not have tried more than a carrot for a root vegetable.  I’m going to introduce you to parsnips which is one root vegetable that when grilled, takes on a flavor very similar to French fries.

That’s why I’m calling this recipe my Smoked Parsnip Fries with Spicy Honey Glaze.  As easy to prepare as it’s cousin the carrot, parsnips take no time at all to prepare and smoke on the grill.  Go to the market and get yourself about 2 pounds of this lesser used vegetable and let’s convert you from the potato to the parsnip!

What do parsnips taste like?

 Parsnips are a sweet root vegetable with a flavor profile between a carrot and potato. While related to the carrot and parsley family, parsnips have a deeper taste and stronger texture, which lends itself to cooking, grilling, and smoking. We recommend smoking this vegetable to improve its woodsy sweetness taste.

Got 5 Minutes?

The parsnips have been clean of the outer skin, washed and sliced to size
Just like carrots, likely the more popular root vegetable, parsnips grow as a tuberous root and can be eaten raw, though most people prefer to cook them.  Once mature, they are harvested and sold in the grocery stores.  I do a simple end trim and peel them with a vegetable peeler.  Next, I cut them into 3-inch lengths and the width of an average potato French fry.  I then toss them with ¼ cup of oil – I’m using avocado oil but you can also use olive, almond, walnut, grape-seed or similar high heat oil – and kosher salt and fresh ground pepper.  Now they’re ready for the grill.

Tasting Notes: When selecting parsnips, it’s important to look for ones that have a smooth surface with no cuts or indentations.  Because they are a root vegetable, it’s important to rinse them well under water before preparing.

 Two-Zone Grill Smoking


Our smoker box is all set on the lite side of the grill and the parsnips on the unlite!The best method of cooking our pre-cut parsnips is on a sheet pan.  This will ensure that the cuts of parsnip get equal browning and tenderization.

Just like roasting in your oven, I’ll be using a higher grill temperature of 400-425° F on my gas grill.  Total cooking time should be roughly 45 minutes to tenderize the parsnips.  For added flavor, I’ve included three double filet wood chunks to a metal smoker box.  These usually have wood chips added to them but I’ve found wood chunks much easier with less mess and no need to refill with more wood.

I’m using a traditional two-zone setup that involves using  ½ the burners of my unit set to a medium-high setting and ½ the burners are left off.  The smoker box will go on the hot side of the grill while our sheet pan of pre-cut parsnips will go on the cold side.  Half way through cooking time I rotate the sheet pan to ensure even browning.  That’s it!


Chef Bert and Tom go over the set up for two zone cookingGrilled Parsnips Glaze ‘Em for Added Flavor


While the parsnips are turning golden and tender on the grill, it’s time to start on the glaze.  Begin by melting 2 tablespoons of unsalted butter in a small saucepan.  Add two chiles or ¾ teaspoon of crushed red pepper flakes, one tablespoon of apple cider vinegar, and 1 tablespoon honey.  Stir the parsnips occasionally until the glaze holds together well.  Set aside and go to the grill and check on the grilled parsnips.  When tender and golden brown, remove from the grill.  The wood chunks will be 100% carbonized.  I’ll like to save these to use in my charcoal grill as a charwood fuel product for a natural charcoal.


pouring the honey sauce over the finished grilled pasnips and ready to serveWith simple trimming and peeling, these grilled parsnips become even more flavorful when wood flavored on the grill.  Two zone cooking makes it easy to step away while the parsnips cook giving you plenty of time to make the great spicy honey glaze to finish off perfectly grilled parsnips.

Remove the parsnips from the grill, place on a serving platter, and drizzle the spicy honey glaze over the parsnips when ready to serve.   Today’s Smoky Grilled Parsnip Fries are going beside a ground chuck burger for more of a traditional taste of burger and fries.

What’s your favorite parsnip recipe?  Leave us a comment to opine and subscribe to get all our postings on tips, techniques and recipes.  Bringing innovation to wood fired cooking with recipes, techniques and the science behind the fire, smoke, and flavor. That’s SmokinLicious®.

Thursday, May 14, 2020

TEMPERATURE, MATERIAL AND TIME DETERMINE WHEN ITS CALLED BARBECUE

When its Called Barbecue?
t’s time I go there.  I’ve fielded way too many questions to ignore it.  Now is the perfect time for me to opine on this highly controversial topic: when it’s called barbecue.

How do you define “true” barbecue?

I have three parameters to cooking that I’d like to address that should help explain my justification for what qualifies as barbecue.

Temperature Comes First


People are often surprised that I don’t include equipment in my considerations but if you’ve followed our recipe blog “Cooking With Dr. Smoke”, you’re well aware that we include a wide array of equipment to demonstrate wood flavor infusion to all types of foods.  One area we do focus on, however, is temperature when cooking.

Extremely Low Temperature (below 80° F):


If the first thing that comes to mind is a temperature under 80°F is just not cooking, you’d be right. 
Basically, this is a temperature that is ideal to complete cold smoking.  Fish, cheese, and some meat products can be exposed to this low temperature process when a combustible plant material is used. 

In most cases, that is wood to smolder and produce a gas or vapor.  The smoke vapor produced from the smoldering wood invokes flavor and preservative qualities to the foods without causing fragile items such as cheese, chocolate, and similar food items to have their molecular composition destroyed by heat. When meats are exposed to this low temperature environment with smoldering wood, the smoke vapor penetrates completely through the meat since there is no high heat surface hardening that occurs like with hot smoking temperatures.

Low Temperature (180° to 300°F):

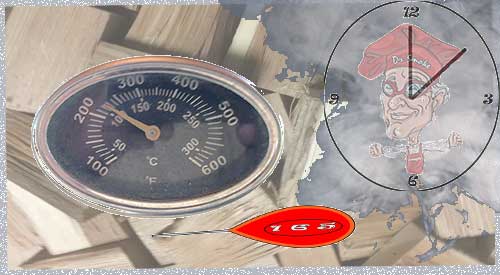
our thermometer at 350 degrees F is the beginning of high temperature cooking.
We’ve all heard the term low and slow cooking.  This is the low temperature reference to cooking tougher cuts of meat.  However, for me, even more tender cuts can be done using low temperature cooking, especially when paired with an indirect cooking set up or two-zone cooking.  Additionally, this temperature range is not just for meats and poultry, but fish, fruits, and vegetables also benefit.

High Heat Temperature (350° to 550°F or more):


Higher temperatures are generally for cooking smaller cuts of meat and poultry that don’t require a lot of cooking time.  Plus, high heat temperature can develop the char crust exterior on foods that many people crave with outdoor meals.  Know that you can use traditional grills for both direct, high heat cooking as well as indirect set up.  The indirect will allow you to cook the food through by placing on the indirect, non-heat side and then use the direct side for adding a sear to the finished foods.

Combustible Material


If you agree with me that barbecue is cooking with smoke then you’ll understand the need for a combustible material.  Some type of plant material must be used to generate the smoke.  The most popular material is wood or hardwood to be specific, since you should never cook with softwoods due to their higher sapwood content, resin, and air space in the cell walls.
Smoke is a key ingredient to Barbecue
First, understand smoke is a gas or vapor and can result from juices and fats that drip off foods into the fuel area of equipment, result from a fuel source like charcoal emitting smoke at it gains temperature to produce hot coals, and result from wood or other plant material (think herbs, teas, etc.) that is ignited.  You’ve likely experienced the first when cooking hamburgers, hot dogs or steak on direct heat of a charcoal or gas grill and watched the flames start with each drip of the fats/juices. 

Just as you’ve likely experienced lighting charcoal and having a plume of smoke sit until the charcoal begins to gray over and produce high heat.  Come Fall and Spring, if you are a leaf burner, you’ve experienced the thick sometimes choking smoke that results from burning leaves, certainly not a pleasant plant material to use for food cooking.

Once you have a source for the smoke understand that not all smoke is good.  For detailed information on this, see our published article on the types of smoke and what they mean for cooking.

Length of Time for Cooking

our Dr Smoke clock,  Always keep track of your cooking time.
Although you’ve likely read that true barbecue is done low (temperature) and slow (length of time to cook), I will tell you that you can still produce smoked foods using temperatures considered above traditional hot smoking levels and in shorter time periods.  I’ve done bone-in beef shanks on the gas grill using a two-zone cooking method with wood chunks and had these done in about 75 minutes using a temperature close to 300°F.  They, to me, are a true barbecue item, right down to the wet rub, wood flavor infusion, and smoke infused color.

I agree, tougher cuts of meat and poultry benefit from longer cooking times to allow the connective tissue to dissolve.  Plus, my preference is to use a temperature closer to 275°F for most of my animal protein cooking.  For my vegetables and fruits, though, I turn up the heat still using wood for true smoking. I use the tenderness of the vegetable and fruit to guide me on the timing.
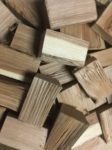
Double Filet hardwood chunks pure wood and bark free!In short, true barbecue is cooking with smoke and for me that is cooking with suitable hardwoods known to present pleasant flavors to foods you cook.  You can introduce hardwood to pretty much any type of equipment including home made smokers whether for the outdoors or on your indoor stove top.

The key is to utilize an ideal temperature to generate quality and flavorful smoke gas production, as well as a tempered hand in the amount of wood to use at a time.  You’ll find that you can produce the flavors of barbecue with any equipment and any food.  After all, barbecue seems to have gone beyond just animal proteins.

How do you define barbecue?   Leave us a comment to opine and subscribe for more great recipes, techniques, tips, and the science behind the flavor, that’s SmokinLicious®.

Tuesday, May 5, 2020

WRAPPED ASPARAGUS WITH A HEALTHY CHOICE

Our finished Grilled Asparagus Wrapped with a healthy Choice

One of the favorite Spring vegetables that certainly don’t have a long fresh season around my area, asparagus is know for its fiber and its diuretic quality since it is 93% water.  Although it certainly is a star vegetable to grill, I’m taking it to the healthy side and preparing a wrapped asparagus without all the fat, sodium, and calories of bacon or prosciutto wrapped.

This is a super flavorful twist of carrot and puff pastry that is perfect for a dipping sauce.  Fresh asparagus comes to life when we wood-fire it on the gas grill with wood chunks for added flavor. 

When done, you’ll never miss the bacon as this is a meaty, satisfying take on the wrapped asparagus theme.  Now, get your bunch of fresh asparagus and learn this healthier version of wrapped asparagus wood-fired!

Vegetable Prep

our two main vegetables fresh asparagus and ripe carrot  
First, start this recipe by trimming the ends of one bunch of asparagus.  Peel and end trim 3 medium size carrots.  Using a vegetable peeler or mandolin, produce thin peels of carrot, figuring about 2 peels per asparagus spear.  Add water to a small saucepan and bring to a boil.  Blanch the carrot peels in the water for about 30 seconds just to soften.  This will make for an easier time of wrapping the carrots around the asparagus spear.  Remove the carrot peels to a colander then place on paper towels to remove excess water.

With the vegetables prepared, it’s time to work on the puff pastry.  After thawing two sheets of puff pastry according to package directions, place one sheet on a cutting surface and cut ½-inch strips of pastry.  After that, take one egg and one teaspoon of water and beat together to produce egg wash.  This will be used to hold the ends of the puff pastry to the asparagus spear.

Asparagus Twists


Starting at the asparagus tip, begin wrapping one strip of puff pastry around the asparagus spear securing the ends in place with a bit of egg wash to the underside of the pastry.  Each spear will take just one puff pastry strip.  Be gentle with the pastry as the warm temperature of your hands will cause the pastry to begin stretching.  If you should have any excess, simply trim the end off.

wrapping our Asparagus with carrot peel in preparation for the grillWith the puff pastry strip in place on the asparagus spear, time to add the pre-blanched carrot peel.  Each spear will take about two carrot peels, depending on the length.  Starting on the tip end of the asparagus, begin wrapping the carrot peel in the space left by the pastry.  Fold the carrot end under the pastry when you reach the ends.  Once all the spears are wrapped in pastry and carrot, brush the entire spear with egg wash.  Next, gently sprinkle grated Parmesan cheese over the surface of the stalk, then sprinkle with white sesame seeds.  Lay on a foil lined sheet pan in preparation for the grill.

Tasting Notes: Other options for wrapping the asparagus spears include using a purple carrot either in place of or in addition to the traditional orange to give more visual appeal.  Also, you can use zucchini or sweet potato peels too.

Two-Zone Grill Smoking


two zone cooking method with smoker box on on side and cooking on the other  
With all the asparagus spears wrapped in carrot and puff pastry and topped with parmesan, egg wash, and white sesame seed, these spears are now ready for the grill.  I’ve preheated my gas grill to 400° F using only two of the four burners.  On those hot burners, I’ve placed a metal smoker box that holds three double filet wood chunks.  My sheet pans of prepared asparagus spears are placed on the unlit side of the grill.  Close up the lid and leave to cook for about 20 minutes.  Don’t be alarmed by the amount of smoke you’ll see from the grill’s vents.  That’s just the wood doing is part to flavor the spears.  After 20 minutes, check and rotate the trays to produce an even coloring to the puff pastry.  It will be 20-30 minutes total cook time depending on the thickness of your asparagus, to make these tender and golden brown.  Once done, remove from the grill and immediately remove the finished spears to a serving platter.

Optional Dipping Sauce


Adding a hint of lemon juice to our dipping sauce Although the smoked asparagus spears are great on their own, I’ll be giving this option of a dipping sauce.  While the wrapped asparagus spears are on the grill, add ½ cup mayonnaise to a bowl.  To the mayo add 2 tablespoons fresh, chopped chives, ¼ teaspoon salt, and 2 teaspoons of fresh lemon juice.  If you’d like a spicy kick to the sauce, add a ¼ teaspoon red pepper flakes.  Stir well and refrigerator until ready to serve with the wrapped asparagus.

Although wrapping our asparagus spears takes a bit of time, the work is worth it when you taste these flavorful twists.  Perfectly cooked asparagus, sweetness of carrot peel, the airy quality of the puff pastry and the slight crunch of sesame seeds. 

Pair them with our simple dipping sauce made from mayonnaise, fresh chives, and lemon juice for the perfect appetizer or side dish.  Ultimately, the only problem is it’s hard to stop eating these spears of flavor.  Grilling asparagus using a two-zone cooking method makes them quick with no need to stand over the grill.  Take advantage of asparagus season and give this easy recipe a try on your favorite grill.

What’s your favorite asparagus recipe?  Leave us a comment to opine and subscribe to get all our postings on tips, techniques and recipes.  Bringing innovation to wood fired cooking with recipes, techniques and the science behind the fire, smoke, and flavor. That’s SmokinLicious®.