Showing posts with label wood chunks. Show all posts

Thursday, July 7, 2022

“MATCH YOUR COOKER” – CHARCOAL SMOKER GRILLS: THE WOOD MASTER’S GUIDE

Charcoal Smoker Grills and SmokinLicious®- for great wood fired flavor!

For those that have followed us for years, you know we are proud that almost from the start of our Company, we were committed to providing a guide for equipment to cooking wood product match. We refer to our guide affectionately as “Match Your Cooker”.

In this article, we are covering our recommendations for charcoal-wood burning grill equipment; these are grills that capable of using charcoal and wood for authentic charcoal grilling. As there are always new equipment lines and models released, our plan is to provide regular updates. We also encourage you to send us a message when you don’t see a manufacturer or model listed.

For now, we introduce you to our wood master’s guide to SmokinLicious® cooking woods for specific smokers.
image of SmokinLicious® full cut log on a Charcoal-Wood Burning Grills

Barrel Smoker Logs-

The following equipment/models would be suitable for the SmokinLicious® Barrel Smoker Log/ Full Cut Log:

Aztec model: Commercial Grills

Gaucho Grills models: Supremo Free-Standing, Grilling Inserts

Image of our quarter cut log

¼ Cut Wood Logs

The following equipment/models would be suitable for the SmokinLicious® ¼ Cut Wood Log:

Aztec model: Home Grill

Engelbrecht Grills & Cookers: all models

Gaucho Grills all models

Kalamazoo models: Outdoor Gourmet, K75OHS Hybrid Fire Grill

M Grills model: B2, M16, A10

Pitts & Spitts models: Traditional Charcoal Grill, Adjustable Charcoal Grill
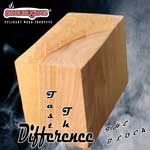
image of the SmokinLicious® Block! for extra flavoring on Charcoal-Wood Burning Grills

Unfileted Wood Blocks

The following equipment/models would be suitable for the SmokinLicious® Unfileted Wood Block:

Gaucho Grills all models

Pitmaker model: BBQ Grills 48

Pitts & Spitts models: Traditional Charcoal Grill, Adjustable Charcoal Grill

PK Grill & Smoker
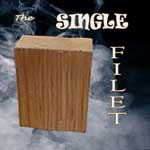
SmokinLicious® Single Filet wood chunk

Single Filet Wood Chunks

The following equipment/models would be suitable for the SmokinLicious® Single Filet Wood Chunks:

American Muscle Grill

Dyna-Glo models:

Grillworks 36

JedaJeda Charcoal Grill BBQ

Kalamazoo Charcoal Smoker Cabinet

Pitmaker models: Tailgater, BBQ Grills 30

West of Memphis Ironman 3
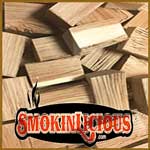
SmokinLicious® Double Filet Wood Chunk in Charcoal-Wood Burning Grills

Double Filet Wood Chunks

The following equipment/models would be suitable for the SmokinLicious® Double Filet Wood Chunk:

Alfresco Grills: Models with Solid Fuel Insert

Arteflame

Aussie models: Walk-A-Bout Portable Charcoal Grill, Americana Sizzler Charcoal Grill, Americana Traveler Portable Grill

Camp Chef model: Wood Fire Cook Wagon

Char-Broil Models: Kettleman Tru-Infrared Charcoal Grill, Kamander Charcoal Grills, CB940X Charcoal Grill, American Gourmet Charcoal Grills, Charcoal Grill 580 & 780, Charcoal Barrel Grill, CB500X Portable Charcoal Grill, American Gourmet® Portable Charcoal Grill, Deluxe Gas & Charcoal Combo Grill

Char-Griller Grills & Smokers models: Super Pro™ 2121 Charcoal Grill, Deluxe Griller™ 2828 Charcoal Grill, Traditional Charcoal Grill, Outlaw™ 2137 Charcoal Grill, Pro Deluxe™ 2727 Charcoal Grill, Wrangler™ 2123, Wrangler™ 2823, 14822 Premium Red & Black Kettle, Legacy Charcoal Grill, Grand Champ™ 8100 Charcoal Grill, Patio Pro® 1616 Charcoal Grill, Patio Pro® 1515 Charcoal Grill, Duel Function™ 5030 2-Burner Gas & Charcoal Grill, Duo™ 550 Gas & Charcoal Grill, Dual Function™ 5072 Gas & Charcoal Grill, Double Play™ 5650 Gas & Charcoal Grill

Cobb all models

Dancook 1900 Charcoal Grill

Texas Pit Crafters models: BBQ King BI, PM 200/200S BI, PM 500/500S BI

Tremor Breeze Smoker
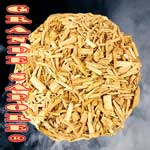
SmokinLicious® Grande Sapore® wood chips to sprinkle over Charcoal-Wood Burning Grills

Grande Sapore® Wood Chips

The following equipment/models would be suitable for the SmokinLicious® Grande Sapore® Wood Chips:

Aussie models: Walk-A-Bout Portable Charcoal Grill, Americana Sizzler Charcoal Grill, Americana Traveler Portable Grill

Camp Chef models: Wood Fire Cook Wagon

Char-Broil: CB500X Portable Charcoal Grill, Portable Charcoal Grill, Portable Kettle Charcoal Grill, American Gourmet® Portable Charcoal Grill

Cobb all models
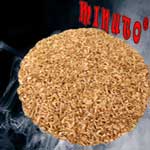
SmokinLicious® Minuto® wood chips

Minuto® Wood Chips

The following equipment/models would be suitable for the SmokinLicious® Minuto® Wood Chips:

Earth Oven

Eco-Que: Portable Grills

Fire Magic Charcoal BBQ Smoker on Stand

Orion Cooker
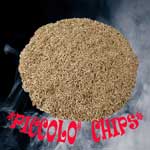
SmokinLicious® Piccolo® wood chips

Piccolo® Wood Chips

The following equipment/models would be suitable for the SmokinLicious® Piccolo® Wood Chip:

Orion Cooker

We hope you view this guide as a helpful resource for selecting the perfect culinary wood for your equipment. As always, our Wood Guide Team is ready to answer your additional questions and further assist you with the perfect grilling and smoking experience!


Thursday, June 30, 2022

Wood Grilled Romaine Lettuce

Wood grilled Romaine lettuce- Scrumptious!

It’s time to bring your vegetables into grilling season! Nothing beats the smell of fresh vegetables roasting over wood even on an LP/gas grill. Any time of the year works fine for this technique to get a great char wood flavor in your seasonal or store-bought fresh vegetables.

All you’ll need for this easy cooking experience is an LP or gas grill – any brand or size will do, double filet wood chunks from SmokinLicious®, and a head or two of fresh Romaine lettuce!

Grill Preparation

If you want to add special wood flavoring to your LP/Gas grill there are easy steps to follow:

Make sure your grill is clean from any significant grease build up. Remove the grilling grates and determine how much space is between the diffuser and the grilling grate. The diffuser is the plate covering the unit’s gas burner(s). Don’t remove the cover.

Once you have the sizing computed, then select the SmokinLicious® wood chunk size that will fit – Single Filet which is ~4 inches or the Double Filet which is ~2 inches.

Wood Preparation

Now, let’s set up the wood on the grill. Remove the cooking grates from the grill then strategically place the wood chunks over the heat diffuser. This is the metal piece covering the actually gas burners. If the SmokinLicious® wood chunks are fresh, then you can add them directly to the unit without pre-soaking them. If not, you may want to consider a lite soaking of about 15 minutes. Because I’m cooking lettuce, I am using the chunks in their natural state. However, feel free to consider a pre-soak in liquid with flavorings such as beer, wine or juice.

Wood chunks above the diffuser

Now replace the grill grates back on the unit, over the SmokinLicious® wood chunks! Make sure the grates are securely seated back on the unit. If there is a lot of space on your unit between the diffuser and the grate you may want to consider a SmokinLicious® single filet or block item. Now light the unit, set the dials to a low heat setting and bring the unit up to temperature. Say around 180 degrees. Do not overheat the unit.

Preparation

In preparing my Romaine lettuce for this cook, I slice it vertically from stem to head creating two equal size halves. After pre-heating the grill to around 180 degrees, I place the two slices of the lettuce head directly on the grill grates. Let the wood infusion flavor begin!

"Two halves are better than one head"

Roasting Process

I position the two halves of the Romaine over the hot spots created by the SmokinLicious® “Double” filet wood pieces which are under the grilling grates. The wood will ignite and begin the charring stage. I recommend bunching the wood pieces together to produce a hot spot on the LP/gas grill to allow for a direct char technique. While I am not using the smoke from the wood, I am still infusing great natural grilling flavor with the wood.

My cooking is taking place with an open lid because I want to char not smoke! It’s important to keep turning the heads so the flavour will be even. At about 1/3 of the time cooking on the grill, I turn the gas completely off and let the flaming wood chunks on the diffuser finish up the final cooking. In this last stage of charring, I brush my clarified butter with chopped parsley and mint baste to the lettuce halves for final flavour and presentation. And, if desired, feel free to drizzle any remaining melted butter mixture to the finished product for a little extra taste kick.

Remember this is a delicate vegetable, not meat so there is no grease to flare up the LP/gas grill. This is another example of why using SmokinLicious® wood chunks on the diffuser and under the grill grates of your LP/gas unit can generate such exceptional wood-fired flavour. Now, get to your grilled Romaine lettuce and ENJOY!


Thursday, May 12, 2022

ADDING WOOD FOR FOOD SMOKING?- OUR GUIDE WILL HELP

our food scale demonstrates Grande Sapore® and Double Filet wood chunks as a guide to adding wood flavoring with our Smokinlicious® products.
Our food scale demonstrates guidance on adding wood for food smoking.

Let’s break this down by equipment and method of smoking so you have a good place to start in answering the above questions.

Get A Food Scale- Step #1 in Adding Wood for Food Smoking

As a reminder, wood should not be sold or referenced by weight so I always recommend you keep a food scale handy to weigh pieces of wood or handfuls of wood chips until you get comfortable with eyeballing your needs. After practicing on your specific equipment, you’ll develop a sense of how much will produce a smoke infusion level you and your food guests like.

To make easier understanding of the amount of wood needed, I will be referencing by ounces in my breakdown lists.

Adding Wood for Food Smoking in The Traditional Smoker

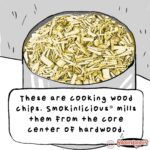
SmokinLicious® wood chips are milled from the heartwood

If you adhere to the basic rule of low temperature cooking on a smoker, then you’ll likely be cooking between 225° and 250°F. You will also likely be using lump charcoal or traditional charcoal known as briquets, for the fuel or heat. That is the material that keeps the smoker at a steady temperature.

Regardless of whether you use the snake method, minion method, or simply dump the charcoal in the smoker’s charcoal area, adding wood for food smoking will be needed in some form to provide the actual smoked flavor to the foods. Why? Because it is what gives foods that smoky flavor and distinct texture and appearance.

For the smoker, here is a guide on the quantity based on food being smoked and for using wood chunks. Note, you can smoke different foods at the same time with small adjustments to these amounts.

Guide

Fruits/Vegetables Turkey/Chicken Ribs Pork Shoulder/Brisket
2-4 ounces 4-6 ounces 8 ounces 10 ounces with additional needed during cooking

For placement of the Double Filet chunks, these can go directly on the hot coals with some banked to the side to catch as the hot coals spread.

Adding Wood for Food Smoking Using the Charcoal Grill

Essentially, you will be doing the same steps as above for the traditional smoker. The main difference between these two units is that smokers are for hot smoking and generally don’t do well when used for grilling. In fact, I would highly recommend you never try grilling on a smoker. Charcoal grills, on the other hand, can do both but you will have to make some airflow adjustments with the unit’s venting to ensure that you can maintain a low temperature consistently for smoking. You also may find adding a heat insulator like bricks or stones works well to attract and use radiant heat.

Here is the guide on quantity based on food being smoked as well as type of wood product. Remember, a wood chip product will combust faster so you will need more chips on hand when hot smoking.

Wood Fruits/Vegetables Turkey/Chicken Ribs Pork Shoulder/Brisket
Chips 2 ounces 6 ounces 10-12 ounces 16 ounces
Chunks 2-4 ounces 4-6 ounces 8 ounces 10-12 ounces

For placement of the wood chunks, these always go on top of the charcoal. You should have a piece on the hot coals and then stage some on unlit coals that will ignite during the cooking process and keep the flavor going.

SmokinLicious® wood chunks
Adding Wood for Food Smoking Using the LP/Gas Grill

 I think the key misnomer is that LP/Gas Grills can only use smoker chips if you want to attempt to do wood-fired cooking. That has certainly changed with the advent of dual fuel or multi-purpose grills on the market today, as well as the development and design of diffusers over the gas burners for traditional grills. The heat covers on burners are the perfect place for wood chunks.

Even if you don’t want to add chunks directly to a component of the grill, you can use a standard chip smoker box and simply put chunks in the box versus chips. Usually these boxes will hold 3-4 small chunks of Double filet. The box also aids in capturing ash.

Here are the options for placement:

  • smoker wood chips in a foil pouch placed over a hot burner or directly on a heat bar/diffuser
  • smoking wood chips in a smoker box placed on the grill grate with the heat under it
  • smoking wood chunks in a smoker box (these will be small pieces about 2×2-inches) place on a grill grate with the heat under it
  • smoker wood chunks directly on a heat bar/diffuser (3-4 pieces) with the heat on medium

Here is a guide on the quantity based on food being smoked as well as type of product. Remember, a wood chip product will combust faster so you will need more of it on hand than wood chunks when hot smoking.

Type Fruits/Vegetables Turkey/Chicken Ribs Pork Shoulder/Brisket
Chips 2 ounces 6 ounces 8 ounces with replenishment needed as they reduce to ash 8 ounces with replenishment needed multiple times
Chunks 2-4 ounces 4-6 ounces 8 ounces – may need to add an 1-2 pieces 8 ounces with replenishment needed at least once

Also, keep in mind that if you’ve purchased a “green” wood or air-dried wood, it likely holds more moisture than a kiln dried products. This will change the weight. Pieces of wood that fall into the “green” category, even if they are the same size, will weigh differently. Work with wood long enough and you’ll develop a feel for what is just about at the perfect weight for smoker or direct-fired cooking.

Adding Wood for Food Smoking to Dual Fuel or Hybrid Grills

With technologies advancing in the grill world you now have so many more options for using charcoal and wood in the convenience of a gas fired grill. For those looking to have that level of ease but the flavors of charcoal and wood at your fingertips, those equipment manufacturers are to be considered. Just get ready to make a substantial investment as these models do not come cheap.

We hope this article provided you with new information about adding wood for food smoking. Leave a comment and remember to follow us on social media for additional tips, techniques, recipes, and great photos. As always, your suggestions on other article topics are always welcome. Hope you can use our blog.

Our Readers Are Asking…

How often should I add wood to my smoker?

There is no fixed rule. The quantity/quality with the right kind of wood, wood that is “moisture managed” produces the best smoke possible. With a consistent cooking fire or heat source, the familiar phrase “less is more” is your guide on adding wood for food smoking, especially when using chips or chunks. When smoke diminishes, add a bit more.


Thursday, March 24, 2022

JUST BECAUSE YOUR SMOKING FOOD (THAT IS!) DOESN’T MAKE IT ALL BAD!

Perhaps the risks associated with dirty, moldy, contaminated wood are too high to ignore anymore.

Recently, I received a very interesting question regarding the safety of ingesting foods and beverages that have been exposed to smoke vapor using hand-held food smokers. Specifically, the question consisted of whether you need to be 18 years of age for items that have been infused with smoke using these gadgets.

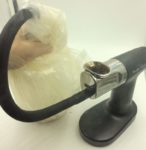
The breville handheld smoker

This got me thinking:

  • does the word “smoke” automatically give off the bad vibe response?
  • why do people only inquire about the smoke without needing to know more about the plant source that produces that smoke?

There is a lot of data out there on carcinogenic effect to high heat grilled foods like burgers, chicken, and steaks, even data on hot smoking foods at lower temperatures. Really, what it all boils down to is, if you grill meats to the point where you blacken them, that increases the risk for the carcinogens. Even if you cook to the blacken state, eating these foods in moderation will halt any real risk over an average person’s lifetime.

So why the question on legality to consume smoked foods and beverages?

If you understand that the tobacco industry had to start putting warning labels on tobacco packaging back in 1966, and smokeless tobacco products in 2010, then you comprehend that smoke vapor does contain toxins. Everything regarding the level of toxicity with cooking is related to the type of food, method of cooking, cooking temperature, and length of cooking time.

Let’s examine those parameters from the handheld food smoking perspective.

You are not cooking the food by this method, merely infusing it with the smoke flavonoids, so there is no temperature (cold smoking technique). You are not exposing the food to smoke vapor for hours – it really comes down to minutes. Most importantly, you are not directly attempting to inhale the smoke vapor into your lungs. Yes, if your standing near the container that is holding the cold smoke when you open it, you will have some exposure but not like the person that takes a drag directly from a tobacco product or is chewing on a tobacco product!

Like anything else in our world, there are risks to everything we do, experience, sense, taste, explore, desire. Hot smoking is another name for roasting just at a lower temperature and usually with cheaper cuts of meat.

SmokinLicious® Double Filet wood chunks are clean and bark free wood pieces that will provide a tasty tinge of smoke to all of your favorite ingredients.
SmokinLicious® Double Filet wood chunks

What should never be compromised is the plant material – the wood – that is used to extract these flavors.

I believe it is time to start asking more questions about the hardwood products being used for the smoking process rather than focusing on the process itself.


Thursday, February 10, 2022

BBQ BOX SMOKER- GRILL ALL YEAR

BBQ Box Smoker should be used as much as your tongs on the gas grill!


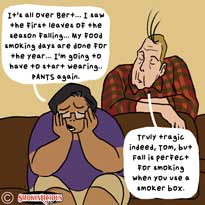
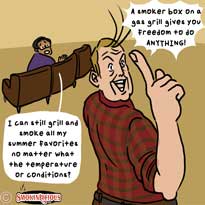
 Bert and Tom discuss when the weather is cold use your BBQ box smoker year round!

We have all been in Tom’s position. We love grilling and smoking but prefer the warmer weather. For those of us in 4 season climates with below zero temperatures in winter and lots of snow, it seems too hard to continuing grilling! But just as Bert remarks, you do not have to give up cooking outdoors just because of the weather.

BBQ Box Smoker- Year-Round Grilling/Smoking

Chef Bert grills year round

Grilling equipment manufacturers are always competing with charcoal grill and smoker manufacturers. That’s why many gas grills have an integrated wood chip drawer to imply that barbecue is possible. If you ever tried these, you likely were disappointed in finding that the intensity of flavor could not compare to charcoal equipment.

At the same time, there was an understanding that not everyone could afford a model of grill that included a built-in smoker box or tray. Thus, the birth of the smoker box. A small, removable, and relatively inexpensive accessory that could be used on any gas grill. Like Bert said, with a smoker box, you can grill-smoke anything!

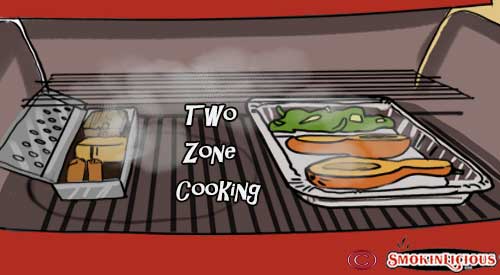
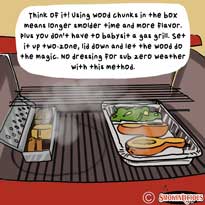
On the gas grill the two zone method, heat and smoker box on one and food on the opposite

But no one ever discussed what should go in the smoker box. The assumption was use a wood chip but you will learn, a wood chunk brings benefits to outdoor cooking never experienced before with the smoker box.

BBQ Box Smoker- Don’t Let the Cold Stop You!

Bert knows when it comes to outdoor cooking in cold weather, you need a means of reducing the number of times you have to add wood. This is the number one reason to use chunks in a smoker box rather than chips.

The Smoker box

With most boxes easily fitting 3 wood chunks, you won’t need to replenish the wood for shorter cook items. Longer cooks will require just a few additional chunks to get the job done.

Gas grills in generally hold a temperature better and don’t react to outdoor ambient temperatures the way charcoal units do. You may need to make some adjustment on the heat level knob to reach your desired temperature but the unit should hold that temperature for the duration of the cooking time.


BBQ Box Smoker- Easy Clean-Up

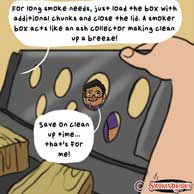
Smoker boxes are made of metal or cast iron giving them durability. Clean up is a breeze as the wood will combust and turn to ash that is trapped in the box. Just dump into a heat safe container and you are all set!

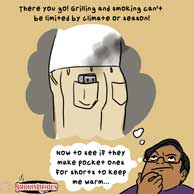
Tom dreaming on how to keep himself warm while winter grilling

Plus, the metal of the box helps to hold and radiate heat keeping the chunks smoldering for a long time.

We don’t think Tom will be lucky enough to find a smoker box that will fit in his pocket but there are a variety of sizes, materials and lid options that should fit any need.

Don’t stop the grilling season when the leaves start to fall. Enjoy flavorful wood-fired foods all year with your new smoker box accessory and premium wood chunks!

Have you used a smoker box on a gas grill? Leave us a comment and subscribe to get our latest tips, techniques, recipes and the science behind the fire and smoke, for all live fire cooking methods. That’s SmokinLicious®!


Thursday, December 16, 2021

GRILLED PRIME RIB THE ULTIMATE WITH WOOD

Our gorgeous color on our Grilled Prime Rib with wood on the gas Grill- Yum!

Yes, prime rib is expensive and likely the reason so many are fearful to take this cut of beef to the grill.  I’m going to take away that fear and show you just how your grill will respect this cut and produce the tender, buttery, crusty outside roast you want.

Although there are different opinions on whether to make a roast with the ribs intact or removed, I am someone who prefers to cook with the ribs in.  I’ll give you tips on doing a boneless version as well if that is your preference.

For now, purchase an 8 lb. or 3 rib roast, get your favorite wood chunks, and get ready to fire up your gas grill using a two-zone cooking method for a prime rib roast you won’t soon forget.

Meat Preparation

Trim off the excess fat and season with Salt! Let site overnight to season

For the most part, my butcher has done most of the trimming.  I will just remove any remaining fat and ensure all the silver skin is gone.  You should see meat all the way around the roast. In the end, I’ve removed about a pound of additional fat.

At this point, I want to add salt to the meat to reduce the amount of water before cooking and tenderize the inner fibers.  For every pound of meat, I sprinkle a ½ teaspoon of kosher salt.  This is called dry brining and will require that the meat be refrigerated for 24 hours after the salt is applied.  I simply salt and wrap the meat in plastic wrap to prevent liquid from leaking, and place in the refrigerator.  Or, you can salt and place in a non-reactive container and leave uncovered.

Char Crust Rub

While the meat is tenderizing with the dry brine, we want to prepare a char crust to be rubbed all over the outside of the roast just before it goes on the grill.  Combine 2 tablespoons fresh rosemary, 1 teaspoon dried rosemary leaves, 2 tablespoons fresh ground black pepper, 2 teaspoons dried oregano, 1 teaspoon garlic powder, 1 teaspoon onion powder, 1 teaspoon paprika, ½ teaspoon chipotle chili powder, and 2 tablespoons prepared horseradish.  I combine all my ingredients with a mortar and pestle.  If it is a bit too thick, just mix in a little water so more of a paste is formed.  Apply the char rub just before cooking and you’re ready to good.

Tasting Notes:

Feel free to incorporate different herbs and spices in the char crust rub.  Some considerations include: thyme, cinnamon, chili powder, clove, ginger, even cocoa powder.

Smoking on the Gas Grill

two zone cooking with the smoker box on the right over the heat and rib roast on the left

I really enjoy cooking a prime cut of beef roast on the gas grill as the two-zone set up makes this low stress.  I prepare my LP/Gas grill by first placing a disposable foil pan under the grill grate on the side I plan to cook on.  This will be my water/drip pan.  I add about ½” of hot water to the pan and place my metal smoker box containing three SmokinLicious® wood chunks on the side I plan to cook on, right under the grill grate.  Now I lite only the burners under the smoker box.  I set these burners to medium heat to start.    Just before I’m ready to grill, I check the temperature readout and adjust my heat setting until I hit my target temperature of 225°F.

Time to add the char crusted rubbed roast to the unlit side of the grill, directly above the drip/water pan.  I insert a thermometer and close the lid.  Basically, for the next couple of hours I just need to monitor that the temperature holds to 225°F and that the water pan has enough water in it.  Only as I get closer to 110°F internal temperature of the meat, do I start to babysit the grill.  This is when I like to brush a bit of butter on the outside of the meat.  It produces great color to the crust.

At 115°F internal temperature, I remove the water/drip pan, meat string ties, and the meat thermometer.  I’m now going to finish the cooking to 130°F internal temperature by direct searing the roast on all sides.  As soon as it reaches or approaches that internal temperature, I immediately get the meat off the grill and serve.

Oue finished roast showing great color and a wood flavoring for and add delite!

Tasting Notes:

We all have a guest who insists they want their meat cook further.  If that is the case, you can add a slice directly to the grill for just a minute or two, turning constantly, to give them what they want.  Yes, you will have someone who wants the meat at 145°F or possibly above.

And don’t forget to save the bones to make our smoked beef broth.

Tasting Notes:

If using a charcoal grill, still use a two-zone cooking set up meaning charcoal on only one side of the grill.  Be sure you only cook with hot coals, no flames.

For those looking for a boneless version of this roast, feel free to request a boneless roast from your butcher, or you can remove the bones yourself and cook separately on the grill for tasty riblets.  Essentially, the preparation is still the same as is the overall cooking temperature and finished meat temperature.

What’s your favorite preparation for prime rib?   Bringing innovation to wood fired cooking with recipes, techniques and the science behind the fire, smoke, and flavor. That’s SmokinLicious®.


Thursday, December 9, 2021

SMOKED HAM ON THE GRILL

Smoked Ham On The Grill Made Easy By Following a Few Tips

Whether you’re preparing ham for a holiday like Easter, Christmas or New Year, for a formal brunch or even for a family special event like a reunion, Christening, or engagement party, you can take this average protein and make it so much more. Even if the ham you purchase has already been smoked, you can take away the factory flavor and truly make it your own with our simple technique for smoking on a gas grill using a two-zone cooking method. Plus, I’ll give you a ham glaze recipe that will make you forever throw away a prepackaged glaze.

Get your gas grill ready, purchase a ham, and bring your game as I give you the easy steps to smoking a ham on the gas grill with wood chunks.

Great Ingredients for a Great Glaze

Today’s hams now come with a variety of labels so let’s cut to the chase to ensure you know what some of them mean. Wet Cured Hams are already smoked but still need to be cooked to kill microbes if they are labeled ‘cook before eating” or need some cooking if labeled “cooked”. These are usually for purchase as a whole, half or bone-in shank ham. Dry Cured Hams have been cured in a lot of salt and usually need to be soaked in ice water before cooking, which removes a great deal of the salt so it’s more edible. Fresh Ham is uncured and uncooked.

for smoked ham on the gas grill

No matter what ham you select, you’ll need a glaze to bring greatness to the meat. For my ham, I’m making an apricot-Dijon glaze that is so flavorful and simple. For my glaze you’ll need the following ingredients:

  • ½ cup apricot preserves
  • ½ cup honey
  • 2 tablespoons brown sugar
  • 1 tablespoon Dijon-style mustard
  • 1-1/2 teaspoons Worcestershire sauce
  • soy sauce – ½ teaspoon
  • paprika – ½ teaspoon, preferably Spanish-style
  • cayenne pepper – ¼ teaspoon
  • black pepper – ¼ teaspoon
  • ¼ teaspoon cinnamon
  • 1/8 teaspoon ground cloves

In a medium bowl, combine the glaze ingredients and mix well. Refrigerate until you need it.

Smoke First

All our apricot glaze ingredients mixed together and ready to baste our ham.

I’ve discussed the different types of ham and the fact that most sold in grocery stores are precooked and often smoked. Don’t let this stop you from doing your own smoking. To start, you’ll need to trim the fat that is still present on the pre-smoked ham. That means, trim to within a 1/4 inch. Remember, smoke vapor will not penetrate through fat. After trimming, you’ll need to score the meat in the traditional checkerboard pattern. Knife cuts measuring ¼ inch in depth are produced first vertically and then horizontally, leaving about 1-inch spacing between cuts.


Preparing the Gas Grill

For this recipe on our as grill, we used a two zone approach; heat applied below the SmokinLicious Single Filet smoker wood chunk and no heat underneath the ham.Once trimmed and scored, it’s time to prepare the gas grill. Light the burners on one side of the grill and set to medium-high heat. We want to maintain a cooking temperature of about 275°F. Leave the other half of the burners off as that will be the cooking area for the ham. This technique is the two-zone cooking set up. Place 2 single filet wood chunks from SmokinLicious® directly on the heat shield of the lit burner. These will heat and release the smoke vapor and add flavor to our ham. Total time cooking the ham in this manner will be about 30 minutes. The ham is placed on the cold half of the grill with the flat side of the ham on the grate.

After 30 minutes, take two long sheets of heavy-duty foil and place the ham on the foil. Take your pre-made glaze and cover the ham with about half of the glaze mixture. Now, fold the foil around the ham sealing at the top. Place the foil-wrapped ham back on the cold side of the grill and insert a meat thermometer in the meat at least 1-inch away from the bone if you have a bone-in cut of ham. Let cook until the thermometer registers 130°F. Every 15 minutes, brush the ham with glaze dripping that have collected in the bottom of the foil. Once cooked to 130°F, remove the ham from the foil, drain the residual glaze back into a saucepan with remaining uncooked glaze you had reserved and allowed to heat on low.

Final Step to Crisp Skin

Place the unwrapped basted ham on the hot grill to crisp the outer skin. Be careful not to over cook!After removal from the foil, there is one final step before serving. The skin requires just a bit of crisping which will be done on the hot side of the grill. Place one side of the ham on the hot side of the grill allowing the glaze sugars to caramelize for just a few minutes per side. Do not do the flat side of the ham and do not allow the sugars to burn. Once the three sides are done, remove to a cutting board and slice. Serve the residual glaze on the side. Now you must try Smoked ham on the gas grill!


Thursday, November 18, 2021

SMOKED TURKEY- NOT-SO-SMOKEY!

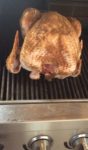
Our not so smokey Smoked Turkey is from cooking this on the gas grill, not on a smoker. We selected this photo because of the great color- not dark like a traditional smoker can impart!

Turkey is one of those items that is generally made for a special event – Thanksgiving, Christmas, New Year – and not associated with everyday cooking.  I’m here to tell you that it’s easy to enjoy turkey any time of year when you use a gas grill for the cooking and smoke infusion.  All you need is a turkey (preferably one under 15 lbs.), 6 wood chunks, a water pan with hot water, and your favorite gas grill.

Smoked Turkey- Turkey 101 Prep

Preparing the Turkey

I’m fortunate to have a local fresh turkey farm, Sprague’s Turkey Farm in Portville, NY, close by so I’ve ordered one that is under 14 lbs.  Before preparing the turkey for marinating overnight, I first need to remove the parts that are commonly found inside the turkey.  This includes the neck, heart, liver, and gizzard which is part of the turkey’s digestive tract.  These parts do make for great stock so if you can, save them to add to a stockpot down the road.

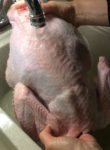
Once the organs and neck are removed, it’s important to wash the entire turkey under running water.  After a thorough wash, pat dry with some paper towels and place in a shallow pan for the rub application.

Herb and Spice Rub

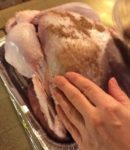
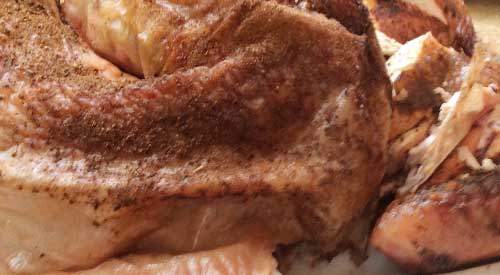
Gently placing the rub on the outside of the Turkey

After washing and patting dry the turkey, I trim the excess skin from the neck area and then begin applying the rub.  I’ve combined an assortment of herbs and spices for my rub as I tend to like a potent mix of ingredients to balance the fresh meat and smoke.  My rub includes: allspice, clove, basil, cumin, cardamom, coriander, cinnamon, celery salt, garlic and onion powder, oregano, orange and lemon peel, paprika, and ancho chili powder.  I make sure to cover the entire surface of the bird.  I add a few drops of avocado oil and then apply additional rub.  This will be refrigerated overnight to allow the flavors to marry and penetrate to the meat.

Tasting Notes: Feel free to incorporate different herbs and spices in your rub as there are no rules when it comes to combinations. 

Smoked Turkey- Smoking on the Gas Grill

Placing the Turkey on the grill

As you can see in some of the photos, this was a cold day at the grill, with a temperature below 25°F.  I prepare my LP/Gas grill by first removing one of the grill grates, exposing two of my burner shields.  To one of the shields I place 3 double filet wood chunks from SmokinLicious®.  Now I lite only two burners; the one with the wood chunks and the one directly next to that.  I set these burners to medium heat to start.    Just before I’m ready to grill, I check the temperature readout and adjust my heat setting until I hit my target temperature of 325°F.

Time to add the rubbed turkey to the unlit side of the grill and my water pan right next to the bird.  I insert a thermometer and close the lid.  Basically, for the next couple of hours, I just need to monitor that the water pan has enough hot water in it and the bird gets spritz with water to keep the skin moist.

Tasting Notes: Although I’ve placed my water pan to the side of my turkey, between the lit and unlit sides of the grill, you can use this as a drip pan and place this directly under the turkey.  I elected not to do this today due to my low outdoor temperature.

Time to Serve Your Smoked Turkey!

Our not so smokey smoked turkey on the table for all the guests to enjoy

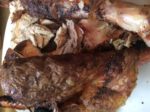
If you’ve maintained the steady temperature of 325°F and hot water in the drip pan, you won’t need to stay with the grill during most of the turkey’s cooking time.  My skin has crisped up thanks to maintaining moisture both on the bird’s skin and in the cooker with my water pan.  I remove the turkey and take it to the kitchen where I cover it for about 30 minutes prior to carving.  It’s super tender, moist, with a crunch to the skin.  The best part is that the smoke is subtle and does not over power the fresh meat.

That’s why the two-zone method of smoking is perfect when your feeding a variety of tastes.  Those that tend to avoid smoked foods will find this full of flavor that is well balanced due to our rub and consistent cooking temperature.  My turkey of 13-1/2 pounds took just about 4 hours to finish with very little effort on my part, even with a 22°F outdoor temperature and wind chill.  The best part is my oven was free to cook a bunch of side dishes so everything was timed perfectly for the table.

What’s your favorite preparation for turkey?   Bringing innovation to wood fired cooking with recipes, techniques and the science behind the fire, smoke, and flavor. That’s SmokinLicious®.


Thursday, October 28, 2021

DOES SIZE MATTER?

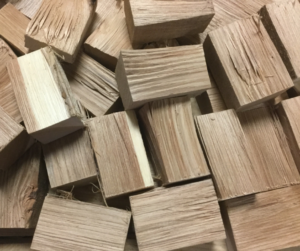
Our double filet wood chunks can fit where size matters for your smoker or cooker unit

I’m sure you’ve had the experience of going into a store and locating the limited supply of wood chips and/or chunks offered, then look closer at the clear plastic bag and ask: Is this it?

It’s always interesting to realize what we are willing to accept versus what we really want.

My Team has spent a lot of time examining the products available in the wood chip line. Boy, have we learned a lot!

For instance, there seem to be two divisions with chip suppliers: those that manufacture wood chips as a waste product to another product line say cleaning agents, animal bedding, or flooring products. Then there are those that offer a product with a brand name on it that may be associated with a specific equipment manufacturer. Generally, that type of supplier is not the manufacturer of the product just simply a re-seller under a brand name. Thus, you can’t be sure what portion of the tree is actually in the bag and where the wood is coming from!

We still hold ourselves to a higher standard believing that a true cooking wood manufacturer should offer different variations in product size to work with the abundance of equipment lines available. That’s why we pride ourselves on being able to offer over 6 chip sizes and 4 chunk sizes. Like other food ingredients, why would you settle for only ground pepper when you can have the whole peppercorn as an option.

We are a food ingredient, a food flavor. Most of all, we are a COOKING WOOD manufacturer!


Thursday, October 21, 2021

Wood Fired Cauliflower- Roasted on a LP/Gas Grill

Look at this great head of wood fired cauliflower over wood chunks!


It’s time to bring your vegetables into grilling season! Nothing beats the smell of a fresh garden vegetable roasting over wood even on an LP/gas grill. Make this the time of the year you’ll get great char wood flavour in your seasonal vegetables.

Ingredients:

  • An LP or gas grill – any brand or size will do.
  • “Double” Filet wood chunks from SmokinLicious®.
  • a couple of heads of cauliflower. Pick the color you like the best – white, yellow or even purple!

Grill Preparation

If you want to add special wood flavoring to your LP/Gas grill there are easy steps to follow:

  • Make sure your grill is clean from any significant grease build up.
  • Remove the grilling grates and determine how much space is between the diffuser and the grilling grate.
  • The diffuser is the plate covering the unit’s gas burner(s).
  • Don’t remove the cover.
[setting up the wood chunks on the heat Diffuser to develop hot spots for Charring]
[setting up the wood chunks on the heat Diffuser to develop hot spots for Charring]

Once you have the sizing computed, then select the SmokinLicious® wood chunk size that will fit – Single Filet which is ~4 inches or the Double Filet which is ~2 inches.


Wood Preparation

Now, let’s set up the wood on the grill. Remove the cooking grates from the grill then strategically place the wood chunks over the heat diffuser. This is the metal piece covering the actually gas burners. If the SmokinLicious® wood chunks are fresh, then you can add them directly to the unit without pre-soaking them. If not, you may want to consider a lite soaking of about 15 minutes. Because I’m cooking wood fired cauliflower, I am using the chunks in their natural state. However, feel free to consider a pre-soak in liquid with flavouring such as beer, wine or juice.


Now replace the grill grates back on the unit, over the SmokinLicious® wood chunks! Make sure the grates are securely seated back on the unit. If there is a lot of space on your unit between the diffuser and the grate you may want to consider a SmokinLicious® single filet or block item. Now light the unit, set the dials to a low heat setting and bring the unit up to temperature. Say around 180 degrees. Do not overheat the unit.

Wood Fired Cauliflower- Preparation

In preparing my wood fired cauliflower for this cook, I’ve elected not to reduce the cauliflower heads into pieces. I prefer to do the cutting towards the end of my grilling presentation.

After pre-heating the grill to around 180 degrees, I add the cauliflower heads to the grill grates. Let the wood infusion flavour begin!

[ Fresh heads added to the grill, note the wood has not ignited yet to develop a hot spot]
[ Fresh heads added to the grill, note the wood has not ignited yet to develop a hot spot]

Roasting Process for Wood Fired Cauliflower

I position the wood fired cauliflower head over the hot spots created by the SmokinLicious® “Double” filet wood pieces which are under the grilling grates. The wood will ignite and begin the charring stage of the heads of cauliflower. I recommend bunching the wood pieces together to produce a hot spot on the LP/gas grill to allow for a direct char technique. While I am not using the smoke from the wood, I am still infusing great natural grilling flavour with the wood.

[Now I have hot spots and look a the char we are putting on the wood fired cauliflower. The green is the Parsley I add at the end of the process]
[Now I have hot spots and look a the char we are putting on the wood fired cauliflower. The green is the Parsley I add at the end of the process]

My cooking is taking place with an open lid because I want to char not smoke! It’s important to keep turning the heads so the flavour will be even. In the final stage of charring, I add some fresh parsley to the wood fired cauliflower heads for final flavour and presentation. And, of course, I love to drizzle melted butter sometimes infused with paprika, to the finished product.

Remember this is a vegetable, not meat so there is no grease to flare up the LP/gas grill. This is another example of why using SmokinLicious® Wood Chunks on the diffuser and under the grill grates of your LP/gas unit can generate such exceptional wood-fired flavour. Now, get to those heads of your wood fired cauliflower and ENJOY!


Thursday, September 2, 2021

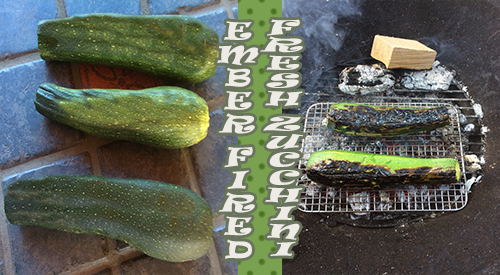
EMBER FIRED FRESH ZUCCHINI

Zucchini is a great vegetable to not only grill but ember cook. It has the density to hold up over the high heat. Add a distinct char taste to this abundant vegetable either as a side dish or an ingredient by making ember fired fresh zucchini.

I love thick-skinned vegetables that come in season during Summer.  They are the perfect items to light a fire and make some hot coals to ember fire flavor into them.

We’re getting ready to coal roast one of my favorite vegetables – zucchini!  This is so simple to do and produces an extraordinary flavor for zucchini to be eaten on its own or to be used in your favorite recipe.  Clean out the fire pit, charcoal grill or outdoor fireplace and prepare to roast “ember fired fresh zucchini” directly on the hot coals.

Building A Small Fire

Starting the fire to burn down the wood into coalsKnow this from the start – You do not need a large fire!  A small fire is best to accomplish your cooking in about an hour’s time.  For my fire, I am using ten SmokinLicious Single Filet Wood Chunks in Ash with a couple of pieces of charwood that were left over from a previous cook.   Why Ash hardwood?  Because it is hands down, the best hardwood to produce an even bed of coals which is what you want when you coal roast.
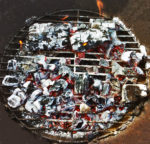
I stack the wood so there is quite a bit of air space between the pieces.  This ensures I have good oxygen flow to produce combustion quickly. My technique is to stand the wood pieces on their end and make a circle. I try to have a couple of pieces in the center kind of tipped on to each other.  Remember, you want to produce hot embers quickly so it only requires a little wood and a lot of oxygen to burn things down.  I light my wood using a small butane torch. Leave the torch in place until I’m sure the wood has ignited.  I keep the lid off my charcoal grill so I can push the combustion process through completion and get those ash covered, hot embers.

Red Means Hot

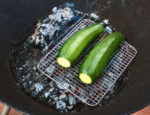
Red Hot coals is the goal before adding the zucchiniYou will know when the coals or embers are ready for cooking when you have uniform coals and they are glowing red from the bottom and gray on top.  I keep a couple of larger coals banked to the side to maintain heat and for reserved hot coals. Just in case I need to rake more to the cooking side.  I like to nestle a high heat metal cooking rack on the hot coals and then place my whole zucchini on the rack.  This allows for little ash to accumulate on the skin.  Remember, those coals are very hot so the zucchini will take less than 20 minutes to tenderize and char.
Turn For Full Char

Zucchini on the grilling rack over the hot fire coalsWith the zucchini and coal rack in place, I give the embers about 8 minutes to char and cook the first side of the zucchini.  After that time, I gently turn the zucchini so that each side gets an even char.  Once the first 8 minutes are done, there will be less time needed for each of the other sides as the zucchini will hold heat.  I’ve added one additional wood piece to my banked fire just to be sure I have enough heat in the coal area.  I will not put the lid on the unit during the entire cooking process as this is open fire cooking.  My total coal cooking time is approximately 16 minutes.
Perfection In Smoke & Char on Ember Fired Fresh Zucchini

Dr. Smoke's clock for the cooking time requiredAfter placing my ember fired fresh zucchini on hot coals for about 16 minutes total, turning several times to get an even char, this spectacular vegetable is ready for eating.  You will see, there is very little coal bed left following this technique so remember, if you are cooking more than a couple of zucchini, you will need a larger coal bed.
For those of you thinking that the black, charred skin will be bitter and not appealing to eat, think again.  Most of the char will rub right off but the flavor will be infused throughout the ember fired fresh zucchini.  I’ve sliced mine about ¼-inch thick as I plan to make a galette of ricotta, garlic oil, and basil.

The Culinary Crew wants you to know…

… that ember roasting is ideal to boost up the bland, delicately flavored zucchini and will add a rich, wood-fired taste dimension to any dish featuring this exquisite summer squash.  So, be prepared to enjoy a rich, char-smoked variation of your ratatouille, quesadillas, stuffed zucchini or soups from ember cooked zucchini!


Thursday, August 19, 2021

USING ALUMINUM FOIL IN SMOKING: PROS & CONS

We discuss the pros and cons for using aluminum foil in smoking foods- in particular your BBQ and how it can affect the food.

“Does using aluminum foil in smoking foods still allow the wood flavor to penetrate?”

It is a common question heard when it comes to hot smoking. In fact, there is even a technique called the Texas Crutch that relies on wrapping meats like ribs, pork shoulder, and brisket in foil with 1-2 ounces of liquid into the foil and then sealing all ends tightly so no liquid or steam escapes. This process tenderizes and speeds the overall cooking process, which with hot smoking, can be quite lengthy.

Here’s the thing – when you use this technique, you do so after the meat product has cooked to about 135-150°F. That means a great deal of smoke flavor has already penetrated. What about if you start out smoking foods in foil? Let’s look at the pros and cons of smoking foods in foil, information you can use for traditional oven cooking as well.

Con #1

Aluminum leaches into foods that are wrapped in it. Current research indicates that the average person can tolerate about 2400mg of aluminum exposure per day due to our body’s ability to excrete the small amounts of this metal efficiently. Therefore, any ingestion levels over this would be considered a health risk by the World Health Organization.

Pro #1

Aluminum foil is disposable so it is a convenience. There is no clean up when you cook foods in foil and often there are recycling programs that accept used foil. It can save on degrading your cookware and grill grates.

Con #2

Aluminum is found in other items like corn, yellow cheese, salt, herbs, spices, tea, cooking utensils, and in over-the-counter medications like antacids. A derived from aluminum is also used during the purification process of drinking water. These all must factor into the recommended daily intake of this metal, meaning you need to assess whether cooking in foil will put you over the daily recommended limit.

Pro #2

Aluminum foil aides in producing a convection heat as it is an excellent heat conductor. Thus, cooking times can be significantly reduced when foods are placed in foil.

Con #3

Foods with higher levels of acid have a higher rate of leaching aluminum into them. This is true whether the acidic ingredient is in solid or liquid form. In fact, acidic liquids have a higher leaching rate than solids. Give this consideration when working with foods such as tomatoes, vinegar and citrus items.

Pro #3

Using aluminum foil can tenderize tougher cuts of meat when you include an ounce or two of liquid. Additionally, aluminum foil is leak proof when you seal all ends.

Con #4

When you cook acidic ingredients in foil, both the appearance and taste of the foods can be altered by the reaction to aluminum. The tastes are often described as metallic.

Smoking Considerations

From the smoking perspective, if you start the foods on the grill grates without any aluminum foil, cook until 135-150°F internal temperature, and then wrap in foil to finish, you likely will find very little change in taste. Ingredients containing acid would have cooked down and not be at a level that would interact as aggressively with the aluminum.

If you do elect to cook on the smoker, charcoal grill or LP grill with foil, know that you can see firsthand the reaction of the aluminum with food ingredients. You can see the wood molecules by the smoke vapor particles that develops on the outside surface of the foil. As foil is a heat conductor, it also is somewhat of a sponge and will steal some of the smoke vapor particles from the food.

Remember, one of the key benefits to using aluminum foil is its ability to seal tightly whether preventing spillage to a piece of cookware or sealing in liquids for cooking. Cooking smoked items wrapped in foil from start to finish will not allow for full penetration of the smoke vapor particles that account for the unique color, texture, and taste to smoked foods. Plus, you likely will increase your risk of health issues with repeated exposure to high aluminum levels.

Thank you for the question submission and we hope you found value in our information. We welcome all types of questions and encourage you to follow and subscribe to our social channels so you don’t miss anything. We look forward to providing you with tip, techniques, recipes, and science for all types of wood-fired cooking.


Thursday, July 22, 2021

WOOD GRILLING AVOCADO

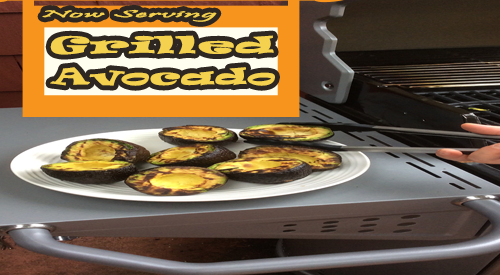
Our nicely grill marked avocado halves look yummy after we did our wood grilling avocado technique explained in this blog.
Wood grilling avocado is a fun way to add different flavor to this wonderful fruit.

 Oh, the wonderful, healthy, creamy, flavorful avocado.  With more potassium than a banana and 18 amino acids for daily intake, you can’t go wrong with this single seed fruit.

Did you ever think to grill this fabulous fruit with a little wood to give it even more flavor?  We’ll show you just how easy it is to wood grilling avocado on the gas grill using wood chunks for your smoke infusion.

Making It More Than A Grill

Regardless of the brand of gas grill you have, you can add wood chunks to the grill for wood fired flavor.  My grill has heat shields over the burners so I use that area to add one small wood chunk under the grill grate, directly on the heat shield.  No, you won’t damage your grill, as the wood combusts to ash and basically blows away.

One chunk is all it will take to get great flavor into the avocados.  I keep the burner that the wood chunk is located on set to medium as well as the burner next to that one on medium.  Since I have 4 burners, 2 are on and 2 are off.

Once the grill is to 300° F, this technique will take less than 20 minutes.

Simple Wood Grilling Avocado Preparation

The only preparation needed for the avocados is to cut them in half and remove the seed.  The avocados are placed flesh side down on the grate only on the side with the burners off.  The heat captured within the grill will spread throughout the grilling area and cook the avocado while adding wood smoke vapor.  Note, it’s important that you don’t attempt to move the avocados for at least 10 minutes otherwise you will find the avocado flesh will stick to the grate and you’ll lose much of the fruit’s flesh.  Wait until some of the fat renders and chars making removal so simple.

Prep To Finish In Less Than 20 Minutes

In less than 20 minutes you will have wonderfully wood flavored, charred flesh avocados ready for your favorite recipes.  Think of using this fruit in smoothies, dips, on salads, as a creamy ingredient for sauces – remember, avocado can be used to substitute the amount of butter used in most recipes.  We will take some of our avocado and make a wood fired guacamole first.  Our recipe will post soon so stay tuned and don’t’ forget to send us your pics of wood fired avocado.

Did you get motivated to fire up the grill with wood?  Send us a comment or your avocado fired pics and don’t forget to subscribe.  Bringing  you fun, innovative tips, techniques and recipes on all wood fired methods for foods, beverages, spices, herbs and so much more.


Thursday, July 8, 2021

BBQ BOX SMOKER LET’S YOU GRILL ALL YEAR


BBQ Box Smoker should be used as much as your tongs on the gas grill!
BBQ Box Smoker should be used as much as your tongs on the gas grill

  Bert and Tom discuss when the weather is cold use your BBQ box smoker year round! 

We have all been in Tom’s position. We love grilling and smoking but prefer the warmer weather. For those of us in 4 season climates with below zero temperatures in winter and lots of snow, it seems too hard to continuing grilling! But just as Bert remarks, you do not have to give up cooking outdoors just because of the weather.

 Chef Bert grills year round

Year Round Grilling

Grilling equipment manufacturers are always competing with charcoal grill and smoker manufacturers. That’s why many gas grills have an integrated wood chip drawer to imply that barbecue is possible. If you ever tried these, you likely were disappointed in finding that the intensity of flavor could not compare to charcoal equipment.

At the same time, there was an understanding that not everyone could afford a model of grill that included a built-in smoker box or tray. Thus, the birth of the smoker box. A small, removable, and relatively inexpensive accessory that could be used on any gas grill. Like Bert said, with a smoker box, you can grill-smoke anything!

But no one ever discussed what should go in the smoker box. The assumption was use a wood chip but you will learn, a wood chunk brings benefits to outdoor cooking never experienced before with the smoker box.

On the gas grill the two zone method, heat and smoker box on one and food on the opposite

Don’t Let the Cold Stop You!

Bert knows when it comes to outdoor cooking in cold weather, you need a means of reducing the number of times you have to add wood. This is the number one reason to use chunks in a smoker box rather than chips.

With most boxes easily fitting 3 wood chunks, you won’t need to replenish the wood for shorter cook items. Longer cooks will require just a few additional chunks to get the job done.

Gas grills in generally hold a temperature better and don’t react to outdoor ambient temperatures the way charcoal units do. You may need to make some adjustment on the heat level knob to reach your desired temperature but the unit should hold that temperature for the duration of the cooking time.

Easy Clean-Up

The Smoker box

Smoker boxes are made of metal or cast iron giving them durability. Clean up is a breeze as the wood will combust and turn to ash that is trapped in the box. Just dump into a heat safe container and you are all set!

Plus, the metal of the box helps to hold and radiate heat keeping the chunks smoldering for a long time.

Tom dreaming on how to keep himself warm while winter grilling

We don’t think Tom will be lucky enough to find a smoker box that will fit in his pocket but there are a variety of sizes, materials and lid options that should fit any need.

Don’t stop the grilling season when the leaves start to fall. Enjoy flavorful wood-fired foods all year with your new smoker box accessory and premium wood chunks!

Have you used a smoker box on a gas grill? Leave us a comment and subscribe to get our latest tips, techniques, recipes and the science behind the fire and smoke, for all live fire cooking methods. That’s SmokinLicious®!