Showing posts with label gas grill. Show all posts

Thursday, February 10, 2022

BBQ BOX SMOKER- GRILL ALL YEAR

BBQ Box Smoker should be used as much as your tongs on the gas grill!


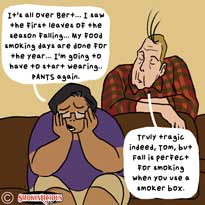
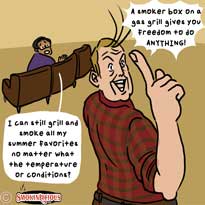
 Bert and Tom discuss when the weather is cold use your BBQ box smoker year round!

We have all been in Tom’s position. We love grilling and smoking but prefer the warmer weather. For those of us in 4 season climates with below zero temperatures in winter and lots of snow, it seems too hard to continuing grilling! But just as Bert remarks, you do not have to give up cooking outdoors just because of the weather.

BBQ Box Smoker- Year-Round Grilling/Smoking

Chef Bert grills year round

Grilling equipment manufacturers are always competing with charcoal grill and smoker manufacturers. That’s why many gas grills have an integrated wood chip drawer to imply that barbecue is possible. If you ever tried these, you likely were disappointed in finding that the intensity of flavor could not compare to charcoal equipment.

At the same time, there was an understanding that not everyone could afford a model of grill that included a built-in smoker box or tray. Thus, the birth of the smoker box. A small, removable, and relatively inexpensive accessory that could be used on any gas grill. Like Bert said, with a smoker box, you can grill-smoke anything!

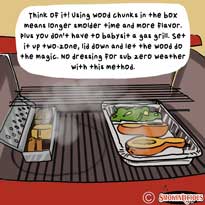
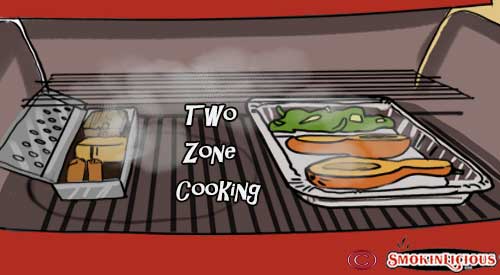
On the gas grill the two zone method, heat and smoker box on one and food on the opposite

But no one ever discussed what should go in the smoker box. The assumption was use a wood chip but you will learn, a wood chunk brings benefits to outdoor cooking never experienced before with the smoker box.

BBQ Box Smoker- Don’t Let the Cold Stop You!

Bert knows when it comes to outdoor cooking in cold weather, you need a means of reducing the number of times you have to add wood. This is the number one reason to use chunks in a smoker box rather than chips.

The Smoker box

With most boxes easily fitting 3 wood chunks, you won’t need to replenish the wood for shorter cook items. Longer cooks will require just a few additional chunks to get the job done.

Gas grills in generally hold a temperature better and don’t react to outdoor ambient temperatures the way charcoal units do. You may need to make some adjustment on the heat level knob to reach your desired temperature but the unit should hold that temperature for the duration of the cooking time.


BBQ Box Smoker- Easy Clean-Up

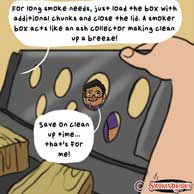
Smoker boxes are made of metal or cast iron giving them durability. Clean up is a breeze as the wood will combust and turn to ash that is trapped in the box. Just dump into a heat safe container and you are all set!

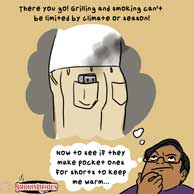
Tom dreaming on how to keep himself warm while winter grilling

Plus, the metal of the box helps to hold and radiate heat keeping the chunks smoldering for a long time.

We don’t think Tom will be lucky enough to find a smoker box that will fit in his pocket but there are a variety of sizes, materials and lid options that should fit any need.

Don’t stop the grilling season when the leaves start to fall. Enjoy flavorful wood-fired foods all year with your new smoker box accessory and premium wood chunks!

Have you used a smoker box on a gas grill? Leave us a comment and subscribe to get our latest tips, techniques, recipes and the science behind the fire and smoke, for all live fire cooking methods. That’s SmokinLicious®!


Thursday, December 9, 2021

SMOKED HAM ON THE GRILL

Smoked Ham On The Grill Made Easy By Following a Few Tips

Whether you’re preparing ham for a holiday like Easter, Christmas or New Year, for a formal brunch or even for a family special event like a reunion, Christening, or engagement party, you can take this average protein and make it so much more. Even if the ham you purchase has already been smoked, you can take away the factory flavor and truly make it your own with our simple technique for smoking on a gas grill using a two-zone cooking method. Plus, I’ll give you a ham glaze recipe that will make you forever throw away a prepackaged glaze.

Get your gas grill ready, purchase a ham, and bring your game as I give you the easy steps to smoking a ham on the gas grill with wood chunks.

Great Ingredients for a Great Glaze

Today’s hams now come with a variety of labels so let’s cut to the chase to ensure you know what some of them mean. Wet Cured Hams are already smoked but still need to be cooked to kill microbes if they are labeled ‘cook before eating” or need some cooking if labeled “cooked”. These are usually for purchase as a whole, half or bone-in shank ham. Dry Cured Hams have been cured in a lot of salt and usually need to be soaked in ice water before cooking, which removes a great deal of the salt so it’s more edible. Fresh Ham is uncured and uncooked.

for smoked ham on the gas grill

No matter what ham you select, you’ll need a glaze to bring greatness to the meat. For my ham, I’m making an apricot-Dijon glaze that is so flavorful and simple. For my glaze you’ll need the following ingredients:

  • ½ cup apricot preserves
  • ½ cup honey
  • 2 tablespoons brown sugar
  • 1 tablespoon Dijon-style mustard
  • 1-1/2 teaspoons Worcestershire sauce
  • soy sauce – ½ teaspoon
  • paprika – ½ teaspoon, preferably Spanish-style
  • cayenne pepper – ¼ teaspoon
  • black pepper – ¼ teaspoon
  • ¼ teaspoon cinnamon
  • 1/8 teaspoon ground cloves

In a medium bowl, combine the glaze ingredients and mix well. Refrigerate until you need it.

Smoke First

All our apricot glaze ingredients mixed together and ready to baste our ham.

I’ve discussed the different types of ham and the fact that most sold in grocery stores are precooked and often smoked. Don’t let this stop you from doing your own smoking. To start, you’ll need to trim the fat that is still present on the pre-smoked ham. That means, trim to within a 1/4 inch. Remember, smoke vapor will not penetrate through fat. After trimming, you’ll need to score the meat in the traditional checkerboard pattern. Knife cuts measuring ¼ inch in depth are produced first vertically and then horizontally, leaving about 1-inch spacing between cuts.


Preparing the Gas Grill

For this recipe on our as grill, we used a two zone approach; heat applied below the SmokinLicious Single Filet smoker wood chunk and no heat underneath the ham.Once trimmed and scored, it’s time to prepare the gas grill. Light the burners on one side of the grill and set to medium-high heat. We want to maintain a cooking temperature of about 275°F. Leave the other half of the burners off as that will be the cooking area for the ham. This technique is the two-zone cooking set up. Place 2 single filet wood chunks from SmokinLicious® directly on the heat shield of the lit burner. These will heat and release the smoke vapor and add flavor to our ham. Total time cooking the ham in this manner will be about 30 minutes. The ham is placed on the cold half of the grill with the flat side of the ham on the grate.

After 30 minutes, take two long sheets of heavy-duty foil and place the ham on the foil. Take your pre-made glaze and cover the ham with about half of the glaze mixture. Now, fold the foil around the ham sealing at the top. Place the foil-wrapped ham back on the cold side of the grill and insert a meat thermometer in the meat at least 1-inch away from the bone if you have a bone-in cut of ham. Let cook until the thermometer registers 130°F. Every 15 minutes, brush the ham with glaze dripping that have collected in the bottom of the foil. Once cooked to 130°F, remove the ham from the foil, drain the residual glaze back into a saucepan with remaining uncooked glaze you had reserved and allowed to heat on low.

Final Step to Crisp Skin

Place the unwrapped basted ham on the hot grill to crisp the outer skin. Be careful not to over cook!After removal from the foil, there is one final step before serving. The skin requires just a bit of crisping which will be done on the hot side of the grill. Place one side of the ham on the hot side of the grill allowing the glaze sugars to caramelize for just a few minutes per side. Do not do the flat side of the ham and do not allow the sugars to burn. Once the three sides are done, remove to a cutting board and slice. Serve the residual glaze on the side. Now you must try Smoked ham on the gas grill!


Thursday, November 18, 2021

SMOKED TURKEY- NOT-SO-SMOKEY!

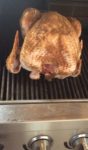
Our not so smokey Smoked Turkey is from cooking this on the gas grill, not on a smoker. We selected this photo because of the great color- not dark like a traditional smoker can impart!

Turkey is one of those items that is generally made for a special event – Thanksgiving, Christmas, New Year – and not associated with everyday cooking.  I’m here to tell you that it’s easy to enjoy turkey any time of year when you use a gas grill for the cooking and smoke infusion.  All you need is a turkey (preferably one under 15 lbs.), 6 wood chunks, a water pan with hot water, and your favorite gas grill.

Smoked Turkey- Turkey 101 Prep

Preparing the Turkey

I’m fortunate to have a local fresh turkey farm, Sprague’s Turkey Farm in Portville, NY, close by so I’ve ordered one that is under 14 lbs.  Before preparing the turkey for marinating overnight, I first need to remove the parts that are commonly found inside the turkey.  This includes the neck, heart, liver, and gizzard which is part of the turkey’s digestive tract.  These parts do make for great stock so if you can, save them to add to a stockpot down the road.

Once the organs and neck are removed, it’s important to wash the entire turkey under running water.  After a thorough wash, pat dry with some paper towels and place in a shallow pan for the rub application.

Herb and Spice Rub

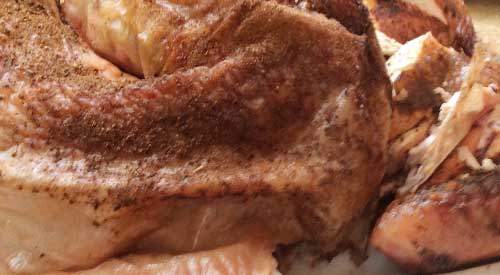
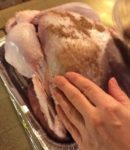
Gently placing the rub on the outside of the Turkey

After washing and patting dry the turkey, I trim the excess skin from the neck area and then begin applying the rub.  I’ve combined an assortment of herbs and spices for my rub as I tend to like a potent mix of ingredients to balance the fresh meat and smoke.  My rub includes: allspice, clove, basil, cumin, cardamom, coriander, cinnamon, celery salt, garlic and onion powder, oregano, orange and lemon peel, paprika, and ancho chili powder.  I make sure to cover the entire surface of the bird.  I add a few drops of avocado oil and then apply additional rub.  This will be refrigerated overnight to allow the flavors to marry and penetrate to the meat.

Tasting Notes: Feel free to incorporate different herbs and spices in your rub as there are no rules when it comes to combinations. 

Smoked Turkey- Smoking on the Gas Grill

Placing the Turkey on the grill

As you can see in some of the photos, this was a cold day at the grill, with a temperature below 25°F.  I prepare my LP/Gas grill by first removing one of the grill grates, exposing two of my burner shields.  To one of the shields I place 3 double filet wood chunks from SmokinLicious®.  Now I lite only two burners; the one with the wood chunks and the one directly next to that.  I set these burners to medium heat to start.    Just before I’m ready to grill, I check the temperature readout and adjust my heat setting until I hit my target temperature of 325°F.

Time to add the rubbed turkey to the unlit side of the grill and my water pan right next to the bird.  I insert a thermometer and close the lid.  Basically, for the next couple of hours, I just need to monitor that the water pan has enough hot water in it and the bird gets spritz with water to keep the skin moist.

Tasting Notes: Although I’ve placed my water pan to the side of my turkey, between the lit and unlit sides of the grill, you can use this as a drip pan and place this directly under the turkey.  I elected not to do this today due to my low outdoor temperature.

Time to Serve Your Smoked Turkey!

Our not so smokey smoked turkey on the table for all the guests to enjoy

If you’ve maintained the steady temperature of 325°F and hot water in the drip pan, you won’t need to stay with the grill during most of the turkey’s cooking time.  My skin has crisped up thanks to maintaining moisture both on the bird’s skin and in the cooker with my water pan.  I remove the turkey and take it to the kitchen where I cover it for about 30 minutes prior to carving.  It’s super tender, moist, with a crunch to the skin.  The best part is that the smoke is subtle and does not over power the fresh meat.

That’s why the two-zone method of smoking is perfect when your feeding a variety of tastes.  Those that tend to avoid smoked foods will find this full of flavor that is well balanced due to our rub and consistent cooking temperature.  My turkey of 13-1/2 pounds took just about 4 hours to finish with very little effort on my part, even with a 22°F outdoor temperature and wind chill.  The best part is my oven was free to cook a bunch of side dishes so everything was timed perfectly for the table.

What’s your favorite preparation for turkey?   Bringing innovation to wood fired cooking with recipes, techniques and the science behind the fire, smoke, and flavor. That’s SmokinLicious®.


Thursday, October 21, 2021

Wood Fired Cauliflower- Roasted on a LP/Gas Grill

Look at this great head of wood fired cauliflower over wood chunks!


It’s time to bring your vegetables into grilling season! Nothing beats the smell of a fresh garden vegetable roasting over wood even on an LP/gas grill. Make this the time of the year you’ll get great char wood flavour in your seasonal vegetables.

Ingredients:

  • An LP or gas grill – any brand or size will do.
  • “Double” Filet wood chunks from SmokinLicious®.
  • a couple of heads of cauliflower. Pick the color you like the best – white, yellow or even purple!

Grill Preparation

If you want to add special wood flavoring to your LP/Gas grill there are easy steps to follow:

  • Make sure your grill is clean from any significant grease build up.
  • Remove the grilling grates and determine how much space is between the diffuser and the grilling grate.
  • The diffuser is the plate covering the unit’s gas burner(s).
  • Don’t remove the cover.
[setting up the wood chunks on the heat Diffuser to develop hot spots for Charring]
[setting up the wood chunks on the heat Diffuser to develop hot spots for Charring]

Once you have the sizing computed, then select the SmokinLicious® wood chunk size that will fit – Single Filet which is ~4 inches or the Double Filet which is ~2 inches.


Wood Preparation

Now, let’s set up the wood on the grill. Remove the cooking grates from the grill then strategically place the wood chunks over the heat diffuser. This is the metal piece covering the actually gas burners. If the SmokinLicious® wood chunks are fresh, then you can add them directly to the unit without pre-soaking them. If not, you may want to consider a lite soaking of about 15 minutes. Because I’m cooking wood fired cauliflower, I am using the chunks in their natural state. However, feel free to consider a pre-soak in liquid with flavouring such as beer, wine or juice.


Now replace the grill grates back on the unit, over the SmokinLicious® wood chunks! Make sure the grates are securely seated back on the unit. If there is a lot of space on your unit between the diffuser and the grate you may want to consider a SmokinLicious® single filet or block item. Now light the unit, set the dials to a low heat setting and bring the unit up to temperature. Say around 180 degrees. Do not overheat the unit.

Wood Fired Cauliflower- Preparation

In preparing my wood fired cauliflower for this cook, I’ve elected not to reduce the cauliflower heads into pieces. I prefer to do the cutting towards the end of my grilling presentation.

After pre-heating the grill to around 180 degrees, I add the cauliflower heads to the grill grates. Let the wood infusion flavour begin!

[ Fresh heads added to the grill, note the wood has not ignited yet to develop a hot spot]
[ Fresh heads added to the grill, note the wood has not ignited yet to develop a hot spot]

Roasting Process for Wood Fired Cauliflower

I position the wood fired cauliflower head over the hot spots created by the SmokinLicious® “Double” filet wood pieces which are under the grilling grates. The wood will ignite and begin the charring stage of the heads of cauliflower. I recommend bunching the wood pieces together to produce a hot spot on the LP/gas grill to allow for a direct char technique. While I am not using the smoke from the wood, I am still infusing great natural grilling flavour with the wood.

[Now I have hot spots and look a the char we are putting on the wood fired cauliflower. The green is the Parsley I add at the end of the process]
[Now I have hot spots and look a the char we are putting on the wood fired cauliflower. The green is the Parsley I add at the end of the process]

My cooking is taking place with an open lid because I want to char not smoke! It’s important to keep turning the heads so the flavour will be even. In the final stage of charring, I add some fresh parsley to the wood fired cauliflower heads for final flavour and presentation. And, of course, I love to drizzle melted butter sometimes infused with paprika, to the finished product.

Remember this is a vegetable, not meat so there is no grease to flare up the LP/gas grill. This is another example of why using SmokinLicious® Wood Chunks on the diffuser and under the grill grates of your LP/gas unit can generate such exceptional wood-fired flavour. Now, get to those heads of your wood fired cauliflower and ENJOY!


Thursday, July 8, 2021

BBQ BOX SMOKER LET’S YOU GRILL ALL YEAR


BBQ Box Smoker should be used as much as your tongs on the gas grill!
BBQ Box Smoker should be used as much as your tongs on the gas grill

  Bert and Tom discuss when the weather is cold use your BBQ box smoker year round! 

We have all been in Tom’s position. We love grilling and smoking but prefer the warmer weather. For those of us in 4 season climates with below zero temperatures in winter and lots of snow, it seems too hard to continuing grilling! But just as Bert remarks, you do not have to give up cooking outdoors just because of the weather.

 Chef Bert grills year round

Year Round Grilling

Grilling equipment manufacturers are always competing with charcoal grill and smoker manufacturers. That’s why many gas grills have an integrated wood chip drawer to imply that barbecue is possible. If you ever tried these, you likely were disappointed in finding that the intensity of flavor could not compare to charcoal equipment.

At the same time, there was an understanding that not everyone could afford a model of grill that included a built-in smoker box or tray. Thus, the birth of the smoker box. A small, removable, and relatively inexpensive accessory that could be used on any gas grill. Like Bert said, with a smoker box, you can grill-smoke anything!

But no one ever discussed what should go in the smoker box. The assumption was use a wood chip but you will learn, a wood chunk brings benefits to outdoor cooking never experienced before with the smoker box.

On the gas grill the two zone method, heat and smoker box on one and food on the opposite

Don’t Let the Cold Stop You!

Bert knows when it comes to outdoor cooking in cold weather, you need a means of reducing the number of times you have to add wood. This is the number one reason to use chunks in a smoker box rather than chips.

With most boxes easily fitting 3 wood chunks, you won’t need to replenish the wood for shorter cook items. Longer cooks will require just a few additional chunks to get the job done.

Gas grills in generally hold a temperature better and don’t react to outdoor ambient temperatures the way charcoal units do. You may need to make some adjustment on the heat level knob to reach your desired temperature but the unit should hold that temperature for the duration of the cooking time.

Easy Clean-Up

The Smoker box

Smoker boxes are made of metal or cast iron giving them durability. Clean up is a breeze as the wood will combust and turn to ash that is trapped in the box. Just dump into a heat safe container and you are all set!

Plus, the metal of the box helps to hold and radiate heat keeping the chunks smoldering for a long time.

Tom dreaming on how to keep himself warm while winter grilling

We don’t think Tom will be lucky enough to find a smoker box that will fit in his pocket but there are a variety of sizes, materials and lid options that should fit any need.

Don’t stop the grilling season when the leaves start to fall. Enjoy flavorful wood-fired foods all year with your new smoker box accessory and premium wood chunks!

Have you used a smoker box on a gas grill? Leave us a comment and subscribe to get our latest tips, techniques, recipes and the science behind the fire and smoke, for all live fire cooking methods. That’s SmokinLicious®!


Thursday, May 21, 2020

A GRILLING TECHNIQUE THAT MAKES GRILLED PARSNIPS TASTE LIKE FRENCH FRIES

Our Grilled Parsnips with added wood smoky flavor taste almost like French Fries!

Your diet likely doesn’t consistent of many root vegetables and I can guarantee that if you have kids, they may not have tried more than a carrot for a root vegetable.  I’m going to introduce you to parsnips which is one root vegetable that when grilled, takes on a flavor very similar to French fries.

That’s why I’m calling this recipe my Smoked Parsnip Fries with Spicy Honey Glaze.  As easy to prepare as it’s cousin the carrot, parsnips take no time at all to prepare and smoke on the grill.  Go to the market and get yourself about 2 pounds of this lesser used vegetable and let’s convert you from the potato to the parsnip!

What do parsnips taste like?

 Parsnips are a sweet root vegetable with a flavor profile between a carrot and potato. While related to the carrot and parsley family, parsnips have a deeper taste and stronger texture, which lends itself to cooking, grilling, and smoking. We recommend smoking this vegetable to improve its woodsy sweetness taste.

Got 5 Minutes?

The parsnips have been clean of the outer skin, washed and sliced to size
Just like carrots, likely the more popular root vegetable, parsnips grow as a tuberous root and can be eaten raw, though most people prefer to cook them.  Once mature, they are harvested and sold in the grocery stores.  I do a simple end trim and peel them with a vegetable peeler.  Next, I cut them into 3-inch lengths and the width of an average potato French fry.  I then toss them with ¼ cup of oil – I’m using avocado oil but you can also use olive, almond, walnut, grape-seed or similar high heat oil – and kosher salt and fresh ground pepper.  Now they’re ready for the grill.

Tasting Notes: When selecting parsnips, it’s important to look for ones that have a smooth surface with no cuts or indentations.  Because they are a root vegetable, it’s important to rinse them well under water before preparing.

 Two-Zone Grill Smoking


Our smoker box is all set on the lite side of the grill and the parsnips on the unlite!The best method of cooking our pre-cut parsnips is on a sheet pan.  This will ensure that the cuts of parsnip get equal browning and tenderization.

Just like roasting in your oven, I’ll be using a higher grill temperature of 400-425° F on my gas grill.  Total cooking time should be roughly 45 minutes to tenderize the parsnips.  For added flavor, I’ve included three double filet wood chunks to a metal smoker box.  These usually have wood chips added to them but I’ve found wood chunks much easier with less mess and no need to refill with more wood.

I’m using a traditional two-zone setup that involves using  ½ the burners of my unit set to a medium-high setting and ½ the burners are left off.  The smoker box will go on the hot side of the grill while our sheet pan of pre-cut parsnips will go on the cold side.  Half way through cooking time I rotate the sheet pan to ensure even browning.  That’s it!


Chef Bert and Tom go over the set up for two zone cookingGrilled Parsnips Glaze ‘Em for Added Flavor


While the parsnips are turning golden and tender on the grill, it’s time to start on the glaze.  Begin by melting 2 tablespoons of unsalted butter in a small saucepan.  Add two chiles or ¾ teaspoon of crushed red pepper flakes, one tablespoon of apple cider vinegar, and 1 tablespoon honey.  Stir the parsnips occasionally until the glaze holds together well.  Set aside and go to the grill and check on the grilled parsnips.  When tender and golden brown, remove from the grill.  The wood chunks will be 100% carbonized.  I’ll like to save these to use in my charcoal grill as a charwood fuel product for a natural charcoal.


pouring the honey sauce over the finished grilled pasnips and ready to serveWith simple trimming and peeling, these grilled parsnips become even more flavorful when wood flavored on the grill.  Two zone cooking makes it easy to step away while the parsnips cook giving you plenty of time to make the great spicy honey glaze to finish off perfectly grilled parsnips.

Remove the parsnips from the grill, place on a serving platter, and drizzle the spicy honey glaze over the parsnips when ready to serve.   Today’s Smoky Grilled Parsnip Fries are going beside a ground chuck burger for more of a traditional taste of burger and fries.

What’s your favorite parsnip recipe?  Leave us a comment to opine and subscribe to get all our postings on tips, techniques and recipes.  Bringing innovation to wood fired cooking with recipes, techniques and the science behind the fire, smoke, and flavor. That’s SmokinLicious®.

Thursday, August 29, 2019

WHY TWO-ZONE COOKING METHOD LET’S YOU WALK AWAY FROM THE GRILL

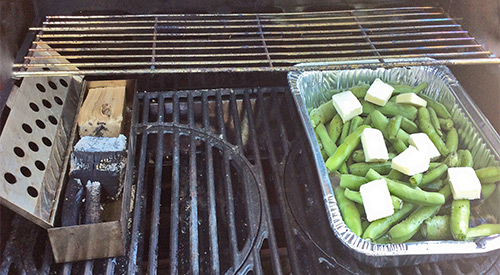
The SmokinLicious® culinary crew's two-zone cooking method set up to smoke Fava Beans on the Gas grill with Wood chunks!
The SmokinLicious® culinary crew’s two-zone cooking method set up to smoke Fava Beans on the Gas grill with Wood chunks!

We all know that the key to easy and successful outdoor cooking is to control the temperature.  I also believe that outdoor cooking should not hold you hostage at the grill.  That’s why everyone should learn the two-zone cooking method for grilling.

Let’s cover what type of cooking you can do by this method, why it’s so successful, and how to set up the zones.


Why Two-Zone is Best

 smoker box and single filet wood chunksTwo-zone cooking can be done on any type of grill no matter the fuel source.  What is two-zone cooking?  Using the fuel source on only half the grill while the other half holds the food.  Although you may use the unlit side of the grill for most of the cooking, you have the benefit of finishing crispy skins of items or quick cooking thinner cuts of meats on the direct heat side.

Two-zone cooking is also called direct and indirect cooking.  The indirect side uses indirect convection heat to cook the food which means the heat generated by the lit side radiates into the material of the equipment and produces heat (convection heat) on the unlit side.  The direct side produces the heat within the unit and can be used when quick cooking is needed or when a food that has been cooked on the indirect side needs crisping, additional coloring, or some char.


Set Up a Two-Zone

setting up the smoker box on the grillThe primary reason you want to set up two-zone cooking is most of the grill cooking does not require direct heat.  When you consistently cook foods, especially meats, over direct heat, you easily can have dried, stiff, flavorless results.  This is due to the components of meat reacting at different temperatures that with direct cooking occur too fast to react.

I will tell you that you need a grilling area that is large enough to establish two zones.  I judge the space needed with a rectangular, disposable foil pan.  If the pan can fit on half the grill area without issue, then you have plenty of room for a two-zone setup.   When using a gas grill, this means lighting the burners on one half of the grill.  If you don’t have an even number of burners, then decide how many are to be turned on and how many left off.   With a charcoal grill, placing the hot coals on only half the charcoal area.  On an electric unit, if you can manipulate the heating element, isolate the element to one side of the unit.  The temperature that works ideally for two-zone cooking is 225°F.  Of course, I always add wood chunks to give a smoky flavor to the foods.  Remember, the hardwood goes on the direct side of the grill or lit burner or hot coals.

Note that you can also use a water pan using two zones.  This can be placed on either side of the grill depending on when you need the direct heat side.  Keep in mind, when doing meats, it’s great to place a pan under the meat with vegetables (onions, potatoes, celery, peppers, etc.) and a small amount of liquid that can collect the meat renderings.  You can also place pans of beans to catch those drippings.  Anything is fair game.

For those times when you don’t want to add any additional foods, you can simply lay a thin foil pan under the grill grate of the indirect side or a sheet of foil.  That will collect any fat drippings.


Cook Anything!

Smoking Tomatoes on the gas grill with the two-zone cooking methodSince radiant heat is what you are cooking with when foods are placed on the indirect side, you can cook anything.  I love doing tarts and cakes via this method, especially during the hot months when you don’t want to lite your indoor oven.  In fact, those are the times that I cook an entire meal using a two-zone setup.

You can also cook multiple items using both direct and indirect heat.  A long cooking meat goes on the indirect side, is cooked to temperature and held there, while a side dish is cooked on direct heat.  Don’t forget, if the cookware you use is high heat tolerant, you can use cookware as well.  This is how I can make cakes, tarts, and bread on the grill.  You need to view this equipment like an oven as that is essentially what it is!


Use Like an Oven & Walk Away

I’m going, to be honest.  Although it’s true that you can produce more moist foods using a two-zone method the real reason I love this method of cooking is I can walk away from the grill.  This is particularly true when using a gas grill which holds the temperature steady, which for me, is 250°F for long cook meats and regular baking temperatures for all my cookies, cakes, tarts, bread.  Remember, charcoal grills will still require you to refuel so the temperature can fluctuate more if you’re not careful.  Keeping an extra chimney starter of charcoal going will solve that issue.

As a final note, even though two-zone cooking allows you more time away from the grill, you still need a good digital thermometer to monitor the temperature of the food.  Invest in an easy read one and you’ll really enjoy this new way of grilling and smoking.

Thursday, July 11, 2019

WOOD ROASTED ONIONS TO DIE FOR!

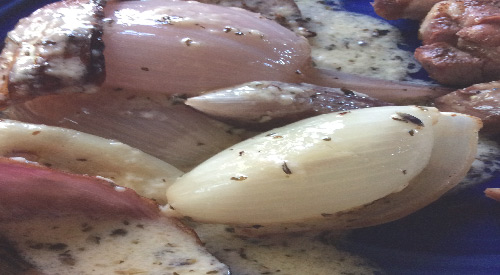
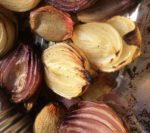
Our finished wood roasted onions!

One vegetable that is available throughout the year is the onion.  Although you’re likely accustomed to using this in recipes as an added natural flavor when you wood-fire the onion, something magical happens to its cell structure that turns these into the buttery, melt-in-your-mouth gems that you’ll want to use in even more recipes.

Onions are high in vitamin C, can aid in weight loss, and have reduced certain cancer risks, especially those associated with the digestive tract.

Our onion assortment, White, Sweet and Shallots 
Whether you elect to do the standard yellow onion, the sweet red onion, or shallots, you will love how smoke vapor works to bring out the best in any variety.


Preparing for the Grill

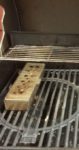
Before preparing the onions for the grill, let’s get the grill started by lighting the burners on only half the grill.  This is referred to as two zone cooking.  On the lit burner side, I place 2 wood chunks – I’m using the Single Filet size from SmokinLicious® – directly on the heat shields of my hot burners.  This will provide the wood flavoring to the onions.  My burners are set to medium-low which usually produces a cooking temperature of about 300°F.  Simply adjust your burner setting to reach this temperature.

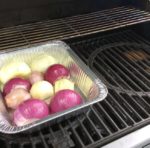
For the onions, I simply cut the tops of, slice in half and remove the skins.  I place the halves cut side down in a roasting pan and add about ¼ cup of oil to the pan.   With my pan ready, I place it on the unlit side of the grill and close the lid.  In about 75 minutes, these will slightly charred, tender, and juicy.

Tasting Notes:  Although I used avocado oil since you are not grilling over direct heat, you can use other oils such as olive, almond, walnut, grapeseed, coconut, sesame, canola, etc.  Remember, some varieties of onion are considered herbs so doing an assortment of types will give you an abundance of flavors.


The Longer the Wood Roast the More Flavor


Onions on the grill with wood chunk over the flavor barYou’ll find as these onions cook and absorb both the smoke vapor and oil, the scales of the onions will separate and caramelize.  The results are tender, juicy and flavorful with a hint of woodsy from the charred edges.

I decided to make a simple sauce of butter, cheese, parsley, and pepper for my onion mix and served these alongside a pork steak, also cooked on the grill with a two-zone method.

The best part is onions are available year-round so I can do this method even in the dead of winter, as remember, the gas grill still functions even in the cold!  For those who like to freeze produce, this freezes very well so grill a lot keep them so they’re ready for the winter days you don’t feel like lighting the grill.   Just think what an onion soup will taste like when you wood-fire the onions first!

Finished wood roasted onions ready for serving 
Tasting Notes:  If using a charcoal grill, still use a two-zone cooking set up meaning charcoal on only one side of the grill.  Be sure you only cook with hot coals, no flames.  This type of grilling can have more challenges to steady temperature so make sure you check the onion pan more frequently.

Thursday, June 27, 2019

EASY GRILL ROASTED TOMATOES

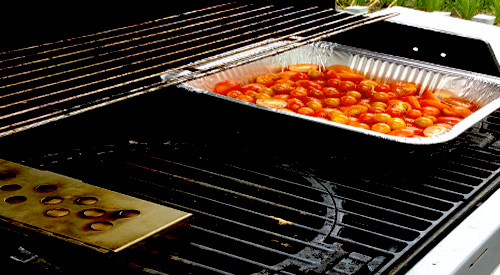
Our Roasted Tomatoes on the gas grill with smoker box containing two Double Filet wood chunks!

Many of us love to grow vegetable gardens but soon find we have an overabundance of certain items like tomatoes (though these are technically a fruit).  I’m here to give you a super easy method of bringing tenderness, juiciness, and great wood flavor to this summer favorite.
Collect your favorite tomato varieties from the garden and meet me at the grill for this great, easy technique.


Preparing for the Grill


With a water content of about 95% and very low caloric value, tomatoes are rich in lycopene and antioxidant linked to heart health and cancer risk reduction.  With lots of colors and sizes to choose from, there’s a variety for everyone.

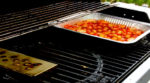
setting up the smoker box on the grillAfter picking my ripe cherry and grape tomatoes from the vines, I give them a thorough wash and allow to air dry.  Since I’m only using small sized tomatoes, I only need to slice the grape ones in half while the cherry size is a perfect fit to just grill-roasting whole.  In the meantime, start the grill by lighting the burners on only half the grill.  On that side, I place a smoker box that contains 3 small hardwood chunks.  This will provide the wood flavoring to the tomatoes.  I add about ¼ cup of oil to the tomatoes and mix to coat.  With my pan ready, I place it on the unlit side of the grill and close the lid.  My lit burners are set to medium-low heat which will maintain a cooking temperature of about 300-325°F.

Tasting Notes:  Although I used avocado oil since you are not grilling over direct heat, you can use other oils such as olive, almond, walnut, grapeseed, coconut, sesame, canola, etc.


Nutritional Boost from Cooking


Our deliciously finished roasted tomatoesAs this is a grill-roasting technique that doesn’t use direct heat but rather the radiant heat built up in the grill, there is no need to do anything during the actual cooking.  You’ll know when these tomatoes are ready by the amount of juice that is produced and the wrinkled skin that develops.   They will be super tender yet still hold their shape.  In fact, research has shown that cooking tomatoes raise the level of beneficial compounds called phytochemicals, making the tomato healthier when cooked.
Now you have an opportunity to do so many things with these super flavorful, healthy, and tender tomatoes.

Tasting Notes:  If using a charcoal grill, still use a two-zone cooking set up meaning charcoal on only one side of the grill.  Be sure you only cook with hot coals, no flames.  This type of grilling can have more challenges to steady temperature so make sure you check the tomato pan more frequently.


What to Make with These Roasted Tomatoes?


This finished sandwich with roasted tomatoes!Here’s one use for your great wood roasted tomatoes.  I take a great baguette and added some wood smoked beef shank.  Next, I top the meat with a crunchy salad mix with a bit of siracha dressing, then add a generous helping of our wood roasted tomatoes.  Yum!

Don’t forget, these tomatoes freeze well so bundle some up in a freezer safe storage container and you’ll be ready for pop-in guests.  They can easily be defrosted in the microwave and reheated on low on the stovetop.  Serve with bread or on their own as part of charcuterie board and you will have a hit.

Thursday, May 16, 2019

USEFUL COOKWARE OPTIONS FOR YOUR GRILL

logo and grill introducing our USEFUL COOKWARE OPTIONS FOR YOUR GRILL
Enjoy our USEFUL COOKWARE OPTIONS FOR YOUR GRILL

If you’ve followed my writings for some time now, you’ve likely learned that I believe outdoor equipment is the same if not better than the traditional indoor options.  You literally can make anything on the outdoor equipment that you make inside your home.

Knowing this, I have received many questions regarding the type of cookware that I use when grilling and/or smoking on said equipment.  Today, I’m going to discuss the preferred cookware materials and the potential issues that can arise if you use a material that is not considered ideal for high heat temperatures.


Material #1: Cast Iron

This is my first choice and many other cooks, and the only material I use when I coal cook with cookware. Why? It is durable, it is relatively inexpensive, it is unbelievable at heat retention, and you can cook almost anything in it.   Literally, it never wears out!

Downside?  It is a material that needs to be maintained meaning oiled consistently.  It is heavy!


Material #2: Carbon Steel

Carbon steel is a beast at retaining heat and it can be used on any cooking surface.  Although lighter in weight than cast iron it is still heavier than stainless steel.  Similar in many attributes to cast iron, it also requires frequent seasoning and the base of the pan will become discolored from the high heat exposure.   Plus, it is not dishwasher safe so you need to love this material and be willing to put some work into maintaining it.  If you’re lucky enough to find a piece you love, you will make magic in it whether near or in the fire.


Material #3: Stainless Steel Combo

I’m sure every one of us owns at least one piece of stainless steel.  This is a very attractive piece of cookware from the aesthetic view.  However, on its own, stainless steel is not the best heat conductor.  This is the main reason why it often is combined with another material to improve its heat retention properties and keep it light in weight.  Suitable pairs you’ll find for stainless steel include copper and aluminum.  All three of these materials on their own, are not ideal.  Cooper and aluminum heat very quickly which means they can burn very quickly as well, while stainless steel on its own can take forever to heat up.  But combine copper and aluminum or aluminum and steel and you have an ideal heat conductor and safe high heat material.  Rule of thumb: never use aluminum and copper cookware on their own for high heat cooking.


Material #5: Enameled Cast Iron

Know as the “pretty” cookware, enameled cast iron is cast iron at the heart-and-soul but with beautiful ceramic enamel outside surfaces.  It has fabulous heat conductivity and retention but it is not non-stick which can cause some issues.  I find it works really well when I use more of a two-zone cooking set up rather than direct coal or heat cooking.


Material #5: Non-Stick

Teflon is a non-stick, promoted material, that should be avoided.  It has no ability to be used for high heat and in fact, excessive heat can melt this material.  Also, Teflon is documented to flakes off after extended use, moving these flakes into your foods.  At higher temperatures, the material produces toxic fumes that have been proven to be a health risk.


What Are High Heat Levels?

Now we know what materials are optimal for high heat cooking but what are the actual temperatures that can be handled?

Cast iron and stainless-steel combos can tolerate 1500°F, with stainless steel excelling to 2200°F.  Although copper has a melting point of 1984°F and aluminum at 1221°F, cast iron, and steel materials in cookware still perform the best.

Now you have the education behind your choice of cookware.  My last piece of advice is to always think about how you plan to use the cookware.  If you love to nestle in the coals or be as close to the flame as you can, the items that may not look as pretty are likely the best choice.  Take our tips in this blog USEFUL COOKWARE OPTIONS FOR YOUR GRILL and expand you cooking/Grilling skills and techniques!

Thursday, May 2, 2019

TOP TOOLS NEEDED FOR GAS GRILLING

Smokinlicious teams top tools needed for gas grilling
Smokinlicious® teams top tools needed for gas grilling

There is no question that LP/Gas grills have changed tremendously over the past 10 years and now include some features standard that for many years, were options.  Then there is the development of dual or multi-fuel options on a grill so you can have one unit that performs as a gas grill, charcoal grill, wood grill, and even electric or pellet grill, all in one unit.

Today, I’m focusing on the standard LP/Gas grill, independent of any other fuel source.  This guide will focus on the basic tools that will provide for a better grilling experience and make you more efficient at the grill.

Tool #1

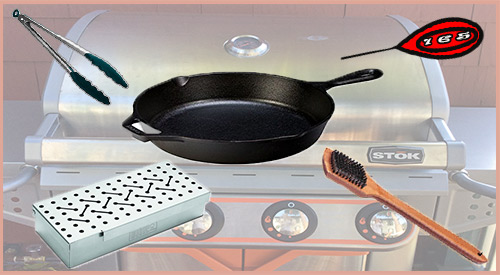
I’m starting with a grill brush since most of us have the habit of thinking about cleaning off the grill grates when we start the grill for cooking, not when we finish.  This tool is to ensure clean up the residual food bits and grease left from your previous grilled foods.

Now I’m aware of the controversy over the use of metal bristles but most of these brushes are made well.  Simple inspection of the brush bristles each time you use it will allow you to identify if the bristles have come loose and have the potential to be transported to your foods.  I prefer a brush with metal bristles, with a long handle to keep my arm away from the heat, as often you want to clean the grill when it’s hot.  Remember, most of these brushes are under $10 so think about purchasing one a couple times per season to ensure the bristles stay put.

Tool #2

There are times when the grill grates and lid will become super coated in grease and pieces of food. 
You’ll need to break out the cleaning agents to ensure these surfaces are ready to go for the next grilling event.  Two of my favorites are CLR BBQ Grill Cleaner and Mr. Clean MagicEraser.  As a non-toxic, non-flammable, biodegradable product, CLR BBQ Grill Cleaner is not something you have to leave on for hours at a time.  It quickly breaks through the issues and allows you to wipe clean to an almost new state.  Keep in mind, the CLR brand also makes a stainless steel cleaner for the outside as well.

Tool #3

Long-handled tongs.  Your standard tong length for the traditional kitchen just won’t work at the grill, as you need to keep some arm distance from the hot grill surfaces.  I like the 20-inch length with silicone grips as well as silicone tips, as silicone can tolerate extremely high heat.  If you grill multiple food items at the same time, think about purchasing tongs with different colored tips and/or handles as that will ensure use of one color for a specific food so there’s no transfer of flavors.

Tool #4

Like the tongs, a must have is long-handled spatula for those food items that need to be flipped.  I prefer one that is made of solid steel and has a bit of a beveling to the edge.  Again, the longer the handle the better for keeping away from high heat.

Tool #5

An easy to read, digital thermometer.  It is a must when you grill or smoke.  Look for one that has a longer probe for when your grilling larger roasts and thicker cuts of meats and poultry.  Be sure the readout is easy to see and if you grill a lot at night, get one that has a back-lite to see more clearly.  If you cook a lot of different animal proteins at the same time, try to have a thermometer dedicated to each food so you don’t cross-contaminate while bacteria may still be an issue.  There are assorted colors available making it easy to dedicate one to red meat, pork, poultry, and fish.   Most of the digital thermometers on the market today are under $18 with even more under $10.

Tool #6

 If you’ve always been a person that cooks directly on the grill grates and only does the standard fare – hamburgers, sausage, chicken, perhaps ribs – you need to get out of that rut and learn to do more with your grill.  Start by investing in one piece of quality cast iron.  Able to withstand intense heat, cast iron can take you from the average griller to someone with skill.  Now, you can enjoy recipes normally done on the indoor stove outside in the fresh air, with your cast iron skillet.  Remember, there’s a whole line of cast iron cookware so as you expand your skills, you can add to your outdoor cookware.

Tool #7

Although I am a fan of the standard steam table disposable foil pan, any size, shape foil pan will do.  These are perfect for use as a drip pan to prevent render juices from spiking flames and as water pans for a two-zone cooking set up.  I won’t deny, that I also use these to cook in especially fragile items like fruit and specific vegetables.  You certainly can invest in a grill pan but clean up becomes a snap with the disposable pan.

Tool #8

Although the smoker box was originally intended for use with wood chips on the grill, I always use small wood chunks in mine.  I prefer a box made from high-grade stainless steel and one that has a hinged lid.  My smoker box holds three Double Filet Wood Chunks from SmokinLicious® perfectly and provides for extended smoke vapor as compared with wood chips.  Used directly on the grill grate or set under the grill grate on the heat shield, it produces smoke for hours.  Although you can place wood chunks directly on the heat shields, as I’m known to do myself sometimes, they will become permanently marked from the wood ash and eventually need replacing.  The smoker box allows you to avoid this.

There you have it!  My TOP TOOLS NEEDED FOR GAS GRILLING for better results and help in extending the life of your investment!
Thursday, March 28, 2019

PAN COOK ZUCCHINI ON THE GRILL WITH WOOD FLAVOR

Try our pan cook zucchini on the gas grill with wood chunks for a flavoring twist


I’ve got a one pan dish that is easy to construct with the best part being you can do the entire recipe on your LP/Gas grill.

Grab your prized zucchini and get to the grill and I’ll show you how easy this technique and recipe are for a great meal.


Zucchini Prep


Preparing the zucchini is very simple for this recipe as we want all the nutritional value of the skin as well.  After washing, patting dry, and trimming off the ends, cut 1-inch thick rounds and then cut each round into smaller pieces.  For the smaller rounds, you should get 4 pieces and the larger 9.  Place all the cut zucchini pieces into a disposable foil pan.  There’s no need to spray the pan or add any liquid as zucchini has a 95% water content and when cooked, produces 6 oz. of water per every cup.  This will naturally steam away while in our grill pan while tenderizing the zucchini for our dish.  Plus, the high-water level will attract the smoke vapor for great flavor.
Diced zucchini in a disposable pan ready for the two zone cooking method
The grill set up is the easiest part.  Simply lite the burners on only half the grill.  Place wood chunks either directly on the heat shields located under the grill grate or in a smoker box placed on top of the grill grate of the lit burners.  Allow to heat up for about 10 minutes.  Then place the pan of cut zucchini on the unlit side of the grill and close the lid.

Tasting Notes: You do have an option to slice your zucchini lengthwise into quarters and grill directly on the grate.  Know this will produce stronger wood flavoring to the finished product and you will still need to cut the zucchini down into bite-size pieces.


Ragout Ingredients

Although ragout in Italian traditional means a sauce made from root vegetables and fruits, I felt it was a suitable term for our tomato-jalapeno based sauce.  In addition to your zucchini, you’ll need the following ingredients:
  • 3 large tomatoes, diced
  • 1 jalapeno, diced
  • 1-1/2 cups pasta sauce
  • Basil- 2 tablespoons
  • 2 tablespoons oregano
  • 2 tablespoons parsley
  • 1 tablespoon garlic powder
  • Fresh ground pepper
  • 10 oz. tortellini
  • ¼ cup shaved Parmesan and Asiago cheese
After the zucchini has cooked for about 30 minutes, add the diced tomato and jalapeno.  Let that cook for 15 minutes and then add the pasta sauce, basil, oregano, parsley and garlic powder.

Tasting Notes: This can be a spicy dish so if you only like a mild kick add ¾ cup of ricotta cheese when the pasta sauce and herbs are added.


Finale

All this made in one pan!
all our spices added to the panThe final step to our grilled zucchini with tomato pepper ragout is to add the tortellini.  You may wonder how tortellini will cook without any water.  Essentially, you only need a little liquid with heat to produce enough steam to cook the tortellini.  The best part is you won’t have any pasta that is soggy and unable to hold its form.

After adding about 10 ounces of tortellini – mine happens to be filled with spinach – the ¼ cup of shaved asiago and parmesan cheese are added.  Everything is mixed well and left on the grill until the tortellini are tender.  That’s it!  Everything completely made on the grill and absorbing the great wood flavor from our SmokinLicious® chunks.  This is a great starter recipe that you can easily modify to fit your taste.

Now you need to try to Pan Cook Zucchini on the gas grill with wood!

Thursday, February 14, 2019

SALT-FREE DRY RUBBED CHICKEN DRUMSTICKS


Dry Rubbed Chicken Drumsticks after being "kissed" with smoke from the smoker box with Double filet wood chunks!


You’ve likely heard about limiting your ingestion of chicken skin which can add unnecessary calories and saturated fat.  On the flip-side, chicken skin also adds to the overall flavor and moisture of chicken.  Here’s the thing: if you limit the amount of chicken skin you ingest, it contains a good amount of unsaturated fat that can be heart healthy, which you may not be benefiting from.

I’m going to give you a dry rub recipe that is salt-free to add in the healthy aspect of this recipe and includes some fat to the skin that will add flavor but also render off.  Purchase chicken drumsticks and prepare the gas grill for this easy technique and super flavorful chicken you’ll want to be sure to make extras of.


Grill Set UpDouble filet wood chunks in the smoker box ready to delicaly flavor our chicken drumsticks 

Before starting the rub recipe, get the gas grill preheated by turning on only half the grills’ burners.  That will be the side that we will add the wood chunks to while the side that remains off will be where the food will be placed.  For the wood chunks, you can either place them directly on the heat shields, on the hot grill grate, or in a smoker box.  Yes, that smoker box that you see advertised for wood chips is going to hold double filet wood chunks from SmokinLicious®.


Salt-Free Dry Rub

I’m balancing my salt-free dry rub flavor by incorporating a variety of ingredients:
  • Whole allspice
  • Ancho Chile pepper
  • Cinnamon
  • Cardamom
  • Curry powder
  • Cocoa powder
  • Fresh ground pepper
I always like to use a mortar and pestle when I make a rub as I usually have whole pods or seeds that need to be reduced.  Once the rub is reduced to powder, I apply it to the drumsticks.
mortise with all our great dry rub ingredients mixed and ready to apply to the chicken drumsticks

These I lay on a roasting rack placed in a disposable foil pan.  This will allow the chicken to render without causing a mess to the grill and allow the smoke vapor produced by the wood chunks to rotate around the chicken.


A Little Fat Will Dothe drumsticks with the dry rub applied and patties of butter on top 

After the drumsticks are lined up on the roasting rack, I add a sprinkling of almond oil and 8 tablespoons of butter.  These two items will allow the skin to crisp slightly.  They also provide the moisture on the outside to attract the smoke vapor.  If you want to skip this step, just keep a spray bottle of tepid water ready and you can moisten the chicken skin with a calorie-free alternative.


Make a Lot!

The cooking dry ribbed Chicken Drumsticks on the gas grillAfter cooking for about 35 minutes, flip each drumstick on the rack and check your wood.  It will likely be black as the wood combusts and renders the flavonoids in the lignin that produce the great flavor.  Close the lid and allow the chicken to cook an additional 35-40 minutes or until the internal temperature registers 165°F.  Be sure to make extra so you have a great go-to protein to feed you throughout the week.


What are your favorite ingredients to add to a dry rub?  Leave us a comment and subscribe for more great recipes, techniques, tips, and the science behind the flavor, that’s SmokinLicious®.