Thursday, August 26, 2021

A FLAVOR RICH TREAT- WOOD GRILLED FRESH CORN!

The how to instructions for cooking fresh corn on a gas grill!
Fresh Corn is the one vegetable that you MUST try on the grill!

It’s that time of year! Fresh corn has arrived but not for long. Time to get your hands on a few dozen and do something truly special with this favorite

There’s Nothing Like Fresh

Yes, you can get corn all year by purchasing in the freezer section of your local grocer. Seriously though. Who wants frozen when by waiting nearly 10 months on the east coast you can have fabulous fresh corn? There is a taste difference between fresh and frozen!

On The Grill With Wood For Smoky Char

Corn is one of those vegetables that just begs to be put on the grill. There are many techniques but I prefer to remove the husks and silks, and grill my corn on the cob with wood chunks on the grill’s heat shields. In answer to the question about soaking the wood in water first – no, I do not do this step as I want my corn kernels to really crackle on the grill. Just see our posting on how to add wood chunks to the LP grill.

putting the wood chunks on the diffuser will allow them to ignite and provide a great wood aroma

Perfect Wood Makes Perfect Char

Smokinlicious double filet wood chunks work perfect on a gas grill for added flavor

SmokinLicious® double filet wood chunks are the perfect size for flavoring as well as fit on most grills. From start to finish, you can easily do a couple dozen ears of corn in about an hour. With this technique, I just need 4-5 wood chunks on one of the heat shields. That will provide enough smoke vapor to collect in the grill’s cooking area to ensure every ear is equally charred and flavored. Next, simply monitor for the need to turn the corn with tongs to produce an even char. Keep in mind, just like popcorn kernels, you will hear some of the raw corn kernels heat up and pop/crackle while cooking. This makes for the sweetest end to your cooking tasks!

So Many Recipe Options

Once I near the end of the corn’s cooking, I snip some fresh herbs from the garden like mint, parsley, and even lavender. I melt butter and add the chopped herbs to the pot. I then brush the nearly cooked corn with this aromatic mix and seal in all the great flavors – smoky, sweet, buttery – just perfect.

After I’ve consumed some of my masterpiece, I remove the kernels from the cob to a large bowl using a knife. This corn will be split into freezer bags and stored for winter recipe cooking that will allow me to bring back the taste of summer.

Need inspiration on what to do with all that corn? Think Cowboy Salsa, Corn Succotash, Smoky Cornbread, Corn Cakes, Corn-Potato Chowder, Corn Pudding, Corn Grits, and so much more. I bet you want to hit the corn stand now! Get going!

Did we inspire you? We’d love to see your photos of your grilled corn and corn recipes. Leave a comment and subscribe. Keep following us as we bring you innovative tips, techniques, and recipes on working with wood for cooking, grilling & smoking.
 

Thursday, August 19, 2021

USING ALUMINUM FOIL IN SMOKING: PROS & CONS

We discuss the pros and cons for using aluminum foil in smoking foods- in particular your BBQ and how it can affect the food.

“Does using aluminum foil in smoking foods still allow the wood flavor to penetrate?”

It is a common question heard when it comes to hot smoking. In fact, there is even a technique called the Texas Crutch that relies on wrapping meats like ribs, pork shoulder, and brisket in foil with 1-2 ounces of liquid into the foil and then sealing all ends tightly so no liquid or steam escapes. This process tenderizes and speeds the overall cooking process, which with hot smoking, can be quite lengthy.

Here’s the thing – when you use this technique, you do so after the meat product has cooked to about 135-150°F. That means a great deal of smoke flavor has already penetrated. What about if you start out smoking foods in foil? Let’s look at the pros and cons of smoking foods in foil, information you can use for traditional oven cooking as well.

Con #1

Aluminum leaches into foods that are wrapped in it. Current research indicates that the average person can tolerate about 2400mg of aluminum exposure per day due to our body’s ability to excrete the small amounts of this metal efficiently. Therefore, any ingestion levels over this would be considered a health risk by the World Health Organization.

Pro #1

Aluminum foil is disposable so it is a convenience. There is no clean up when you cook foods in foil and often there are recycling programs that accept used foil. It can save on degrading your cookware and grill grates.

Con #2

Aluminum is found in other items like corn, yellow cheese, salt, herbs, spices, tea, cooking utensils, and in over-the-counter medications like antacids. A derived from aluminum is also used during the purification process of drinking water. These all must factor into the recommended daily intake of this metal, meaning you need to assess whether cooking in foil will put you over the daily recommended limit.

Pro #2

Aluminum foil aides in producing a convection heat as it is an excellent heat conductor. Thus, cooking times can be significantly reduced when foods are placed in foil.

Con #3

Foods with higher levels of acid have a higher rate of leaching aluminum into them. This is true whether the acidic ingredient is in solid or liquid form. In fact, acidic liquids have a higher leaching rate than solids. Give this consideration when working with foods such as tomatoes, vinegar and citrus items.

Pro #3

Using aluminum foil can tenderize tougher cuts of meat when you include an ounce or two of liquid. Additionally, aluminum foil is leak proof when you seal all ends.

Con #4

When you cook acidic ingredients in foil, both the appearance and taste of the foods can be altered by the reaction to aluminum. The tastes are often described as metallic.

Smoking Considerations

From the smoking perspective, if you start the foods on the grill grates without any aluminum foil, cook until 135-150°F internal temperature, and then wrap in foil to finish, you likely will find very little change in taste. Ingredients containing acid would have cooked down and not be at a level that would interact as aggressively with the aluminum.

If you do elect to cook on the smoker, charcoal grill or LP grill with foil, know that you can see firsthand the reaction of the aluminum with food ingredients. You can see the wood molecules by the smoke vapor particles that develops on the outside surface of the foil. As foil is a heat conductor, it also is somewhat of a sponge and will steal some of the smoke vapor particles from the food.

Remember, one of the key benefits to using aluminum foil is its ability to seal tightly whether preventing spillage to a piece of cookware or sealing in liquids for cooking. Cooking smoked items wrapped in foil from start to finish will not allow for full penetration of the smoke vapor particles that account for the unique color, texture, and taste to smoked foods. Plus, you likely will increase your risk of health issues with repeated exposure to high aluminum levels.

Thank you for the question submission and we hope you found value in our information. We welcome all types of questions and encourage you to follow and subscribe to our social channels so you don’t miss anything. We look forward to providing you with tip, techniques, recipes, and science for all types of wood-fired cooking.


Thursday, August 12, 2021

SUCCULENT WOOD FIRED STUFFED TOMATO WITH HERB RICE

Wood fired stuffed tomato with Rice!

 It’s tomato season! Boy, do we have a great technique for you to try on your charcoal grill as well as a tasty recipe to make- wood fired stuffed tomato.

Bring 8 large tomatoes in from the garden or purchased at the fresh market, clean out the charcoal grill, fire pit, or fireplace, and give a few hours to a great cooking experience and exceptionally flavorful recipe.

Lighting a Fire for Hot Embers

Coal cooking can be a very easy method of cooking foods once you know how to make and manage the fire. First, I am going to use only hardwood for my fire as I want to produce as much flavor as I can into the cooking area. For tomatoes, I am using Beech hardwood in the SmokinLicious® Single Filet Wood chunk. Once lit, I let the wood burn down to hot embers before even thinking about cooking. Oh, and the lid stays off my grill – I’m using a kettle from Stok®, while the wood burns down. I wait until the coal bed shows gray embers on top with hot red spots on the bottom. I’ve used a mesh screen in the charcoal area, to keep all my coals from ending up in the ash collection area, since many will get to be quite small.

Preparing the Tomatoes for Hot Coals

With our tomatoes washed, it’s time to prepare them for the coals. First, I cut about ¼ of the way around the top. I’ll be cooking both the body of the tomato as well as the tops. Next, I add a high heat roasting rack to my raked coals. Try to make the coal bed as even as possible to keep the tomatoes balanced. First cooking time will be about 12 minutes before any turning needs to be done. You will see bubbling juices in the tomatoes which will makes these red beauties even more flavorful.

Coal Firing to Unbelievable Flavor

After placing the tomatoes on the coal rack and leaving for about 12 minutes, it’s time to turn them. You’ll see how the outer skin will start to flake. When I get some cooking time on the entire tomato, I separate the cut top from the body and coal roast the tops separately to get a nice char. Once cooked through, which takes a total time of about 22 minutes, I remove the tomatoes to a cooling rack. Once cooled enough to handle, it’s time to take all the wood fired pulp out of each tomato leaving the charred skins as the base to my wood fired stuffed tomato recipe.

Fresh Recipe Ingredients

With our fresh tomatoes coal fired over hardwood, it’s time to start on our recipe. First, we need to remove all the tomato pulp from the charred tomatoes. You can do this with a spoon or the way I like to do it – with my fingers. Place the pulp only in a blender keeping as much of the shell of the tomato as possible for our base in the roasting pan. Then blend until a puree is formed. Meanwhile gather the other ingredients needed to make wood fired stuffed tomatoes:

  • 1 teaspoon Kosher salt
  • 1 cup brown rice
  • 8 medium to large tomatoes
  • 2 anchovy fillets mashed
  • 2 tablespoons unsalted butter, softened
  • ¾ cup grated Parmesan
  • 1 small red bell pepper, diced (feel free to use hot pepper as well)
  • 2 tablespoons chopped basil
  • 2 tablespoons flat leaf parsley
  • Fresh ground pepper

Herb Rice Mixture & Anchovy Butter

This recipe allows you to use any rice you prefer. I like the texture of brown rice for this dish. As you cook the rice according to the package directions, you can start on the flavor mixture for the cooked rice. First, combine the 2 anchovy filets with the 2 tablespoons softened butter. I use a mortar and pestle. This will be added to the hot rice as soon as it is cooked. In a bowl, combine the tomato puree, diced pepper, parsley, basil, Parmesan cheese, and fresh ground pepper. Mix until just combined.

With all the ingredients combined, it’s time to put it all together. First, to our anchovy butter, brown rice, I add the tomato puree mixture combining well. Taking the tomato shells, I place them in a roasting pan that has been coated with oil. Next, comes the rice mixture, layering it in making sure all the tomatoes are covered. Last, top the rice mixture with the coal fired tomato tops. Now this pan is ready for a 350°F oven to bake for about 30 minutes.

Preserve the Flavors

After cooking our beautiful tomatoes over hot coals made from 100% beech hardwood, we removed the wood flavored pulp and produced a tomato puree. To that, we added Parmesan, basil, parsley, red pepper, and fresh ground pepper. Infusing anchovy butter into hot brown rice, we pour the tomato puree into the rice. Our wood fired stuffed tomato is made by layering the tomato shells in a roasting pan, then topping with the tomato puree-rice mixture, and the charred tomato tops. Then bake for 30 minutes in a 350°F oven, this is the perfect dish to serve with rustic bread. Stock up on your coal fired tomatoes – they can well – so you can enjoy your take on this wood fired stuffed tomatoes.

Now that we spurred your imagination with this recipe, we need your comment and rating, so subscribe and follow us so you don’t miss a thing. Finally, suggestions are always welcome as well on recipes and techniques you want to learn about. We are your source for all things wood-fired, providing tips, techniques, recipes, and the science behind the fire.


Thursday, August 5, 2021

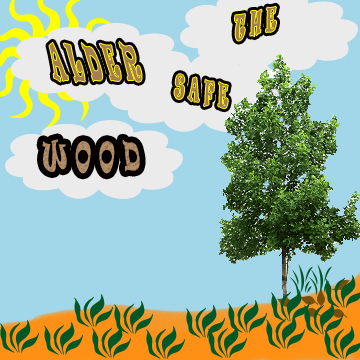
EASTERN ALDER ON THE LIGHTER SIDE!

Eastern Alder tree growing in our meadow provides a light smoky taste to food when used for cooking. Perfect for fish and light tasting fare.
Eastern Alder wood for a light smoke wood flavor

 As we highlight another hardwood from our offerings, we need to start by pointing out that we are referring to Eastern Alder not the better known Western Alder or Red Alder of the west coast.  Eastern Alder is part of the Birch family, with the scientific name of Alnus but the common names for the varieties found in the Western New York and Northwestern Pennsylvania regions of Eastern Alder (Smooth Alder), White Alder, Red Alder.

Alder is a relatively soft hardwood of medium density.  It is most commonly used with fish but I think I need to stress here that really any cooking hardwood can be used with any food item at the discretion of the cook.  Many factors play in to how a hardwood reveals itself during the cooking event: rub ingredients, brine ingredients, quality of the meat/poultry/fish, freshness of the food item, style of cooking (over the coals, in the coals, indirect heat, etc.) and most importantly, oxygen flow which feeds the combustion of the wood.   Alder provides a neutral coloring to the outer skin of foods which is why it is a favorite for fish.  Would this be a first choice for say a steak or other beef item?  No, but I certainly like to use it for lots of other things like fruit, vegetables, cheese dishes, and of course, fish.

For cooking, you can expect Alder to perform as follows:

Heat Level: Medium – 17.6MBTU

Fuel Efficiency: Fair

Ease of Lighting: Good

Ideal Uses: Cold Smoking/Poaching/Grilling/Stove Top Smoking

When you’re looking for something on the lighter menu of woods, keep Alder in mind, and explore its lighter heat level and versatility for the more delicate items of cooking.