Thursday, January 17, 2019

Grilled Seafood Recipe: Simple but Exquisitely Mediterranean

The raw squid and mussels ready for our grilled seafood recipe
Our Grilled Seafood Recipe for Squid and Mussels

Over the past several weeks, my good friends at SmokinLicious® have allowed me to make their Tips & Techniques blog platform “my home away from culinary home” to highlight the cooking with wood style.  I hope you’ve enjoyed the articles as much as I’ve enjoyed writing them.  Before I begin an extended hiatus overseas, as my thanks, I thought I’d leave you with a pretty easy and flavorful recipe that showcases all the virtues of wood grilling with a couple of my favorite seafood- squid and mussels.  The cooking style is one that is very popular in the Mediterranean region.  Give it a try and let us know how it fared!

Let’s start out with squid or “calamari” as my Italian friends remind me.  Whether it’s squid or calamari, it’s got to be fresh!  Prepare first by thawing and rinsing thoroughly with cold water.  Drizzle with a good quality of EVOO.

Grilling the Squid

Chef Calle drizzling extra virgin olive oil over the squid and MusselsGrill over the hottest part of the wood fire, cover to get a shot of wood smoke flavor.  It’s important to not overcook the calamari.  If your grill is really hot (and it should be) cook just long enough to get a grill sear mark (30-40 seconds per side) Remove immediately when ready. Drizzle again with EVOO, season with salt and pepper.  Spritz with a squeezed fresh quartered lemon section and garnish with a sprig of fresh parsley.  Plate and serve right off the grill!

Mussel Preparation


Grilling over the hottest part of the fire and spritz with lemonNext, grilling the mussels in the shell!  Rinse the shelled mussels with cold water. Remove the beard with a quick, firm yank.  Working in batches, place shelled mussels directly on grill grate over the hottest part of the wood fire.  When shells just begin to open, cover to allow for a wood smoke infusion.   After a minute, uncover and remove with tongs.  Make sure you discard any unopened mussels.  Quickly but carefully, remove the mussel meat from the opened shells with a fork or spoon and collect the meat in a mixing bowl.

Finished grilling of mussels
After shelling out the mussels, drizzle with a good amount of EVOO (1/8 cup), season with salt and pepper and a hefty spritz of a squeezed whole fresh lemon.  Plate and serve right away.  For a flavor option, if desired, before grilling the mussels, prepare a mixture of clarified butter (about 2 tablespoons per 1 dozen mussels) with equal amounts (1/8 to 1/4 teaspoon) of finely chopped garlic, oregano, and parsley.  Season the grilled mussel meat with the mixture, plate and serve with wedges of fresh lemons.

I hope you enjoy these recipes.  Keep on cooking with wood!  Bon Appetite!
Grilled calamari and mussels- great side dishes!

Thursday, January 10, 2019

Grilling & Smoking Shallots a Finesse Technique


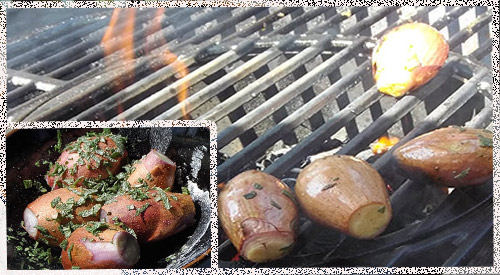
Chef Calle's finesse technique of Grilling & Smoking Shallots on the charcoal grill using Charwood for the smoky wood flavor
Chef Calle’s finesse technique of Grilling & Smoking Shallots on the charcoal grill using Charwood for the smoky wood flavor

For all my BBQ cooking friends who have been under the assumption that grilling is only for protein food groups, (beef, pork, fish etc.) boy do I have a taste revelation that could transform you into a disciple of the vegetable sections at local farmers markets– Char Grilled and Smoked Shallots!

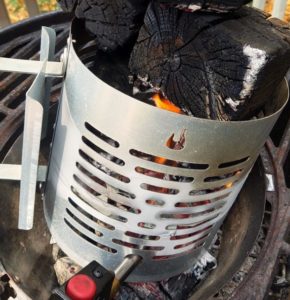
Using chimney starter to ignite charwoodGrilling Process

The process is fairly straightforward but doesn’t get the impression that this food item is something that you can flop on the grill grate and walk away from for an extended period of time.  Finesse is the cooking standard that must be applied to enjoy the maximum flavor result rendered from this sweet cousin of the onion family.

You can tell by my strong friendship with the folks at SmokinLicious®, that I’m a big advocate of grilling with a hardwood fire.  It allows for uniform cooking temperatures while simultaneously infuses food items with a natural wood smoke flavor.
So, as we begin, go about preparing your grill with only the best hardwood cooking wood and remember- never, ever start your fire with a chemically based liquid starting fluid.  Use a chimney starter!

While your grill preheats to a medium temperature, prepare the whole shallots by cutting off the tips and drizzling them with skins on using the high-quality EVOO and a touch of Kosher salt. You can even season with fresh thyme or sage and let marinate for a few minutes.

Shallot Technique

Grilled shallots are a great side dish or garnish to prepare alongside your protein or immediately after you have removed your meat to let it rest.

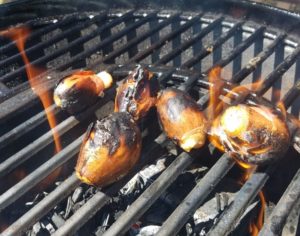
Charring shallots on grill gratePlace the shallots on the grate directly over the outer fringes of the embers, ideally between the smoking wood chips and outer ring of embers.  Do not place them directly over the center most concentration of the embers.  If you want a slightly stronger smoky flavor, cover.  If not, leave uncovered.

Here’s where the finesse part comes in- over the next 3-10 minutes, (depending on the heat and size of the shallots) watch over the shallots like a hawk watches over hatchlings in a nest.  Turn often, get a good char on all sides but, for Heaven’s sake – don’t allow them to ignite into a raging conflagration!  If this happens, you will lose much of the smoky sweetness and be left with a bitter tasting, burnt onion.  You can best determine a great finish when the outer skins are charred nicely while the centers have a soft, moist feel when gently squeezed with cooking tongs or fingers.

Remove from the grill, let them cool a bit.  Once cooled for 2-5 minutes lightly squeeze the charred outer skin and out will come the sweet and delicious interior.

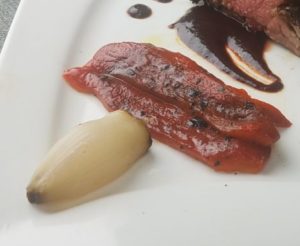
Finished dish with tasty grilled shallots
After you experience the fabulous smoky flavor of your grilled shallots, I’m sure you’ll have a greater appreciation for all the food flavor benefits that can be had from your backyard grill!

Thursday, January 3, 2019

STRAWBERRY BELLINI BOTH SWEET & SMOKY


I’ve worked on a trio of recipes to take full advantage of the short seasonal harvest of strawberries we have here in Western New York State.  I’ve already shared with you my Smoked Strawberry Hand Pie and my Creamy Smoked Strawberry Semifreddo.  Now, it’s time for a refreshing cocktail that also features smoked strawberry.

Just grab a couple of quarts of fresh strawberries or even store bought when they are out of season in your area and pick your smoke technique: we have three options – the charcoal grill which is how I did my strawberries, the gas grill or the handheld food smoker.  Then prepare to make our version of the strawberry Bellini which has a trademark smoked strawberry to balance the sweetness of simple syrup and Prosecco.

Simple Syrup


the pot of simple syrup ingredients blending over low temperaturesAfter smoking the strawberries using either a handheld food smoker, stovetop smoker, gas grill or charcoal smoker – we have instructional videos on all these techniques – the next step for our Bellini is to make the simple syrup.  Taking 1 cup of sugar and 1 cup of water, I add both to a saucepan set over medium heat and stir constantly until the sugar is dissolved.  Then I remove it from heat and allow to cool.  At this point, I like to pour the simple syrup into a liquid measuring cup to make adding to our cocktail easier.

Bellini Base

strawberries and simple syrup mixture in the blender adding ice to chillTime to start making the Bellini.  I add ice cubes to a blender and pulse them into crushed ice.  I then take my smoked strawberry juice which I reserved from my previous smoked strawberries and add about 1 cup to the crushed ice.  If you’re using whole smoked strawberries, you can pulse these into the crushed ice.  After adding my smoked strawberry juice, I add about 1 cup of simple syrup.  Pulse the mixture until blended and make any necessary adjustments to ice, strawberry or syrup flavors until you have the consistency and balance of sweet and smoky that you like.  Keep in mind, you will be pouring this mixture into the glass first, then adding the sparkling Prosecco so don’t over-sweeten.

Perfect Balance

Now it’s time to bring everything together for the final drink.  First, grab a bottle of Prosecco.  Take the glass of your choice and fill it about halfway with the smoked strawberry mixture.  Fill the rest of the glass with chilled Prosecco.  I like to top my glass off with some fresh mint.  Serve immediately.  Immensely refreshing on a hot day and festive looking too. The perfect way to use less than perfect strawberries.  Cheers from SmokinLicious®!

Tasting Notes

Now, this is a drink base that easily can be adapted for other liquor content.  Feel free to add tequila, rum, even vodka.  Just reduce the hard liquor amount to 2 ounces.

Thursday, December 27, 2018

Charwood Grilled Salmon Fillets for a Hint of Smoky Flavor


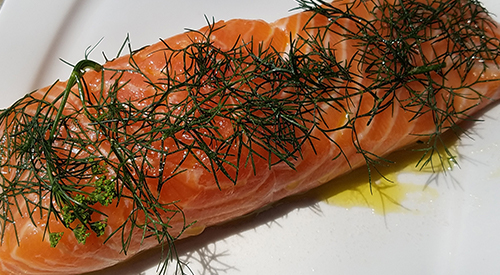
Our gorgeous filet of salmon is awaiting Chef Calle to turn it into Charwood Grilled Salmon on a kettle grill using a two-zone method along with Smokinlicious® wood chips!

Chef Calle here and thanks to SmokinLicious®, I’m going to offer an easy and palate-pleasing method to cook and lightly smoke fresh salmon fillets over a Charwood fire that features a small number of smoking chips.  With this approach, the smoking chips infuse a delicate smoky flavor to the salmon without overpowering its delicious fresh taste.

Today, I’m using a Stok® Tourist™ grill, clearly one of the best Charwood grilling and smoking units on the market.  If you don’t have a Stok®, just about any Charwood grill will work, if its heat chamber has room enough for both the Charwood and wood chips.

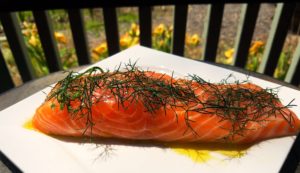
Salmon seasoned and awaiting the grill

Preparation

Preparation is key with salmon and setting up the cooking equipment.  So, first prepare the fresh salmon fillets by lightly seasoning with EVOO, salt, pepper and if you have it- fresh dill or fennel.  Let them sit and soak up all those great flavorful ingredients for about half an hour or until the salmon reaches room temperature.
 
Chef’s Tip:  Do not use salmon that is past its prime, thinking that the smoke will disguise the slightly off flavor of the fish.  Only use the best salmon available.

While the fish is marinating, begin preparations for the actual grilling by first firing up SmokinLicious® all natural Charwood using a hollowed chimney starter.  Never use charcoal lighter fluid!  Or Charwood, charcoal briquettes, pretreated with petroleum-based starting fluid.  In addition to ruining your salmon with a foul aftertaste, it’s safer not to consume the residue or remnants from petrochemical fire starter liquids.

After your embers have taken on a medium to high heat condition (grayish color), place them directly in the center of the grill’s heating chamber.  Put the grill grate on over the fired embers and clean it by using either a halved onion or lemon like you would use a sponge but, do it quickly and in short strokes to avoid getting fingers or hands burned.

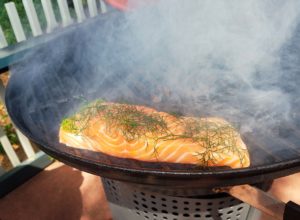
Salmon on a two zone grill absorbing all the great smoke flavorSmoking the Salmon

Next, position small amounts of the smoking chips (a few large handfuls, I’m using SmokinLicious® Grande Sapore) around the outer fringes of the main concentration of burning Charwood.  This allows the wood chips to take on two roles- 1) indirectly contributing to the cooking process, and; 2) producing a burst of smoky vapor that flavors the fillets.


A minute or two after you’ve positioned the smoking wood chips and reattached the grate, place the salmon fillets, skin side down on the grate, directly over the medium embers and cover.  Grill and smoke the salmon for about 4 to 6 minutes, uncover and gently turn the fillets over, cover and grill and smoke the skinless side for no longer than 2 to 4 minutes depending on the thickness of the fillets.

Chef’s Tip:  Be careful not to overcook.  You can gauge the finish of the fillets be being able to flake them with a fork.

final plating with all the decorations!When done, remove the skin by gently peeling away with a fork or just serve skin side down.  For a nice finishing touch, brush with a bit more, high-quality EVOO, season with freshly ground salt and pepper to taste.  Feel free to garnish with fresh dill, fennel edible flowers or lemon.  Hope you enjoyed Chef Calle’s recipe Charwood Grilled Salmon Fillets for a Hint of Smoky Flavor!

Bon Appetit

Thursday, December 20, 2018

STRAWBERRY SEMIFREDDO GETS SMOKY

Strawberry Semifreddo gets smoky is a "cool" treat with a little smoky taste for your BBQ!
Strawberry Semifreddo gets smoky is a “cool” treat with a little smoky taste for your BBQ!


My favorite fruit season is here!  Strawberry picking and eating season.  I’ve worked on a trio of recipes to take full advantage of the short seasonal harvest we have here in Western New York State.  My first was a Smoked Strawberry Hand Pie.  The second is another dessert option – Creamy Smoked Strawberry Semifreddo.  The perfect slice of smoky, cool goodness on a hot day.

Just grab a couple of quarts of fresh strawberries or even store bought when they are out of season in your area and pick your smoke technique: we have three options – the charcoal grill which is how I did my strawberries, the gas grill or the handheld food smoker.  Be sure to make plenty of extras so you can enjoy our other recipes.  Let’s get started.

Ingredients & Prep


Smoked Strawberries are the feature and the other ingredients are very fewOnce you’ve smoked your strawberries using one of our easy techniques, you’ll just need six ingredients to make the actual semifreddo.  For a single semifreddo, you’ll need a standard bread loaf pan and either plastic wrap or press ‘n seal wrap.  Line the loaf pan with the wrap so it hangs over the ends.  This will allow you to easily remove the semifreddo from the pan once it sets up in the freezer.  For the actual semifreddo, you will need 1-1/2 cups of whipping cream, 2 cups of smoked strawberries, 1/3 cup of sugar, 1 teaspoon of fresh lemon juice, ½ teaspoon of vanilla, and ½ cup of Greek plain yogurt.  You will also need a hand or stand mixer for whipping the cream, two medium size bowls, and a small saucepan.

Start the semifreddo by whipping the 1-1/2 cups of whipping cream using a hand or stand mixer until stiff peaks form.  Fold in the ½ teaspoon of vanilla.  I do this step first and place the entire bowl in the refrigerator to keep it chilled while I work on the rest of the recipe.  Next, you’ll need to get your saucepan, smoked strawberries, sugar, and lemon juice ready as this step will be done on the stovetop burner or the grill’s side burner. 

Smoke Meets Sweet

While the whipped cream is chilling, time to take the previously smoked strawberries and sweeten them up.  Place the 2 cups of smoked strawberries in a small saucepan.  Add the 1/3 cup of sugar to the pan and stir constantly.  Allow the mixture to come to a boil, then reduce the heat and cook for just about 5 minutes, again stirring constantly.  The strawberries will thicken up and infuse the smoky, sweet flavor.  Remove from heat and place in a bowl or container to cool.  You can do a quick chill to the mixture by placing in the freezer for about 10 minutes or in the refrigerator for 15-20 minutes.  Be sure the mixture is cool before working it into the cream.

Semifreddo Time!


pouring the smoked strawberries into the mixtureOnce the smoked strawberry and sugar mixture is completely cool, time to fold it into our whipped vanilla cream.  Take the whipped cream from the refrigerator and pour the strawberry mixture into the cream bowl.  Gently fold the strawberry mixture into the cream until completely combined.  This will produce a beautiful pink coloring with speckles of the red strawberry seeds.  Next, you’ll need the prepared loaf pan as we get ready to mold the semifreddo for freezing.

Pour the strawberry cream mixture into the prepared loaf pan ensuring that the overhang of the liner remains intact.  Place the loaf pan in the freezer for a minimum of 3 hours.  Once set, remove the semifreddo from the loaf pan by gripping the liner overhangs and lifting the entire loaf out of the pan.  Place on a serving platter and slice into 1-inch thick slices.  This can be served as is, or with additional whipped cream and mint leaves.  Full of sweet and smoky flavor that is a great cooling dessert when the days are hot.

Tasting Notes

For mild smoke flavor infusion, try using a handheld food smoker.  For medium smoke intensity, a gas grill or stovetop smoker pan works perfectly.  For those who prefer a bold smoke flavor, the charcoal grill is the answer.

We hope this recipe inspires you to try wood-fired grilling techniques with your favorite foods.  Tells us what is your favorite fruit to smoke or grill with wood and the perfect recipe to make?  Bringing innovation to wood-fired cooking with recipes, techniques and the science behind the fire, smoke, and flavor. That’s SmokinLicious®. wanting you to “cool” off with our BBQ desert-Try our recipe–Strawberry Semifreddo gets smoky!

Thursday, December 13, 2018

TOP 10 TIPS FOR GRILLING SAFETY


We all love the time of year when we can abandon the indoor kitchen and head out to the grill for open air breathing, relaxing, and some great food.  For those of you who are new to outdoor grilling or who may need a refresher, we are giving you our top TIPS FOR GRILLING SAFETY so there’s no chance your summer grilling season is remembered for another reason.

Tip #1

You probably wondered why about 15 years ago, outdoor kitchens became all the rage.  The real purpose in having an area designated for outdoor cooking took hold when people realized these structures were highly durable and allowed for measures to be in place to ensure rogue hot coals from charcoal fires or excessive heat from gas grills didn’t ignite the surrounding structures like the house and garage.  If you can’t afford a full outdoor kitchen layout, at least follow some of the basic ideas: set the cooking area a distance away from any building and preferably on a fire-proof surface like concrete, that is safely away from trees and grass.

Tip #2

Keep your grill clean.  Whether it’s propane, natural gas, electric or charcoal, all grills need periodic cleaning to keep them performing optimally as well as to prevent those surprise grease fires.  Any grill can have a grease fire!  Clean the drip pan, grease pan, lid, walls and grilling grates.  In addition to the safety need, this will give you the longest life out of the grills parts.   If you grill a lot in a single season, then clean the equipment more than just at the start and end of the season.

Tip #3

Don’t use lighter fluid.   This is a chemical designed to give quick life to briquets, charcoal, and wood.  Don’t use it!  It adds a prominent chemical taste to your foods and can result in a fire that goes wild.  Learn what a chimney starter is, buy one, and use it.  It is the safest and easiest method of lighting a fire for a charcoal/wood grill.

Tip #4

Take note of the clothing you choose to wear when you know you’re going to be in control of the grill.  No dangling sleeves, strings, or flammable materials should be near the grill.  Aprons are a great way to keep clean as well as to keep flowing clothing under control.   Just be sure the ties to said apron don’t become a fire starter.

Tip #5

Outdoor cooking is an adult activity.  Don’t assign a youngster to watch the grill.  Grease fires account for most of the damaging fires resulting from grilling.  Plus, it is so easy for youngsters to receive burns from brushing or directly touching the hot grill surfaces.   Animals, too, should be kept away.

Tip #6

Always prepare for catastrophic events!  That means keep a fire extinguisher handy, sand, or baking soda at the ready.  Never attempt to put out a grease fire with water.  Remember, when using a fire extinguisher, spray ahead of the fire and then move toward it.

Tip #7

Understand how your grill works.  With multi-fuel options in one piece of equipment, you need to know how to close vents, valves to gas, and output drafts.  Firing up the grill and having something uncontrollable occur is not the time to learn what those knobs, slides, and dials are for.

Tip #8

If nuts, bolts, or screws loosen up, take the time to secure them back in place, especially if they are on lids, wheels, or fuel areas.  Grills need to be sturdy to withstand the constant opening and closing of the lid.   Protect the surface the grill is on by investing in a grill mat that is fire retardant.  Not only can it prevent the start of a fire, but it will protect your deck or patio material from needing replacement.

Tip #9

When lighting a gas grill, be sure to keep the lid open.  Lighting when the lid is down can result in the gas pooling and exploding.  This will result in the lid becoming a weapon of its own when it is blown off the grill!

Tip #10

Never move a grill indoors including to a garage!  I know.  Space is always an issue when you entertain and a grill can take a lot of that valuable space.  But there is no way around the fact that these pieces of equipment require outdoor air to prevent accumulation of volatile gases that can make you and everyone around ill or worse.  Plus, these units radiate a lot of heat and that heat can spread quickly to other surfaces like the garage door, walls, siding, canopies, lawn chairs – you name it.  Always maintain a 3- foot barrier around the grill including above it to ensure no issues.

Have you experienced a disaster while grilling?  Tell us what safety tip you wish you had known about before disaster struck.  Get tips, techniques, recipes, and the science behind the flame and fire to improve your skills with wood-fired cooking! Follow our TIPS FOR GRILLING SAFETY for a wonderful safe grilling season!

Thursday, December 6, 2018

SMOKED STRAWBERRY HAND PIE

SMOKED STRAWBERRY HAND PIE being filled with the Stawberry mixture with the final result in the middle! yummy
SMOKED STRAWBERRY HAND PIE is a great recipe for fresh or frozen Strawberries. The smokiness will add a special twist

It’s one of my favorite times of year – strawberry picking season!  As my area of Western New York State has such a short strawberry season, I literally am consuming strawberries for three weeks straight.

Good thing they are packed with vitamins and minerals like Vitamin C and K, folate, potassium, magnesium, as well as being low in calories and fiber-rich.  They sure are great at filling you up which makes you eat less.

This season, I’ve got a trio of recipes all using the smoked strawberries that I’ve done on my charcoal grill.  Get yourself a flat of strawberries, follow our easy smoking technique (we do have 3 to choose from that offer various levels of smoke flavor), and prepare to make simple hand pies, perfect for the hot days of summer or frankly anytime you can find strawberries.

Grill and Strawberry Prep

As I’m using a charcoal grill, I get that started first as I want a temperature of about 300°F or slightly more when the strawberries are placed on the grill.  My grill has an insert system making it a bit easier to light my fuel.  I place my Firestarter at the base of my chimney starter in the charcoal pan that has been filled with SmokinLicious® Charwood.  I’ve also foil covered a brick to radiate additional heat to the strawberries, and placed that on one side of the charcoal area.  I will use a two-zone set-up so I don’t burn the sugars in the strawberries.  I light the Firestarter, place the chimney of charwood on top, and go to the kitchen to prepare the strawberries.

I’ll be preparing about 6 quarts for all three recipes I plan to make.  Start with strawberries that are at their peak.  Gently wash them and then trim the stem end.  I cut smaller strawberries in half and larger in quarters to ensure the smoke vapor can penetrate easily.  Tiny ones, I leave whole.  I place my clean, trimmed strawberries into a disposable foil pan for the actual cooking on the grill, which makes clean up so easy.

Smoking

pan of strawberries on the grill with CharwoodOnce the strawberries are ready for the grill, I place one chunk of hardwood on the charwood coals.  This will add smoke flavor.  I’ve used a double filet wood chunk to control the boldness of the smoke.  The actual smoking process will only take about 15 minutes to know about halfway through, you will want to rotate your foil pan to prevent the pectin from burning.  I’ll be collecting all that thicken juice after the cook and save it for a cocktail I’m making.  Be sure to keep in mind that you’ll still have hot coals left when the smoked strawberries are done so use them for another cooking: maybe some charred peppers or onions, or even cook some meats as you’ll have plenty of heat left.

The Recipe

ingredients for our recipeWith the strawberries all smoky good, the juices thickened and rendered, it’s time to take these to the kitchen and make our hand pies.  First, drain off as much of the juice as possible and capture in a container to use for other recipes.  We have a great one for a strawberry marinade you should check out.


The dough cut outs ready for the filingNext, you’ll need about 1 cup of the smoked strawberries, pie dough either homemade or store bought; 1 tablespoon cornstarch, 2 tablespoons sugar, sanding or turbinado sugar, and one egg plus 1 teaspoon of water.  You’ll also need a rolling pin if making your own dough and flour for rolling out the dough, as well as 4-5-inch round cookie cutter.  Cut 10 rounds from your dough and refrigerate them on a parchment lined sheet pan while you prepare the filling.

The Filing

filing and closing up the doughTake the cup of smoked strawberries and add the tablespoon of cornstarch and the 2 tablespoons of sugar, mixing gently but well.  If additional juices have rendered, pour off.  Taking one dough round at a time while keeping the others refrigerated, add about 1-2 tablespoons of strawberries to one half of the round maintaining a dough border.  Brush egg “wash” around the edge of the filled side of the dough round.  Gently fold over the dough to make a crescent shape and seal the edges by pushing lightly with your fingertip to form a crimped edge.

Finishing

To finish the pies for cooking, after folding and crimping the edge, brush the surface with egg wash and sprinkle with coarse sugar.  Make a small slit in each hand pie top to allow the steam to release during cooking.  Make sure the hand pies are spaced out on the sheet pan to allow for juice spillage.  Bake in a 400° F oven for 20-25 minutes or until crust browns.  Remove from oven and allow to rest on the sheet pan for 5 minutes, then remove to a cooling rack.

Super Outcome


close up of the final baked hand pieAfter a simple smoking of 15 minutes on a charcoal grill using a two-zone cooking method, pouring off the beautiful juice, and producing a pie filling, we stuffed 4-inch dough rounds with our smoked mixture producing the perfect size hand pie.  After baking in the oven for about 25 minutes, although you can do that step as well on your grill of choice, we let them rest and then served them up a-la-natural though these are fabulous with a bit of fresh whipped cream or even a scoop of vanilla bean ice cream.  Smoked Strawberry Hand Pie will be your easy dessert or snack recipe to whip up when those short-lived fresh strawberries come to town!

Tasting Notes: 

The equipment you use will reflect the boldness of the smoke.  If you want a mild smoke flavor infusion, use a handheld food smoker.  Medium boldness will be produced on the gas/LP grill, and Bold will be produced on the Charcoal grill.

We hope this recipe inspires you to try wood-fired grilling techniques with your favorite foods.  Tells us what is your favorite fruit to smoke or grill with wood and what kind of recipe do you make? 

Bringing innovation to wood-fired cooking with recipes, techniques and the science behind the fire, smoke, and flavor. That’s SmokinLicious®. Please try and leave a comment on our Smoked Strawberry Hand Pie recipe!