Showing posts with label charcoal grill. Show all posts

Thursday, July 28, 2022

WOOD-FIRED CLAMS CASINO

Our wood-fired clams casino on the offset grill with brick and the finished product

Have you ever noticed how many ingredients go with clams? This low fat, high protein seafood also has many beneficial minerals. They are also one of the most sustainable seafood resources.

I thought I would provide an easy wood-fired cooking method that can be done on your charcoal grill (you certainly can modify a few setup items and do this on the gas grill as well using wood) and produce the most flavorful clams casino out there.

Go find some similarly sized clams, fire up the grill, and get ready for this recipe and technique to become your favorite.

Hot Coal Grilling

Our Wood-Fired Clams Casino recipe is quite simple gather together:

    our ingredient table with everything ready for the stuffing!

  • 1 tablespoon olive oil
  • 2 oz. sliced pancetta or bacon, finely chopped
  • 1 cup finely diced red bell pepper
  • 1/3 cup chopped shallots
  • 2 large garlic cloves, minced (you can use pre-minced garlic)
  • ¼ teaspoon dried parsley
  • 1/3 cup dry white wine
  • 4 tablespoons freshly grated Parmesan
  • 2 tablespoons panko breadcrumbs
  • salt & fresh ground pepper
  • 18 medium clams, shucked, bottom shells reserved


Before starting on the casino filling, it’s important that you get the grill ready. First, you’ll want to get a chimney starter of charcoal going. I’m using SmokinLicious® charwood in place of traditional charcoal as this is a partially charred product that will also provide for some hardwood flavor infusion. Once lit, the chimney starter needs to burn down the charwood to hot coals – no flame should be visible when you dump this into the grill.

our wire mesh on the charcoal rack to retain all the small and hot pieces

For my charcoal grill, I’ve set a mesh screen at the base of my kettle grill to allow me to retain as many hot coals as possible. The screen helps to prevent small coals from falling through the charcoal area. I’ve also covered brick with heavy-duty foil to act as a heat conductor and radiator. This will help to keep a constant temperature during the actual cooking process. The brick will also separate the cooking area from the fuel area. A bit of unlit charwood is also added to the charcoal half of the grill so these bits can ignite from the hot coals and sustain the heat level more evenly.

Casino Mixture

our ingredients in the mixing bowl with cheese added

With the charwood burning in the chimney starter, I can now start on the casino filling. After adding a tablespoon of oil and cooking the pancetta or bacon in a skillet, I’ve put that aside on a paper towel lined dish and added the diced red pepper to the fat drippings in my pan. After cooking a few minutes, I had the shallots, garlic, and parsley to the same skillet and sauté until the shallots are tender and translucent, which is about 5 minutes. Add the white wine and simmer until it is almost evaporated. Remove the skillet from the heat and cool completely.

Assembling the Casinos

While the casino mixture is cooling, I prepare my clams. Here you have a couple of options depending on your skill level and time management. You can shuck the clams as normal and reserve the bottom shell with the clam, or you can steam the clams until just open, separate the top from the bottom shell, reserving the bottom shell. I loosen the clam from the shell so it’s easier to consume with the casino mixture. After the clams are readied, I take the cooled casino mixture and add the previously cooked pancetta or bacon, 2 tablespoons of grated Parmesan, and fresh pepper mixing well. I then take a tablespoon of the mixture and mound it over the clam in the shell. The finished clams are placed in a grill-proof pan.

Wood Firing Brings Depth of Flavor

Chef Bert explains the indirect cooking method.

With all my top neck clams stuffed with casino filling, I sprinkle the remaining Parmesan and the 2 tablespoons of panko bread crumbs over each clam. I am now ready to place the tray on the grill. Since I’m using a two-zone cooking method, I can safely put the lid on the grill without concern for charring these clams too far. With a steady temperature of about 300°F, these will take between 15-20 minutes. You can rotate the tray if you feel the heat level in your grill is not even or steady. For those that like a crunchy outside to the clam feel free to place these under the broiler for a few minutes. The clams pick up the wood flavor in a very balanced way, giving just hints of charry goodness with each bit. Super easy, super flavorful, and super fun to make. Take your clams to the wood fire for your next event.

The Culinary Crew wants you to know…

about the great results had from indirect cooking or the two-zone grilling technique, as referenced in this recipe blog. When it comes to this particular recipe, you will find that wood fired clams done on a charcoal grill with indirect heat and a simple brick heat conductor will add a distinctive smoky flavor twist to your clams casino. This appetizer promises to be a fan favorite for any seasonal or football party!

Now you can enjoy a video tutorial on this recipe as we collaborated with our friends at Passing It On. Get the visual step-by-step directive on making our rendition of clams casino.

Thursday, April 28, 2022

LOW AND SLOW CHARCOAL WOOD BY SMOKINLICIOUS®

"Charwood

There are many terms around the world to describe wood used for wood-fired cooking.  We take for granted in America the use of the term barbecue.  In fact, even that word has its spelling variations.  BBQ, barbeque, barbecue are just a few that relate to this style of cooking.  Grilling is NOT barbecue!  For many BBQers, low and slow charcoal is the way to go but consider this approach with a charcoal like product that accelerates wood smoke vapor and flavoring.

When Its Barbecue It’s Best with Low and Slow Charcoal Wood

Barbecue is cooking with smoke.  Considered an aerosol, smoke imparts the true flavor of barbecue.  You need a vessel to cook in and a combustible material to produce the smoke.  The number one choice is wood.

Not just any wood will do.  Hardwood is the best choice for Charwood.
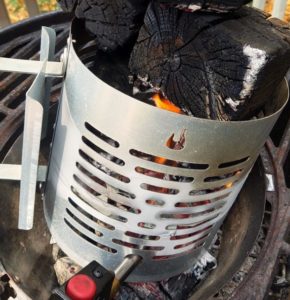
What is low and slow charcoal wood?  This is wood that has the perfect balance of moisture.  It allows the wood to smolder, producing a flavorful smoke to foods cooked over it.  As you burn the wood it becomes fully carbonized in the form of charcoal.  When it completely burns, all that remains is ash.

What to Look For

Although hardwood is the choice for low and slow cooking, not every hardwood is ideal.  You should use hardwoods that are common: maple, cherry, hickory, oak, ash, alder, beech.  Be sure the wood is not “seasoned” for a long period of time or you will simply end up with firewood.  That means wood that is too try to smolder.  No smolder means no smoke.  No smoke means no flavor.

Also, check on where the wood comes from.  Natural forest lands are best as these woods haven’t been altered.  Be wary of orchard sourced woods which can be treated with chemicals or enhancers.

In the end, a true low and slow charcoal wood gives you the perfect balance in flavor and texture to your barbecue.  Learn why SmokinLicious® is the perfect brand for low and slow charcoal wood and explore the world of hardwood as an ingredient!


Thursday, October 7, 2021

SNAPPER GETS WRAPPED IN CORN HUSK & COAL FIRED

Snapper Gets Wrapped in Corn Husk and is now ready to rest on our bed of coals to get roasted!

When fresh fish comes in season, whether you catch it yourself or find your perfect catch at the seafood market or store, there is no better way to release the flavor than on the charcoal grill. I found some splendid snapper fillets that I plan to marinate, wrap in a corn husk, and cook on the coals of my charcoal grill. Let’s get started!

The Perfect Marinade

The final blended ingredients for this tasty marinade!


Fish does not require a lot of marination time so know in the time it takes the fish to absorb the marinade’s great flavors, you can set up the charcoal grill. I like to lite the chimney starters while I make the marinade. For that, you’ll need:

  • 6 white fish fillets (tilapia, branzino, snapper)
  • ½ cup finely chopped scallion
  • 10 garlic cloves, minced
  • 1 cup oil
  • ¼ cup lime juice
  • 1 teaspoon paprika
  • 1 teaspoon curry powder
  • Salt – 1 teaspoon
  • ½ teaspoon black pepper
  • 12 pieces of soaked corn husks

Mix together the scallion, minced garlic, oil, lime juice, paprika, curry powder, salt and black pepper. Place the fish in a baking dish or in a sealable storage bag and top with the marinade mixture. Marinate the fish in the refrigerator for a minimum of 1 hour.

Wrapping the Snapper

It’s time to take our marinated fish and encase it in the corn husk. If you have fish fillets that will fit in a single corn husk, then one will do. However, if you are doing larger pieces of fish, usually over a few ounces in weight, you will need to place 2 corn husks on a work surface overlapping the husks. Place one piece of fish on a pre-soaked corn husk wrapping the husk around the fish. Tie the ends of the husk with meat twine noting that most of the fish is enclosed in the corn husk. Repeat with the remaining pieces of fish. You’ll see that what has been made is a steam packet for the fish. The corn husk is strong enough to allow the extra marinade to stay within the husk and simply tenderize the fish.

Grill Setup

The grill has the Smokinlicious Smoker Wood Chunks around the brick and the snapper wrapped in corn husk on the grill

I’m using a kettle grill with a wire mesh placed in the charcoal area to retain more of my hot coals. Since I started the chimney starters while preparing the marinade, I pour these into the charcoal area that also holds some unlit charcoal. On top of the hot coals, I place a couple of wood chunks which will add great flavor. I’ve also included a foil-covered brick to act as a heat conductor and retention device. This is a two-zone setup. I’ll keep the hot coals and wood going on one side of the brick and place my corn husked fish on the other side of the brick. In less than 20 minutes, these will be ready to go, fully cooked, and full of moisture.

Coal Fired to Perfection

Our finished Snapper wrapped in corn husk opened to show this wonderful method of cooking fish

Know that when you coal or ember cook foods, the temperature even from these small embers is high. The grill will average between 300-350° F for the cooking. There is no need to turn the corn husks, just simply monitor to ensure they don’t catch fire. A spray bottle of water on hand is helpful at this stage. In the end, the char flavor will penetrate the husk and produce the most fantastic flavor to the fish. Simply cut the ties from the corn husk ends and enjoy the fish with your favorite sides. There is nothing like natural fire cooking for fish.


Thursday, September 30, 2021

SMOKEY HUNGARIAN PEPPERS ON THE KETTLE GRILL!

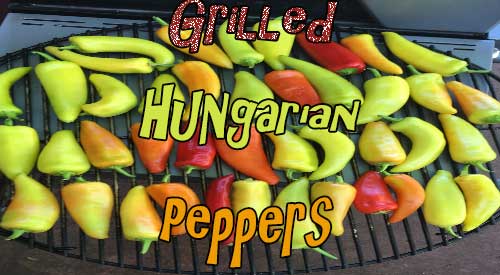
Smokey Hungarian Peppers on our kettle Grill!

I love growing Hungarian wax peppers in my garden and then harvesting for recipes and freezing for future recipes. Hungarian wax pepper come in different levels of heat depending on the variety chosen. Mine are a hot variety but work perfectly for mixing with other creamy flavors to produce some great condiments and sauces. I will introduce you to two versions of my Smoked Hungarian Pepper Spread in our recipe blog which will post soon.

Previously we showed you how to ember cook Hungarian peppers which entailed placing the peppers whole on hot embers and turning every 5 minutes or so. This time, the cooking will be over the hot coals of a traditional charcoal kettle grill and include wood chunks to the coals for added flavor.

Purchase or pick your favorite variety of Hungarian wax pepper and bring great grilled flavor to them with charcoal and hardwood, using any charcoal grill you have.

Homegrown Is Best

Our homegrown Hungarian peppers on the plants!

Just a small number of pepper plants can produce an abundance of peppers! Start with a high-quality organic soil and you will find there is little to be done to peppers other than watch them grow. You will see that though these are a wax variety of Hungarian pepper, if left on the plant, they will turn from the traditional yellow-green coloring to red. Do not confuse these peppers with the banana pepper variety. Though they look the same, they are different in heat level, with the wax variety being higher heat/spice level than banana. Once picked, I simply clean them under running water and pat dry. These are then ready for grilling.

Tasting Note: I don’t remove the membrane or seeds from the peppers prior to grilling. I simply place them on the grill grate whole. Note some of the peppers may have more water than others and burst on the grill. Be sure to turn them before they show wrinkling and that should prevent them from bursting.

Charcoal Grill Set Up

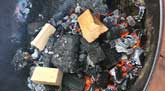
Our wood chunks on the charcoal for the smokey flavor.
Our Wood chunks on the charcoal for the smokey flavor

The key to producing a great char on the peppers is to be sure you are cooking over gray, hot coals and not flame. The easiest method of starting the coals is with a charcoal chimney starter.

Simply fill the starter and light at the base using newspaper or a fire starter. Then allow the chimney to burn down until the charcoal is grayed over and red. I still put a bit of unlit charcoal in the kettle and then pour the hot coals over the unlit. Only do this step if you have more than one grate of peppers to cook or want to use the grill for cooking something else as the heat level produced will last many hours.

Place your peppers on the grill grate and grill until charred on one side. Turn with tongs and grill a few more minutes, then remove. These are now ready for your favorite pepper recipes! Do not forget to freeze some to keep on hand during the months the peppers won’t be available in stores.

What is your favorite pepper to grill? Leave us a comment to opine and subscribe to get all our postings on tips, techniques and recipes. Bringing innovation to wood fired cooking with recipes, techniques and the science behind the fire, smoke, and flavor. That’s SmokinLicious®.


Thursday, April 29, 2021

HOW TO STORE WOOD CHIPS

Tom did pay attention to our tips on how to store wood chips!

 It is one of our top questions. Wood storage. Where to store wood, how to store wood, temperature ideal for storing wood, shelf life of stored wood. If you are an avid follower of our readings, you are likely familiar with our two cartoon characters, Tom and Bert. Thru these characters, SmokinLicious® has been able to guide millions of home grilling and smoking enthusiasts on techniques and tips to make every wood-fired cooking event a success.

Here are some great lessons to learn from Tom’s wood storage mistakes.

Tip #1

Tom having issues lighting his fire

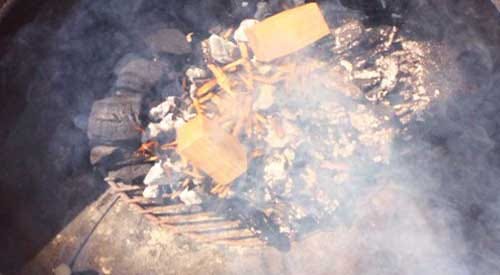
Tom is using a traditional charcoal grill. One of the first tips concerns the charcoal. Be sure it is super hot (gray in color) and that once you add the wood chunks or chips to the hot coals, you have your lid ready to go on.

This is when the difference between hardwood that has some measurable moisture versus one that is too dry to register determines if smoke vapor will be produced. No moisture means no smolder. That in turn means no smoke vapor to infuse your foods.

Tip #2

image of wood chips on the open picnic table

Tom admits that he did nothing special to store his extra wood chips. He made the mistake of leaving the leftover chips exposed to the elements – sun, rain, air. These elements can cause the wood to lose moisture much faster, especial when the product is a wood chip.

Moisture depletes much faster in chips than in chunks. All wood needs to be stored under proper conditions regardless of the size of the pieces. Cooler temperatures like those in your refrigerator are best which is why many people find garages and basements to be ideal.

Tip #3

Chef Bert upset that Tom left his wood chips outside

Tom’s friend, Bert, is quick to point out that wood does require proper storage. If you want to be sure any extra wood will be good material for your next grilling/smoking event, take the time to store it properly.

A cool, dark, dry location is ideal. If you are considering a garage or basement, be sure the wood is not set directly on any cement flooring or additional moisture can be drawn in from the cement making the wood too wet. That is when mold can set in!

You can use just about anything to store the wood: cardboard box, plastic crate with air holes, metal crate or basket, wood box.

Tip #4

Chef Bert discussing how to store wood chips properly

When you want to use hardwood for flavor essence infusion, moisture is important. Without any measurable water level in the hardwood, what was intended to be used as a flavor enhancer literally becomes a fuel wood.

Just like the seasoned firewood used in the home fireplace or wood stove, wood that dries out too much produces more heat with less aromatic. Dry wood added to charcoal equipment will become fuel, just like the charcoal. No long burst of smoke will result as the dry wood burns up too quickly. This is not the outcome you want when hot smoking food.

Learn from Tom’s mistakes and properly store your hardwood chunk and/or chip investment. By taking the time to store the wood correctly, you get the longest value from your purchase.

Thursday, April 15, 2021

HOW TO TURN YOUR CHARCOAL GRILL INTO A SMOKER

How to turn your charcoal grill into a smoker

 Let’s be honest.  When you bought that charcoal grill you were likely thinking that you could both grill and smoke without needing to add anything.  Soon, you realized, that just wasn’t the case.  Now, you’re contemplating whether you need to purchase a smoker.  Well, hold on the shopping trip until you read this.

  You can turn your charcoal grill into a smoker with these simple steps!

 Any Charcoal Unit Will Smoke

 Obviously, if you own a little tailgate model of a charcoal grill, you won’t be doing multiple slabs of ribs or a full packer cut brisket on that unit.  But you can smoke on any charcoal grill if you follow some simple steps and afford yourself enough time to do it right.

 How To Add Smoking Woods to the Charcoal Grill

Essentially, when you smoke on a charcoal grill you are roasting outdoors like you do in your conventional oven.  If you use a good quality hardwood charcoal, you will get some flavor from that product but not like true smoked foods you may have experienced in your favorite barbecue restaurant.  That bolder flavor only comes from unprocessed hardwoods.

 Picking Your Fuel and Smoke Flavor

There are three primary fuel types you can use in your charcoal grill: briquettes with instant lite, briquettes, and lump hardwood charcoal.  Right off the bat, I’m going to tell you to eliminate the briquettes with instant lite.  That is a product that contains an accelerant or petroleum product to make it quick lighting.  Unfortunately, it adds a very distinct, unpleasant component to the cooking process that can transfer off-flavors to your foods.  Stick with plain briquettes or lump hardwood charcoal.  Just note, that you likely will find a bit more ash developing faster with lump hardwood charcoals than you would with briquettes.

 Picking the wood for smoke flavor has a few rules you should adhere to: only use hardwoods, try to limit the bark on the wood or go bark-free for the best temperature control, find woods that have some measurable moisture level so they smolder – around the 20% level is ideal, and use chunks of wood versus chips.

 Indirect Cooking Method

What truly makes for barbecue and not just grilling is using the indirect method of cooking.  There are many ways to set up a two-zone cooking method which is also referred to as indirect cooking.  Often, what you are cooking and the quantity will determine the setup of the fuel.

 There are two popular methods that work the best: banking the charcoal to one side of the unit with the food going on the unlit side and putting the charcoal on each side of the unit with the food going in the middle where no charcoal is present.

For those that need a bit more help keeping everything where it’s supposed to go, there is an accessory called the Slow “N Sear that works well with kettle grills and includes a trough that holds water.  This allows you to place foods on the upper grates as well as below on the opposite side of the charcoal.  It certainly will give you ample room to cook many pounds of meat.

Water Keeps Everything Moist

To ensure that any protein cooked on the grill remains moist and tender, include a water pan in your set up.  This is easily done by purchasing readily available disposable foil pans from the discount store.  The shape and size will be dependent on your actual grill.  I like to add warm water to the water pan so the grill does not have to exert energy to heat up the water, which takes heat away from the unit.  Remember, the water will be evaporating during the cooking process so have additional water available if it depletes before the cooking is complete.  Water pans are set in the base of the unit on the charcoal free side, directly under the food.  This will also act as a drip pan, catching all those juices as well.

Chimney Starter for Easy Lighting

Once you have your charcoal set up, the water pan laying in the charcoal free section, it’s time to light the charcoal.  The easiest way to do this and ensure that the grill gets hot pretty fast is to light a chimney starter.  These are portable containers made of metal that allow you to pour a couple of pounds of charcoal into and light from vent openings at the base.  Usually these devices require you to place newspaper at the base which is then lit with a lighter to ignite the cold charcoal.  I skip the newspaper step and simply use a MAP gas canister with easy operating torch head to lite the charcoal.  The best part is I can leave the torch under the chimney starter on a safe surface such as concrete, while I finish the grill set up.  Once the charcoal at the bottom of the chimney starter is lit, I remove the torch and allow it to burn up through the rest of the charcoal.  Once the pieces are grayed over and showing hot embers, it’s ready to pour into the grill’s charcoal area.  I carefully pour the hot coals on top of the unlit coals.  This will ensure plenty of fuel during the cooking process.  Next, 3-4 wood chunks are placed on the hot coal area.  I usually disperse these with a couple of inches between pieces.

Moist Cold Surfaces Attract Smoke Vapor

With the grill set up complete, the hot coals going and the wood chunks beginning to smolder, it’s time for the meat.  Always take the prepared meat directly from the refrigerator to the grill COLD!  Cold foods will attract smoke vapor faster, allowing the vapor to condense on the food’s surface.  The water pan will ensure that moisture remains within the grill which also will ensure attraction of the smoke vapor.

Vent Settings Guarantee Temperature Control!

Although charcoal as a fuel also aides in temperature control, I’m going to speak about air control.   To sustain fire or combustion, you need oxygen flowing into the grill, stimulating the hot coals.  This is the intake damper.  Close it completely, and you’ll put the fire out and lose all temperature.  Open it wide and you’ll increase the temperature as the coals get stimulated for more heat.

On the opposing end is the exhaust damper also called a vent or flue/chimney.  This vent is what pulls in the oxygen through the lower intake damper.  Yes, smoke is expelled through the exhaust vent but heat as well as the gases that are derived from the combustion of the fuel material including the hardwood chunks are also vented.  The exhaust vent needs to be partially open all the time.  If the temperature starts to fall, open the intake damper wider.  If the temperature is too high, reduce the oxygen to the fire by closing the intake damper.

 Now, make your shopping list for your favorite foods to smoke and set up that charcoal grill for a fabulous flavorful day.  It’s really that simple!

 Did we get you motivated with this article?  If so, leave a comment as we’d love to hear from you.  Don’t forget to let us know what other questions you have, as we always design our postings after the needs of our followers.  As always, subscribe and follow us, so you don’t miss a thing!


Friday, September 27, 2019

COAL-FIRED LEEKS TERRINE

COAL-FIRED LEEKS TERRINE begins by cooking the leeks over a bed of hot ember coals!

Considered one of the healthiest foods, leeks join onion and garlic as part of the allium vegetable family.  This seasonal delight is commonly used as a soup but I have something else in mind.  I’ll be putting these directly on the hot coals and charring them for tenderness and flavor.  Then I’ll be layering them in a terrine that includes goat cheese and crème Fraiche.  I’ll also provide a dip alternative using the same ingredients to give you two options for these great flavors.  Get shopping and pick out about 5 lbs. of vibrant green leeks, and let’s make an appetizer.


The Small Coal Bed

One of the benefits of having a cooking wood company is when we produce our charwood product, I can have the micro pieces saved for my cooking use.  By using these smaller pieces, it allows my fire to reduce faster to the hot coal stage.  I’m using a Weber kettle for this coal method and include a fine mesh screen on the charcoal grate to prevent the micro pieces from falling through.

our cooking bed of coalsI place a Firestarter on the screen, then place my chimney starter over the top.  I fill the chimney with my micro charwood pieces and light the base where the Firestarter is.  Leave this alone until the coals gray over and are hot.  Then pour in an even layer in the charcoal area to be ready for the leeks.

Tasting Notes: I recommend for the best char taste to the leeks that you use hardwood charcoal and not briquets.  This will allow you to break apart charcoal pieces easier and get an even coal bed.


Quick Leek Preparation

Leeks are one of those vegetables that are simple to prepare for cooking.  First thing, if you’ve purchased with the root ends intact, remove those roots.  Even if the roots are removed, still trim the root end to remove the hardened, dried end.  Then cut off the dark green tops.  Remember to save these parts to flavor soup stock! Wash the leeks to remove trapped dirt and pat dry.  Once dry, cut each leek lengthwise in half.  Now get a sheet pan and we’ll finish getting the leeks ready for the coals.

With the leeks cleaned and trimmed, it’s time to spread them out on a sheet pan and season with salt and fresh ground pepper.  Taking the pan to the grill, place the leeks on the hot coals trying not to overlap any.  Let them cook for about 10 minutes before turning to char the other side.  Be sure to move around any leeks that are lighter in char color than the others.  Total time on the coals will be about 20 minutes.  Remove and allow to cool briefly.


Terrine Filling

With the leeks charred and tenderized, it’s time to make the terrine filling.  Start by combining 4 ounces of softened goat cheese, 4 ounces of crème Fraiche, 1 teaspoon lemon or lime zest, kosher salt and fresh ground pepper to taste.    Mix these ingredients together well.   Line a standard 9×5 loaf pan with plastic wrap so that about 4-inches of wrap overhang the ends of the pan.  This will allow for ease in releasing our terrine once it is set.

The layering of the leeks in the pan and goat chees fillingWith the leeks, goat cheese mixture, and loaf pan ready, it’s time to assemble the terrine.  Start by adding leeks to the bottom of the loaf pan in a single layer.  Then add a layer of the goat cheese mixture.  Repeat until the pan is filled, being sure to start and end with a leek layer.  Fold the plastic wrap over the finished terrine and place a piece of cardboard cut to size on the covered terrine.  Apply canned goods to weigh down the terrine and refrigerate overnight.

Tasting Notes: If you prefer to not make a terrine, you can still use this basic recipe to make molded leek topping.  Simply chop the charred leeks into small pieces and add directly to the goat cheese mixture.  Combine well and then mold in small bowls, still refrigerating overnight.

After spending the night in the refrigerator, the coal-fired leek terrine is ready to be un-molded.  Start by unwrapping the terrine and inverting it onto a serving platter.  I like to cut 1-inch slices while the terrine is still firm.  Be sure to use a sharp, serrated knife to get through all the leek layers.  Then allow softening somewhat before serving with your selections of suitable accompaniments.  I am using a hearty pumpernickel bread as well as a crusty Italian bread.  Other good choices are radicchio leaves, water crackers, petite bread, and mini pepper halves.  This is an easy means of giving your guests a unique appetizer that is healthy too.

Do you have a favorite leek recipe?  Tell us in a comment.   Bringing innovation to wood-fired cooking with recipes, techniques and the science behind the fire, smoke, and flavor. That’s SmokinLicious®.

Thursday, September 12, 2019

COAL FIRE CAULIFLOWER BY COOKING ON A CHIMNEY STARTER

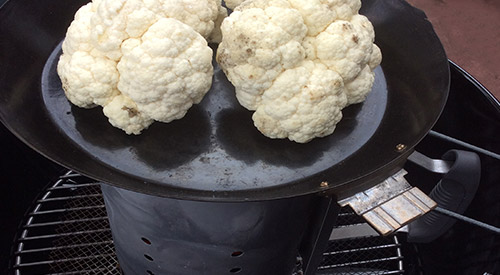
We are cooking on a chimney starter with a grill pan to nicely char our head of Cauliflower for this recipe!

A cousin to broccoli, #cauliflower is one of those vegetables that can be eaten raw or cooked and converted to so many different textures.  Best yet, cauliflower is one of those super cancer-fighting foods as it contains sulforaphane known to kill cancer stem cells.

I’ll be taking my head of cauliflower and introducing it to hot coals, first, direct heat using a #chimneystarter for the actual cooking and then directly on the hot coals to give it the perfect “meat” char.  No matter what color you enjoy – white, yellow, purple – grab a head and get your chimney starter ready, as I show you how to use a chimney starter as an actual grill.


Why a Chimney Starter


There are times when you really don’t need to fire up a full charcoal area of coals on the charcoal grill.  I have the perfect solution when you’re doing just a small quantity of a food, like our head of cauliflower. 
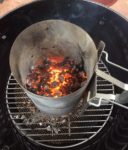
All our hot embers accumulated in the Chimney starter provides an excellent heat source for cooking
To start, I place a mesh screen on the charcoal grill grate to help retain the small, hot coals for cooking.  I have a collection of micro charcoal pieces that work perfectly for this type of cooking.

After lighting a Firestarter, I place the charcoal filled chimney starter on top of the Firestarter and allow the coals to burn down to hot embers.  Hot embers are what I will be using to cook my fresh cauliflower, first, directly on the chimney starter, then on the mesh screen once I dump the hot embers from the chimney starter.


Prep and Cook


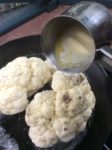
Pouring the butter over the cauliflower resting on our grill planCauliflower is so simple to prepare for chimney starter coal cooking.  Just remove the thick stem and the green leaves, then cut in half.  I’ll be placing a griddle pan directly over the chimney starter for the start of the cooking.  I first drizzle a couple of tablespoons of a high heat tolerant oil over the cauliflower (I’m using avocado oil).  Allow that to cook while you melt butter which will be poured over the cauliflower.   I melt the butter directly on the grill while the cauliflower is cooking.  Allow this to char the cauliflower on the griddle for about 12 minutes.  We just want enough tenderness to allow the direct coal cooking to provide the flavor.


Embers Give Char Flavor


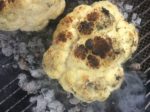
nicely charred Cauliflower ready for our recipe!After the cauliflower has produced some tenderness while direct cooking over the chimney starter, it’s time to remove the griddle pan and dump the hot coals onto the mesh.  You’ll see I’ve placed a large wood chunk just off the hot coals to produce some additional wood-fired flavor.  Now in goes the cauliflower steaks.  I position them right on the hot coals.  Don’t turn or disturb these pieces for a least 8 minutes at which time, flip the cauliflower to char the other side.  This is what produces the fabulous “meaty” char taste and why cauliflower is done on the grill is often referred to as a cauliflower steak.

If you will use the cauliflower in a recipe, then cooking about 12 minutes on the coals will be enough.  If enjoying as is, then cook slightly longer and enjoy.  This truly is the easiest method of cooking a single head of cauliflower for a true char flavor.  Which I will be taking to a cauliflower rice recipe that’s coming up!

Have you ever cooked directly on a chimney starter?  Leave us a comment to share.  Bringing innovation to wood-fired cooking with recipes, techniques and the science behind the fire, smoke, and flavor. That’s SmokinLicious®.

Thursday, May 16, 2019

USEFUL COOKWARE OPTIONS FOR YOUR GRILL

logo and grill introducing our USEFUL COOKWARE OPTIONS FOR YOUR GRILL
Enjoy our USEFUL COOKWARE OPTIONS FOR YOUR GRILL

If you’ve followed my writings for some time now, you’ve likely learned that I believe outdoor equipment is the same if not better than the traditional indoor options.  You literally can make anything on the outdoor equipment that you make inside your home.

Knowing this, I have received many questions regarding the type of cookware that I use when grilling and/or smoking on said equipment.  Today, I’m going to discuss the preferred cookware materials and the potential issues that can arise if you use a material that is not considered ideal for high heat temperatures.


Material #1: Cast Iron

This is my first choice and many other cooks, and the only material I use when I coal cook with cookware. Why? It is durable, it is relatively inexpensive, it is unbelievable at heat retention, and you can cook almost anything in it.   Literally, it never wears out!

Downside?  It is a material that needs to be maintained meaning oiled consistently.  It is heavy!


Material #2: Carbon Steel

Carbon steel is a beast at retaining heat and it can be used on any cooking surface.  Although lighter in weight than cast iron it is still heavier than stainless steel.  Similar in many attributes to cast iron, it also requires frequent seasoning and the base of the pan will become discolored from the high heat exposure.   Plus, it is not dishwasher safe so you need to love this material and be willing to put some work into maintaining it.  If you’re lucky enough to find a piece you love, you will make magic in it whether near or in the fire.


Material #3: Stainless Steel Combo

I’m sure every one of us owns at least one piece of stainless steel.  This is a very attractive piece of cookware from the aesthetic view.  However, on its own, stainless steel is not the best heat conductor.  This is the main reason why it often is combined with another material to improve its heat retention properties and keep it light in weight.  Suitable pairs you’ll find for stainless steel include copper and aluminum.  All three of these materials on their own, are not ideal.  Cooper and aluminum heat very quickly which means they can burn very quickly as well, while stainless steel on its own can take forever to heat up.  But combine copper and aluminum or aluminum and steel and you have an ideal heat conductor and safe high heat material.  Rule of thumb: never use aluminum and copper cookware on their own for high heat cooking.


Material #5: Enameled Cast Iron

Know as the “pretty” cookware, enameled cast iron is cast iron at the heart-and-soul but with beautiful ceramic enamel outside surfaces.  It has fabulous heat conductivity and retention but it is not non-stick which can cause some issues.  I find it works really well when I use more of a two-zone cooking set up rather than direct coal or heat cooking.


Material #5: Non-Stick

Teflon is a non-stick, promoted material, that should be avoided.  It has no ability to be used for high heat and in fact, excessive heat can melt this material.  Also, Teflon is documented to flakes off after extended use, moving these flakes into your foods.  At higher temperatures, the material produces toxic fumes that have been proven to be a health risk.


What Are High Heat Levels?

Now we know what materials are optimal for high heat cooking but what are the actual temperatures that can be handled?

Cast iron and stainless-steel combos can tolerate 1500°F, with stainless steel excelling to 2200°F.  Although copper has a melting point of 1984°F and aluminum at 1221°F, cast iron, and steel materials in cookware still perform the best.

Now you have the education behind your choice of cookware.  My last piece of advice is to always think about how you plan to use the cookware.  If you love to nestle in the coals or be as close to the flame as you can, the items that may not look as pretty are likely the best choice.  Take our tips in this blog USEFUL COOKWARE OPTIONS FOR YOUR GRILL and expand you cooking/Grilling skills and techniques!

Thursday, April 4, 2019

PEACHES WOOD FIRED FOR A SMOKY FLAVORFUL GAZPACHO

We are showing peaches on the grill for our peaches wood fired recipe along with the finished smoky peach gazpacho in a bowl.
Smoky peaches wood fired is a great way to enhance this fruit. Add as an ingredient in soup for a special flavor touch especially on a hot summer day.

One of the easiest techniques to do with fruit on a gas or charcoal grill is wood firing peaches.  Take advantage of the season with this fruit by bringing different flavors and textures for great recipe. 

Why not start with my recipe for a summer gazpacho that will cool you off during the hot season.  It’s time to take advantage of the summer harvest with fresh peaches and yellow tomatoes for fabulous summer cuisine


Fresh Is Key

Peaches are one of those fruits that performs perfectly on the grill, whether you use charcoal or gas for the actual cooking process.  To start, purchase fresh, in season peaches.  Wash and pat dry.  Then pass a knife through the center until you just hit the peach pit and cut through the flesh in a circular motion.  Remember, the pit will stay in place.   Take your hands and grip each side of the peach turning your hands in opposite directions to open the peach.  This will result in the pit separating from the peach flesh of one half of the peach.  Take a spoon and gentle insert the side around the pit and loosen until the pit is released from the peach flesh.  You now have 2 equal sized peach halves. 

You may do as many peaches as you like but know for the gazpacho recipe you will need at least 3-4 good sizes peaches.


Releasing Sweet Smoky Flavor

Once all the peaches are cut in half they are ready for the grill.  I am going to use my charcoal smoker for this recipe but you can easily use a gas grill with wood chunks as well. Just see our posting on how to add wood chunks to the LP grill.

I’m going to set up an indirect method of cooking the peaches to keep them from getting too soft.  That means my hot coals will be in one half of the grill while I do the actual cooking of the peaches on the half without hot coals.  Keeping the lid on will ensure that the heat is collected in the grilling area for an even cook.


Flavor In No Time At All

I have the benefit of being able to use the SmokinLicious® charwood product which is a blend of charred and uncharred wood. It allows for a lot of smoke vapor. I place my peaches with the skin side down on the grate, keeping all the peach halves on the non-coal side of the grill.  I’ll let them cook for about 10 minutes and then rotate them so the flesh side is on the grate.  Once cook through, I will remove and place them on the skin side to cool.


Seasonal Fresh Ingredients

With the peaches wood fired and ready, it’s time to collect the other ingredients for the gazpacho:
  • 3 cups peaches wood fired
  • 3 medium yellow tomatoes, chopped
  • 1 medium sweet yellow pepper, chopped
  • 1 medium cucumber peeled and chopped – I’m using 3 mini cukes
  • ½ cup chopped sweet onion
  • 1 garlic clove, minced
  • 1/3 cup lime juice
  • 2 tablespoons rice vinegar
  • 1 tablespoon marinade for chicken
  • 1 teaspoon salt
  • 2 teaspoons sugar
  • ¼ teaspoon hot pepper sauce (optional)
  • Reserved chopped peaches, cucumber and yellow tomatoes for topping/garnish
  • You will also need a food processor or blender


Blending Your Way To Fabulous Flavor

Time to bring all the ingredients together starting with the wood fired peaches, yellow tomatoes, yellow pepper, cucumber, sweet onion and garlic.  Process all these items until thoroughly blended.  Now add the lime juice, vinegar, marinade, salt, sugar, and pepper sauce if you are including this.

Time to refrigerate for at least 4 hours or preferably overnight.  You must wait for everything to blend and make the most fabulous gazpacho ever!

With the smoky tang of the peaches wood fired meeting up with the coolness of the tomatoes and cucumber, this gazpacho has just the right amount of tang, kick, and sweet to make this a summer favorite.  Once the soup has chilled, place in serving bowls and top with chopped smoked peach, cucumber, and tomato.  All the fabulous seasonal ingredients the season can offer in one bowl!

We hope you’ll try your hand at this recipe.  We’d love to see your photos of your version of the recipe.  Leave a comment and subscribe.  Keep following us as we bring you innovative tips, techniques, and recipes on working with wood for cooking, grilling & smoking.

Thursday, March 21, 2019

TOP TOOLS TO OWN FOR CHARCOAL GRILLING

Our take on the Top Tools to Own for Charcoal Grilling
Our take on the Top Tools to Own for Charcoal Grilling – some may surprise you!

When I get the chance to visit a brick-and-mortar barbecue specialty store, I am always amazed at the number of accessory items currently offered for grilling and smoking.  The options are staggering!  I certainly can see why an individual might end up purchasing too many items, thinking that it’s a necessity when it comes to the grill or smoker.

My intent is to guide you on the bare basics tools that are needed when you own a charcoal grill.  Of course, I may slip in there a couple of “next in line” purchases that may not be necessities but sure come in handy.  Let’s get started!


Tool #1

We demonstrate a lite chimney starter!Chimney Starter: Honestly, I don’t know a safer, easier method of lighting the fuel for your grill than with a chimney starter.  Are they pretty much the same?  Pretty much but here’s my recommendations on what to look for: one that is made of plain steel meaning no paint; one that has a heat-safe handle that is placed far enough away from the chimney body to prevent you from receiving burns and includes a heat shield;  large enough to hold enough charcoal for the size of your grill; well vented at the base to get things hot within 15 minutes.


Tool #2

insulated long sleved gloves protect from heat and burnsWe just talked about the chimney starter which emits very high-heat so this next item is going to keep you fire safe.  High-temperature resistant gloves.  Personally, I use welding gloves as I appreciate that I can purchase a longer length glove, plus, these gloves tend to have great flexibility to them since most are made from cow leather.   Best of all, they last forever!


Tool #3

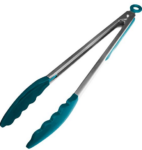
The long handle tonges are great for putting and turning food on the grillLong-handled tongs.  Your standard tong length for the traditional kitchen just won’t work at the grill, as you need to keep some arm distance from those hot coals.  I like the 20-inch length with silicone grips as well as silicone tips as silicone can tolerate extremely high heat.


Tool #4

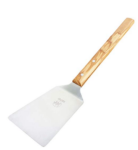
Spatula with long handle to turn the food on the grillLike the tongs, a must have is long-handled spatula for those food items that need to be flipped.  I prefer one that is made of solid steel and has a bit of a beveling to the edge.  Again, the longer the handle to better for keeping away from intense heat.  Of course, you’ll be wearing your high-temperature resistant gloves as well!


Tool #5

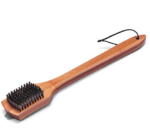
Wire brush to clean the grates of residual food.Even if you don’t grill every day you’re still going to need a good brush to clean up the residual food bits and grease.  There’s been a lot of controversy over the use of metal bristles but most of these brushes are made well.  You simply forget that like your toothbrush, they need to be replaced periodically before the bristles start to come loose and have the potential to be transported to your foods.  I prefer a brush with metal bristles, with a long handle to keep my arm away from the heat, as often you want to clean the grill when it’s still hot.  Remember, most of these brushes are under $10 so think about purchasing one a couple times per season to ensure the bristles stay put.


Tool #6

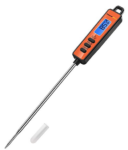
Probe thermometerAn easy to read, digital thermometer.  It is a must when you grill or smoke.  Look for one that has a longer probe for when your grilling larger roasts and thicker cuts of meats and poultry.  Be sure the readout is easy to see and if you grill a lot at night, get one that has a backlight to see more clearly.  If you cook a lot of different animal proteins at the same time, try to have a thermometer dedicated to each food so you don’t cross-contaminate while bacteria may still be an issue.  Most of the digital thermometers on the market today are under $18 with even more under $10.


Other Recommended Tools:

These are additional items I love to have on hand to use with my charcoal grilling and smoking.

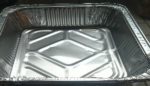
Aluminum disposible pans are grillers best friendThe Disposable Foil Pan: Perfect to use as a water pan, cooking pan with a roasting rack insert, grease collection pan, and warming pan.


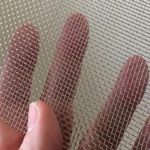
Wire mesh to hold the coals from falling thru the larger grates. especially for ember cooking.Fine Wire Mesh: Cut to size to fit my charcoal area, I prefer to use fine wire mesh when I want to ensure I can retain every small hot coal for my cooking.  This works particularly well when you plan to ember cook foods like peppers, onions, eggplant, and garlic.


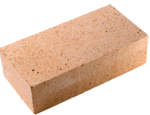
Brick for ember cooking- heat retention and separation for delicate foods such as fish!Fire Brick:  I use one or two fire bricks to set up my two-zone cooking area.  The bricks also work great for positioning a pan on to allow for elevation in the cooking area.


There you have it!  My top choices for the tools that will bring ease to your charcoal grilling and smoking.  Just remember to include some clean, bark-free hardwood on the charcoal for an even better flavor to your foods.

There you have it our take on the Top Tools to own for Charcoal Grilling!

Thursday, March 7, 2019

TEMPERATURE CONTROL IS ALL IN THE AIR FLOW

Your Temperature control is all in the air flow for smoking and grilling with equipment!

How do you keep a charcoal grill at 200°F? How do you cool down a charcoal grill?  Do you keep the vents open all the time?

These are some of the common questions posed when it comes to learning how to control the temperature of a grill or smoker.  This can be a challenge specifically for charcoal/wood units as they rely on the human hand to determine when to add fuel as opposed to a gas/LP unit that has continual, regulated flow.

You might assume that the only combustible material used in these units is charcoal or wood but there is another one.  Oxygen.

I’m going to provide my top tips on gaining control of temperature by instructing you on airflow or oxygen regulation in specific styles of charcoal/wood burning equipment.


Intake and Outtake


For many of the charcoal/wood using units, they are built with an intake and an outtake vent.  Let’s make sure you understand what these vents are and what the purpose of each is.

Intake Vent: It has one job – bring in oxygen to control the heat of the fire.  If you need to raise the temperature of your unit, open the intake vent.  Too much heat, close the intake vent which starves the fire for oxygen.  Note: if you close the intake vent entirely while keeping the outtake open, you will still starve the fire and put it out.

Here’s the trick – each unit will have a “sweet spot” for the perfect balance of oxygen flow.  Find that spot, and you can maintain a temperature easily in your equipment.  But, I’m getting a little ahead of myself.  Let’s discuss the opposing vent.

Outtake Vent:  This goes by different names (chimney, flue, outtake, vent) but has the same purpose regardless of what you call it; vent out the gases from the combustible material and pull in oxygen from the intake vent which is commonly know as draft.  Remember a charcoal/wood fire produces gases which need to be vented.  If they aren’t properly vented, they will smother the fire.

When learning how to regulate your equipment for the desired temperature setting, always start with the outtake vent fully open.  This allows you to manipulate only the intake vent until you reach the desired temperature.  That will help you learn where the sweet spot is on your equipment.


When You Never Find the Sweet Spot


There are times when no matter how you play with the intake vent, you never seem to get the temperature to hold.  What now?

Time to look for leaks in your equipment.  If an access door or lid are bleeding smoke, then you know where the extra oxygen is coming from.  That will affect the draft between the intake and outtake vent and result in fluctuating temperature that cannot be controlled.  Best course of action is to try to seal the leaks with food grade silicone or other materials suitable for high heat appliances.


The Shape of the Equipment


In my opinion, the vertical-style equipment models tend to be much easier to get airflow/temperature control.  Horizontal units also referred to as off-set smokers and grills, specifically the inexpensive models, tend to have poor design in the vent placements as well as poor insulation that results in heavy leakage.

If you insist on purchasing a horizontal unit, read reviews and ask questions about how the unit is insulated.  Get specific with the materials used, quality of the metal parts, etc.


Other Tips


Always try to light your initial fuel product, whether briquets, lump hardwood charcoal, or charcoal in a chimney starter so you can control the quantity with every cook.  Use the chimney to add hot coals to the unit when you need to increase temperature.  Although you can have unlit charcoal in your charcoal area so it will ignite as the lit produce makes contact, this isn’t always a guarantee that you won’t produce some temperature variance.  The best chance of getting the temperature regulated is by adding hot coals as needed, even if this may be every hour or so.

To summarize, learn to control temperature by using the same quantity and type of material for the fuel, lit it with a chimney starter, only add hot coals to increase the temperature, and always have the exhaust vent open at least ½ way when cooking.  Remember the number one thing is Temperature control is all in the air flow and you will have tasty grilling results!

Thursday, January 24, 2019

THE WATER PAN EXPLAINED FOR GRILLING & SMOKING

The Water Pan explained for grilling and smoking techniques!

If you’ve purchased a smoker, you’re likely familiar with the term “water pan”.  If, however, you’re more of an LP/Gas Grill person, than this term is likely one that escapes your knowledge.

Water pans are a means of introducing valuable moisture into the cooking environment which has immense value when grilling and smoking.  Let me explain each of the pros of learning and using a water pan for your outdoor cooking, no matter the type of equipment you’re cooking on.

Water Pan Pro #1

Temperature control.  This is the ultimate need when you grill or smoker, especially when you smoke.  Maintaining a stable temperature that you’ve predetermined.  When the day is scorching hot and the equipment is made of metal, you will experience a challenge with temperature control.  Introduce a water pan, and your battle can be won.

A water pan goes above the heat source.  If using a charcoal grill or charcoal/wood smoker, this pan would be placed above the coal area.  Have an electric unit and you’ll find the pan over the electric heating element.  If you want to introduce a water pan on an LP/Gas Grill, this would be placed over the lit burners.  Many vertical smokers come with a water pan.

Water Pan Pro #2

Water cannot go above the boiling point which is 212°F.  Additionally, evaporative cooling also takes place as the water is exposed to heat.

Water Pan Pro #3

A water pan can become the number one tool when doing direct heat cooking over an open flame.  Why?  It acts as a repellent for the flame giving your foods a chance to survive without becoming a blackened, dried out, former piece of food.

Water Pan Pro #4

Are you having trouble with hot spots in your equipment?  Well, a water pan will even them out.  Now, the temperature you desire can essentially be locked in just by using a water pan.

Water Pan Pro #5

Humidity that develops from the use of a water pan keeps the surface of the meat moist, which in turn, attracts smoke vapor, which in turn, produces great flavor.  The water vapor mixes with the combustible gases which are emitted from the burning material and add to the overall flavor.  Yes, water is a passageway to all things flavorful!

What Goes in the Water Pan

It’s called a water pan for a reason.  It is designed to hold water, specifically hot water to keep the cooker from wasting energy on heating cold water put in the pan.  Here’s a tip when you fill the water pan: use a teapot to fill the pan while it’s in place so you don’t take the chance of spilling hot water on surfaces or you.  Remember, water evaporates while other liquids don’t evaporate.

Don’t Make the Water Pan a Drip Pan

Here’s the thing with a drip pan.  Due to its location directly over the heat source, when used on vertical units it often serves double duty as a drip pan.  Don’t do that!  Here’s why.  The rendered fat drippings can produce an oil slick on the surface of the water which will prevent water evaporation.

Make Cleaning a Snap

Here’s a couple of tips when using a water pan.  If your unit comes with a water pan, line it in aluminum foil which will allow you to simply pull the foil off and preserve the condition of the original pan.

If you’re using a unit that has no water pan but want to introduce one, simply purchase a disposable foil pan.  You will want to purchase one that is compatible in size to the unit your using, that will fit comfortably over the heat source, and that can hold enough water to prevent you from having to make refill trips every 15 minutes.

Thursday, January 10, 2019

Grilling & Smoking Shallots a Finesse Technique


Chef Calle's finesse technique of Grilling & Smoking Shallots on the charcoal grill using Charwood for the smoky wood flavor
Chef Calle’s finesse technique of Grilling & Smoking Shallots on the charcoal grill using Charwood for the smoky wood flavor

For all my BBQ cooking friends who have been under the assumption that grilling is only for protein food groups, (beef, pork, fish etc.) boy do I have a taste revelation that could transform you into a disciple of the vegetable sections at local farmers marketsChar Grilled and Smoked Shallots!

Using chimney starter to ignite charwoodGrilling Process

The process is fairly straightforward but doesn’t get the impression that this food item is something that you can flop on the grill grate and walk away from for an extended period of time.  Finesse is the cooking standard that must be applied to enjoy the maximum flavor result rendered from this sweet cousin of the onion family.

You can tell by my strong friendship with the folks at SmokinLicious®, that I’m a big advocate of grilling with a hardwood fire.  It allows for uniform cooking temperatures while simultaneously infuses food items with a natural wood smoke flavor.
So, as we begin, go about preparing your grill with only the best hardwood cooking wood and remember- never, ever start your fire with a chemically based liquid starting fluid.  Use a chimney starter!

While your grill preheats to a medium temperature, prepare the whole shallots by cutting off the tips and drizzling them with skins on using the high-quality EVOO and a touch of Kosher salt. You can even season with fresh thyme or sage and let marinate for a few minutes.

Shallot Technique

Grilled shallots are a great side dish or garnish to prepare alongside your protein or immediately after you have removed your meat to let it rest.

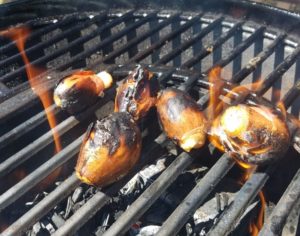
Charring shallots on grill gratePlace the shallots on the grate directly over the outer fringes of the embers, ideally between the smoking wood chips and outer ring of embers.  Do not place them directly over the center most concentration of the embers.  If you want a slightly stronger smoky flavor, cover.  If not, leave uncovered.

Here’s where the finesse part comes in- over the next 3-10 minutes, (depending on the heat and size of the shallots) watch over the shallots like a hawk watches over hatchlings in a nest.  Turn often, get a good char on all sides but, for Heaven’s sake – don’t allow them to ignite into a raging conflagration!  If this happens, you will lose much of the smoky sweetness and be left with a bitter tasting, burnt onion.  You can best determine a great finish when the outer skins are charred nicely while the centers have a soft, moist feel when gently squeezed with cooking tongs or fingers.

Remove from the grill, let them cool a bit.  Once cooled for 2-5 minutes lightly squeeze the charred outer skin and out will come the sweet and delicious interior.

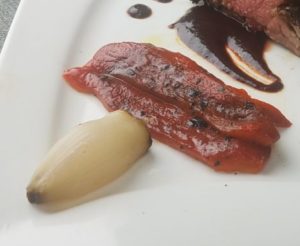
Finished dish with tasty grilled shallots
After you experience the fabulous smoky flavor of your grilled shallots, I’m sure you’ll have a greater appreciation for all the food flavor benefits that can be had from your backyard grill!