Showing posts with label charwood. Show all posts

Thursday, April 28, 2022

LOW AND SLOW CHARCOAL WOOD BY SMOKINLICIOUS®

"Charwood

There are many terms around the world to describe wood used for wood-fired cooking.  We take for granted in America the use of the term barbecue.  In fact, even that word has its spelling variations.  BBQ, barbeque, barbecue are just a few that relate to this style of cooking.  Grilling is NOT barbecue!  For many BBQers, low and slow charcoal is the way to go but consider this approach with a charcoal like product that accelerates wood smoke vapor and flavoring.

When Its Barbecue It’s Best with Low and Slow Charcoal Wood

Barbecue is cooking with smoke.  Considered an aerosol, smoke imparts the true flavor of barbecue.  You need a vessel to cook in and a combustible material to produce the smoke.  The number one choice is wood.

Not just any wood will do.  Hardwood is the best choice for Charwood.

What is low and slow charcoal wood?  This is wood that has the perfect balance of moisture.  It allows the wood to smolder, producing a flavorful smoke to foods cooked over it.  As you burn the wood it becomes fully carbonized in the form of charcoal.  When it completely burns, all that remains is ash.

What to Look For

Although hardwood is the choice for low and slow cooking, not every hardwood is ideal.  You should use hardwoods that are common: maple, cherry, hickory, oak, ash, alder, beech.  Be sure the wood is not “seasoned” for a long period of time or you will simply end up with firewood.  That means wood that is too try to smolder.  No smolder means no smoke.  No smoke means no flavor.

Also, check on where the wood comes from.  Natural forest lands are best as these woods haven’t been altered.  Be wary of orchard sourced woods which can be treated with chemicals or enhancers.

In the end, a true low and slow charcoal wood gives you the perfect balance in flavor and texture to your barbecue.  Learn why SmokinLicious® is the perfect brand for low and slow charcoal wood and explore the world of hardwood as an ingredient!


Thursday, September 30, 2021

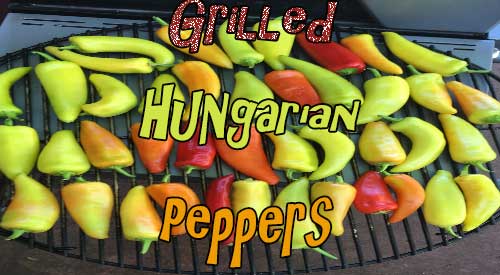
SMOKEY HUNGARIAN PEPPERS ON THE KETTLE GRILL!

Smokey Hungarian Peppers on our kettle Grill!

I love growing Hungarian wax peppers in my garden and then harvesting for recipes and freezing for future recipes. Hungarian wax pepper come in different levels of heat depending on the variety chosen. Mine are a hot variety but work perfectly for mixing with other creamy flavors to produce some great condiments and sauces. I will introduce you to two versions of my Smoked Hungarian Pepper Spread in our recipe blog which will post soon.

Previously we showed you how to ember cook Hungarian peppers which entailed placing the peppers whole on hot embers and turning every 5 minutes or so. This time, the cooking will be over the hot coals of a traditional charcoal kettle grill and include wood chunks to the coals for added flavor.

Purchase or pick your favorite variety of Hungarian wax pepper and bring great grilled flavor to them with charcoal and hardwood, using any charcoal grill you have.

Homegrown Is Best

Our homegrown Hungarian peppers on the plants!

Just a small number of pepper plants can produce an abundance of peppers! Start with a high-quality organic soil and you will find there is little to be done to peppers other than watch them grow. You will see that though these are a wax variety of Hungarian pepper, if left on the plant, they will turn from the traditional yellow-green coloring to red. Do not confuse these peppers with the banana pepper variety. Though they look the same, they are different in heat level, with the wax variety being higher heat/spice level than banana. Once picked, I simply clean them under running water and pat dry. These are then ready for grilling.

Tasting Note: I don’t remove the membrane or seeds from the peppers prior to grilling. I simply place them on the grill grate whole. Note some of the peppers may have more water than others and burst on the grill. Be sure to turn them before they show wrinkling and that should prevent them from bursting.

Charcoal Grill Set Up

Our wood chunks on the charcoal for the smokey flavor.
Our Wood chunks on the charcoal for the smokey flavor

The key to producing a great char on the peppers is to be sure you are cooking over gray, hot coals and not flame. The easiest method of starting the coals is with a charcoal chimney starter.

Simply fill the starter and light at the base using newspaper or a fire starter. Then allow the chimney to burn down until the charcoal is grayed over and red. I still put a bit of unlit charcoal in the kettle and then pour the hot coals over the unlit. Only do this step if you have more than one grate of peppers to cook or want to use the grill for cooking something else as the heat level produced will last many hours.

Place your peppers on the grill grate and grill until charred on one side. Turn with tongs and grill a few more minutes, then remove. These are now ready for your favorite pepper recipes! Do not forget to freeze some to keep on hand during the months the peppers won’t be available in stores.

What is your favorite pepper to grill? Leave us a comment to opine and subscribe to get all our postings on tips, techniques and recipes. Bringing innovation to wood fired cooking with recipes, techniques and the science behind the fire, smoke, and flavor. That’s SmokinLicious®.


Thursday, September 9, 2021

THE ULTIMATE WOOD-FIRED CLAMS CASINO

Our wood-fired clams casino on the offset grill with brick and the finished product

Have you ever noticed how many ingredients go with clams?  This low fat, high protein seafood also has many beneficial minerals.  They are also one of the most sustainable seafood resources.

I thought I would provide an easy wood-fired cooking method that can be done on your charcoal grill (you certainly can modify a few setup items and do this on the gas grill as well using wood) and produce the most flavorful clams casino out there.

Go find some similarly sized clams, fire up the grill, and get ready for this recipe and technique to become your favorite.

our ingredient table with everything ready for the stuffing!

Hot Coal Grilling

Our recipe is quite simple: gather together

  • 1 tablespoon olive oil
  • 2 oz. sliced pancetta or bacon, finely chopped
  • 1 cup finely diced red bell pepper
  • 1/3 cup chopped shallots
  • 2 large garlic cloves, minced (you can use pre-minced garlic)
  • ¼ teaspoon dried parsley
  • 1/3 cup dry white wine
  • 4 tablespoons freshly grated Parmesan
  • 2 tablespoons panko breadcrumbs
  • salt & fresh ground pepper
  • 18 medium clams, shucked, bottom shells reserved


Before starting on the casino filling, it’s important that you get the grill ready.  First, you’ll want to get a chimney starter of charcoal going.  I’m using SmokinLicious® charwood in place of traditional charcoal as this is a partially charred product that will also provide for some hardwood flavor infusion.  Once lit, the chimney starter needs to burn down the charwood to hot coals – no flame should be visible when you dump this into the grill.

our wire mesh on the charcoal rack to retain all the small and hot pieces

For my charcoal grill, I’ve set a mesh screen at the base of my kettle grill to allow me to retain as many hot coals as possible.  The screen helps to prevent small coals from falling through the charcoal area.   I’ve also covered brick with heavy-duty foil to act as a heat conductor and radiator.  This will help to keep a constant temperature during the actual cooking process.  The brick will also separate the cooking area from the fuel area.  A bit of unlit charwood is also added to the charcoal half of the grill so these bits can ignite from the hot coals and sustain the heat level more evenly.

Casino Mixture

With the charwood burning in the chimney starter, I can now start on the casino filling.  After adding a tablespoon of oil and cooking the pancetta or bacon in a skillet, I’ve put that aside on a paper towel lined dish and added the diced red pepper to the fat drippings in my pan.  After cooking a few minutes, I had the shallots, garlic, and parsley to the same skillet and sauté until the shallots are tender and translucent, which is about 5 minutes.  Add the white wine and simmer until it is almost evaporated.  Remove the skillet from the heat and cool completely.

our ingredients in the mixing bowl with cheese added

Assembling the Casinos

While the casino mixture is cooling, I prepare my clams.  Here you have a couple of options depending on your skill level and time management.  You can shuck the clams as normal and reserve the bottom shell with the clam, or you can steam the clams until just open, separate the top from the bottom shell, reserving the bottom shell.  I loosen the clam from the shell so it’s easier to consume with the casino mixture.  After the clams are readied, I take the cooled casino mixture and add the previously cooked pancetta or bacon, 2 tablespoons of grated Parmesan, and fresh pepper mixing well.  I then take a tablespoon of the mixture and mound it over the clam in the shell.  The finished clams are placed in a grill-proof pan.

Wood Firing Brings Depth of Flavor

Chef Bert explains the indirect cooking method.

#chefbertandtom

With all my top neck clams stuffed with casino filling, I sprinkle the remaining Parmesan and the 2 tablespoons of panko bread crumbs over each clam.  I am now ready to place the tray on the grill.  Since I’m using a two-zone cooking method, I can safely put the lid on the grill without concern for charring these clams too far.  With a steady temperature of about 300°F, these will take between 15-20 minutes.  You can rotate the tray if you feel the heat level in your grill is not even or steady.  For those that like a crunchy outside to the clam feel free to place these under the broiler for a few minutes.  The clams pick up the wood flavor in a very balanced way, giving just hints of charry goodness with each bit.  Super easy, super flavorful, and super fun to make.  Take your clams to the wood fire for your next event.

The Culinary Crew wants you to know…

about the great results had from indirect cooking or the two-zone grilling technique, as referenced in this recipe blog.  When it comes to this particular recipe, you will find that wood fired clams done on a charcoal grill with indirect heat and a simple brick heat conductor will add a distinctive smoky flavor twist to your clams casino.  This appetizer promises to be a fan favorite for any seasonal or football party!


Friday, September 27, 2019

COAL-FIRED LEEKS TERRINE

COAL-FIRED LEEKS TERRINE begins by cooking the leeks over a bed of hot ember coals!

Considered one of the healthiest foods, leeks join onion and garlic as part of the allium vegetable family.  This seasonal delight is commonly used as a soup but I have something else in mind.  I’ll be putting these directly on the hot coals and charring them for tenderness and flavor.  Then I’ll be layering them in a terrine that includes goat cheese and crème Fraiche.  I’ll also provide a dip alternative using the same ingredients to give you two options for these great flavors.  Get shopping and pick out about 5 lbs. of vibrant green leeks, and let’s make an appetizer.


The Small Coal Bed

One of the benefits of having a cooking wood company is when we produce our charwood product, I can have the micro pieces saved for my cooking use.  By using these smaller pieces, it allows my fire to reduce faster to the hot coal stage.  I’m using a Weber kettle for this coal method and include a fine mesh screen on the charcoal grate to prevent the micro pieces from falling through.

our cooking bed of coalsI place a Firestarter on the screen, then place my chimney starter over the top.  I fill the chimney with my micro charwood pieces and light the base where the Firestarter is.  Leave this alone until the coals gray over and are hot.  Then pour in an even layer in the charcoal area to be ready for the leeks.

Tasting Notes: I recommend for the best char taste to the leeks that you use hardwood charcoal and not briquets.  This will allow you to break apart charcoal pieces easier and get an even coal bed.


Quick Leek Preparation

Leeks are one of those vegetables that are simple to prepare for cooking.  First thing, if you’ve purchased with the root ends intact, remove those roots.  Even if the roots are removed, still trim the root end to remove the hardened, dried end.  Then cut off the dark green tops.  Remember to save these parts to flavor soup stock! Wash the leeks to remove trapped dirt and pat dry.  Once dry, cut each leek lengthwise in half.  Now get a sheet pan and we’ll finish getting the leeks ready for the coals.

With the leeks cleaned and trimmed, it’s time to spread them out on a sheet pan and season with salt and fresh ground pepper.  Taking the pan to the grill, place the leeks on the hot coals trying not to overlap any.  Let them cook for about 10 minutes before turning to char the other side.  Be sure to move around any leeks that are lighter in char color than the others.  Total time on the coals will be about 20 minutes.  Remove and allow to cool briefly.


Terrine Filling

With the leeks charred and tenderized, it’s time to make the terrine filling.  Start by combining 4 ounces of softened goat cheese, 4 ounces of crème Fraiche, 1 teaspoon lemon or lime zest, kosher salt and fresh ground pepper to taste.    Mix these ingredients together well.   Line a standard 9×5 loaf pan with plastic wrap so that about 4-inches of wrap overhang the ends of the pan.  This will allow for ease in releasing our terrine once it is set.

The layering of the leeks in the pan and goat chees fillingWith the leeks, goat cheese mixture, and loaf pan ready, it’s time to assemble the terrine.  Start by adding leeks to the bottom of the loaf pan in a single layer.  Then add a layer of the goat cheese mixture.  Repeat until the pan is filled, being sure to start and end with a leek layer.  Fold the plastic wrap over the finished terrine and place a piece of cardboard cut to size on the covered terrine.  Apply canned goods to weigh down the terrine and refrigerate overnight.

Tasting Notes: If you prefer to not make a terrine, you can still use this basic recipe to make molded leek topping.  Simply chop the charred leeks into small pieces and add directly to the goat cheese mixture.  Combine well and then mold in small bowls, still refrigerating overnight.

After spending the night in the refrigerator, the coal-fired leek terrine is ready to be un-molded.  Start by unwrapping the terrine and inverting it onto a serving platter.  I like to cut 1-inch slices while the terrine is still firm.  Be sure to use a sharp, serrated knife to get through all the leek layers.  Then allow softening somewhat before serving with your selections of suitable accompaniments.  I am using a hearty pumpernickel bread as well as a crusty Italian bread.  Other good choices are radicchio leaves, water crackers, petite bread, and mini pepper halves.  This is an easy means of giving your guests a unique appetizer that is healthy too.

Do you have a favorite leek recipe?  Tell us in a comment.   Bringing innovation to wood-fired cooking with recipes, techniques and the science behind the fire, smoke, and flavor. That’s SmokinLicious®.

Thursday, May 30, 2019

WOOD BURNING PIZZA OVENS: THE WOOD MASTER’S GUIDE

The Wood Burning Pizza Oven with our Ash Wood glowing with great flavor
We specialize in products for Wood Burning Pizza Ovens!

For those that have followed us for years, you know we are proud that almost from the start of our Company, we were committed to providing a guide for equipment to cooking wood product match.  We refer to our guide affectionately as Match Your Cooker”.

In this article, we are covering our recommendations for Pizza Ovens, whether made of ceramic, clay, brick, steel or any combination, that are wood burning or a combination of wood burning and gas.

As there are always new equipment lines and models released, our plan is to provide regular updates on this listing.  We also encourage you to send us a message when you don’t see a manufacturer or model listed to ensure it is added to the list.

For now, we introduce you to our Wood Master’s Guide to SmokinLicious® culinary woods for Pizza Oven.
Smokinlicious Full cut log 

Barrel Smoker Logs


The following equipment/models would be suitable for the SmokinLicious® Barrel Smoker Log/ Full Cut Log which are only designed for the largest pizza oven’s cooking area.  These logs would also be suitable with the commercial-grade wood-burning pizza ovens:

Braza Brick Wood Fired Pizza Oven

Forno Bravo: Primavera 60 Outdoor Oven, Napoli Commercial Pizza Oven

Forno Classico: The Colosso, Fiamma Square

Mugnaini: Medio 110, Prima 120


¼ Cut Wood Barrel Logs
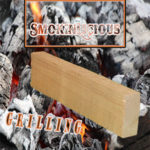

Our Quarter cut logThe following equipment/models would be suitable for the SmokinLicious® Barrel Smoker Log ¼ Cut Wood Log which we also call Pizza Legno:

Alfa Pizza 5 Minuti

American Barbecue Systems model: “The Judge”, “The Smokehouse 6042”

Authentic Pizza Ovens: Portable Maximus Oven, Traditional Brick Famosi Wood Fire Oven,  Traditional Brick Lisboa Wood Fire Oven, Stone Domed Pizza Oven, Traditional Brick Pizziaoli Wood Fire Oven, Traditional Brick Braza Wood Fire Oven

Bella Outdoor Living: Medio Wood Burning Pizza Oven

Bull Outdoor Products: X-Large Outdoor Wood Fired Pizza Oven, Large Pizza Oven

Californo: Garzoni Pizza Oven, Verona Pizza Oven

Chicago Brick Oven: Wood Burning Pizza Oven Kit CBO-500, CBO-700, CBO-1000; Americano Chicago Counter Top Brick Oven; Mobile Wood Burning Pizza Oven

Deeco: Aztec Allure Pizza Oven

Dome Ovens: Tudor Model Pizza Oven, Model Pizza Oven

Earthstone 90-PA Wood Fired Oven

EcoQue Wood Burning Pizza Oven and Smoker

Fontana Forni: The Small-Est Outdoor Oven, Toscano Margherita Outdoor Oven

Fornetto: Wood Fire Oven and Smoker built-in or freestanding

Forno Bravo: Primavera 60 Outdoor Oven, Bella Grande C36, Bella Ultra C40, Giardino Outdoor Pizza Oven Kit, Casa Home Pizza Oven Kit, Premio Home Pizza Oven Kit, Artigiano Italian Brick Pizza Oven, Andiamo Pizza Oven, Vesuvio Tiled Pizza Oven, Napolino Tiled Pizza Oven, Toscano

Forno Classico: Napoli, Cupola, Square, The Colosso, Fiamma Square

Forno Venetzia: Pronto 500 Outdoor Pizza Oven, Pronto 300 Outdoor Pizza Oven, Pronto 200 Counter Top Wood Burning Oven, Torino 500 Pizza Oven, Torino 200 Pizza Oven, Bellagio 300 Pizza Oven, Bellagio 500 Pizza Oven, Bellagio 200 Counter Top Wood Burning Oven

Gardeco: Pizzaro Pizza Oven

ilFornino: F-Series Mini Professional Stainless Steel Wood Fired Pizza Oven, Platinum Series Wood Fired Pizza Oven, Piccolino Wood Fired Pizza Oven, Professional Plus Wood Fired Pizza Oven, Professional Series Wood Burning Pizza Oven, Elite Plus Wood Fired Pizza Oven, Grand G-Series Wood Burning Pizza Oven

LaToscana: Forno Easy Pizza Oven

Mugnaini: Medio 110 Barrel Outdoor Oven, Masonry Oven Kits Piccolo 80/Medio 100/Medio 110/Prima 100/Prima 120/Piccolo 60

NXR Professional Ranges: Burning Wood Dome Pizza Oven

Pizza Party Pizzone

Preto Beleza Wood Fired Oven

Prime Portable Pizza Oven

Renato PR/310 Outdoor Oven

Ravenna: Talavera Tile Pizza Oven, Rustic Liso Pizza Oven

Rustic Natural Cedar Furniture: Rustic Wood Fired Oven, Wood Fired Pizza Oven

Sunjoy: Wood-Fired Pizza Oven

Valhinos Natural Wood Burning Oven

Wood Stone: Bistro Home Ovens 3030/4836/4343/4355, Mountain Home Ovens Mt. Chuckanut 4’ & Mt. Adams 5’


Charwood


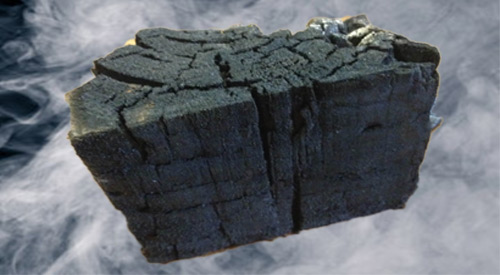
Our Charwood product is a partially charred hardwood that still has the core of the specific hardwood’s flavoring intact.  In other words, the outside is carbonized while retaining a hardwood core.  For those ovens that specify using an anthracite coal only which is a hard, mineral coal, charwood would not be an alternative.  Also, any residential oven that requires gas assist, should not use charwood.

The following equipment/models would be suitable for the SmokinLicious® Charwood:

Authentic Pizza Ovens

Braza

Chicago Brick Oven

ilFornino

Mugnaini

Pit Boss Charcoal Pizza Oven

Wood Stone: Coal Fired Pizza Ovens
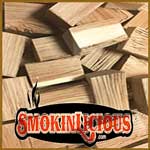
Double Filet Wood Chunk

The following equipment/models would be suitable for the Double Filet Wood Chunk:

Uuni Pro (Ooni Pro)


We hope you view this guide as a helpful resource for selecting the perfect culinary wood for your wood-fired oven.  As always, our Wood Guide Team is ready to answer your additional questions and further assist you for the perfect wood-fired experience!
Thursday, April 11, 2019

GRILLED PEACHES FOR THE PERFECT SALAD ADDITION

Our Grilled Peaches for the perfect salad addition with sweet onion, Tomatoes, and fresh herbs!

If you’ve been a follower of our recipes and techniques for a while, then you’re aware of our preference to grill, smoke, coal cook, and ember fire in-season produce.  Peaches are no exception!

I’ve got my two quarts of fresh peaches and a plan to grill these on the charcoal grill using charwood coals.  Then I’ll use my luscious smoked peaches in a salad that features two additional seasonal ingredients – tomato and shallots.

Get your chimney starter of charwood or charcoal and meet me at the grill for this quick technique and recipe featuring peaches.


Fire Up the Grill!

Whenever you use the charcoal grill, it’s always best to get it lit about 30 minutes ahead of cooking.  I’m using a kettle-style grill made by Stôk that has a removable center grate for an assortment of inserts.  I won’t be using any inserts for this cook as my peaches will stay in a disposable foil pan for easy cooking and removal.

Start by placing charcoal or charwood in a chimney starter.  Place a Fire starter in the charcoal area of the grill and place the filled chimney starter over the starter.  Lite the Fire starter and allow to remain in place until all the charwood has ignited and started to reduce to hot coals.  While that’s burning, let’s prepare the peaches.  Be sure you have a couple of wood chunks available to add to the coals when we are ready to grill.  I like to use the single filet wood chunk size from SmokinLicious®.

Tasting Notes: there are differences in charcoal so be sure to use a natural charcoal or charwood product rather than briquets as briquets will produce more heat than you need.


Perfect Peach Bites

With our charcoal grill going, it’s time to start on the peaches.  There are a few ways to remove the skin from peaches including placing them in hot water for a few minutes then removing and placing in a bowl of ice water.  The skins will just peel off.  I’m an old school so I use a sharp paring knife and just remove the skin.
dicing the peachs in preparation for the smoker
Once the skin is removed, it’s time to cut the peach into bite-size pieces.  You can easily cut around the pit and cut those slices into pieces.  Place all the pieces in a foil pan in an even layer.

Tasting Notes: Try to purchase peaches that have some firmness to them if you don’t plan to grill them right away.  The peaches should have no bruising and have a slight give when touched.  Too soft and those peaches won’t hold their shape when exposed to the grill’s heat.


Smoking Process

With the peaches prepared, time to take them to the grill.  Pour the chimney of hot coals into the grill’s charcoal area and add the wood chunks.  Add the pan of prepared peaches and placed the lid on the grill.  Be sure the outtake vent on the lid is ½ way open.  The intake vent at the charcoal area should be ¼ way open.  Now allow smoking for 15 minutes prior to checking.  Remember, we want to add smoke without reducing the peaches to a puree.

Tasting Notes:  Since peaches contain 89% water, they take in the smoke vapor extremely well.  Keep that in mind when you select both the charcoal and wood.  Remember, oak based charcoal tends to burn hot and has a stronger undertone to fruit.


Final Salad Prep- Grilled Peaches for the perfect salad addition!

While the peaches are absorbing all that great smoke flavor, return to the kitchen and prepare the remaining ingredients for our salad.
ingredients table

You’ll need:
  • 1 lb. tomatoes cut into 1/2’” pieces; or if using cherry or grape tomato, halved
  • 3 tablespoons extra virgin olive oil, plus additional for final drizzle
  • 2 tablespoons rice vinegar
  • ½ teaspoon lemon zest
  • 1 tablespoon lemon juice
  • 1 shallot, sliced thin
  • fresh mint leaves torn
  • salt and pepper
I start by slicing my tomatoes in half, then add a teaspoon of salt to them while sitting in a colander so I can render some of the water.

the ingredients in the serving bowl and ready to add the dressing
While the tomatoes sit, I start slicing the shallot into thin strips.   At this point, you’ll want to check the peaches.  They should be close to or ready to remove from the grill.  I like to place them in the refrigerator for about 10 minutes to cool them down for the salad.  While that’s happening, let’s prepare the vinaigrette.

I prefer to mix all the vinaigrette ingredients in a measuring cup so I can easily pour it to the salad right before serving, to keep the tomato and peach from getting too soggy.  Start with the extra virgin olive oil and add the rice vinegar.   Next, the lemon zest, lemon juice, salt, and fresh pepper.  Whisk it all together and set aside while you combine the salad ingredients.

Tasting Notes: you can substitute cider vinegar for the rice vinegar and any color of tomato will do though I lean toward the reds and purples to give a color contrast from the orange peach.

Smoked peaches go into the serving bowl first, following by the tomatoes, and shallots.  Pour the vinaigrette over the salad within an hour of serving and top with the torn mint leaves.  A perfect balance of sweet, tart, smoky, and refreshing.  An easy method and recipe you can have in 60 minutes.  I love peaches so try our grilled peaches for the perfect salad addition for your next dish to pass!  You will tantalize the guest taste buds!

Thursday, April 4, 2019

PEACHES WOOD FIRED FOR A SMOKY FLAVORFUL GAZPACHO

We are showing peaches on the grill for our peaches wood fired recipe along with the finished smoky peach gazpacho in a bowl.
Smoky peaches wood fired is a great way to enhance this fruit. Add as an ingredient in soup for a special flavor touch especially on a hot summer day.

One of the easiest techniques to do with fruit on a gas or charcoal grill is wood firing peaches.  Take advantage of the season with this fruit by bringing different flavors and textures for great recipe. 

Why not start with my recipe for a summer gazpacho that will cool you off during the hot season.  It’s time to take advantage of the summer harvest with fresh peaches and yellow tomatoes for fabulous summer cuisine


Fresh Is Key

Peaches are one of those fruits that performs perfectly on the grill, whether you use charcoal or gas for the actual cooking process.  To start, purchase fresh, in season peaches.  Wash and pat dry.  Then pass a knife through the center until you just hit the peach pit and cut through the flesh in a circular motion.  Remember, the pit will stay in place.   Take your hands and grip each side of the peach turning your hands in opposite directions to open the peach.  This will result in the pit separating from the peach flesh of one half of the peach.  Take a spoon and gentle insert the side around the pit and loosen until the pit is released from the peach flesh.  You now have 2 equal sized peach halves. 

You may do as many peaches as you like but know for the gazpacho recipe you will need at least 3-4 good sizes peaches.


Releasing Sweet Smoky Flavor

Once all the peaches are cut in half they are ready for the grill.  I am going to use my charcoal smoker for this recipe but you can easily use a gas grill with wood chunks as well. Just see our posting on how to add wood chunks to the LP grill.

I’m going to set up an indirect method of cooking the peaches to keep them from getting too soft.  That means my hot coals will be in one half of the grill while I do the actual cooking of the peaches on the half without hot coals.  Keeping the lid on will ensure that the heat is collected in the grilling area for an even cook.


Flavor In No Time At All

I have the benefit of being able to use the SmokinLicious® charwood product which is a blend of charred and uncharred wood. It allows for a lot of smoke vapor. I place my peaches with the skin side down on the grate, keeping all the peach halves on the non-coal side of the grill.  I’ll let them cook for about 10 minutes and then rotate them so the flesh side is on the grate.  Once cook through, I will remove and place them on the skin side to cool.


Seasonal Fresh Ingredients

With the peaches wood fired and ready, it’s time to collect the other ingredients for the gazpacho:
  • 3 cups peaches wood fired
  • 3 medium yellow tomatoes, chopped
  • 1 medium sweet yellow pepper, chopped
  • 1 medium cucumber peeled and chopped – I’m using 3 mini cukes
  • ½ cup chopped sweet onion
  • 1 garlic clove, minced
  • 1/3 cup lime juice
  • 2 tablespoons rice vinegar
  • 1 tablespoon marinade for chicken
  • 1 teaspoon salt
  • 2 teaspoons sugar
  • ¼ teaspoon hot pepper sauce (optional)
  • Reserved chopped peaches, cucumber and yellow tomatoes for topping/garnish
  • You will also need a food processor or blender


Blending Your Way To Fabulous Flavor

Time to bring all the ingredients together starting with the wood fired peaches, yellow tomatoes, yellow pepper, cucumber, sweet onion and garlic.  Process all these items until thoroughly blended.  Now add the lime juice, vinegar, marinade, salt, sugar, and pepper sauce if you are including this.

Time to refrigerate for at least 4 hours or preferably overnight.  You must wait for everything to blend and make the most fabulous gazpacho ever!

With the smoky tang of the peaches wood fired meeting up with the coolness of the tomatoes and cucumber, this gazpacho has just the right amount of tang, kick, and sweet to make this a summer favorite.  Once the soup has chilled, place in serving bowls and top with chopped smoked peach, cucumber, and tomato.  All the fabulous seasonal ingredients the season can offer in one bowl!

We hope you’ll try your hand at this recipe.  We’d love to see your photos of your version of the recipe.  Leave a comment and subscribe.  Keep following us as we bring you innovative tips, techniques, and recipes on working with wood for cooking, grilling & smoking.

Thursday, December 27, 2018

Charwood Grilled Salmon Fillets for a Hint of Smoky Flavor


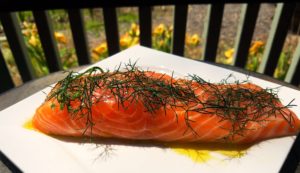
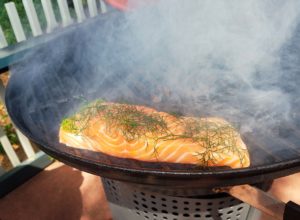
Our gorgeous filet of salmon is awaiting Chef Calle to turn it into Charwood Grilled Salmon on a kettle grill using a two-zone method along with Smokinlicious® wood chips!

Chef Calle here and thanks to SmokinLicious®, I’m going to offer an easy and palate-pleasing method to cook and lightly smoke fresh salmon fillets over a Charwood fire that features a small number of smoking chips.  With this approach, the smoking chips infuse a delicate smoky flavor to the salmon without overpowering its delicious fresh taste.

Today, I’m using a Stok® Tourist™ grill, clearly one of the best Charwood grilling and smoking units on the market.  If you don’t have a Stok®, just about any Charwood grill will work, if its heat chamber has room enough for both the Charwood and wood chips.

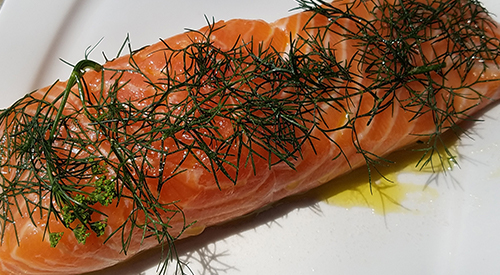
Salmon seasoned and awaiting the grill

Preparation

Preparation is key with salmon and setting up the cooking equipment.  So, first prepare the fresh salmon fillets by lightly seasoning with EVOO, salt, pepper and if you have it- fresh dill or fennel.  Let them sit and soak up all those great flavorful ingredients for about half an hour or until the salmon reaches room temperature.
 
Chef’s Tip:  Do not use salmon that is past its prime, thinking that the smoke will disguise the slightly off flavor of the fish.  Only use the best salmon available.

While the fish is marinating, begin preparations for the actual grilling by first firing up SmokinLicious® all natural Charwood using a hollowed chimney starter.  Never use charcoal lighter fluid!  Or Charwood, charcoal briquettes, pretreated with petroleum-based starting fluid.  In addition to ruining your salmon with a foul aftertaste, it’s safer not to consume the residue or remnants from petrochemical fire starter liquids.

After your embers have taken on a medium to high heat condition (grayish color), place them directly in the center of the grill’s heating chamber.  Put the grill grate on over the fired embers and clean it by using either a halved onion or lemon like you would use a sponge but, do it quickly and in short strokes to avoid getting fingers or hands burned.

Salmon on a two zone grill absorbing all the great smoke flavorSmoking the Salmon

Next, position small amounts of the smoking chips (a few large handfuls, I’m using SmokinLicious® Grande Sapore) around the outer fringes of the main concentration of burning Charwood.  This allows the wood chips to take on two roles- 1) indirectly contributing to the cooking process, and; 2) producing a burst of smoky vapor that flavors the fillets.


A minute or two after you’ve positioned the smoking wood chips and reattached the grate, place the salmon fillets, skin side down on the grate, directly over the medium embers and cover.  Grill and smoke the salmon for about 4 to 6 minutes, uncover and gently turn the fillets over, cover and grill and smoke the skinless side for no longer than 2 to 4 minutes depending on the thickness of the fillets.

Chef’s Tip:  Be careful not to overcook.  You can gauge the finish of the fillets be being able to flake them with a fork.

final plating with all the decorations!When done, remove the skin by gently peeling away with a fork or just serve skin side down.  For a nice finishing touch, brush with a bit more, high-quality EVOO, season with freshly ground salt and pepper to taste.  Feel free to garnish with fresh dill, fennel edible flowers or lemon.  Hope you enjoyed Chef Calle’s recipe Charwood Grilled Salmon Fillets for a Hint of Smoky Flavor!

Bon Appetit

Thursday, December 6, 2018

SMOKED STRAWBERRY HAND PIE

SMOKED STRAWBERRY HAND PIE being filled with the Stawberry mixture with the final result in the middle! yummy
SMOKED STRAWBERRY HAND PIE is a great recipe for fresh or frozen Strawberries. The smokiness will add a special twist

It’s one of my favorite times of year – strawberry picking season!  As my area of Western New York State has such a short strawberry season, I literally am consuming strawberries for three weeks straight.

Good thing they are packed with vitamins and minerals like Vitamin C and K, folate, potassium, magnesium, as well as being low in calories and fiber-rich.  They sure are great at filling you up which makes you eat less.

This season, I’ve got a trio of recipes all using the smoked strawberries that I’ve done on my charcoal grill.  Get yourself a flat of strawberries, follow our easy smoking technique (we do have 3 to choose from that offer various levels of smoke flavor), and prepare to make simple hand pies, perfect for the hot days of summer or frankly anytime you can find strawberries.

Grill and Strawberry Prep

As I’m using a charcoal grill, I get that started first as I want a temperature of about 300°F or slightly more when the strawberries are placed on the grill.  My grill has an insert system making it a bit easier to light my fuel.  I place my Firestarter at the base of my chimney starter in the charcoal pan that has been filled with SmokinLicious® Charwood.  I’ve also foil covered a brick to radiate additional heat to the strawberries, and placed that on one side of the charcoal area.  I will use a two-zone set-up so I don’t burn the sugars in the strawberries.  I light the Firestarter, place the chimney of charwood on top, and go to the kitchen to prepare the strawberries.

I’ll be preparing about 6 quarts for all three recipes I plan to make.  Start with strawberries that are at their peak.  Gently wash them and then trim the stem end.  I cut smaller strawberries in half and larger in quarters to ensure the smoke vapor can penetrate easily.  Tiny ones, I leave whole.  I place my clean, trimmed strawberries into a disposable foil pan for the actual cooking on the grill, which makes clean up so easy.

Smoking

pan of strawberries on the grill with CharwoodOnce the strawberries are ready for the grill, I place one chunk of hardwood on the charwood coals.  This will add smoke flavor.  I’ve used a double filet wood chunk to control the boldness of the smoke.  The actual smoking process will only take about 15 minutes to know about halfway through, you will want to rotate your foil pan to prevent the pectin from burning.  I’ll be collecting all that thicken juice after the cook and save it for a cocktail I’m making.  Be sure to keep in mind that you’ll still have hot coals left when the smoked strawberries are done so use them for another cooking: maybe some charred peppers or onions, or even cook some meats as you’ll have plenty of heat left.

The Recipe

ingredients for our recipeWith the strawberries all smoky good, the juices thickened and rendered, it’s time to take these to the kitchen and make our hand pies.  First, drain off as much of the juice as possible and capture in a container to use for other recipes.  We have a great one for a strawberry marinade you should check out.


The dough cut outs ready for the filingNext, you’ll need about 1 cup of the smoked strawberries, pie dough either homemade or store bought; 1 tablespoon cornstarch, 2 tablespoons sugar, sanding or turbinado sugar, and one egg plus 1 teaspoon of water.  You’ll also need a rolling pin if making your own dough and flour for rolling out the dough, as well as 4-5-inch round cookie cutter.  Cut 10 rounds from your dough and refrigerate them on a parchment lined sheet pan while you prepare the filling.

The Filing

filing and closing up the doughTake the cup of smoked strawberries and add the tablespoon of cornstarch and the 2 tablespoons of sugar, mixing gently but well.  If additional juices have rendered, pour off.  Taking one dough round at a time while keeping the others refrigerated, add about 1-2 tablespoons of strawberries to one half of the round maintaining a dough border.  Brush egg “wash” around the edge of the filled side of the dough round.  Gently fold over the dough to make a crescent shape and seal the edges by pushing lightly with your fingertip to form a crimped edge.

Finishing

To finish the pies for cooking, after folding and crimping the edge, brush the surface with egg wash and sprinkle with coarse sugar.  Make a small slit in each hand pie top to allow the steam to release during cooking.  Make sure the hand pies are spaced out on the sheet pan to allow for juice spillage.  Bake in a 400° F oven for 20-25 minutes or until crust browns.  Remove from oven and allow to rest on the sheet pan for 5 minutes, then remove to a cooling rack.

Super Outcome


close up of the final baked hand pieAfter a simple smoking of 15 minutes on a charcoal grill using a two-zone cooking method, pouring off the beautiful juice, and producing a pie filling, we stuffed 4-inch dough rounds with our smoked mixture producing the perfect size hand pie.  After baking in the oven for about 25 minutes, although you can do that step as well on your grill of choice, we let them rest and then served them up a-la-natural though these are fabulous with a bit of fresh whipped cream or even a scoop of vanilla bean ice cream.  Smoked Strawberry Hand Pie will be your easy dessert or snack recipe to whip up when those short-lived fresh strawberries come to town!

Tasting Notes: 

The equipment you use will reflect the boldness of the smoke.  If you want a mild smoke flavor infusion, use a handheld food smoker.  Medium boldness will be produced on the gas/LP grill, and Bold will be produced on the Charcoal grill.

We hope this recipe inspires you to try wood-fired grilling techniques with your favorite foods.  Tells us what is your favorite fruit to smoke or grill with wood and what kind of recipe do you make? 

Bringing innovation to wood-fired cooking with recipes, techniques and the science behind the fire, smoke, and flavor. That’s SmokinLicious®. Please try and leave a comment on our Smoked Strawberry Hand Pie recipe!

Thursday, November 22, 2018

THE ULTIMATE WOOD-FIRED CLAMS CASINO


Our wood-fired clams casino on the offset grill with brick and the finished product

Have you ever noticed how many ingredients go with clams?  This low fat, high protein seafood also has many beneficial minerals.  They are also one of the most sustainable seafood resources.
I thought I would provide an easy wood-fired cooking method that can be done on your charcoal grill (you certainly can modify a few setup items and do this on the gas grill as well using wood) and produce the most flavorful clams casino out there.

Go find some similarly sized clams, fire up the grill, and get ready for this recipe and technique to become your favorite.

Hot Coal Grilling

Our recipe is quite simple: gather together

    our ingredient table with everything ready for the stuffing!
  • 1 tablespoon olive oil
  • 2 oz. sliced pancetta or bacon, finely chopped
  • 1 cup finely diced red bell pepper
  • 1/3 cup chopped shallots
  • 2 large garlic cloves, minced (you can use pre-minced garlic)
  • ¼ teaspoon dried parsley
  • 1/3 cup dry white wine
  • 4 tablespoons freshly grated Parmesan
  • 2 tablespoons panko breadcrumbs
  • salt & fresh ground pepper
  • 18 medium clams, shucked, bottom shells reserved

Before starting on the casino filling, it’s important that you get the grill ready.  First, you’ll want to get a chimney starter of charcoal going.  I’m using SmokinLicious® charwood in place of traditional charcoal as this is a partially charred product that will also provide for some hardwood flavor infusion.  Once lit, the chimney starter needs to burn down the charwood to hot coals – no flame should be visible when you dump this into the grill.

our wire mesh on the charcoal rack to retain all the small and hot pieces
For my charcoal grill, I’ve set a mesh screen at the base of my kettle grill to allow me to retain as many hot coals as possible.  The screen helps to prevent small coals from falling through the charcoal area.   I’ve also covered brick with heavy-duty foil to act as a heat conductor and radiator.  This will help to keep a constant temperature during the actual cooking process.  The brick will also separate the cooking area from the fuel area.  A bit of unlit charwood is also added to the charcoal half of the grill so these bits can ignite from the hot coals and sustain the heat level more evenly.

Casino Mixture

With the charwood burning in the chimney starter, I can now start on the casino filling.  After adding a tablespoon of oil and cooking the pancetta or bacon in a skillet, I’ve put that aside on a paper towel lined dish and added the diced red pepper to the fat drippings in my pan.  After cooking a few minutes, I had the shallots, garlic, and parsley to the same skillet and sauté until the shallots are tender and translucent, which is about 5 minutes.  Add the white wine and simmer until it is almost evaporated.  Remove the skillet from the heat and cool completely.

our ingredients in the mixing bowl with cheese addedAssembling the Casinos

While the casino mixture is cooling, I prepare my clams.  Here you have a couple of options depending on your skill level and time management.  You can shuck the clams as normal and reserve the bottom shell with the clam, or you can steam the clams until just open, separate the top from the bottom shell, reserving the bottom shell.  I loosen the clam from the shell so it’s easier to consume with the casino mixture.  After the clams are readied, I take the cooled casino mixture and add the previously cooked pancetta or bacon, 2 tablespoons of grated Parmesan, and fresh pepper mixing well.  I then take a tablespoon of the mixture and mound it over the clam in the shell.  The finished clams are placed in a grill-proof pan.

Wood Firing Brings Depth of Flavor

With all my top neck clams stuffed with casino filling, I sprinkle the remaining Parmesan and the 2 tablespoons of panko bread crumbs over each clam.  I am now ready to place the tray on the grill.  Since I’m using a two-zone cooking method, I can safely put the lid on the grill without concern for charring these clams too far.  With a steady temperature of about 300°F, these will take between 15-20 minutes.  You can rotate the tray if you feel the heat level in your grill is not even or steady.  For those that like a crunchy outside to the clam feel free to place these under the broiler for a few minutes.  The clams pick up the wood flavor in a very balanced way, giving just hints of charry goodness with each bit.  Super easy, super flavorful, and super fun to make.  Take your clams to the wood fire for your next event.

Thursday, November 15, 2018

WHY CHAR-WOOD IS THE BETTER OPTION OVER CHARCOAL

Our Char-wood is produced by Direct firing our North American hardwood blocks until the right amount of Carbonization is achieved!

Frankly, the term “charwood” may be a new one for you.  Although its function is like charcoal, the benefits clearly outweigh those of charcoal.  Let’s examine the key reasons why charwood may be the better option for outdoor cooking over standard charcoal.


Carbonization

Hopefully, if you’ve been engaging in outdoor grilling and/or smoking for some time. You’ve understood the need for a fuel material that burns evenly and hot.  You’ve likely also heard the controversy that’s brewed for years about what is the best product to use for the fuel.  Products range from briquets, lump hardwood charcoal, specialty wood charcoal, and compressed woods like pellets and compressed wood blocks.  The key is to understand that some of these products could contain binding agents as well as accelerants to make for easy lighting.

Carbonization is the conversion of an organic matter into carbon.  Carbon is an element that forms when the organic matter is heated to a high level without oxygen, burning off the volatile gases, leaving the pure carbon behind.   Although commercial material production, whether briquet, hardwood charcoal, or standard charcoal have different percentages of carbonization in the outcome, most are above 90%.  That high level of carbonization is what allows for heat to be produced for outdoor cooking.


Flavor

When you use straight charcoal briquets, you are getting heat only with no flavor as that is a fully carbonized or charred product.  Many prefer to use briquets because they are uniform in size and give the same outcome every time they are used.  Fill a chimney starter with briquets, and you’ll have the same number of briquets fit in the chimney every time.

When you use lump hardwood charcoal, you will get variation in sizing from small, chip-like pieces to half-log size pieces.  Here’s information you need to know.  Although the label may read “hardwood”, there is no information on where that hardwood derived from.  Often, manufacturers of lump hardwood charcoal produce their product from recycled materials such as old pallets, lumber scraps from flooring, cabinet, and furniture makers.  They may take in scraps from lumber mills. 

When this material is carbonized, it will do so at various levels due to the variation in material sizing.
That means when you cook with it or for that matter when you lite it, expect great variation from use to use due to all the inconsistency in sizing.  The inconsistency will produce a lower percentage of carbonized material than briquets.  So know you may get some minimal flavor from lump hardwood due to poorly carbonized larger pieces of product.  This is the reason there is more ash production with lump hardwood charcoals.

Specialty charcoals, generally made in other countries, are a particularly hard substance, light in weight product, that can be a challenge to lite.  Once they are ignited, however, they produce a lot of heat – often more than the standard briquet.  Very little ash is produced and there is no flavor from this product.


Benefits of SmokinLicious® Charwood

When SmokinLicious® made the decision to manufacture a charwood product, we researched extensively why the Japanese binchotan charcoal, also called white charcoal, was so popular and expensive.  We found that though it could be a challenge to lite, it burned extremely hot, clean, leaving little to no ash, produced no smoke and no flavor.  We produced a similar set up to the Japanese direct-fire method with our charwood production.  Instead of using miniature branches, we use consistently sized wood blocks.  Unlike the binchotan, we do not do a complete carbonization.  The result is you get the ease of lighting like a lump hardwood charcoal, the flavor of premium hardwood.  Plus, the reduced ash production of a briquet, and reduced smoke output than burning wood alone.  We see this as the best of all the options out there.

Now, instead of viewing your charcoal as just a heat generator, when you use SmokinLicious® charwood you have one product that can be used as fuel for temperature while the reduced carbonized center portion produces the flavor.  A premium product that gives premium results!

Thursday, May 17, 2018

WOOD-FIRED APPLES MAKE THE BEST CAKE

WOOD-FIRED APPLES MAKE THE BEST CAKE BECAUSE OF THE UNIQUE FLAVOR BROUGHT OUT BY THE SMOKING PROCESS!
Wood Fired Apple


As the second most consumed fruit in the USA, apples are loaded with antioxidant benefits and have been found to have extensive benefit to the colon due to the high level of gut bacteria present in its polyphenols.  Plus, this is a fruit that is readily available all year long making it an ideal choice for cooking.

We are taking the Gala variety and putting them over a coal fire for wood-fired flavor in our apple pie cake.  Pick your favorite variety of apple and get out the charcoal grill for this fun and simple technique and recipe.

Fire Up the Grill


Fire up the Stok grillAfter purchasing 12 apples of your choice, get the charcoal grill going, so the flames can reduce to hot coals.  That’s all needed for our apple cooking!  Any size charcoal grill will do, including the small portable grill.  I use a chimney started to lite charwood from SmokinLicious® as this is my preferred product when I do a short cook fruit or vegetable item.  The reason?  It is not fully carbonized, so it still releases plenty of flavonoids from the hardwood.  You certainly can use a standard hardwood charcoal but add a chunk or two of SmokinLicious® double filet wood chunks to be sure you get a wood flavor.

While the chimney starter is burning down to hot coals, I peel and thinly slice 12 apples.  I use a Gala variety for my recipe and a Stôk charcoal grill, equipped with an insert system.  I place my sliced apples in the insert vegetable basket for this simple method of wood firing the apples.  Just be sure to spray the basket with non-stick cooking spray to ensure the apples don’t stick.

A Cake by Name

With my hot SmokinLicious® charwood producing steady heat, my 12 Gala apples peeled and sliced thin, I’m ready to place the vegetable basket over the hot coals.  Remember, apples have a lot of water content, so they will steam initially.  The water will attract the smoke vapor and bring great color and flavor.  After approximately 10 minutes, I shake the apple slices in the basket to allow them to rotate for even cooking and color.  You’ll see the edges become bronzed as they cook.   In 20 minutes, these will be ready to go.

wood-fired apples make the best cake

Adding the Ingredients & Cook Time


After the apples are removed from the grill and cooled slightly, add a teaspoon of cinnamon and 2 teaspoons of fresh lemon juice to maintain color until baked in the oven.  Set those aside and gather together 2 cups flour, 1 cup packed light brown sugar, 1 teaspoon cinnamon and 2 sticks of cold butter cut into 8 cubes.
Our wood fired apples and dry ingredients mixed in the pan ready for baking
Start by combining 2 cups of flour, 1 cup of packed light brown sugar, and 1 teaspoon of cinnamon.  Taking one piece of cold butter at a time, add to the flour mixture, cutting each piece using either an electric hand mixer, 2 knives or a pastry cutter.  You want to have pea-size pieces of butter mixed into the flour mixture.  Press 2/3 of this mixture into a 9-inch spring form pan then add the wood-fired apple slices, spreading evenly in pan.


With the wood fired apple slices nestled in the simple cake batter of flour, brown sugar, and cinnamon, it’s time to top the apples with the remaining 1/3 flour mixture.  Be sure all areas are covered.  Set the spring form pan on the foil lined sheet pan and place in a 350°F oven for 75 minutes.  Once cooked, remove from the oven and allow to sit in the spring form pan until cool.  Just run a knife along the edge of the cake to ensure it will separate from the pan’s ring once removed.  Remove the ring when the cake has cooled then sift a ¼ cup powdered sugar on the surface of the cake.

Cake Perfection


Our finished wood fired apple pie cake nicely golden brown
After giving Gala apple slices the lick of smoke from our charwood grill, mix together flour, brown sugar and cinnamon with butter for a great cake batter, and baking everything together, the ultimate in apple pie cake is born.  With a light coating of powder sugar, the wood-fired apple slices pile high for perfection in the single bite.  More like a cobbler batter than cake, you’ll love the simplicity of the construction and the unique flavor a wood fire gives to apples.  Perfect anytime of the year, just like apples are, you’ll be the envy of your neighborhood when you fire up the grill for wood infusion to apples.  Now you must also prove that Wood-Fired Apples make the best Cake – Enjoy!