Thursday, April 1, 2021

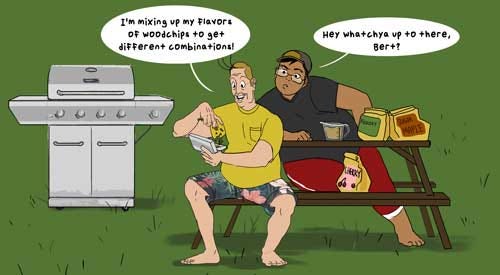
AN EASY GUIDE TO COMBINING HARDWOODS FOR BALANCED SMOKED FOOD FLAVORS


There is misinformation out there that you may have been victim to.  When cooking with hardwood, you may have been under the impression that only certain woods can be used with certain foods.  For instance, hickory is reserved only for pork shoulder and brisket.  Cherry for chicken, etc.

But that is hardly the truth. 

Hardwood used for cooking must be viewed as another ingredient.  As a key ingredient, it needs to be balanced with the food item and other ingredients used in preparation before grilling and smoking.

The intent today is to provide a guide on combinations of hardwood that work well for specific foods.  Essentially, the ingredients of a rub, glaze, sauce or marinade will dictate what hardwoods will maximize all the flavors to become a finished masterpiece.

Hardwood Selection as a Compatible Ingredient

The goal when using hardwood is balance of the flavor outcome.  You never want the hardwood to produce an ashy or burnt flavor.  The essence of the wood should simply add to the beautiful flavor outcome for a memorable eating experience.

 Here is SmokinLicious® rating on boldness of flavor for the hardwoods we offer:


                                   Mild                              Eastern Alder

                                                                      Ash

                                                                      Wild Cherry

                               Medium                           Sugar Maple

                                                                          Beech

                               Bold                               Hickory

                                                                         White Oak

                                                                         Red Oak

When I design wood recipes for specific foods, I like to think about balancing out a medium or bolder flavor with one that is lighter.  For lighter fare items like vegetables and fish, two wood combinations are generally used while longer cooked animal proteins can tolerate three hardwoods well. 

In the chart that follows, reference is provided to various foods that benefit from exposure to the specified hardwoods.   Use the color blocks indicated under each food group to guide you on combinations.  Find the same color blocks in that group, and you have the balanced combination of hardwood.   For instance, under Fruit, there are two red squares for an alder and cherry combination.  Under the Fish column, there are 3 options: Alder and Maple represented by the pink square, Beech and Cherry represented by the orange square, and Ash and Maple represented by the gray square.  These combinations are balanced by the essence they produce in the smoke vapor.  Just use equal parts of each wood and remember, always start with a small quantity of hardwood as it does not take much to produce great flavor.

 TIP: if you are using a spicy rub, default to combinations that includes mild to moderate flavor intensity.  Using sweet ingredients, include a bolder hardwood flavor.


Fruit

Veggie

Fish

Pork

Beef

Poultry

Game

Alder


Ash

Beech


Hickory


Red Oak


Maple

White Oak


Cherry

 Experiment to find your favorite combinations of hardwood and soon you’ll have your own personal, detailed guide!

Do you have a favorite combination of hardwood?  Leave us a comment and subscribe to get our latest tips, techniques, recipes and the science behind the fire and smoke, for all live fire cooking methods. That’s SmokinLicious!

Thursday, March 25, 2021

SMOKEY HUNGARIAN PEPPERS ON THE KETTLE GRILL!

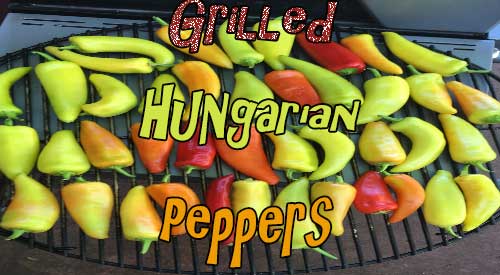
Smokey Hungarian Peppers on our kettle Grill!

 I love growing Hungarian wax peppers in my garden and then harvesting for recipes and freezing for future recipes. Hungarian wax pepper come in different levels of heat depending on the variety chosen. Mine are a hot variety but work perfectly for mixing with other creamy flavors to produce some great condiments and sauces. I will introduce you to two versions of my Smoked Hungarian Pepper Spread in our recipe blog which will post soon.

Previously we showed you how to ember cook Hungarian peppers which entailed placing the peppers whole on hot embers and turning every 5 minutes or so. This time, the cooking will be over the hot coals of a traditional charcoal kettle grill and include wood chunks to the coals for added flavor.

Purchase or pick your favorite variety of Hungarian wax pepper and bring great grilled flavor to them with charcoal and hardwood, using any charcoal grill you have.

Homegrown Is Best

Our homegrown Hungarian peppers on the plants!

Just a small number of pepper plants can produce an abundance of peppers! Start with a high-quality organic soil and you will find there is little to be done to peppers other than watch them grow. You will see that though these are a wax variety of Hungarian pepper, if left on the plant, they will turn from the traditional yellow-green coloring to red. Do not confuse these peppers with the banana pepper variety. Though they look the same, they are different in heat level, with the wax variety being higher heat/spice level than banana. Once picked, I simply clean them under running water and pat dry. These are then ready for grilling.

Tasting Note: I don’t remove the membrane or seeds from the peppers prior to grilling. I simply place them on the grill grate whole. Note some of the peppers may have more water than others and burst on the grill. Be sure to turn them before they show wrinkling and that should prevent them from bursting.

Charcoal Grill Set Up

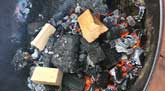
Our wood chunks on the charcoal for the smokey flavor.
Our Wood chunks on the charcoal for the smokey flavor

The key to producing a great char on the peppers is to be sure you are cooking over gray, hot coals and not flame. The easiest method of starting the coals is with a charcoal chimney starter.

Simply fill the starter and light at the base using newspaper or a fire starter. Then allow the chimney to burn down until the charcoal is grayed over and red. I still put a bit of unlit charcoal in the kettle and then pour the hot coals over the unlit. Only do this step if you have more than one grate of peppers to cook or want to use the grill for cooking something else as the heat level produced will last many hours.

Place your peppers on the grill grate and grill until charred on one side. Turn with tongs and grill a few more minutes, then remove. These are now ready for your favorite pepper recipes! Do not forget to freeze some to keep on hand during the months the peppers won’t be available in stores.

What is your favorite pepper to grill? Leave us a comment to opine and subscribe to get all our postings on tips, techniques and recipes. Bringing innovation to wood fired cooking with recipes, techniques and the science behind the fire, smoke, and flavor. That’s SmokinLicious®.


Thursday, March 11, 2021

TOP 12 GRILLING MISTAKES

Our top 12 Grilling Mistakes!

 As a billion-dollar business, selling grills is likely not going away any time soon.  In fact, sales are gaining strength thanks to COVID-19 which forced many to find ways to keep cooking and eating interesting while forced to stay out of restaurants.

When asked, most people say they grill or barbeque for flavor.  If that is the case, then why are some of the most common practices the ones causing the most variation in the taste of your grilled foods?

Here are the top 12 grilling mistakes you should avoid.

#1 Skipping Preheat of the Grill

It does not matter if you prefer to use a gas grill or a charcoal unit, you need to preheat the grill before adding food.  Why?  It is the only way to avoid having your foods stick to the grill grate.  When you allow the metal to heat to a very hot level, the protein in meats cannot form a bond with the metal grate.  Plan about 5 minutes preheat time for charcoal grills and 15 minutes for gas units.

#2 Cooking on an Unclean Grill

Yeah, I know.  The grill is located outside so you think it does not need the same care and cleaning as your kitchen equipment indoors.  Wrong! Leftover food particles, grease, smoke tar and creosote can build up on various parts of the grill and cause changes in food flavors as well as make the food stick.  Plus, a grease trap that has never been emptied can ignite which will ruin your planned grill day!  Get in the habit of scraping the grill grate after preheating and lightly scrub the cooled down grill including the lid area, with steel wool and water.  The lid likes to hold on to carbonized grease which becomes flaky and falls off onto your foods if left in place.

#3 Not Oiling the Grill Grate

In addition to preheating the grill oiling the grate is key to keeping food from sticking.  This needs to be done whether your cooking on gas or charcoal.  Using tongs, dip a wad of paper towels in vegetable oil and wipe the preheated, scrubbed cooking grate before adding food.

#4 Using Lighter Fluid

For charcoal grill lovers, stop ruining your foods with lighter fluid.  Coals are easier to lite with lighter fluid for one reason only – the chemicals make for quick lighting.  They also impart those chemical flavors to your food.  Learn to use a chimney starter with either newspaper for lighting or a Firestarter placed at the bottom.   And this leads us to …

#5 Not Having Enough Coals

Depending on the size of the chimney starter you purchase, the average weight of charcoal used in one is 3 pounds.  If your planning a full day of grilling, that one chimney starter will not be enough.  Do not forget to load the charcoal area of the grill with unlit charcoal before the hot coals are added. The hot coals will gradually ignite the unlit and keep the temperature going so you can keep cooking.

#6 Pouring the Coals Too Soon

Once you have the chimney starter lit, leave it alone!  Too often, the chimney is poured before the top layer of coals is covered with ash.  That means, the coals are a gray color not black.  If you do not allow the coals to fully heat, you will not be able to sustain the temperature of the equipment for cooking or worse, the fire could go completely out.

#7 Turning Meat Too Soon

We covered why it is so important to preheat the grill before placing food on the grate.  Part of the “non-stick” relates to turning meat. The meat’s surface needs to be hot enough to release from the grate.  If  you don’t wait long enough, the meat will tear.  Wait until you can easily lift the meat before making the turn.

#8 Running Out of Propane

I think just about everyone at one time or another makes the mistake of starting a grilling day and the propane tank runs out!  Here is a trick for those who own a tank that has no fuel gauge. Boil one cup of water and pour it down the side of the tank.  Feel the metal with your hand.  Where you feel warmth on the tank means that area of the tank is empty.  Feel coolness, that is the current level of available propane.

#9 Cooking with the Lid Open

Apart from lighting a gas grill, which should always be done with the lid up, you should do cooking with the lid down.  Remember, gas grills deliver less heat than charcoal models.  Keep the lid down to trap as much heat as possible.

#10 Lifting the Lid During Cooking

Having a hinged lid seems to imply that you are to readily open and close it at a whim.  Nothing is further from the truth!  Just like your oven, ever time you open the lid on the grill, you allow heat to escape forcing it to work harder to maintain the heat setting.  Leave the lid alone!

#11 Using Vents for Proper Airflow

Comparable to the dials on an oven, vents are what control airflow to either boost the heat of the grill, reduce the heat, and extinguish fire/heat.  On a charcoal grill, there are vents on the bottom of the charcoal area as well as the top of the lid.  The bottom vents draw in oxygen to feed the fire while the top provide for the draft.  Balance the two openings and you succeed in reaching regulated temperature, just like setting the dial on your stove.  Gas grills also have vents but they are usually fixed and intended to release some gases and heat from the higher BTU burner ratings.

#12 Using Only One Cooking Set Up on the Grill

Grills allow for so much versatility in cooking essentially any food item, whether that is animal protein, fruit, vegetables or even bread and baked items.  Do not limit yourself to just one grill set up!  If you are one to lite up all the burners on the grill or place your hot coals all throughout the charcoal area of your grill, then you are missing out.  Direct fire works for quick cooking methods like burgers and hot dogs, but it is not the best set up for other foods.  Learn to use a two-zone set up: heat on only one half of the grill area while food is placed on the unheated side.  You will have the benefit of controlled cooking when needed and the option for direct char and searing for finishing items or for quick cook foods on the direct fire side.

Did we miss a grilling mistake?  Leave us a comment to let us know.  We welcome all types of questions and encourage you to follow and subscribe to our social channels so you don’t miss anything.  We look forward to providing you with tips, techniques, recipes, and the science for all things wood-fired cooked.


Thursday, March 4, 2021

SMOKEY BLT SALAD

Our homemade smoked bacon, lettuce and fresh tomatoes for our smokey BLT Salad

 We know smoked bacon is a favorite which is why we wanted to include a great recipe for fresh produce you may have available. This is our take on the BLT salad featuring smoked bacon, homegrown lettuce and tomatoes, as well as a homemade dressing and Naan croutons. Don’t forget to check out our technique on smoking pork belly which is super easy and fast for the ultimate homemade smoked bacon.

Dressing First

I believe a salad is only as good as the dressing you top it with. That is why homemade is so much better than any store bought, even those with limited ingredients and a claim to freshness. Make it yourself and you can guarantee freshness and flavor.

To start our dressing for the smoked BLT salad, add 4 tablespoons of sour cream to a medium size bowl. Now add 3 tablespoons of your favorite mayonnaise, a healthy grind of fresh ground pepper, a ½ teaspoon of minced garlic and ¼ cup of freshly diced chives. To dilute the dressing so it can be poured, start with 3 tablespoons of milk or cream and whisk well. Add additional milk or cream until you reach the consistency you prefer.

Crispy Bacon & Croutons

With the creamy chive dressing made, place in the refrigerator to chill while you begin the next steps for the smoked BLT salad.

If you have your smoked bacon ready, slice to the thickness you prefer. Place the slices on a sheet pan and crisp in the oven at 350°F. Timing for the bacon will depend on how crisp you want the outcome; plan 15 minutes for less crisp and 20-25 minutes for crispy.

While the bacon is cooking, take Naan and slice into small squares. Coat the cut pieces with a bit of oil and toast in the oven with the bacon until crisp as well; about 15 minutes. Remove both the croutons and bacon and allow to cool until they can be handled.

Tasting Notes: Feel free to change to any favorite bread for the croutons. Just be sure to toast in a single layer with a little oil until crunchy

Assembling & Plating the Salad

Once the dressing, Naan croutons, and crisp bacon are ready, it is time to assemble the other ingredients for our salad. This starts with our homegrown lettuce. I am using three types of lettuce: romaine, butter-crisp and red leaf. Gently tear or cut into ribbons. Add these to the center of a serving platter. Along one side of the lettuce, place your Naan croutons and cut tomatoes. For my tomatoes, I’m using homegrown cherry which only need to be sliced in half. To the other side of the lettuce, I place the smoked crispy bacon which I diced.

As you can see, the components of the Smoked BLT Salad are very simple but highly flavorful. Using fresh produce and herbs makes a big difference. I prefer to plate the salad after mixing individual portions in a bowl and tossing with dressing. Start by adding lettuce, smoked bacon, tomatoes, and croutons in a medium bowl. Add the desired dressing – usually 2-3 tablespoons is perfect- and toss with tongs. Then plate. Tangy, smokey freshness is all yours! Enjoy!

What is your favorite salad recipe featuring a smoked component? Leave us a comment to opine and subscribe to get all our postings on tips, techniques and recipes. Bringing innovation to wood fired cooking with recipes, techniques and the science behind the fire, smoke, and flavor. That’s SmokinLicious®.


Thursday, February 25, 2021

WET OR DRY WOOD FOR SMOKING: DOES IT MATTER?

Wet or dry wood for smoking? Which is the best!

 This is one of the top questions heard when it comes to cooking with wood.  Do you soak the wood chunks or chips before using on the grill or smoker?

I have a definite answer which is do not soak the wood before using in your equipment.

Let us examine why.

Water Becomes Steam

Any time water is introduced to a preheated piece of equipment, whether it is an LP/gas grill, electric unit, or charcoal grill, it will affect the temperature of that equipment.  For the LP/gas and electric units, this can be seen in the call for more gas or electric energy to keep the temperature at the preset level.  For the charcoal unit, the water will reduce the heat of the coals and the fire will need to work harder to regain the energy to sustain the target temperature.

Wet Produces Off Flavor

There is an ideal moisture range for hardwood used for cooking, which includes grilling, smoking, direct coal and ember methods.  You will hear the terms “seasoned” and “green”.  “Green” wood refers to fresh cut wood which has not had an opportunity to dry out.  The risks of using this type of wood is it will burn at variant rates, emit more sap, and has the potential to impart bitter and musty flavors.  “Seasoned” woods refer to hardwoods that have dried out naturally.  These will provide for more consistent temperature, provide cleaner flavors, and combust with less creosote build-up.  Just be aware, you do not want firewood!  If you Google seasoned wood, you will read that this is wood left to dry for 9-12 months or more.  Do not leave your wood that long as it will not release any essence that produces the flavor.

Mold Potential

The wetter the wood the more potential there is for mold to develop.  Mold needs 3 conditions:  moist or damp locations to grow, a food source to survive, ideal temperatures usually from 32° to 120°F but love 70-90°F.

It is important that though you will use wood dry on any equipment (unless the equipment manufacturer specifically requests you soak the wood in water) that the wood not be completely dehydrated of all moisture.  We recommend that you cook with wood that is approximately 20-25% moisture level.  This is the main reason why at SmokinLicious®, we take the moisture reading on every order and provide that information to you.  Here is a tip: if you see wood that is packaged in a plastic bag with no air holes, that is completely dry wood and will not provide any flavor or essence of the wood.  It merely becomes a heat source

Wood Chips Combust Faster

One product that chronically is misrepresented to be prepared wet are wood chips.  I have yet to see packaging in the retail box stores that states to use the chips dry.  All brands make a recommendation to soak the wood chips and apply them to a coal fire wet.  If you do as recommended, you will not only stall the temperature of your equipment, you will stall the production of smoke vapor production.  Remember, water must become steam for the wood to be dry enough to combust.

What should you take away from this article?  It does matter if the wood used for grilling and smoking is wet or dry. Do not stall your cooking, do not taint your food’s flavor, do not risk your health by using wet wood.  Keep it dry for clean, pure flavors that make wood-fired foods so enjoyable.

Do you have a target moisture level or seasoning time you keep your hardwood at?  Leave us a comment and subscribe to get our latest tips, techniques, recipes and the science behind the fire and smoke, for all live fire cooking methods.  That’s SmokinLicious!