Showing posts with label smoker wood chunks. Show all posts

Thursday, August 4, 2022

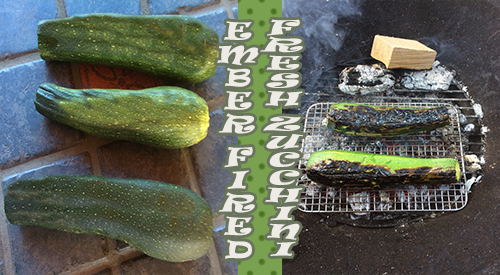
EMBER FIRED FRESH ZUCCHINI

Zucchini is a great vegetable to not only grill but ember cook. It has the density to hold up over the high heat. Add a distinct char taste to this abundant vegetable either as a side dish or an ingredient by making ember fired fresh zucchini.

I love thick-skinned vegetables that come in season during Summer. They are the perfect items to light a fire and make some hot coals to ember fire flavor into them.

We’re getting ready to coal roast one of my favorite vegetables – zucchini! This is so simple to do and produces an extraordinary flavor for zucchini to be eaten on its own or to be used in your favorite recipe. Clean out the fire pit, charcoal grill or outdoor fireplace and prepare to roast “ember fired fresh zucchini” directly on the hot coals.

Building A Small Fire
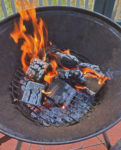
Starting the fire to burn down the wood into coals

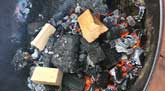
Know this from the start – You do not need a large fire! A small fire is best to accomplish your cooking in about an hour’s time. For my fire, I am using ten SmokinLicious Single Filet Wood Chunks in Ash with a couple of pieces of charwood that were left over from a previous cook. Why Ash hardwood? Because it is hands down, the best hardwood to produce an even bed of coals which is what you want when you coal roast.

I stack the wood so there is quite a bit of air space between the pieces. This ensures I have good oxygen flow to produce combustion quickly. My technique is to stand the wood pieces on their end and make a circle. I try to have a couple of pieces in the center kind of tipped on to each other. Remember, you want to produce hot embers quickly so it only requires a little wood and a lot of oxygen to burn things down. I light my wood using a small butane torch. Leave the torch in place until I’m sure the wood has ignited. I keep the lid off my charcoal grill so I can push the combustion process through completion and get those ash covered, hot embers.

Red Means Hot
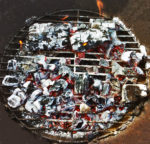
Red Hot coals is the goal before adding the zucchini

You will know when the coals or embers are ready for cooking when you have uniform coals and they are glowing red from the bottom and gray on top. I keep a couple of larger coals banked to the side to maintain heat and for reserved hot coals. Just in case I need to rake more to the cooking side. I like to nestle a high heat metal cooking rack on the hot coals and then place my whole zucchini on the rack. This allows for little ash to accumulate on the skin. Remember, those coals are very hot so the zucchini will take less than 20 minutes to tenderize and char.

Turn For Full Char
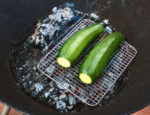
Zucchini on the grilling rack over the hot fire coals

With the zucchini and coal rack in place, I give the embers about 8 minutes to char and cook the first side of the zucchini. After that time, I gently turn the zucchini so that each side gets an even char. Once the first 8 minutes are done, there will be less time needed for each of the other sides as the zucchini will hold heat. I’ve added one additional wood piece to my banked fire just to be sure I have enough heat in the coal area. I will not put the lid on the unit during the entire cooking process as this is open fire cooking. My total coal cooking time is approximately 16 minutes.

Perfection In Smoke & Char on Ember Fired Fresh Zucchini

Dr. Smoke's clock for the cooking time required

After placing my ember fired fresh zucchini on hot coals for about 16 minutes total, turning several times to get an even char, this spectacular vegetable is ready for eating. You will see, there is very little coal bed left following this technique so remember, if you are cooking more than a couple of zucchini, you will need a larger coal bed.

For those of you thinking that the black, charred skin will be bitter and not appealing to eat, think again. Most of the char will rub right off but the flavor will be infused throughout the ember fired fresh zucchini. I’ve sliced mine about ¼-inch thick as I plan to make a galette of ricotta, garlic oil, and basil.

The Culinary Crew wants you to know…

… that ember roasting is ideal to boost up the bland, delicately flavored zucchini and will add a rich, wood-fired taste dimension to any dish featuring this exquisite summer squash. So, be prepared to enjoy a rich, char-smoked variation of your ratatouille, quesadillas, stuffed zucchini or soups from ember cooked zucchini!

Check in soon for our post on that recipe. Did you love this wood-fired technique? Leave a comment and subscribe as we continue to bring you new ideas, tips, techniques and recipes for all things wood-fired, smoked, and charred!

Thursday, July 28, 2022

WOOD-FIRED CLAMS CASINO

Our wood-fired clams casino on the offset grill with brick and the finished product

Have you ever noticed how many ingredients go with clams? This low fat, high protein seafood also has many beneficial minerals. They are also one of the most sustainable seafood resources.

I thought I would provide an easy wood-fired cooking method that can be done on your charcoal grill (you certainly can modify a few setup items and do this on the gas grill as well using wood) and produce the most flavorful clams casino out there.

Go find some similarly sized clams, fire up the grill, and get ready for this recipe and technique to become your favorite.

Hot Coal Grilling

Our Wood-Fired Clams Casino recipe is quite simple gather together:

    our ingredient table with everything ready for the stuffing!

  • 1 tablespoon olive oil
  • 2 oz. sliced pancetta or bacon, finely chopped
  • 1 cup finely diced red bell pepper
  • 1/3 cup chopped shallots
  • 2 large garlic cloves, minced (you can use pre-minced garlic)
  • ¼ teaspoon dried parsley
  • 1/3 cup dry white wine
  • 4 tablespoons freshly grated Parmesan
  • 2 tablespoons panko breadcrumbs
  • salt & fresh ground pepper
  • 18 medium clams, shucked, bottom shells reserved


Before starting on the casino filling, it’s important that you get the grill ready. First, you’ll want to get a chimney starter of charcoal going. I’m using SmokinLicious® charwood in place of traditional charcoal as this is a partially charred product that will also provide for some hardwood flavor infusion. Once lit, the chimney starter needs to burn down the charwood to hot coals – no flame should be visible when you dump this into the grill.

our wire mesh on the charcoal rack to retain all the small and hot pieces

For my charcoal grill, I’ve set a mesh screen at the base of my kettle grill to allow me to retain as many hot coals as possible. The screen helps to prevent small coals from falling through the charcoal area. I’ve also covered brick with heavy-duty foil to act as a heat conductor and radiator. This will help to keep a constant temperature during the actual cooking process. The brick will also separate the cooking area from the fuel area. A bit of unlit charwood is also added to the charcoal half of the grill so these bits can ignite from the hot coals and sustain the heat level more evenly.

Casino Mixture

our ingredients in the mixing bowl with cheese added

With the charwood burning in the chimney starter, I can now start on the casino filling. After adding a tablespoon of oil and cooking the pancetta or bacon in a skillet, I’ve put that aside on a paper towel lined dish and added the diced red pepper to the fat drippings in my pan. After cooking a few minutes, I had the shallots, garlic, and parsley to the same skillet and sauté until the shallots are tender and translucent, which is about 5 minutes. Add the white wine and simmer until it is almost evaporated. Remove the skillet from the heat and cool completely.

Assembling the Casinos

While the casino mixture is cooling, I prepare my clams. Here you have a couple of options depending on your skill level and time management. You can shuck the clams as normal and reserve the bottom shell with the clam, or you can steam the clams until just open, separate the top from the bottom shell, reserving the bottom shell. I loosen the clam from the shell so it’s easier to consume with the casino mixture. After the clams are readied, I take the cooled casino mixture and add the previously cooked pancetta or bacon, 2 tablespoons of grated Parmesan, and fresh pepper mixing well. I then take a tablespoon of the mixture and mound it over the clam in the shell. The finished clams are placed in a grill-proof pan.

Wood Firing Brings Depth of Flavor

Chef Bert explains the indirect cooking method.

With all my top neck clams stuffed with casino filling, I sprinkle the remaining Parmesan and the 2 tablespoons of panko bread crumbs over each clam. I am now ready to place the tray on the grill. Since I’m using a two-zone cooking method, I can safely put the lid on the grill without concern for charring these clams too far. With a steady temperature of about 300°F, these will take between 15-20 minutes. You can rotate the tray if you feel the heat level in your grill is not even or steady. For those that like a crunchy outside to the clam feel free to place these under the broiler for a few minutes. The clams pick up the wood flavor in a very balanced way, giving just hints of charry goodness with each bit. Super easy, super flavorful, and super fun to make. Take your clams to the wood fire for your next event.

The Culinary Crew wants you to know…

… about the great results had from indirect cooking or the two-zone grilling technique, as referenced in this recipe blog. When it comes to this particular recipe, you will find that wood fired clams done on a charcoal grill with indirect heat and a simple brick heat conductor will add a distinctive smoky flavor twist to your clams casino. This appetizer promises to be a fan favorite for any seasonal or football party!

Now you can enjoy a video tutorial on this recipe as we collaborated with our friends at Passing It On. Get the visual step-by-step directive on making our rendition of clams casino.

Thursday, June 30, 2022

Wood Grilled Romaine Lettuce

Wood grilled Romaine lettuce- Scrumptious!

It’s time to bring your vegetables into grilling season! Nothing beats the smell of fresh vegetables roasting over wood even on an LP/gas grill. Any time of the year works fine for this technique to get a great char wood flavor in your seasonal or store-bought fresh vegetables.

All you’ll need for this easy cooking experience is an LP or gas grill – any brand or size will do, double filet wood chunks from SmokinLicious®, and a head or two of fresh Romaine lettuce!

Grill Preparation

If you want to add special wood flavoring to your LP/Gas grill there are easy steps to follow:

Make sure your grill is clean from any significant grease build up. Remove the grilling grates and determine how much space is between the diffuser and the grilling grate. The diffuser is the plate covering the unit’s gas burner(s). Don’t remove the cover.

Once you have the sizing computed, then select the SmokinLicious® wood chunk size that will fit – Single Filet which is ~4 inches or the Double Filet which is ~2 inches.

Wood Preparation

Now, let’s set up the wood on the grill. Remove the cooking grates from the grill then strategically place the wood chunks over the heat diffuser. This is the metal piece covering the actually gas burners. If the SmokinLicious® wood chunks are fresh, then you can add them directly to the unit without pre-soaking them. If not, you may want to consider a lite soaking of about 15 minutes. Because I’m cooking lettuce, I am using the chunks in their natural state. However, feel free to consider a pre-soak in liquid with flavorings such as beer, wine or juice.

Wood chunks above the diffuser

Now replace the grill grates back on the unit, over the SmokinLicious® wood chunks! Make sure the grates are securely seated back on the unit. If there is a lot of space on your unit between the diffuser and the grate you may want to consider a SmokinLicious® single filet or block item. Now light the unit, set the dials to a low heat setting and bring the unit up to temperature. Say around 180 degrees. Do not overheat the unit.

Preparation

In preparing my Romaine lettuce for this cook, I slice it vertically from stem to head creating two equal size halves. After pre-heating the grill to around 180 degrees, I place the two slices of the lettuce head directly on the grill grates. Let the wood infusion flavor begin!

"Two halves are better than one head"

Roasting Process

I position the two halves of the Romaine over the hot spots created by the SmokinLicious® “Double” filet wood pieces which are under the grilling grates. The wood will ignite and begin the charring stage. I recommend bunching the wood pieces together to produce a hot spot on the LP/gas grill to allow for a direct char technique. While I am not using the smoke from the wood, I am still infusing great natural grilling flavor with the wood.

My cooking is taking place with an open lid because I want to char not smoke! It’s important to keep turning the heads so the flavour will be even. At about 1/3 of the time cooking on the grill, I turn the gas completely off and let the flaming wood chunks on the diffuser finish up the final cooking. In this last stage of charring, I brush my clarified butter with chopped parsley and mint baste to the lettuce halves for final flavour and presentation. And, if desired, feel free to drizzle any remaining melted butter mixture to the finished product for a little extra taste kick.

Remember this is a delicate vegetable, not meat so there is no grease to flare up the LP/gas grill. This is another example of why using SmokinLicious® wood chunks on the diffuser and under the grill grates of your LP/gas unit can generate such exceptional wood-fired flavour. Now, get to your grilled Romaine lettuce and ENJOY!


Thursday, June 9, 2022

SMOKED HERBS FLAVORS WITH SMOKED HERB DUST

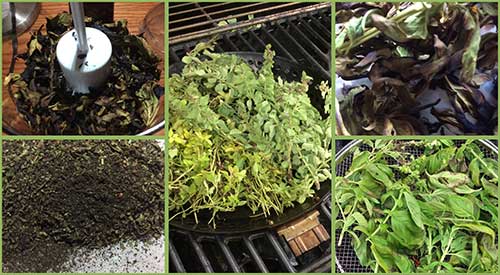
Our preparation of smoked herbs, from picking, smoking and grinding to make smoked herb dust. Adding great flavor to dishes.

Don’t make the mistake of thinking fresh herbs are to be used in dishes as, well, fresh only. Although you may have dried your fresh herb harvest before, we are bringing another alternative to you, smoked herbs.

We hot smoke the fresh herbs on the grill then turn them into a dust for use in all types of dishes. The smoking process will bring a depth of flavor that you’ve likely never experienced before. Go to the herb garden and pick your favorite varieties and let’s get making smoked herb dust!

Smoke Vapor Infusion

Fresh herbs on the grill using a grilling cage

One thing about this smoked herb technique is you can do the smoke infusion by a variety of equipment methods.

For those with a gas grill, add wood chunks either directly to the heat shields on one side of the grill or add wood chunks to a metal smoker box that can be placed on the heat shields or the grill grate. For charcoal grill owners, light your charcoal and allow to reduce to hot coals only. Add a piece or two of hardwood chunks or a handful of hardwood chips to the hot coals. If possible, push the hot coals to one side of the grill. For both grill types, you want to use a two-zone cooking method so the herbs don’t catch fire.

For those that don’t own grilling equipment or who simply don’t want to bother lighting up the grill, you can use a handheld food smoker. Simply place micro wood chips in the bowl of the unit, place the herbs in a storage bag with the tubing of the smoker unit, cinch the end of the bag around the tubing, and light the chips. I like to leave the smoke in the bag for maximum smoke vapor infusion.

I used both my gas grill and charcoal grill for the smoke process by placing my herbs in a vegetable basket and grilling with the herbs on the unlit side of the grill. Within the first 5 minutes, you’ll see how the herbs lose moisture and begin the drying stage.

Tasting Notes: I find the handheld food smoker will produce the boldest smoke flavor to the herbs. The intensity of flavor rated from lightest to boldest based on equipment would be a gas grill, electric smoker, pellet smoker, charcoal grill, handheld food smoker.

Grinding Process

smoked herbs in the food processor for reduction into smoked herbs dust

Once the herbs have charred and dried, it’s time to remove them from the grill and bring them to the food processor. I have a mini processor that only has two settings: chop and grind. I prefer to use this appliance to bring the smoked herbs to dust level but a spice grinder works just as well.

First, remove all the herb leaves from the stems and place a small quantity in the food processor bowl. You can remove the leaves by placing the entire herb sprig in a colander and pressing the leaves through to parchment paper. Secure the lid and grind until you get as fine a dust as the appliance will allow. Both the appliance and the herb will determine how fine the herb dust will get. As you will see, basil dust becomes finer than oregano. This technique will work for just about any herb you can grow or locate at the market. Store the herb dust in glass or metal jars for up to a year.

Tasting Notes: Smoked herbs are much stronger in flavor than the standard dried herb. Adjust the amount used in recipes as needed. It is often best to start with less, taste, and then add more as needed.

So Many Uses

finished herb bottles of smoked Basil and Smoked oregano

Experimentation is key when it comes to #herbdust. Most often, herbs will be applied to meats and poultry, perhaps rice and pasta dishes, but there are so many more foods that are good pairings for herb dust. Let’s take parsley as an example. Commonly used with fish and beef, parsley is a great pairing for sweet items as well. This includes banana and cream. It’s important that you look beyond the traditional side dishes and entrees and explore the sweet side of what herbs can offer. By doing so, you’re sure to find endless combinations that will tickle your palate and give you more pleasing menu experiences.

The Culinary Crew wants you to know …

… that the two-zone method is certainly a practice that you will want to master and prioritize in your wood cooking toolkit, especially when grilling and smoking delicate fresh consumables like herbs. Not only will two-zone cooking avoid those acrid tastes associated with flare ups, it will infuse your food items with a nice balance of wood smoke flavoring.


Thursday, February 10, 2022

BBQ BOX SMOKER- GRILL ALL YEAR

BBQ Box Smoker should be used as much as your tongs on the gas grill!


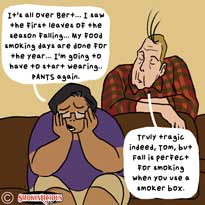
 Bert and Tom discuss when the weather is cold use your BBQ box smoker year round!

We have all been in Tom’s position. We love grilling and smoking but prefer the warmer weather. For those of us in 4 season climates with below zero temperatures in winter and lots of snow, it seems too hard to continuing grilling! But just as Bert remarks, you do not have to give up cooking outdoors just because of the weather.

BBQ Box Smoker- Year-Round Grilling/Smoking

Chef Bert grills year round

Grilling equipment manufacturers are always competing with charcoal grill and smoker manufacturers. That’s why many gas grills have an integrated wood chip drawer to imply that barbecue is possible. If you ever tried these, you likely were disappointed in finding that the intensity of flavor could not compare to charcoal equipment.

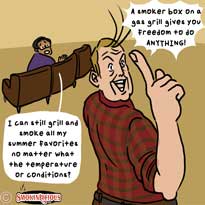
At the same time, there was an understanding that not everyone could afford a model of grill that included a built-in smoker box or tray. Thus, the birth of the smoker box. A small, removable, and relatively inexpensive accessory that could be used on any gas grill. Like Bert said, with a smoker box, you can grill-smoke anything!

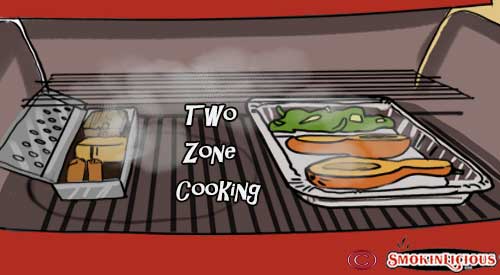
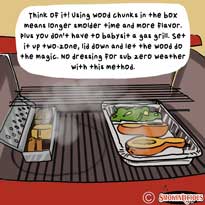
On the gas grill the two zone method, heat and smoker box on one and food on the opposite

But no one ever discussed what should go in the smoker box. The assumption was use a wood chip but you will learn, a wood chunk brings benefits to outdoor cooking never experienced before with the smoker box.

BBQ Box Smoker- Don’t Let the Cold Stop You!

Bert knows when it comes to outdoor cooking in cold weather, you need a means of reducing the number of times you have to add wood. This is the number one reason to use chunks in a smoker box rather than chips.

The Smoker box

With most boxes easily fitting 3 wood chunks, you won’t need to replenish the wood for shorter cook items. Longer cooks will require just a few additional chunks to get the job done.

Gas grills in generally hold a temperature better and don’t react to outdoor ambient temperatures the way charcoal units do. You may need to make some adjustment on the heat level knob to reach your desired temperature but the unit should hold that temperature for the duration of the cooking time.


BBQ Box Smoker- Easy Clean-Up

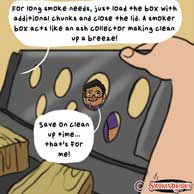
Smoker boxes are made of metal or cast iron giving them durability. Clean up is a breeze as the wood will combust and turn to ash that is trapped in the box. Just dump into a heat safe container and you are all set!

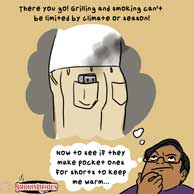
Tom dreaming on how to keep himself warm while winter grilling

Plus, the metal of the box helps to hold and radiate heat keeping the chunks smoldering for a long time.

We don’t think Tom will be lucky enough to find a smoker box that will fit in his pocket but there are a variety of sizes, materials and lid options that should fit any need.

Don’t stop the grilling season when the leaves start to fall. Enjoy flavorful wood-fired foods all year with your new smoker box accessory and premium wood chunks!

Have you used a smoker box on a gas grill? Leave us a comment and subscribe to get our latest tips, techniques, recipes and the science behind the fire and smoke, for all live fire cooking methods. That’s SmokinLicious®!


Thursday, December 9, 2021

SMOKED HAM ON THE GRILL

Smoked Ham On The Grill Made Easy By Following a Few Tips

Whether you’re preparing ham for a holiday like Easter, Christmas or New Year, for a formal brunch or even for a family special event like a reunion, Christening, or engagement party, you can take this average protein and make it so much more. Even if the ham you purchase has already been smoked, you can take away the factory flavor and truly make it your own with our simple technique for smoking on a gas grill using a two-zone cooking method. Plus, I’ll give you a ham glaze recipe that will make you forever throw away a prepackaged glaze.

Get your gas grill ready, purchase a ham, and bring your game as I give you the easy steps to smoking a ham on the gas grill with wood chunks.

Great Ingredients for a Great Glaze

Today’s hams now come with a variety of labels so let’s cut to the chase to ensure you know what some of them mean. Wet Cured Hams are already smoked but still need to be cooked to kill microbes if they are labeled ‘cook before eating” or need some cooking if labeled “cooked”. These are usually for purchase as a whole, half or bone-in shank ham. Dry Cured Hams have been cured in a lot of salt and usually need to be soaked in ice water before cooking, which removes a great deal of the salt so it’s more edible. Fresh Ham is uncured and uncooked.

for smoked ham on the gas grill

No matter what ham you select, you’ll need a glaze to bring greatness to the meat. For my ham, I’m making an apricot-Dijon glaze that is so flavorful and simple. For my glaze you’ll need the following ingredients:

  • ½ cup apricot preserves
  • ½ cup honey
  • 2 tablespoons brown sugar
  • 1 tablespoon Dijon-style mustard
  • 1-1/2 teaspoons Worcestershire sauce
  • soy sauce – ½ teaspoon
  • paprika – ½ teaspoon, preferably Spanish-style
  • cayenne pepper – ¼ teaspoon
  • black pepper – ¼ teaspoon
  • ¼ teaspoon cinnamon
  • 1/8 teaspoon ground cloves

In a medium bowl, combine the glaze ingredients and mix well. Refrigerate until you need it.

Smoke First

All our apricot glaze ingredients mixed together and ready to baste our ham.

I’ve discussed the different types of ham and the fact that most sold in grocery stores are precooked and often smoked. Don’t let this stop you from doing your own smoking. To start, you’ll need to trim the fat that is still present on the pre-smoked ham. That means, trim to within a 1/4 inch. Remember, smoke vapor will not penetrate through fat. After trimming, you’ll need to score the meat in the traditional checkerboard pattern. Knife cuts measuring ¼ inch in depth are produced first vertically and then horizontally, leaving about 1-inch spacing between cuts.


Preparing the Gas Grill

For this recipe on our as grill, we used a two zone approach; heat applied below the SmokinLicious Single Filet smoker wood chunk and no heat underneath the ham.Once trimmed and scored, it’s time to prepare the gas grill. Light the burners on one side of the grill and set to medium-high heat. We want to maintain a cooking temperature of about 275°F. Leave the other half of the burners off as that will be the cooking area for the ham. This technique is the two-zone cooking set up. Place 2 single filet wood chunks from SmokinLicious® directly on the heat shield of the lit burner. These will heat and release the smoke vapor and add flavor to our ham. Total time cooking the ham in this manner will be about 30 minutes. The ham is placed on the cold half of the grill with the flat side of the ham on the grate.

After 30 minutes, take two long sheets of heavy-duty foil and place the ham on the foil. Take your pre-made glaze and cover the ham with about half of the glaze mixture. Now, fold the foil around the ham sealing at the top. Place the foil-wrapped ham back on the cold side of the grill and insert a meat thermometer in the meat at least 1-inch away from the bone if you have a bone-in cut of ham. Let cook until the thermometer registers 130°F. Every 15 minutes, brush the ham with glaze dripping that have collected in the bottom of the foil. Once cooked to 130°F, remove the ham from the foil, drain the residual glaze back into a saucepan with remaining uncooked glaze you had reserved and allowed to heat on low.

Final Step to Crisp Skin

Place the unwrapped basted ham on the hot grill to crisp the outer skin. Be careful not to over cook!After removal from the foil, there is one final step before serving. The skin requires just a bit of crisping which will be done on the hot side of the grill. Place one side of the ham on the hot side of the grill allowing the glaze sugars to caramelize for just a few minutes per side. Do not do the flat side of the ham and do not allow the sugars to burn. Once the three sides are done, remove to a cutting board and slice. Serve the residual glaze on the side. Now you must try Smoked ham on the gas grill!


Thursday, October 28, 2021

DOES SIZE MATTER?

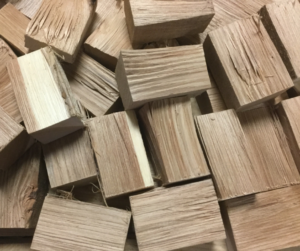
Our double filet wood chunks can fit where size matters for your smoker or cooker unit

I’m sure you’ve had the experience of going into a store and locating the limited supply of wood chips and/or chunks offered, then look closer at the clear plastic bag and ask: Is this it?

It’s always interesting to realize what we are willing to accept versus what we really want.

My Team has spent a lot of time examining the products available in the wood chip line. Boy, have we learned a lot!

For instance, there seem to be two divisions with chip suppliers: those that manufacture wood chips as a waste product to another product line say cleaning agents, animal bedding, or flooring products. Then there are those that offer a product with a brand name on it that may be associated with a specific equipment manufacturer. Generally, that type of supplier is not the manufacturer of the product just simply a re-seller under a brand name. Thus, you can’t be sure what portion of the tree is actually in the bag and where the wood is coming from!

We still hold ourselves to a higher standard believing that a true cooking wood manufacturer should offer different variations in product size to work with the abundance of equipment lines available. That’s why we pride ourselves on being able to offer over 6 chip sizes and 4 chunk sizes. Like other food ingredients, why would you settle for only ground pepper when you can have the whole peppercorn as an option.

We are a food ingredient, a food flavor. Most of all, we are a COOKING WOOD manufacturer!


Thursday, October 21, 2021

Wood Fired Cauliflower- Roasted on a LP/Gas Grill

Look at this great head of wood fired cauliflower over wood chunks!


It’s time to bring your vegetables into grilling season! Nothing beats the smell of a fresh garden vegetable roasting over wood even on an LP/gas grill. Make this the time of the year you’ll get great char wood flavour in your seasonal vegetables.

Ingredients:

  • An LP or gas grill – any brand or size will do.
  • “Double” Filet wood chunks from SmokinLicious®.
  • a couple of heads of cauliflower. Pick the color you like the best – white, yellow or even purple!

Grill Preparation

If you want to add special wood flavoring to your LP/Gas grill there are easy steps to follow:

  • Make sure your grill is clean from any significant grease build up.
  • Remove the grilling grates and determine how much space is between the diffuser and the grilling grate.
  • The diffuser is the plate covering the unit’s gas burner(s).
  • Don’t remove the cover.
[setting up the wood chunks on the heat Diffuser to develop hot spots for Charring]
[setting up the wood chunks on the heat Diffuser to develop hot spots for Charring]

Once you have the sizing computed, then select the SmokinLicious® wood chunk size that will fit – Single Filet which is ~4 inches or the Double Filet which is ~2 inches.


Wood Preparation

Now, let’s set up the wood on the grill. Remove the cooking grates from the grill then strategically place the wood chunks over the heat diffuser. This is the metal piece covering the actually gas burners. If the SmokinLicious® wood chunks are fresh, then you can add them directly to the unit without pre-soaking them. If not, you may want to consider a lite soaking of about 15 minutes. Because I’m cooking wood fired cauliflower, I am using the chunks in their natural state. However, feel free to consider a pre-soak in liquid with flavouring such as beer, wine or juice.


Now replace the grill grates back on the unit, over the SmokinLicious® wood chunks! Make sure the grates are securely seated back on the unit. If there is a lot of space on your unit between the diffuser and the grate you may want to consider a SmokinLicious® single filet or block item. Now light the unit, set the dials to a low heat setting and bring the unit up to temperature. Say around 180 degrees. Do not overheat the unit.

Wood Fired Cauliflower- Preparation

In preparing my wood fired cauliflower for this cook, I’ve elected not to reduce the cauliflower heads into pieces. I prefer to do the cutting towards the end of my grilling presentation.

After pre-heating the grill to around 180 degrees, I add the cauliflower heads to the grill grates. Let the wood infusion flavour begin!

[ Fresh heads added to the grill, note the wood has not ignited yet to develop a hot spot]
[ Fresh heads added to the grill, note the wood has not ignited yet to develop a hot spot]

Roasting Process for Wood Fired Cauliflower

I position the wood fired cauliflower head over the hot spots created by the SmokinLicious® “Double” filet wood pieces which are under the grilling grates. The wood will ignite and begin the charring stage of the heads of cauliflower. I recommend bunching the wood pieces together to produce a hot spot on the LP/gas grill to allow for a direct char technique. While I am not using the smoke from the wood, I am still infusing great natural grilling flavour with the wood.

[Now I have hot spots and look a the char we are putting on the wood fired cauliflower. The green is the Parsley I add at the end of the process]
[Now I have hot spots and look a the char we are putting on the wood fired cauliflower. The green is the Parsley I add at the end of the process]

My cooking is taking place with an open lid because I want to char not smoke! It’s important to keep turning the heads so the flavour will be even. In the final stage of charring, I add some fresh parsley to the wood fired cauliflower heads for final flavour and presentation. And, of course, I love to drizzle melted butter sometimes infused with paprika, to the finished product.

Remember this is a vegetable, not meat so there is no grease to flare up the LP/gas grill. This is another example of why using SmokinLicious® Wood Chunks on the diffuser and under the grill grates of your LP/gas unit can generate such exceptional wood-fired flavour. Now, get to those heads of your wood fired cauliflower and ENJOY!


Thursday, July 22, 2021

WOOD GRILLING AVOCADO

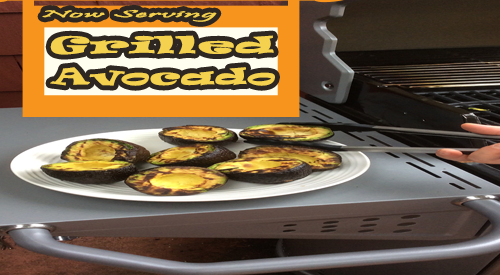
Our nicely grill marked avocado halves look yummy after we did our wood grilling avocado technique explained in this blog.
Wood grilling avocado is a fun way to add different flavor to this wonderful fruit.

 Oh, the wonderful, healthy, creamy, flavorful avocado.  With more potassium than a banana and 18 amino acids for daily intake, you can’t go wrong with this single seed fruit.

Did you ever think to grill this fabulous fruit with a little wood to give it even more flavor?  We’ll show you just how easy it is to wood grilling avocado on the gas grill using wood chunks for your smoke infusion.

Making It More Than A Grill

Regardless of the brand of gas grill you have, you can add wood chunks to the grill for wood fired flavor.  My grill has heat shields over the burners so I use that area to add one small wood chunk under the grill grate, directly on the heat shield.  No, you won’t damage your grill, as the wood combusts to ash and basically blows away.

One chunk is all it will take to get great flavor into the avocados.  I keep the burner that the wood chunk is located on set to medium as well as the burner next to that one on medium.  Since I have 4 burners, 2 are on and 2 are off.

Once the grill is to 300° F, this technique will take less than 20 minutes.

Simple Wood Grilling Avocado Preparation

The only preparation needed for the avocados is to cut them in half and remove the seed.  The avocados are placed flesh side down on the grate only on the side with the burners off.  The heat captured within the grill will spread throughout the grilling area and cook the avocado while adding wood smoke vapor.  Note, it’s important that you don’t attempt to move the avocados for at least 10 minutes otherwise you will find the avocado flesh will stick to the grate and you’ll lose much of the fruit’s flesh.  Wait until some of the fat renders and chars making removal so simple.

Prep To Finish In Less Than 20 Minutes

In less than 20 minutes you will have wonderfully wood flavored, charred flesh avocados ready for your favorite recipes.  Think of using this fruit in smoothies, dips, on salads, as a creamy ingredient for sauces – remember, avocado can be used to substitute the amount of butter used in most recipes.  We will take some of our avocado and make a wood fired guacamole first.  Our recipe will post soon so stay tuned and don’t’ forget to send us your pics of wood fired avocado.

Did you get motivated to fire up the grill with wood?  Send us a comment or your avocado fired pics and don’t forget to subscribe.  Bringing  you fun, innovative tips, techniques and recipes on all wood fired methods for foods, beverages, spices, herbs and so much more.


Thursday, July 8, 2021

BBQ BOX SMOKER LET’S YOU GRILL ALL YEAR


BBQ Box Smoker should be used as much as your tongs on the gas grill!
BBQ Box Smoker should be used as much as your tongs on the gas grill

  Bert and Tom discuss when the weather is cold use your BBQ box smoker year round! 

We have all been in Tom’s position. We love grilling and smoking but prefer the warmer weather. For those of us in 4 season climates with below zero temperatures in winter and lots of snow, it seems too hard to continuing grilling! But just as Bert remarks, you do not have to give up cooking outdoors just because of the weather.

 Chef Bert grills year round

Year Round Grilling

Grilling equipment manufacturers are always competing with charcoal grill and smoker manufacturers. That’s why many gas grills have an integrated wood chip drawer to imply that barbecue is possible. If you ever tried these, you likely were disappointed in finding that the intensity of flavor could not compare to charcoal equipment.

At the same time, there was an understanding that not everyone could afford a model of grill that included a built-in smoker box or tray. Thus, the birth of the smoker box. A small, removable, and relatively inexpensive accessory that could be used on any gas grill. Like Bert said, with a smoker box, you can grill-smoke anything!

But no one ever discussed what should go in the smoker box. The assumption was use a wood chip but you will learn, a wood chunk brings benefits to outdoor cooking never experienced before with the smoker box.

On the gas grill the two zone method, heat and smoker box on one and food on the opposite

Don’t Let the Cold Stop You!

Bert knows when it comes to outdoor cooking in cold weather, you need a means of reducing the number of times you have to add wood. This is the number one reason to use chunks in a smoker box rather than chips.

With most boxes easily fitting 3 wood chunks, you won’t need to replenish the wood for shorter cook items. Longer cooks will require just a few additional chunks to get the job done.

Gas grills in generally hold a temperature better and don’t react to outdoor ambient temperatures the way charcoal units do. You may need to make some adjustment on the heat level knob to reach your desired temperature but the unit should hold that temperature for the duration of the cooking time.

Easy Clean-Up

The Smoker box

Smoker boxes are made of metal or cast iron giving them durability. Clean up is a breeze as the wood will combust and turn to ash that is trapped in the box. Just dump into a heat safe container and you are all set!

Plus, the metal of the box helps to hold and radiate heat keeping the chunks smoldering for a long time.

Tom dreaming on how to keep himself warm while winter grilling

We don’t think Tom will be lucky enough to find a smoker box that will fit in his pocket but there are a variety of sizes, materials and lid options that should fit any need.

Don’t stop the grilling season when the leaves start to fall. Enjoy flavorful wood-fired foods all year with your new smoker box accessory and premium wood chunks!

Have you used a smoker box on a gas grill? Leave us a comment and subscribe to get our latest tips, techniques, recipes and the science behind the fire and smoke, for all live fire cooking methods. That’s SmokinLicious®!


Thursday, March 25, 2021

SMOKEY HUNGARIAN PEPPERS ON THE KETTLE GRILL!

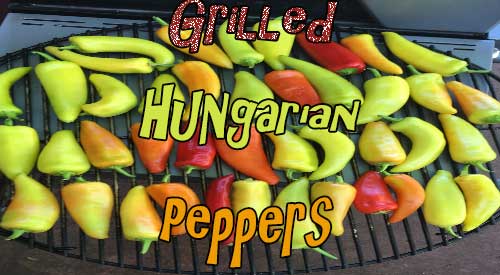
Smokey Hungarian Peppers on our kettle Grill!

 I love growing Hungarian wax peppers in my garden and then harvesting for recipes and freezing for future recipes. Hungarian wax pepper come in different levels of heat depending on the variety chosen. Mine are a hot variety but work perfectly for mixing with other creamy flavors to produce some great condiments and sauces. I will introduce you to two versions of my Smoked Hungarian Pepper Spread in our recipe blog which will post soon.

Previously we showed you how to ember cook Hungarian peppers which entailed placing the peppers whole on hot embers and turning every 5 minutes or so. This time, the cooking will be over the hot coals of a traditional charcoal kettle grill and include wood chunks to the coals for added flavor.

Purchase or pick your favorite variety of Hungarian wax pepper and bring great grilled flavor to them with charcoal and hardwood, using any charcoal grill you have.

Homegrown Is Best

Our homegrown Hungarian peppers on the plants!

Just a small number of pepper plants can produce an abundance of peppers! Start with a high-quality organic soil and you will find there is little to be done to peppers other than watch them grow. You will see that though these are a wax variety of Hungarian pepper, if left on the plant, they will turn from the traditional yellow-green coloring to red. Do not confuse these peppers with the banana pepper variety. Though they look the same, they are different in heat level, with the wax variety being higher heat/spice level than banana. Once picked, I simply clean them under running water and pat dry. These are then ready for grilling.

Tasting Note: I don’t remove the membrane or seeds from the peppers prior to grilling. I simply place them on the grill grate whole. Note some of the peppers may have more water than others and burst on the grill. Be sure to turn them before they show wrinkling and that should prevent them from bursting.

Charcoal Grill Set Up

Our wood chunks on the charcoal for the smokey flavor.
Our Wood chunks on the charcoal for the smokey flavor

The key to producing a great char on the peppers is to be sure you are cooking over gray, hot coals and not flame. The easiest method of starting the coals is with a charcoal chimney starter.

Simply fill the starter and light at the base using newspaper or a fire starter. Then allow the chimney to burn down until the charcoal is grayed over and red. I still put a bit of unlit charcoal in the kettle and then pour the hot coals over the unlit. Only do this step if you have more than one grate of peppers to cook or want to use the grill for cooking something else as the heat level produced will last many hours.

Place your peppers on the grill grate and grill until charred on one side. Turn with tongs and grill a few more minutes, then remove. These are now ready for your favorite pepper recipes! Do not forget to freeze some to keep on hand during the months the peppers won’t be available in stores.

What is your favorite pepper to grill? Leave us a comment to opine and subscribe to get all our postings on tips, techniques and recipes. Bringing innovation to wood fired cooking with recipes, techniques and the science behind the fire, smoke, and flavor. That’s SmokinLicious®.


Thursday, January 14, 2021

SMOKE A TURKEY- LEARN HOW

Smoke a Turkey with our easy to do tips will result in awesome color and flavor. Give it a try!

 There are so many ways to smoke a turkey with the main difference found in the amount of time for both preparation and cooking. One of the favorite methods is hot smoking whether done on a traditional smoker, charcoal grill, or gas grill.

To smoke a turkey, you’ll need the following supplies:

  • Grill or Smoker plus fuel for the equipment (charcoal, propane)
  • Wood Chunks
  • Meat Thermometer
  • Dry Rub and/or Brine (about 1 cup of dry rub and 2 cups brine)
  • Whole Turkey preferably fresh and less than 18 lbs.
  • Aluminum Pan
  • Aluminum foil and towels or an insulated blanket

Preparations Before You Smoke a Turkey

The cleaning of the bird is the same as when you do traditional roasting; removal of the giblets and neck, rinsing and drying the bird, and trimming any loose skin. However, don’t truss or tie the legs as this can make it harder to cook the bird completely through when smoking. You can use toothpicks to pin the wings in if they seem to be falling away from the bird. If you elect to brine your turkey, be sure to start this process at least a day ahead of smoking. Even brined birds will have more flavor if a dry rub is applied. So apply any combination of dry ingredients you prefer to the turkey, being sure to put some of the rubs under as well as on top of the skin. Refrigerate the rubbed turkey overnight.

Once you’re ready to smoke, remove the turkey from the refrigerator and rub a small amount of oil on the skin, especially the bottom portion that will be touching the grill grates. This will keep the bird from sticking. Don’t apply oil to the grates as that will not guarantee the bird won’t stick! Always place a cold turkey on the grill or smoker as cold will attract more smoke vapor. Plan about 30 minutes cooking time per pound.

Preparing the Grill or Smoker

Charcoal Grill/Smoker:

Charcoal base with Smokinlicious® wood chunks added

When using a traditional smoker, you can simply place the charcoal and wood chunks, as normally done, for a long smoking event. Usually, you position unlit charcoal in the firebox. Then lite a chimney starter full of charcoal and pour that next to the unlit charcoal. Then place a few wood chunks on the lite charcoal and some on the unlit areas so you will have wood flavor infusion during the entire cooking process. Place a disposable pan under the turkey that contains a few cups of water or mix of water and broth/stock. This will add moisture to the cooking environment and collect all the turkey drippings if you should want to make gravy. The goal is to maintain a cooking temperature of 225-275°F, though you can go as high as 300°F if desired.

When using a kettle-style charcoal grill, set up the drip pan and the turkey to one side of the grill, placing the hot coals on the opposite side. You can also set up some fire bricks in the charcoal area to retain more heat and stabilize the temperature.

Gas/Propane Grill:

Smoke coming from our wood chunks! Using a two zone cooking method

These grills need to be set up using an indirect method of cooking – heat on one side meaning burners on one side lite while the turkey and drip pan goes on the unlit side. Wood chunks will be placed on the heat shields of the lit burners. These will smolder/burn giving off true wood flavor. Additionally, smoker wood chunks last a lot longer than using wood chips in a smoker box or foil pouch. Still, maintain a temperature of 250-275°F which can be tricky. You will have to see how many burners need to stay lit to do this technique. Then check the level of heat those burners need to be set to for that temperature. Certainly, you can cook at a higher temperature if you like but you may need to replenish the wood chunks as they will likely combust faster.

Don’t Fuss over Smoke a Turkey

It’s important that you allow the turkey to cook on its own without fussing with the lid. Each time you open the lid, you release smoke vapor as well as heat. If you want the bird to cook in a reasonable amount of time, then leave the lid alone.

Never stuff a turkey that will be smoked as this causes the overall cooking time to extend and produce overcooked meat. Heat flow is blocked by anything put in the cavity as well so try to avoid stuffing herbs, citrus slices, etc. in there.

Always use a quality digital thermometer. You’re looking for the breast meat to register 160°F. You can remove from the grill/smoker at that point. Remember, if left sitting, the bird will continue to cook from all the radiant heat that has been trapped in the bones and meat.

Final Tips for How to Smoke a Turkey

If you need more than 18 lbs. of turkey, then consider smoking two smaller birds doing the same set up as above, just with two birds on the grill.

Feel free to mix some of your dry rubs with melted butter and a little oil and brush this mixture on the bird during the final hour of cooking. It will produce a fabulous color to the bird and help crisp the skin.

Remember, turkeys labeled as basted or enhanced contain a salt solution so be sure you season lightly so you don’t end up with a salty outcome.

You do not need to foil or tent the turkey when smoking. Let the air always circulate for the entire cooking process.

When cooking with charcoal, you will likely need less wood than with the gas/propane grill.

I hope I’ve inspired you to try smoke a turkey, so you can see just how unbelievably flavorful and easy this technique is. Remember to leave a comment and subscribe to our channel. Bringing you tips, techniques, recipes, and the science behind the fire and flavor – that’s Smokinlicious®!

The Culinary Crew wants you to know…

… that whether it’s smoking a turkey or any meat/protein food item, our recommendation to “Don’t Peek and Let the Smoker Apparatus Do Its Trick” is very important and can’t be stressed enough! Be patient and keep the lid on! You’ll be rewarded with incredible coloring and awesome flavor! If you’re tempted to look, resist the urge by thinking of this in much the same light as many of us did when we saw that Christmas present under the tree days before Advent, all wrapped up nicely with a tag that beckons- ‘Don’t Open Until Christmas!’ Don’t ruin the joy by spoiling the element of surprise and satisfaction!

Thursday, July 9, 2020

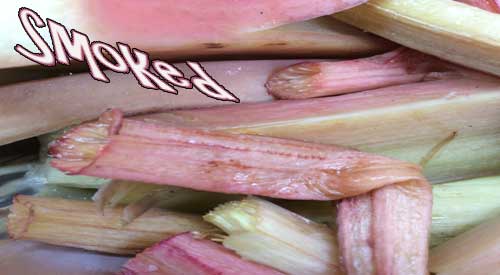
TAKE TART TO THE SMOKEY SIDE WITH FRESH RHUBARB (SMOKED)!

Our finished Smoked Rhubarb
Our Finished Rhubarb (Smoked)

Rhubarb (Smoked) – I will make a confession: I don’t like rhubarb, a spring to early summer perennial vegetable, on its own, likely due to the very tart flavor.  I do, however, enjoy this vegetable smoked and then blended with a sweet fruit.

This is likely why you may not have realized that rhubarb is a perennial vegetable since this is so widely used for dessert items. The rhubarb stalks are suitable to eat but the leaves are poisonous meaning they should never be eaten or added to a smoothie.  Since this is a tart vegetable, I am going to first smoke it to change the balance of that tartness.  Later, I plan to use these smoked stalks in combination with some smoked strawberry to make a strawberry-rhubarb fool, a delicious treat or dessert.

For now, let’s get about a pound of fresh rhubarb, hopefully from a garden or a fresh market, and meet at the smoker for an easy method of infusing wood flavoring to this tart stalk vegetable.

Selecting and Preparing

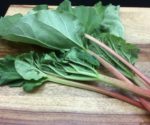
Our fresh Rhubarb picked from the garden- or buy at the Farmers Market
Rhubarb is a perennial vegetable that prefers cold conditions to thrive.  When first planted, you won’t be able to harvest any of the stalks until the second year, similar to growing asparagus.  When ready to harvest, you’re looking for stalks 12 to 18-inches in length with good girth to them.  If the stalks are too thin, that means the plant does not have enough nutrients.

Once harvested, clean well under water and pat dry.  Trim all the leave ends from the stalks as these are poisonous, and discard. Note you can compost the leaves as the poisonous oxalic acid breaks down quickly when decomposition begins.

I prefer to cut my stalks into 3-4-inch lengths.  That’s it!  Likely one of the easiest vegetables to prepare for the smoker.  Speaking of the smoker, time to prepare ours.  I’ll be using an electric smoker today since smoking rhubarb takes very little time.

Tasting Notes: Whether to cut the stalks is dependent on what you plan to do with the rhubarb so adjust this step according to your planned recipe.

Fire Up the Smoker!


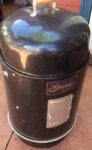
I’ll be using a standard vertical electric smoker that uses lava rocks as the radiator of the heat as well as an electric element as the fuel/heat source.  My electric smoker allows me to use wood chunks so I have an assortment of small sizes that total about 6 ounces of hardwood.  The double filet wood chunk size is ideal and as a tip, if you note to SmokinLicious® the need for thin chunks, these can be provided.
The Electric Smoker for our Rhubarb (smoked) technique
My set up is simple: I wrap one of my grill grates in aluminum foil, place my element on the lava rocks and insert wood chunks between the element’s spaces.  I’m using a combination of maple and cherry hardwood.  I add my water pan with about 2-inches of hot water so energy from the unit isn’t wasted heating up the water.  On goes my tray of pre-cut rhubarb that are spaced to allow the smoke to penetrate all around.  Leave these untouched on the smoker for about 20-25 minutes or until the thickest stalks are fork tender.

The best part about rhubarb on the smoker is it takes very little effort.  Trim, clean, and cut to size then place on the grate and smoke.  In about 15 minutes time, you’ll see a golden hue come out of the rhubarb pieces.  That means the smoke has penetrated its great flavor.  Using a fork or the tip of a paring knife, I check the thickest stalk to be sure I can easily pass the metal tip thru.  If so, then the rhubarb is tender and ready to come off the smoker.
Cut up Rhubarb pieces in the smoker
If your plans are to prepare this for rhubarb pie, then just continue with your favorite recipe.  This step is simply to provide another flavor level and begin the cooking process. Check in with us soon as we release our version of the strawberry-rhubarb fool featuring this smoked rhubarb and smoked strawberry.

What’s your favorite method of cooking rhubarb?  Leave us a comment to opine and subscribe to get all our postings on tips, techniques and recipes.  Bringing innovation to wood fired cooking with recipes, techniques and the science behind the fire, smoke, and flavor. That’s SmokinLicious®.