Tuesday, November 1, 2022

SEASONAL SMOKEY BAKED APPLES WITH SWEET STUFFING


 Apple season is here and I’ve found some beauties to make a simple but super sweet and flavorful recipe.    And of course, I’m taking it to the grill to let the apple get a kiss of smoke while tenderizing.  With so many varieties of apples available, you can pick your favorite and use this filling for the perfect stuffed apple.

In my home state of New York, there are over 25 varieties of apples.  Since these can be cold stored, they are available year-round but there is nothing like the fresh harvest.  In fact, controlled atmosphere storage was pioneered in New York State.

Whether served as the dessert or a sweet side dish is up to you but either way, you’re going to love the ease of making this dish and consuming all its seasonal goodness.  Pick your favorite variety of apple and get ready to stuff them with goodness everyone is going to love!  Smokey baked apples done on the grill, cleanup is a breeze!

Apple Preparation

Smoke coming from our wood chunks! Using a two zone cooking method


I’ll be using my gas grill for this recipe so I start by lighting only half the burners on my grill which I’ve added a smoker box that contains 3 hardwood chunks.  This will provide for the great smoke flavor to the apples.  While the grill heats up to about 375°F, I prepare the Macintosh apples.  First, wash and pat dry the apples.  You can use an apple corer to remove the core but note you do not want to produce a clean hole through the entire apple.  We want to produce an opening for adding the stuffing but we don’t want it to run out of the apples.  I like to use a small, sharp knife, cut into the apple stem end about ¾-inch from the stem making a circle.  Remove the core membrane and seeds leaving a firm base to the apple for filling.

Tasting Notes: Although I’ve selected Macintosh apples to know any variety will do.  Just note, if the apples are significantly larger, you will need to make an additional filling.

Sweet Stuffing

our sweet stuffing in the mixing bowl

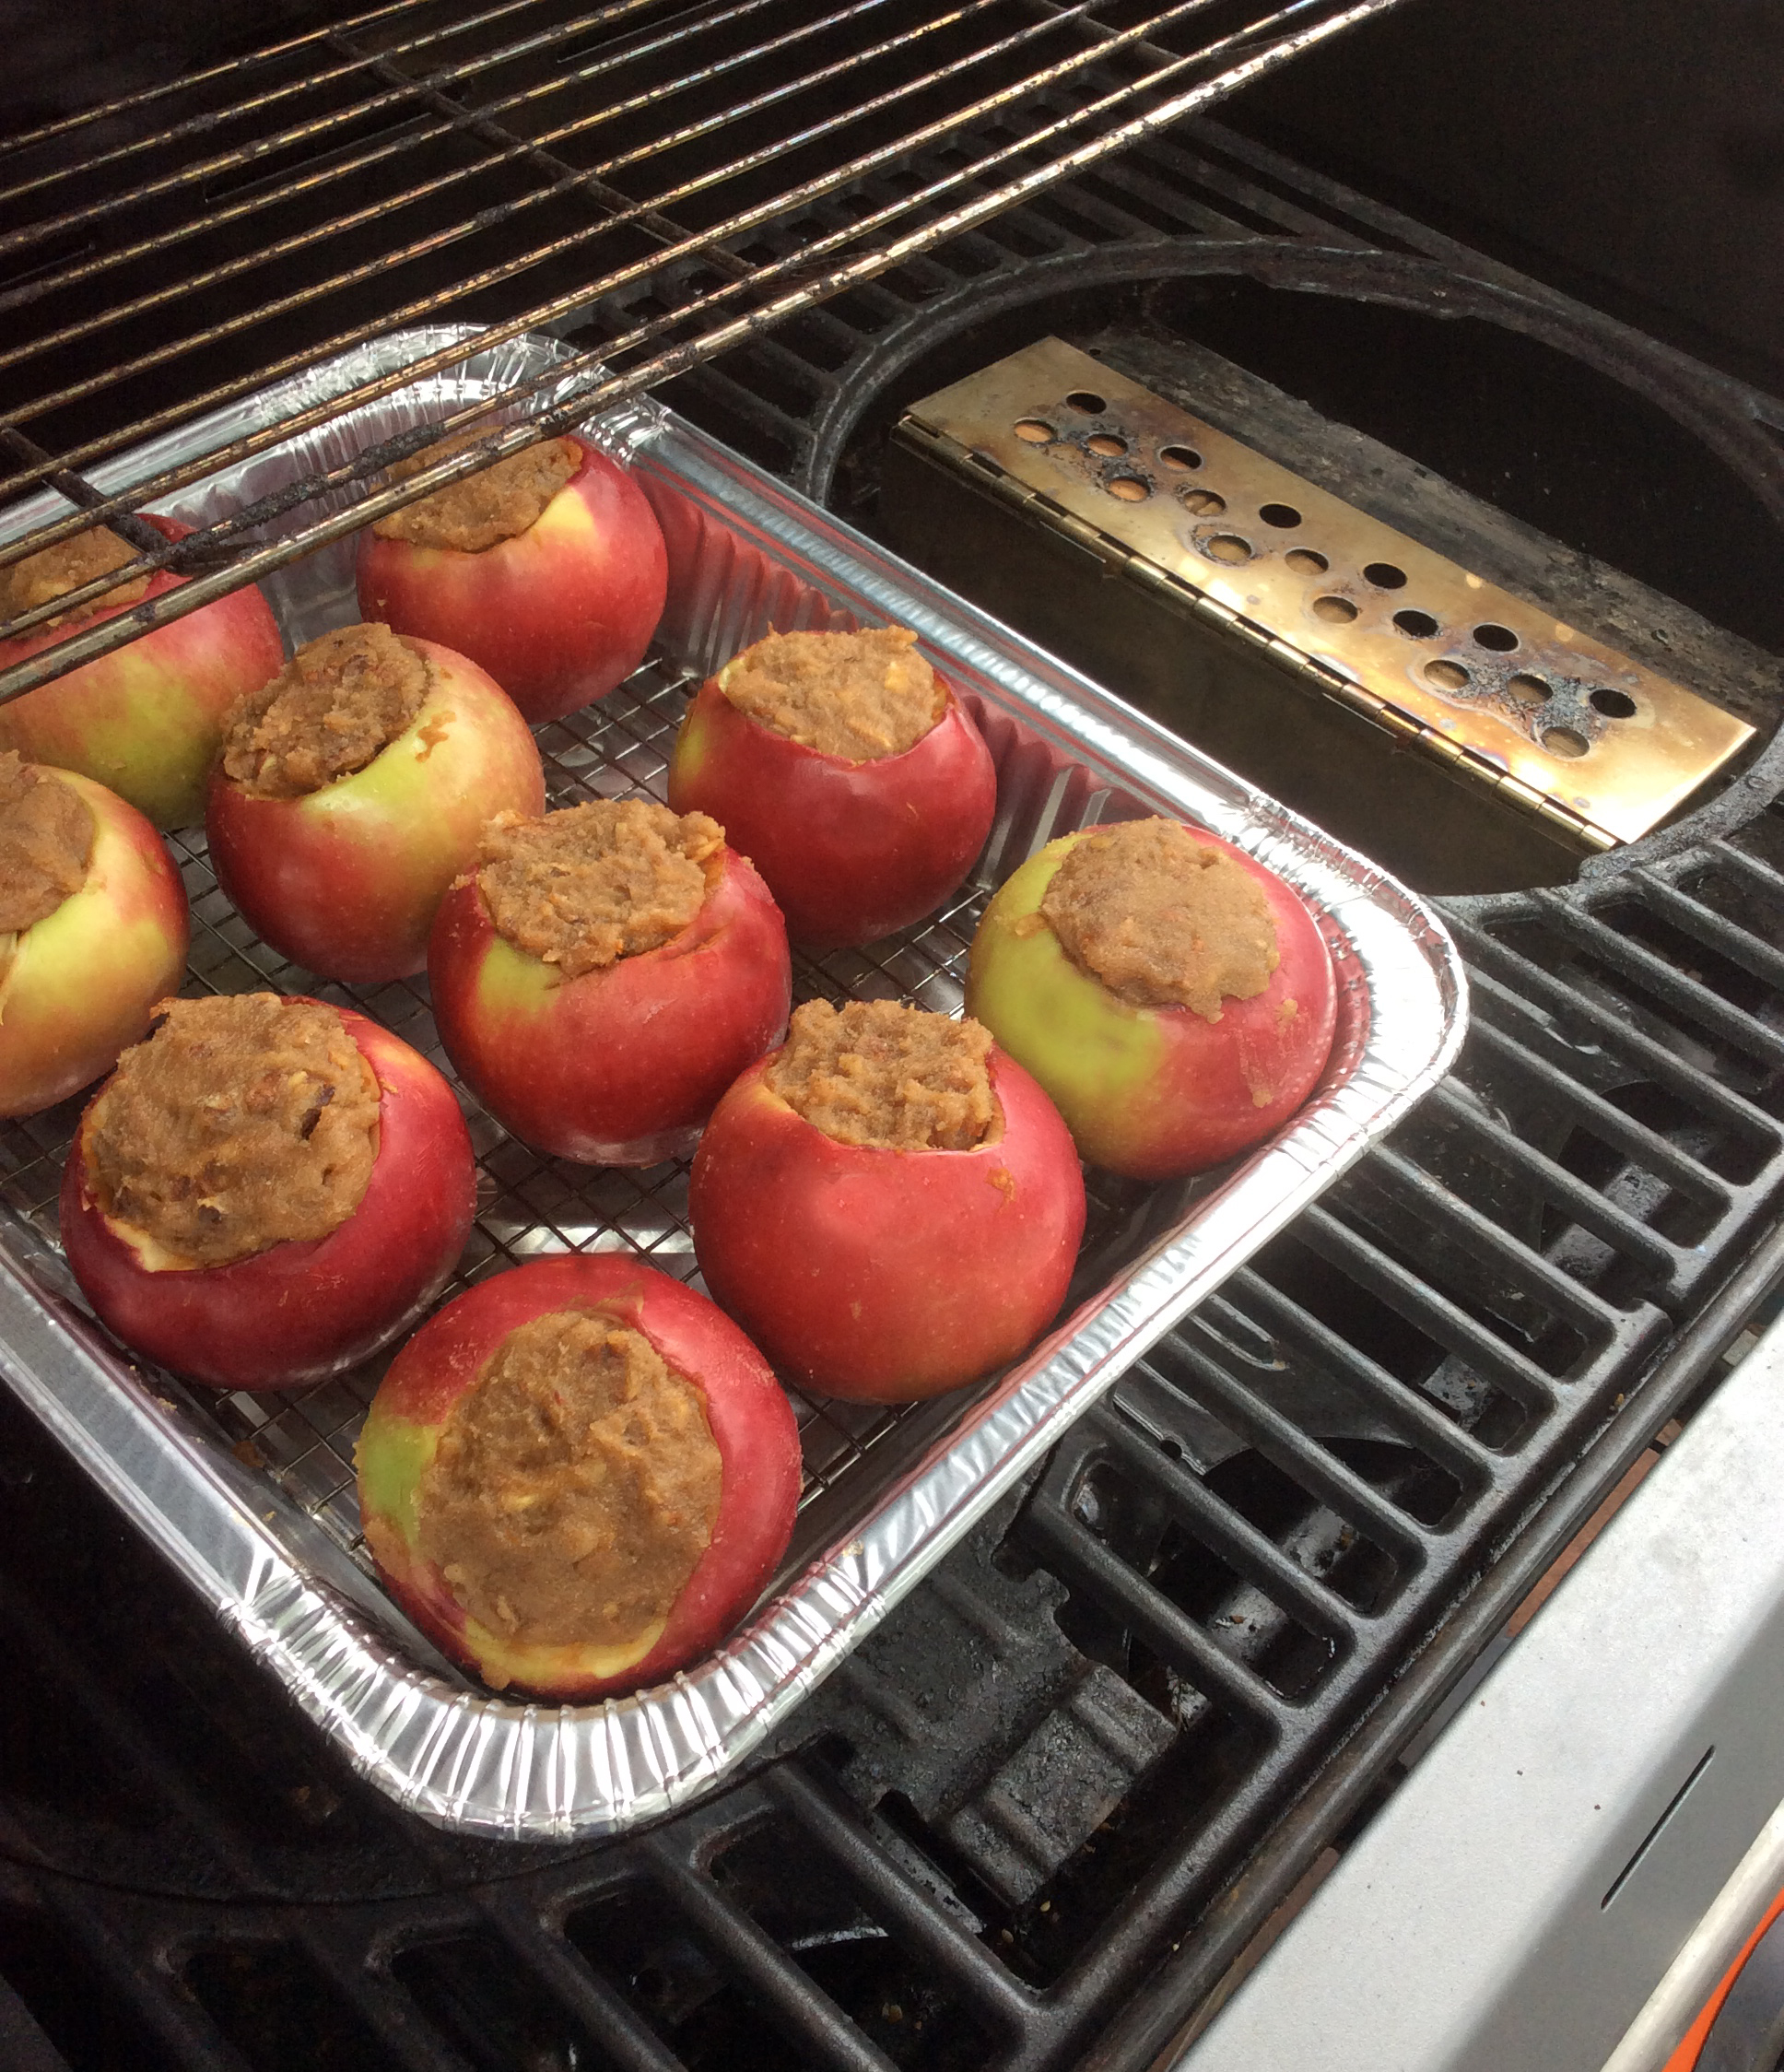
With our apples cored, it’s time to make the sweet filling before heading to the grill.  First, know I like to use a disposable foil pan to make clean up a breeze.  In that pan, I place a roasting rack so the apples will be exposed to radiant heat all the way around the apple.  I’m making ten stuffed apple but I will give you the ingredients needed for making eight apples.

Place 1 stick of softened butter in a bowl.  Add 1 cup of light brown sugar, ½ cup chopped pecans, and 1-1/2 teaspoons of ground cinnamon.  I prefer to mix this with my hand to ensure good distribution of the ingredients.  Taking a small amount of the mixed filling, I form a log shape and insert into the apple opening, pressing down to make sure this is filled to the top of the apple.  Once all the apples are filled, I head to the grill with my pan.


Tasting Notes: The stuffing for this apple recipe can be easily modified.  Feel free to swap the pecan for another nut like walnut, hazelnut or almond.  For spices, consider adding ginger, allspice, and clove either in addition to or in place of the cinnamon.

No Fuss Grilling

Our Smoker box with wood chunks for smokey flavor

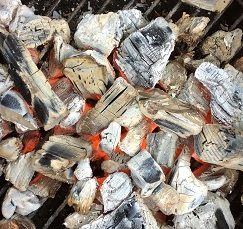
Once at the grill, I check to ensure my wood chunks are smoking well.  I place my pan of prepared apples on the unlit side of the grill and pour enough water into the pan to coat the bottom by about 1-inch.  This will allow moisture into the cooking area to get the apples very tender in a short amount of time.  I usually check the apples after 45 minutes and rotate the pan if needed.  When the apples are tender and the filling browned, these are ready and can be removed from the grill-#grilledapples.

Tasting Notes:  Note that if you elect to use a charcoal grill the smoke infusion produced will be stronger.  You are encouraged to still use a two-zone set up on the charcoal grill to keep the sugars from burning.

  Serve ‘Em Up

Once the apples are tender and the filling browned, it’s time to remove the apples and prepare to serve them.  There are many options for an accompaniment to the apples.  Today, I’m using a vanilla bean ice cream that I’ve sliced into wedges.  Certainly, the apples can be served with whipped topping, another flavor of ice cream, a vanilla custard or pudding, or even a slice of hard or rind cheese.    These are best if served warm.  Don’t forget, if any filling is left, add to a pureed squash for another great recipe.  That’s why I always make extra!

Tuesday, October 25, 2022

HOW LONG DO WOOD CHIPS LAST IN ELECTRIC SMOKERS


Without question, electric smokers are by far the easiest smokers to manage as they require no charcoal lighting, no constant checking of the fuel supply, and usually no messy ash pan.  These are units that are designed to run on very little wood product, usually between 2-5 ounces because the actual ‘fuel’ is an electric coil.  No gas, charcoal, or pellet.

Are There Flavor Differences?

To answer the question of whether flavor differences exist between an electric unit and those that use combustible fuel sources, you need to weigh who the response is coming from.  For me, someone who has an electric unit (we need to have a good assortment of equipment to produce our recipes), I do indeed feel there are flavor differences.  Without the volatile gases that are produced with combustible items meaning wood and lump hardwood charcoal, there is less of a smoke flavor.  The trademark smoke ring on meats can also go missing with electric units.  Take this into consideration when deciding whether to purchase an electric unit.

The Small Wood Appetite - How Long Do Wood Chips Last in an Electric Smoker

Electric smokers are very specific when it comes to the quantity of wood to use.  Most manufacturers will provide a measurement level in ounces that you need to adhere to.  If you should have an electric unit that does not include the reference to wood quantity but does have a wood tray, be sure not to overfill that tray.  To gauge how long wood chips last in your typical electric smoker, know first that most units use between 2-5 ounces of wood product to start.  You may have to replenish the wood 1-2 more times depending on what your smoking.  Larger cuts of meat, plan on enough wood to fill the wood tray three times.

Solid Black Wood Chips

You followed the directions and placed the referenced amount of wood chip product in the unit but when the cooking time was finished, you looked at the chip tray and found most of the wood chips still in solid form.  Nothing was reduced to ash and all the chips were black in color.  Did something go wrong?

Black color to the wood chips means that the wood processed through most of the stages of combustion and turned to carbon on the outside, giving the distinct black coloring.  If the wood chips are still in sold form, then combustion was not complete.  Complete combustion would have reduced the chips to a pile of carbon ash.

How Long Do Wood Chips Last? - Remember- Combustion Has Needs!

To ensure complete combustion of a wood product specific factors need to be in place: air-fuel ratio, quality of the fuel, reduced moisture or water level, etc.  The 3 ingredients that must be present to sustain combustion are oxygen, heat, and fuel.  If you can achieve a balance of these 3 ingredients, you will achieve complete combustion and have great success with wood product used in an electric smoker.

Can Black Chips Be Re-Used?

The most important thing to remember about combustion is when wood is reduced to carbon, it produces very little if any smoke and has no flavor release.  To answer the question of whether wood chips that are black but still in solid form can be re-used, the answer is no.

Those chips will not give out any flavor, they simply will finish the final stage of combustion and turn to ash. when is a wood chip dead

Remove those black chips and add fresh, keeping the chips in the dry state when smoking with them.  You’ll find better results and less waste in the wood product you purchase.

Tuesday, October 18, 2022

BLT SALAD GOES SMOKEY


We know smoked bacon is a favorite which is why we wanted to include a great recipe for fresh produce you may have available. This is our take on the BLT salad featuring smoked bacon, homegrown lettuce and tomatoes, as well as a homemade dressing and Naan croutons. Don’t forget to check out our technique on smoking pork belly which is super easy and fast https://www.smokinlicious.com/blog/homemade-smoked-bacon/ for the ultimate homemade smoked bacon.

Abundant flavor in a bowl!

Dressing First

I believe a salad is only as good as the dressing you top it with. That is why homemade is so much better than any store bought, even those with limited ingredients and a claim to freshness. Make it yourself and you can guarantee freshness and flavor.

To start our dressing for the smoked BLT salad, add 4 tablespoons of sour cream to a medium size bowl. Now add 3 tablespoons of your favorite mayonnaise, a healthy grind of fresh ground pepper, a ½ teaspoon of minced garlic and ¼ cup of freshly diced chives. To dilute the dressing so it can be poured, start with 3 tablespoons of milk or cream and whisk well. Add additional milk or cream until you reach the consistency you prefer.

Crispy Bacon & Croutons

With the creamy chive dressing made, place in the refrigerator to chill while you begin the next steps for the smoked BLT salad.

If you have your smoked bacon ready, slice to the thickness you prefer. Place the slices on a sheet pan and crisp in the oven at 350°F. Timing for the bacon will depend on how crisp you want the outcome; plan 15 minutes for less crisp and 20–25 minutes for crispy.

While the bacon is cooking, take Naan and slice into small squares. Coat the cut pieces with a bit of oil and toast in the oven with the bacon until crisp as well; about 15 minutes. Remove both the croutons and bacon and allow to cool until they can be handled.

Tasting Notes: Feel free to change to any favorite bread for the croutons. Just be sure to toast in a single layer with a little oil until crunchy

Assembling & Plating the Salad

Once the dressing, Naan croutons, and crisp bacon are ready, it is time to assemble the other ingredients for our salad. This starts with our homegrown lettuce. I am using three types of lettuce: romaine, buttercrisp and red leaf. Gently tear or cut into ribbons. Add these to the center of a serving platter. Along one side of the lettuce, place your Naan croutons and cut tomatoes. For my tomatoes, I’m using homegrown cherry which only need to be sliced in half. To the other side of the lettuce, I place the smoked crispy bacon which I diced.

As you can see, the components of the Smoked BLT Salad are very simple but highly flavorful. Using fresh produce and herbs makes a big difference. I prefer to plate the salad after mixing individual portions in a bowl and tossing with dressing. Start by adding lettuce, smoked bacon, tomatoes, and croutons in a medium bowl. Add the desired dressing — usually 2–3 tablespoons is perfect- and toss with tongs. Then plate. Tangy, smokey freshness is all yours! Enjoy!


Thursday, October 13, 2022

SMOKE FLAVORED FOOD- HOW TO CORRECT STRONG SMOKINESS


when you smoke flavored food too much and how to correct!

When your smoke flavored food is too strong and how to correct!

I’m going to start this by stating smoke is a lot like salt. You can add more of it but if you add too much to smoke flavored food, it’s hard to correct. All is not lost though. I’m going to provide a tip that could save a smoke flavored food item that has been over smoked.

It’s All in the Ingredients

You’ve made the mistake of either using too much wood material to smoke or you smoked for too long. Either way, the outcome appears to be a disaster. Take a breath and a step back and assess the ingredients you used.

Often, you can correct the smoke level by adding an ingredient that was not included in the recipe. For instance, if your smoke flavored food involved a vegetable for a soup, find an ingredient in the soup recipe that has not been used. This may be cream, sugar or vinegar. Additionally, by adding the ingredient that was smoked in a non-smoked fashion, you can reduce the smoke flavor intensity. If you infused too much smoke in the broccoli for your broccoli cream soup, think about steaming some additional raw broccoli and adding with the smoked base. That will diffuse the smokiness.

SMOKE IS A GAS- Prime Factor for Smoke Flavored Food Items

Smoke is a vapor or gas. That means it is readily absorbed by the food product especially if moisture is present. This is one of the reasons why a water pan is used in a smoker.

Certain foods are more apt to be over smoked. Items like vegetables, fruits, dough item like breads, pies and tarts, and dairy items like egg-based recipes. Wood choice, amount of wood and length of the smoking process all play a part in how much essence comes from the wood.

Remember, smoke flavored food like a cut of meat can taste bitter with too much smoke vapor. This results from using wood that is too wet or using a wood that is not ideal for food.

But even a bitter smoked meat item can be saved by blending the meat with a sauce or glaze, especially one that contains a balance of sweet and heat.

In the end, you may find a smoke flavored food destined for the trash becomes a star dish when you know how to balance the smokiness with another flavor.

Smokinlicious® Products:

Wood Chunks- Double & Single Filet

Wood Chips- Grande Sapore®

Smoker Logs

More Related reading on "What Wood for Smoking" and other great smoking and grilling tips and techniques

More Related reading on “What Wood for Smoking” and other great smoking and grilling tips and techniques

Related reading:

BBQ SMOKE COLOR

SMOKING COLOR


Dr. Smoke sometimes you over smoke food, we have tips on how to correct

Dr. Smoke: Sometimes you over smoke food, we have tips on how to correct!

Thursday, October 6, 2022

GRAPE FLATBREAD SWEET & SAVORY


Our Delicious Smoked Grape Flatbread with Brie and a little fresh Rosemary

Smoked Grape Flatbread- Even if you aren’t the biggest fan of Concord Grapes, this recipe completely changes the flavor of this variety of grape to produce a very pleasing outcome. I’ve gone to my own personal grapevines and selected grapes at their peak for a flatbread recipe that is super easy and scrumptious. It all starts with the grapes so go to your own vines, a neighbor’s, a farmer’s market or fresh market, and pick up a quart or two to bring to the grill for wood flavor infusion to make the ultimate in flatbread. Remember, any grape you find will work for this recipe, so go ahead and pick your favorite.

Grape Flatbread- Grape Prep & Wood Infusion

The first steps to our recipe are related to the grapes. I’ve visited my grapevines and selected grapes that our deep purple and firm. Bringing them to the kitchen, I remove them from the vine, ensuring all stems are out, rinse under cold water and pat dry with a paper towel. I’ve started my grill by lighting only one burner. To that side, I’ve prepared a metal smoker box with wood chunks. My grill needs to heat up to 250-275°F. While it’s heating, I prepare a sheet pan with a single layer of clean grapes. Then we’re ready to add wood flavor.

Two zone cooking on a grill or smoker is the easiest since the temperature will remain steady and you won’t need to constantly watch the grill. After achieving a 250°F temperature, I place the sheet pan of prepared grapes on the unlit side of the grates. The smoker box of chunks should be releasing a consistent smoke at this stage. Put the lid down and allow the grapes to infuse for about 20 minutes. I then return to the grill and rotate the pan, lid down again, and allow to smoke for an additional 10-15 minutes.

Tasting Notes: There is no rule regarding the type of wood you should use for the smoking. Just be sure it is only hardwood and not a completely dried out piece of wood or you’ll find it will burn up almost immediately. Remember, you want smoke not flames from the wood. Positioning as close to the burner as you can get is best for the placement of the smoker box.

Grape Flatbread- Dough Time

With the grapes smoking on the grill, I’m going to starting the dough for the flatbread.

Taking 2 cups of unbleached bread flour, I add it to a stand mixer bowl with a ½ teaspoon of kosher salt, whisking together. In a measuring cup, I place 1 cup of warm water that is between 110-115°F. I sprinkle into the water 1-1/2 teaspoons active dry yeast and wait 5 minutes for it to bloom. Fitting my stand mixer with a dough hook, I start the mixer on low speed and gradually add in the bloomed water/yeast mixture from the measuring cup. Turning up the speed on the mixer, I continue to knead the dough until it begins to ride up the dough hook, pulling away from sides of the bowl.

Taking a large bowl, I add 1 tablespoon of olive oil to the bottom and place some bread flour on a clean work surface to roll the dough out.

Removing the flatbread dough from the mixer bowl, I place the dough on the floured surface and begin to hand knead the dough into a ball. I place the ball of dough into the oiled bowl, rolling the dough in the oil and up the sides of the bowl to ensure everything is nonstick. Place the dough in the bottom of the oiled bowl, cover with a towel and place in a warm place to rise until double in size which will take about an hour. Once risen, prepare a sheet pan with two tablespoons of oil, coating the pan’s surface with the oil using your fingers. The oil will ensure the bottom of the flatbread crisps while cooking.

Grape Flatbread- Simple Fresh Ingredients

Punch the dough down and place on the oiled sheet pan, stretching the dough out on the pan until it almost touches the sides. Time for the fresh ingredients. Start by slicing then tearing into pieces Brie cheese, placing over the top of the flatbread dough. Sprinkle with fresh rosemary leaves. Press the smoked grapes into the dough’s surface until all three ingredients cover most every spot of the dough. Cover the dough with a cloth and allow the flatbread to rise a second time for another 20 minutes. Then bake at 400°F until the cheese is bubbly and the bread surface is golden brown. Remember, the grill works great for the flatbread cooking as well and for additional wood-fired flavor, use wood chunks at this stage as well.

Tasting Notes: Feel free to use other seasonal fruits and even vegetables from the wood-fired grill for this recipe. Swap out the herb and cheese based on the main ingredient and you’ll have a versatile recipe for any seasonal food.

What’s your favorite flatbread recipe and featured flatbread item? Leave us a comment to opine and subscribe to get all our postings on tips, techniques and recipes. Bringing innovation to wood fired cooking with recipes, techniques and the science behind the fire, smoke, and flavor. That’s SmokinLicious®.

Love this post? Then please share!

SmokinLicious® Products Used in this Recipe:

Our custom split double filet wood chunk used in this blog
#woodchunks

Wood Chunks- Double & Single Filet

For more reading related to Smoked Grape Flatbread with herbs try these recipes

More delicious recipes to try:

-ADDING A SMOKY INGREDIENT FOR SAVORY CORN MUFFINS

-Crostini with Smoked Asparagus

-RASPBERRIES GO TO THE GRILL– FOR THE ULTIMATE MINI TART APPETIZER

Dr. Smoke- Awesome Smoked Grape Flatbread with Brie!

Thursday, September 29, 2022

WOOD EMBER COOKING!

Our coals showing their hot glow and ready for direct wood ember cooking!

THE GLOW OF WOOD EMBER COOKING!

So what exactly is wood ember cooking and why is it suddenly gaining attention as a method of cooking? Well, first, it’s most certainly not a new cooking concept. Cooking over a fire and hot coals have been around for thousands of years. Recently, some Chefs and well-known restaurants have taken to returning to this method of cooking because they know where great flavor can come from and they know how to manage the heat from hot wood embers.

An ember is a glowing, hot coal made of greatly heated wood, coal or other carbon-based material that remain after a fire. The heat radiated from hot embers can be as hot as the fire which created them. You can see this first hand, by placing new wood pieces on hot embers and watching a full fire develop. An ember is usually formed when a fire has only partially burnt a piece of fuel and there is still usable chemical energy in that piece of fuel. It continues to stay hot and does not lose its thermal energy quickly because combustion is still happening at a low level. The small yellow, orange, and red lights are often seen among the embers are actually combustions. There just is not enough combustion happening at one time to create a flame. Once the embers are completely ‘burned through’, they are not carbon as is commonly believed (carbon burns, and is not normally left behind), but rather various other oxidized minerals like calcium and phosphorus. At that point, they are commonly called ashes. But why cook on the embers versus over a live fire? Because embers radiate a more constant form of heat, as opposed to an open fire which is constantly changing along with the heat it radiates (think water trapped within the wood and you’ll understand why there is heat fluctuation).

Ember cooking techniques include placing thickly skinned food items directly into the embers (i.e. garlic, onion, peppers, eggplant, steaks, etc.), placing a cast iron skillet into the embers that can hold any food items from vegetables, meats, poultry, fish – really anything. The results produced from this method are super moist, super flavorful, and the aromas are exceptional.

Peppers being cooked over wood embers
Sweet Peppers over direct wood ember cooking
Dr. Smoke- You don't need a flashy grill, a simple fireplace with enough room, just like Asado, you can do direct wood ember cooking.
Dr. Smoke- You don’t need a flashy grill, a simple fireplace with enough room, just like Asado, you can do direct wood ember cooking

Thursday, September 22, 2022

GRILLED PEACHES- THE PERFECT SALAD ADDITION

Our Grilled Peaches for the perfect salad addition with sweet onion, Tomatoes, and fresh herbs!

If you’ve been a follower of our recipes and techniques for a while, then you’re aware of our preference to grill, smoke, coal cook, and ember fire in-season produce. Peaches are no exception!

I’ve got my two quarts of fresh peaches and a plan to grill these on the charcoal grill using charwood coals. Then I’ll use my luscious smoked peaches in a salad that features two additional seasonal ingredients – tomato and shallots.

Get your chimney starter of charwood or charcoal and meet me at the grill for this quick technique and recipe featuring peaches.

Grilled Peaches- Fire Up the Grill!

Whenever you use the charcoal grill, it’s always best to get it lit about 30 minutes ahead of cooking. I’m using a kettle-style grill made by Stôk that has a removable center grate for an assortment of inserts. I won’t be using any inserts for this cook as my peaches will stay in a disposable foil pan for easy cooking and removal.

Start by placing charcoal or charwood in a chimney starter. Place a Fire starter in the charcoal area of the grill and place the filled chimney starter over the starter. Lite the Fire starter and allow to remain in place until all the charwood has ignited and started to reduce to hot coals. While that’s burning, let’s prepare the peaches. Be sure you have a couple of wood chunks available to add to the coals when we are ready to grill. I like to use the single filet wood chunk size from SmokinLicious®.

Tasting Notes: there are differences in charcoal so be sure to use a natural charcoal or charwood product rather than briquets as briquets will produce more heat than you need.

Grilled Peaches- Perfect Peach Bites

With our charcoal grill going, it’s time to start on the peaches. There are a few ways to remove the skin from peaches including placing them in hot water for a few minutes then removing and placing in a bowl of ice water. The skins will just peel off. I’m an old school so I use a sharp paring knife and just remove the skin.

Once the skin is removed, it’s time to cut the peach into bite-size pieces. You can easily cut around the pit and cut those slices into pieces. Place all the pieces in a foil pan in an even layer.

Tasting Notes: Try to purchase peaches that have some firmness to them if you don’t plan to grill them right away. The peaches should have no bruising and have a slight give when touched. Too soft and those peaches won’t hold their shape when exposed to the grill’s heat.

 Grilled Peaches- Smoking Process

With the peaches prepared, time to take them to the grill. Pour the chimney of hot coals into the grill’s charcoal area and add the wood chunks. Add the pan of prepared peaches and placed the lid on the grill. Be sure the outtake vent on the lid is ½ way open. The intake vent at the charcoal area should be ¼ way open. Now allow smoking for 15 minutes prior to checking. Remember, we want to add smoke without reducing the peaches to a puree.

Tasting Notes: Since peaches contain 89% water, they take in the smoke vapor extremely well. Keep that in mind when you select both the charcoal and wood. Remember, oak based charcoal tends to burn hot and has a stronger undertone to fruit.

ingredients table

Grilled Peaches- Final Salad Prep- Addition for the perfect salad!

While the peaches are absorbing all that great smoke flavor, return to the kitchen and prepare the remaining ingredients for our salad.

You’ll need:

  • 1 lb. tomatoes cut into 1/2’” pieces; or if using cherry or grape tomato, halved
  • 3 tablespoons extra virgin olive oil, plus additional for final drizzle
  • 2 tablespoons rice vinegar
  • ½ teaspoon lemon zest
  • 1 tablespoon lemon juice
  • 1 shallot, sliced thin
  • fresh mint leaves torn
  • salt and pepper

I start by slicing my tomatoes in half, then add a teaspoon of salt to them while sitting in a colander so I can render some of the water.

the ingredients in the serving bowl and ready to add the dressing

While the tomatoes sit, I start slicing the shallot into thin strips. At this point, you’ll want to check the peaches. They should be close to or ready to remove from the grill. I like to place them in the refrigerator for about 10 minutes to cool them down for the salad. While that’s happening, let’s prepare the vinaigrette.

I prefer to mix all the vinaigrette ingredients in a measuring cup so I can easily pour it to the salad right before serving, to keep the tomato and peach from getting too soggy. Start with the extra virgin olive oil and add the rice vinegar. Next, the lemon zest, lemon juice, salt, and fresh pepper. Whisk it all together and set aside while you combine the salad ingredients.

Tasting Notes: you can substitute cider vinegar for the rice vinegar and any color of tomato will do though I lean toward the reds and purples to give a color contrast from the orange peach.

Smoked peaches go into the serving bowl first, following by the tomatoes, and shallots. Pour the vinaigrette over the salad within an hour of serving and top with the torn mint leaves. A perfect balance of sweet, tart, smoky, and refreshing. An easy method and recipe you can have in 60 minutes. I love peaches so try our grilled peaches for the perfect salad addition for your next dish to pass! You will tantalize the guest taste buds!

SmokinLicious products used in this blog:

Charwood

Wood Chunks- Single Filet

For more reading related to
For more reading related to our recipes

Additional reading:

-PEACHES WOOD FIRED FOR A SMOKY FLAVORFUL GAZPACHO

-STEPPING UP RADISH SALAD WITH A WOOD-FIRED FLARE

-RASPBERRIES GO TO THE GRILL– FOR THE ULTIMATE MINI TART APPETIZER

-GRILLED PEACHES FOR THE PERFECT SALAD

Dr. Smoke add some mint, onions, and tomatoes to Grilled Peaches for the perfect salad addition!
Dr. Smoke- Add some mint, onions, and tomatoes to Grilled Peaches for the perfect salad addition!