Thursday, October 1, 2020

WOOD SMOKERS & GRILLING- RETURN TO THE BASICS!

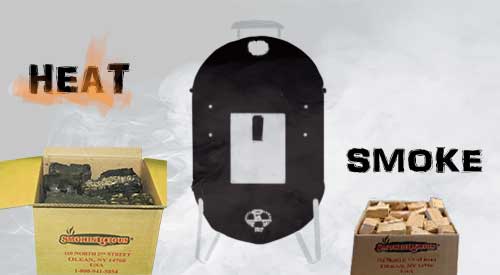
Wood Smokers need Charcoal for fuel/heat/combustion and smoking wood for flavor!

WOOD SMOKERS & GRILLING- RETURN TO THE BASICS! – I recently received an email from a new customer who was questioning the moisture level of the wood she recently purchased.  Her claim was, she thought the moisture wasn’t ideal as she was finding that the wood chunks “weren’t catching fire.”  That got me thinking that despite what we publish for information on the various methods of wood-fired cooking, when it comes to smoking, the very basics of this method may not be understood, as well as the basics of grilling with wood.

My goal with this article is to remind you of what is needed to be successful with each type of wood-fired method.

Know the Combustion Need

One of the knowledge areas I feel is weak is understanding what is needed from the wood for different styles of wood-fired cooking.  Let me get you educated.

Smoking

Hopefully you know that hot smoking means you are cooking with wood material to affect the color, aroma, texture, and flavor of the food.  This method requires a lower temperature, a longer cook time, fuel for temperature and wood for flavor.  Certainly, you can use wood for both flavor and fuel but a more cost-effective method is to use charcoal or briquets for fuel and wood just for the flavor, aroma, color, and texture to food.

For cold smoking, you still need the same items listed above but the temperature needs to be under 80°F which means the fuel is often wood which will flavor, color, provide texture, as well as the minimal heat level.

What’s the difference for these methods?  Moisture of the wood product.

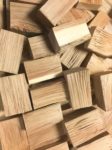
Hot smoking needs hardwood that is at least 20% moisture and preferably under 30%.  Cold smoking needs hardwood that is under 15% moisture.

Wood-Fired Grilling

This method of grilling generally requires the use of wood both for higher temperature and for flavor.  Here’s a big difference with this method: you can vary the type of food used on the grill but how you position the food to the active fire versus the hot coals is another need.  Often operators of a wood-fired grill will have a couple of stations to the fire.  One will be direct fire or flame cooking.  This is for mostly animal proteins that you want to get a great char on the outside while cooking relatively quickly.  Then there is wood grilling with the hot coals from the fire.  By raking hot coals to one side, you can direct fire items that need less char to them like fish, vegetables, fruits, etc.

Another option with wood-fired grills is you can do both direct heat cooking and indirect.  These two methods can also be done directly on cooking grates or by using grilling accessories like high heat tolerant cookware, grill baskets, and grilling pans.

Animal Protein Preparation

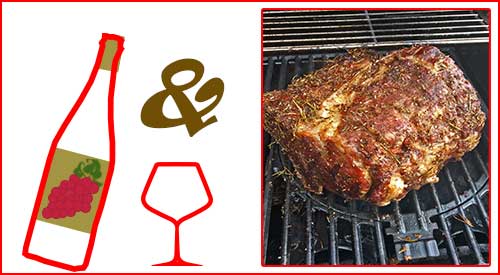
Everyone has their own preference when it comes to preparing meat or poultry for the grill or smoker.  But did you know that marinating meat or poultry should be done for shorter periods of time not over night or longer.  Why?  Marinades contain oil and meat contains water so… just like the old saying “oil and water don’t mix”.  Don’t take a risk of breaking the fibers down too far and stick to short marinating times.  Don’t forget – any marinade left in the bag or pan after removing the meat or poultry should be discarded as it CANNOT be reused due to bacteria growth potential from exposure to raw product.

Now if you’re thinking about a dry rub, feel free to marinate just as long as you want.  In fact, I’ve been known to marinate up to 3 days!

A wet rub, however, goes by the rule of a marinade.  If you’ve included oil in that rub, short marinating time is best.

Wood Quantity Doesn’t Make It Better for Wood Smokers

If you’ve made the commitment to introduce wood flavor to the grill or smoker, then know up front, it doesn’t take a lot of wood to add flavor.  As mentioned at the start of the article, you need to be sure you select the right wood with the right moisture level for the right application.

When smoking, about 6 ounces of hardwood is ideal to start.  Although you may need to add wood during the cooking process dependent on what your cooking (larger cuts of meat may require you to feed additional wood every hour), always start with a reserved amount.

When grilling, the same quantity of wood applies – about 6 ounces.  Wood is the ingredient that works with the other flavors to bring out a balanced wood-fired flavoring of the food.  Put too much wood on and you’ll have food that tastes like an ashtray.  Put wood on that contains too much moisture and it will produce an acrid smoke that will leave bitter flavors and black coloring to the skin or bark.

Let’s summarize.  Decide what method of wood-fire cooking you plan to do, if you plan to set up a direct cooking method or indirect, and the hardwood you plan to use.  If smoking, plan on that hardwood to smolder given a moisture level of at least 20%.  If wood grilling, plan on that hardwood to be drier, between 15-20% to allow it to release flavonoids quickly.  Start with about 6 ounces of wood regardless of the method you select and add only as the previous wood has combusted.  That’s the basics to having a fun, positive experience no matter what you elect to put on the grill or smoker.

Making you an informed consumer through valuable articles like this one.   Leave us a comment and follow us or subscribe for more great recipes, techniques, tips, and the science behind the flavor and fire.  That’s SmokinLicious®.

Thursday, September 24, 2020

ZUCCHINI ROLLS (WOOD-FIRED) THAT’S EASY TO MAKE ANYTIME!

Our Finished Zucchini Rolls, Rolls that are easy to prepare, prepare your appetite for this great vegetable!
Our Finished Zucchini Rolls, Rolls that are easy to prepare, prepare your appetite for this great vegetable recipe!

 Zucchini Rolls– For those of us who love to grow zucchini you know just how heavy a harvest you can end up with.   Then the question is: what to do with all those zucchinis?  Let me offer up a suggestion.  Zucchini ribbon rolls are a super easy way to make a quick appetizer or a great side dish.  In fact, if you don’t need the fanciness of the ribbons, you can modify this recipe which I’ll cover in this posting.  I’ll be taking the zucchini ribbons to the gas grill which I’ve equipped with wood chunks and provide a subtle smokiness to the zucchini before filling with a flavorful ricotta-basil-Parmesan mixture that easily could be smoked as well.  Pick out some of your larger zucchini and get ready to make a super appetizer or side dish with your harvest.

Become a Ribbon Maker

As you likely know, zucchini grows on a vine so when you start, you will find an end that has a growth nub and then a rounded bottom.  Both ends need to be trimmed after the entire zucchini has been washed and pat dry.

Making the Zucchini RibbonsAlthough you can make the ribbons on a mandolin, I’ve elected to use a wide vegetable peeler.  I located the flattest portion of the zucchini and begin at the stem top down in one peel.  This will produce a ribbon of about 1-inch in width.  I continue peeling on this side until I begin seeing seeds.  I then rotate the zucchini and begin peeling on the opposite side.  You can produce as many ribbons as the zucchini will make until it begins to reach tender inner flesh that won’t support a single ribbon peel.

With the long ribbons of zucchini made, I lay them out on a sheet pan lined with parchment paper.  I then brush each ribbon lightly with olive oil before placing on the grill.  Since my grill is set up for two zone cooking, the zucchini pan will go on the side with no direct heat meaning all burners on that side are off, while my wood chunks are smoking in the smoker box on the direct heat side.  These will only take about 12-15 minutes to flavor with smoke and they do not require any flipping.  Just a quick rotation of the pan about halfway through the cooking process.

Tasting Notes:

Remember, zucchini has a lot of water content which makes it ideal of attracting smoke vapor.  That means, you need to use hardwoods that are more mild or medium in boldness so the intensity of the smoke flavor is pleasant and not bitter.  I like maple, ash, alder, and cherry either alone or in combination.

A Creamy Filling for our Zucchini Rolls

Making the creamy filing

While the zucchini ribbons are cooking with wood flavor, I begin working on the filling for my ribbon rolls.  I start by placing 1 cup of whole milk ricotta cheese in a sieve over a bowl to remove any excess liquid.  Once transferred to a bowl, I work on chopping some fresh basil from my garden, until I end up with about 3 tablespoons worth.  I add that to the ricotta bowl along with 2 tablespoons of chopped garlic.  A drizzle of white truffle oil and some fresh ground pepper go in next.  Finally, about a ¼ cup of grated Parmesan is added and mixed in well.

Tasting Notes:

You can substitute many other fillings for the one I’ve included.  Other ingredients that would work well include goat cheese, chives with some chopped nuts for crunch.  Even a dried fruit like cranberry or golden raisins would be a great addition. 

Time to Roll

Zucchini Ribbons on the grill with wood chunks using a two zone cooking technique

With our filling well mixed, it’s time to return to the grill and remove our ribbons in preparation for filling.  If the ribbons are still oily, simply take a paper towel and wipe the residual oil away.  You don’t want the ribbons too wet or they won’t hold up when placed back on the grill.  Working with a single ribbon at a time, lay a generous dab of the filling in the center of the ribbon and spread to within ½ inch of each end.  Starting on one end, gently roll the zucchini ribbon until you have a small spiraled log.  Place on a parchment lined sheet pan leaving 1-inch spacing between rolls.  Continue with the rest of the ribbons until all are filled.  Then return the pan to the grill just to heat the filling up.

I will tell you that you can grill smoke the ribbons to the consistency you prefer you just need to ensure that they stay flexible enough to roll.  It is sometimes beneficial to dry these out a bit more before grilling so making the ribbons a day ahead of the actual grill-smoking is helpful.  Once tender and warmed inside, remove from the grill and serve.  I prefer to place mine on a base of vodka sauce with some fresh basil leaves.  These are slightly smoky, creamy and easy to eat.  They can be served easily as an appetizer or a side dish to your choice of animal protein.  I like these served with a rich short rib or a nice flaky fish like snapper or sea bass.  Oh, and don’t forget about that leftover zucchini you’ll have after you’ve made the ribbons.  I like to matchstick cut my leftover zucchini and add the remaining cheese filling with a bit of sauce and make this for another side dish or healthy lunch.

What’s your favorite zucchini recipe from the grill?  Leave us a comment to opine and subscribe to get all our postings on tips, techniques and recipes.  Bringing innovation to wood fired cooking with recipes, techniques and the science behind the fire, smoke, and flavor. That’s SmokinLicious®.

Thursday, September 17, 2020

HOW TO MAKE THE NEW PLANT-BASED BURGER TASTE EVEN MEATIER!

 Plant-based burger taste better when cooked with wood chips or wood chunks for added flavor!

What is a plant-based burger?  There is no question that this has become the new rage.  Plant-based burgers have been introduced not only to the grocery meat case in over 8000 locations but to thousands of restaurant locations world-wide.

It is a genetically modified version of heme, the iron containing molecule in soy plants, which is what accounts for a “meat” flavor.  It also incorporates coconut oil and potato starch to give a more burger-like texture, something that has been a complaint with vegetarian or vegan patties.  Brands like Impossible Burger® use a braiding of minerals, fats, and proteins to keep the burger from falling apart. 

To compare an animal protein burger with a plant-based burger from a nutritional view, you’ll find that the plant-based burger may not always be the better choice.  It really depends on the brand but know you should look at the saturated fat level and calories as the plant-based burger is not always lower than the traditional beef patty or even a poultry patty.  Sodium levels should also be monitored.

Make It More Like A Burger Experience

You may know that many people accept that there are two camps for cooking burgers: grill grates whether on a gas grill or charcoal, and a griddle whether on a stove top or on a griddle insert of a grill.

I would argue, however, that there is another camp.  Those of us who believe in live fire with wood for cooking common items like burgers and dogs.  This is how you take an average burger and maximize the experience of eating while creating a newness to a very popular American item. 

The influence of plant material combustion and release of the flavonoid composition of this material is what can take your average burger to the next level.  I don’t know how many times I’ve had dinner guests inquire how I made something like a burger taste so high quality.  It’s only then that I reveal my use of hardwood, whether chunks in a smoker box, chunks directly on hot charcoal, or a sprinkle of wood chips on a griddle or plancha.  Wood takes even the most basic food item and brings out umami. 

Grill Set Up

For the easiest cooking of your plant-based burger, start by setting up an outdoor grill with a two-zone cooking set up.  That means one half of the grill has no burners lit for the gas grill, or no hot coals on one half of the charcoal unit. 

Start the burger cooking by placing the plant-based burgers on the indirect side (no direct heat) and adding wood to the direct side.  This is where a smoker box comes in handy on the gas grill, which I fill with small wood chunks.  Close the lid and cook for about 7 minutes, unless the burger is particularly thick which would call for 10 minutes cooking.  Open the lid and turn the burgers over still using the indirect side for cooking and allow to cook for another 7 minutes (or 10 for thicker cuts). 

If you’re going to medium finish which is 145°F, then at about 125°F internal temperature, move the burgers to the direct heat side of the grill and cook leaving the lid up.  This will sear the outside.  Be sure to keep flipping the burgers every minute to ensure a perfect sear and not an overdone burger. 

To me, this makes a plant-based burger even more of an authentic burger flavor with the simple addition of hardwood on the grill of your choice.

Have you tried and loved a specific brand of plant-based burger?   Leave us a comment to state your preference and follow us or subscribe for more great recipes, techniques, tips, and the science behind the flavor.  That’s SmokinLicious®.

Thursday, September 10, 2020

SPAM® ON A CHIMNEY STARTER FOR QUICK GRILLED ASIAN SLIDERS


 Grilling our Spam® on a chimney starter for a quick preparation for Asian sliders- yes we used Spam®

Although Spam® may not be your go to meat choice, there are a lot of recipes that have been created around this canned meat.  With 6 primary ingredients – pork with ham, potato starch, water, salt, sugar and sodium nitrate – Spam® was key to feeding our troops during WWII and retained some popularity since its introduction in 1937.  Although this is a high sodium food item, it can offer some easy meal prep and is super easy to smoke.  In fact, due to the small size of the servings, I’m going to show you how to grill-smoke this using my chimney starter only and a grill rack.  Then I’ll take these charry slices and make an Asian Inspired Spam® Slider.  Go select your favorite variety of Spam® and let’s get this smoked in no time!

Spam® is removed from the can, then thickly sliced for the grilling of Spam® on the chimney starter

Plain or with a Little Marinade Boost

Although you may love Spam® plain, I prefer to marinate it a bit for additional flavor.  Today’s marinade is a mix of liquid aminos, rice vinegar, brown sugar, hoisin sauce, sesame oil, curry paste, fresh ginger, chopped garlic, and coconut sweet chili sauce.  I cut the Spam® into 7 equal slices.  Starting with about ¼ cup of liquid aminos, I add 1 tablespoon each of fresh grated ginger, hoisin sauce, rice vinegar, chopped garlic, ¼ cup brown sugar, 1 teaspoon Thai curry paste, and 3 tablespoons coconut sweet chili sauce. 

All our marinade mixed and ready for the Spam® slices to be added Mix well then place the cut Spam® slices in a storage bag, pour in the marinade, and seal the bag.  Allow this to marinate for about an hour in the refrigerator, then remove to go to the chimney starter for grill-smoking.

Tasting Notes: There are 15 varieties of Spam® available including flavors like teriyaki, hot & spicy, Portuguese sausage, garlic.  Keep this in mind when you go to add marinades or sauces. 

It’s All About Flavor

You’ll need to wait until about 20 minutes before your marinating Spam® is finished prior to lighting your chimney starter.  Only fill the chimney about ½ way as the grilling of the meat is quite fast.  Once the chimney burns down to hot coals, add either 1-2 wood chunk pieces of your favorite hardwood or a handful of hardwood chips.  Then place a roasting rack on the chimney and add your marinated Spam® slices.  Allow to cook for just a few minutes then turn.  You should see the sides of the slices crisp which will signal that they are ready to turn.  Another couple of minutes, and theses slices are ready.

Tasting Notes: Keep in mind that chimney starters come in various sizes.  Some hold 4 lbs. and others up to 8 lbs. of charcoal.  You generally only need 4-5 lbs. of charcoal for this quick cook recipe.  Remember, if using briquets, they will burn hotter so you may have to reduce the cooking time on each side of the Spam®.

Your Slider Design

For my Asian Inspired Sliders, I use a small roll, cut in half.  To the bottom, a slather on a layer of Dijon or similar mustard.  On goes one charred slice of Spam®, followed by a dollop of coleslaw.  To the top of the roll, I squeeze some additional coconut sweet chili sauce.  There you have it!  I have no doubt that you can make this with star ingredients that fit your taste and style.  Perhaps a big slice of fresh red onion or sliced pickle, or maybe kimchi.  The possibilities are endless. I do love Spam® when crisping and char are added from something as simple as a chimney starter half filled with hardwood charcoal or briquets and flavored with wood chunks or chips.  Keep this in mind for emergency food storage as Spam® can be a survivalist best friend!

Our finished Spam®on a chimney starter is on the bun and condiments added. Ready for the fold!What would be your Spam® slider toppings?  Let us know in the comments and don’t forget to follow us on all platforms.  Providing tips, techniques, recipes, and the science behind the flame and fire to improve your skills with wood-fired cooking! That’s SmokinLicious®!

Enjoyed this blog? Please spread the word


Thursday, September 3, 2020

WHY PEOPLE GRILL? THE ANSWER MAY SURPRISE YOU!

 We ask the question why people grill and found the response much different than our expectation.

You may not be aware that every year a trade show is held usually in the month of March that is dedicated to all things related to fireplace, stove, heater, barbecue, and outdoor living appliances and accessories.  In addition to the trade show, this organization, known as HPBA or Hearth, Patio & Barbecue Association, conducts various surveys every couple of years.   A recent survey was posted asking the question “Why do people grill?”

The top answer to this survey surprised and THRILLED me!

Most Recent Statistics

For North America, owning a grill is common.  Currently, in the United States, 7 of 10 adults own a grill while in Canada that number increases to 8 of 10.  Gas grills remain the most popular (64%) with charcoal units coming in second (44%).  When looking at the most popular times of the year to use the grill, holidays, of course, dominate.  Memorial Day and 4th of July are the clear winners for firing up the grill but Father’s Day remains a high demand grilling day as well likely due to this holiday falling right before true summer begins on the North American calendar.  Of course, Labor Day is not far behind on the list. 

This survey will be conducted again in 2019 with updated numbers likely available by the close of the year.  I can’t wait to view them to see current trends.

Now to the question of “Why do people grill?” 

It’s All About Flavor

The number one reason people stated for grilling is for flavor!  This got me thinking about this answer. 

What exactly made the flavor difference? Is it that the heat of the grill produced changes in the ingredients used?  Was it the charring affect from direct fire of the grill which leads to a distinct taste?  Or was it the flavor choices used when grilling with wood like wood chips, wood chunks, and charcoal?

I think without adding these follow up questions, it’s very hard to know just what the flavor enhancer is when grilling for these respondents. 

For me, there is no question that it is the introduction of smoke to my outdoor cooking experience.  Whether I’m cooking on a gas grill that I’ve included a smoker box of wood chunks, a charcoal grill equipped with hardwood charcoal or charwood plus wood chunks, an electric grill I’ve incorporate a micro wood chip product, or my outdoor fireplace that I’ve converted to an open pit fire using hardwood, I let the tantalizing smoke vapor work with the other ingredients of my foods to bring out the best of all the blended flavors. 

Smokinlicous Charwood products.
#charwood

Direct fire or indirect cooking, either way the eating experience of foods cooked grilled, smoked, or by embers is unique and is likely the reason why people from around the world continue to seek out these methods of cooking. 

Smokinlicious Double filet smoking wood chunks

So I agree with the 72% of North Americans who say they grill for flavor but I’d certainly add that I grill for flavor that is heightened by the addition of the natural plant material known as hardwood which takes my grilling to an umami level that’s hard to beat by any other cooking method.

What is your reason for grilling?  Let us know in the comments and don’t forget to follow us on all platforms.  Providing tips, techniques, recipes, and the science behind the flame and fire to improve your skills with wood-fired cooking! That’s SmokinLicious®!

Thursday, August 20, 2020

Great Sustainable Wines To Pair With Your Smoked Meat

 Wines to pair with your smoked Meat is important but not easy!

Great Sustainable Wines To Pair With Your Smoked Meat Guest blog by — Kylee Harris is an events planner and writer who is a strong advocate of allergy awareness.

She has also expanded her mission to stress the importance of food safety not just in events, but in her community.  She also has a great eye for current interests and finds great ways to tie wood fired foods and sustainable food practices together.

Back in 2015, only 6% of consumers said that their first choice of wine would be a bottle that is produced in a sustainable way. This figure has been steadily rising. The 2018 American Wine Consumers Survey even showed that customers are willing to pay $3 more for a sustainable option. 

They want an environmentally-conscious wine that has been made from ethically grown grape varieties. The farming process is pesticide free and even bottling the wine is done in a way that won’t cause harm to the environment. It has even been suggested (although not proved as yet) that sustainable, organic wine can prevent a hangover. You’re more than welcome to test out this theory – and even better, you can pair the wine with some delicious smoked meat. 

Maple-Smoked Pork Chops, Wines to Pair

Pairing your wine with smoked meat, is all about complimenting the delicate smoky flavor of the wood used. Maple-smoked meat will naturally have a slightly sweet and fragrant taste. This can be achieved by using maple woodchips in your barbecue or smoker. In order to contrast the sweet maple taste and the white umami flavor of pork, you should pair your meal with a sharp and zingy white wine.

Benziger Chardonnay-Coelo Chardonnay
Coelo Chardonnay

Benziger Family Winery in Sonoma county have a few delicious and fresh Chardonnay options, including the Coelo Chardonnay and the West Rows Chardonnay. Perfect for a barbecue on a hot summer’s day with friends and family. Don’t forget you can also buy sustainable wines by the can – this makes it so easy to keep cool when you’re having a garden party. Everyone can help themselves. 

White Oak Smoked Venison 

The strong and almost pungent aromas of white oak are best paired with a dark, gamey meat that can hold its own. Duck breast, pigeon and venison are good choices. The white oak adds a complimentary bitterness that balances well with the rich flavors. A hearty sustainable red wine is a good option with smoked white oak. Silver Oak Vineyard in Napa Valley have a fruity and dark Cabernet Sauvignon that pairs beautifully with White Oak smoked dark meat. New York’s sustainable Red Tail Ridge Winery offer a tangy Teroldego, which is similar to Syrah that is a great partner to White Oak smoked venison.

2012 Teroldego bottle -Red Tail Ridge winery
Teroldego

Alder-Smoked Seabass Wines to pair

The mild flavor profile of alder makes it the perfect wood choice to smoke fish with – particularly slightly salty seabass. The taste of the alder itself adds a slightly sweet taste to the fish, even if it is only smoked for a short amount of time. Pairing alder with a sustainable wine is easy. A good Prosecco or sparkling wine will work well – look for something dry and fresh. Left Coast Cellars in Oregon have a lively Blanc de Noir that is perfect with alder. It adds citrus notes of lemon and pineapple, which complement the taste of the smoke and the fish well.

Left Coast Cellars Blanc de Noir sparkling wine
Left Coast Cellars

There are an increasing number of vineyards and suppliers in America offering truly sustainable wine. Pair something tasty and delicious with your smoked meat and enjoy a great meal.


Thursday, August 6, 2020

TOP TIPS TO PREVENT HOT DOG SHRINKAGE!


Our top tips to prevent hot dog shrinkage!

 Prevent Hot Dog Shrinkage–There is nothing more frustrating than getting your family and friends all excited for a hot dog barbecue only to have great disappointment when the dogs come off the grill.  There they are.  All shrunk and shriveled that it would take a least two hot dogs to fill a standard hot dog bun.

That’s why I’m going to share with you my top tips to prevent shrinkage and shriveling of your hot dogs.  All these tips are done before adding the hot dogs to the grill of your choice, making them very simple.

Let’s get started!

Three Techniques to Keep Size


Before I start with the first preparation tip, let me just clarify some information about the standard hot dog or frankfurter or wiener, additional terms you may be familiar with.

Hot dogs now come in a variety of options including all beef, beef and pork, chicken, turkey and even a vegetarian or vegan style.  One thing that is common with hot dogs is that they contain a lot of water, fat and generally, sodium.   Know that the water can be in the form of ice mixed with the meat trimmings and flavor ingredients.  To adjust for all the wetness, dry starches or powdered milk are used to absorb the extra moisture, as starches do not allow moisture to enter the hot dog until heated. 
Once heated, the starch granules breakdown and allow the moisture to enter which makes the starch swell.  This is the plumping commonly seen when hot dogs are cooked on a grill.

Know that all hot dogs are fully cooked before being packaged and some brands may also include smoking the hot dogs which gives them extra flavor and color.

Now, for our first tip on preventing the hot dog from shrinking while being reheated or “cooked” on the grill.

Tip #1: The “X” End Slice to prevent hot dog Shrinkage

cutting the end of each hot dog with an X allows the juices for run out

This is the easiest method of preparing the hot dog without an obvious change to its overall shape.  Simply take the blade of a knife and cut an “X” shape on each end.  This cut should go only about ½-inch deep into the meat.  The ends will curl slightly and get additional crispness that make them extra tasty.  Essentially, this hot dog maintains most of its original shape.

Tip #2: The Length Cut to prevent hot dog Shrinkage

The hot dog is cut to length with one slice of the knife and placed open on the grill surface
One of the reasons I prefer the length cut preparation to hot dogs is that if you are planning a large variety of toppings, this is an ideal preparation.  Additionally, it allows the toppings to nestle comfortably in the middle of the meat and gives every bite you take full flavors.  Simply take the blade of a knife and run it down the center of the hot dog from end to end about halfway down the meat’s thickness.  You can know cook these in the flat form.

Tip #3: The Spiral Cut to prevent hot dog Shrinkage

slices are randomly made over the length of the hot dog about 3-4 depending on the length of the dog

The spiral cut is another easy method of keeping your hot dogs true to size.  For this technique, simply pass the blade of a knife thru the skin of the hot dog about 1/2 -inch deep every inch or so down the length of the hot dog.  Be sure to do both sides of the hot dog.

Load ‘Em Up!


I’ve done all three preparation tips so you can see that the size of the hot dogs remains essentially intact no matter which technique you elect to do.  I also used both a charcoal and gas grill equipped with wood chunks for added smoky flavor to the grilled dogs.

the dogs with the different slicing are placed on the charcoal grill with double filet wood pieces added for flavor. I did set up an indirect cooking method on the gas grill to allow for a holding spot if I had some hot dogs cook faster than others, which tends to happen more on a gas grill than a charcoal unit.

I’ve got four topping options each that contains three ingredients.  Now, let’s look at each option in more detail.


The Italiano Dog


Featuring: fresh mozzarella, fresh basil leaves, and marina sauce
our Italiano Dog has fresh moxxarella, fresh basil and marina sauces.
I am a lover of fresh ingredients and summer harvest season makes it easy to get those fresh flavors. 

I start by spooning on a flavorful marina sauce followed by cubes of fresh mozzarella and finally topped with fresh whole basil leaves.


The alliedog has gruyere cheese, caramelized onions and fresh thyme

The Allie Dog


Featuring: Gruyère cheese, caramelized onions, fresh thyme

I call this one the Allie Dog in honor of the onions used as a bold flavor, which onion is part of the allium family, thus, the “allie” name.  Load on the buttery, caramelized onions, then top with Gruyére cheese and fresh thyme sprigs.

The Jalo-bean dog has re-fried beans, white cheddar and Jalapenos for a little heat! The Jalo-Bean Dog


Featuring re-fried beans, white cheddar, jalapeño

If you have a taste for tacos, then this is the dog for you.  Start by loading on a good quality refried beans.  Then top with chopped jalapeño and cheddar cheese – I prefer the white version.


The dog from Mexico has fresh guacamole, corn, and fresh cilantro

The Dog From Mexico

 
Featuring fresh guacamole, corn, fresh cilantro
 
I love this hot dog combination!  For me, spice is great so I tend to use a spicy corn but you can use just plain corn or buttered corn kernels if desired.  Start with fresh guacamole on the hot dog meat.
After that add the corn, and top with fresh cilantro.

There are no rules when it comes to toppings for your hot dogs so experiment and find what combinations you enjoy.  That includes experimenting with the bread as well so know that though I did not change the rolls on my combinations, that is another flavor level that can vary right along with the toppings.

What is your favorite method of grilling hot dogs and what makes your topping list?  Let us know in the comments and don’t forget to follow us on all platforms.  Providing tips, techniques, recipes, and the science behind the flame and fire to improve your skills with wood-fired cooking! That’s SmokinLicious®!