Showing posts with label cooking. Show all posts

Thursday, June 24, 2021

GRILLING MEALS WHEN HOME WORKING

Grilling meals while home working provides hands free cooking and healthy choices!

It has been months since the new normal occurred. You thought working from home would be brief but it is now clear this situation has no end. Reality has set in that you are working, educating, entertaining, eating and sleeping from home.

One benefit is you no longer are commuting. For those that use mass transit like a subway, bus line or rail line to get to work now find they have more time to devote to family and meals. For those that have had to drive to work now have freedom to cruise online recipes and those old cookbooks. This is your opportunity to make the most of those meals while not making cooking a chore.

Grilling Flavors that Bring Them to the Table

Families love to gather for a grilled meal. There is something about the smell of the grill and the taste of grilled foods that make a meal feel special. That feeling can continue any season of the year when you plan meals or portions of meals prepared on a grill or smoker.

Here is where you can get creative. Any recipe you find can usually be done on the grill. You read that correctly! Whether it is a dessert, side dish, main protein – it really makes no difference. The grill or smoker is an extension of the inside kitchen just with more flavor. Cookware can go on a grill or smoker too. Use that Dutch oven, the Pyrex dish, and sheet pans. They are perfect for the grill.

Large Proteins Mean More Than One Meal

You might be intimidated by that large pork shoulder or whole chicken but these are perfect proteins to invest the time in grilling/smoking while you work. The easiest means of cooking outdoors is to use indirect heat on a gas grill and hot coals (no flames) on a charcoal grill. This allows you to dial in the perfect roasting/grilling temperature so the equipment works just like your oven.

Best part – all the leftovers can be used for additional meals cutting down on the cooking even more. This is the way to serve healthy, filling meals to your family and be ready to sit down to dinner at a reasonable time.

Start with pulled pork or chicken sandwiches and then use the leftovers for tacos or burritos, baked eggs, noodles with vegetables, and so much more.

Don’t forget, if you use a large enough sheet pan or foil pan, when you grill the meat, you can add all types of seasonal vegetables to cook right along with the meat in the same pan! Leeks, onions, fennel, cubes squash, peppers, zucchini, carrots, potatoes, all work well for roasting with meat. Just add 1 to 1-1/2 hours before the meat is done or add from the start and remove when cooked.

Savings Abound Now You Are Home Working

Not only will you save on the time spent cooking but you’ll also save money. Larger cuts of meats often have lower price points. Some discount stores also bundle two whole chickens for a discount price per pound or two pork loins or beef roasts. Do a good assessment of the meat bins and find the best deals your family likes to eat.

What a great time to pass on cooking techniques and knowledge to those younger members of your family or those that never had an opportunity to learn.

What have you been grilling and/or smoking since working from home? Leave us a comment and subscribe to get our latest tips, techniques, recipes and the science behind the fire and smoke, for all live fire cooking methods.

 

Thursday, November 5, 2020

MARINATING: THE MYTHS AND TRUTHS TO GUIDE YOU

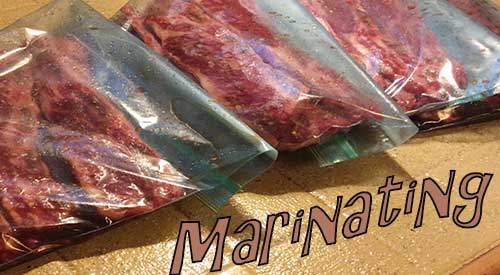
Marinating our Riblets
Marinating our Riblets in Zip Lock bag

 Marinating-At one time or another, I’m sure you’ve either purchased a prepared marinade or constructed your own to use with some type of animal protein.  Likely, your goal was to either add flavor or to tenderize or both.  But, let me ask you: do you really know what marinades do for specific foods and do you know how to use them?

My intention is to debunk the myths, get at the truth of what marinades can do and provide a guide on marinade amounts and ideal marinating times for specific foods.

Let’s get started!

PART I: Myth to Truth

How Deep Do Marinades Go?

One of my favorite myths is that of the depth that marinades penetrate in meat.  The tale is that once a meat is exposed to a marinade, it will get completely thru but this is far from the truth.

Marinades are a surface to few millimeters below surface benefit no matter what the content of the soaking liquid.  The oil, herbs, seasonings and spices only add flavor to the exterior of the food with no ingredient ever penetrating to the center of the meat.

Are Bottled Dressings a Marinade?

We all look for ways to cut corners and one of the myths out there is that bottled dressings work just fine as a substitute marinade.  The truth, however, is bottled dressings have high levels of acidity which when exposed to meat protein tend to break down the meat molecules too far resulting in a mushy texture.  Additionally, bottled dressings are loaded with unwanted ingredients like sweeteners (sugar), gums, and stabilizers and lack ingredients that give any real flavor.

How Long Should You Marinate Meat?

As mentioned above, since marinades don’t penetrate deeply into meat, a longer marinating time doesn’t mean more tender or flavorful meat.  In fact, the opposite becomes true.  Marinating too long will allow the protein bonds in the meat to weaken resulting in a mushy exterior which can prevent the meat from holding on to moisture.  That means you end up with a dry piece of meat.

Doesn’t the Acid in a Marinade Tenderize Meat?

When you’re looking to tenderize meat what you are really doing is breaking down connective tissue in the meat which is what produces tough cuts. Connective tissue is made up of collagen and fiber which can be weakened by an acidic ingredient like vinegar, wine, citrus juice, etc.  The problem again is this affect is surface only and cannot penetrate to the core of the meat.  Best advise is to use these ingredients sparingly and for shorter marinating times.

Can You Use a Marinade on Any Meat?

Since you’ve learned that marinades benefit the surface of the meat only, it is best for them to be used with thinner cuts of meat, like chicken breasts, cutlets, chunked meats, steak, and chops.  Larger cuts of meat do best with a wet rub or spice paste.

PART II: Marinating Tips for High Flavor and Juiciness

Tip #1 Flavorings and Seasonings: Use a lot of these ingredients in marinades and be sure to watch the salt or it will inhibit the absorption of other herbs, spices, and seasonings.

Tip #2 Score the Meat: To achieve as much penetration as possible, score the meat’s surface with a knife or prick the surface with a fork.

Tip #3 Reactivating the Marinade: I personally like to marinate in a storage bag but you can use chaffing dishes or other similar large baking dishes covered with plastic wrap.  When using a storage bag, ensure that all the air is out of the bag before sealing.  Halfway through the marinating time, flip the storage bag or stir the meat in a dish to ensure everything is getting even soaking time.

Tip #4 Refrigeration: One risk with marinating is the development of microorganisms since you are dealing with raw meat.  You can reduce this risk but getting your marinated meat in the refrigerator as quickly as possible to avoid the temperature danger zone of 40-140°F when bacteria can spread rapidly.

Tip #5 Wipe Off Excess and Discard Leftover: Remember, you’ve just marinated raw meat so never keep used marinade.  It needs to be discarded immediately.  If you feel you want to offer some of the marinade to go on the cooked food, simply keep a small amount separate from the marinating meat.  Also, so you don’t get excessive flare-up on the grill, wipe off excess marinade from the meat before grilling.

PART III: Can you Marinate too long?

Guide to Marinating Foods

This guide is intended to provide a starting point for specific foods on the quantity of marinade needed and the timing of the marinating process.

Smokinlicious marinating table, providing marinating time by food tryupe
Smokinlicious marinating table

By following these tips and guidelines, you’ll be sure to keep your foods moist, flavorful and promote a great mouth-food experience texture-wise.

Do you have favorite marinade ingredients?  Leave us a comment to opine.  Making you an informed consumer through valuable articles like this one.   Leave us a comment and follow us or subscribe for more great recipes, techniques, tips, and the science behind the flavor and fire.  That’s SmokinLicious®.

Thursday, September 24, 2020

ZUCCHINI ROLLS (WOOD-FIRED) THAT’S EASY TO MAKE ANYTIME!

Our Finished Zucchini Rolls, Rolls that are easy to prepare, prepare your appetite for this great vegetable!
Our Finished Zucchini Rolls, Rolls that are easy to prepare, prepare your appetite for this great vegetable recipe!

 Zucchini Rolls– For those of us who love to grow zucchini you know just how heavy a harvest you can end up with.   Then the question is: what to do with all those zucchinis?  Let me offer up a suggestion.  Zucchini ribbon rolls are a super easy way to make a quick appetizer or a great side dish.  In fact, if you don’t need the fanciness of the ribbons, you can modify this recipe which I’ll cover in this posting.  I’ll be taking the zucchini ribbons to the gas grill which I’ve equipped with wood chunks and provide a subtle smokiness to the zucchini before filling with a flavorful ricotta-basil-Parmesan mixture that easily could be smoked as well.  Pick out some of your larger zucchini and get ready to make a super appetizer or side dish with your harvest.

Become a Ribbon Maker

As you likely know, zucchini grows on a vine so when you start, you will find an end that has a growth nub and then a rounded bottom.  Both ends need to be trimmed after the entire zucchini has been washed and pat dry.

Making the Zucchini RibbonsAlthough you can make the ribbons on a mandolin, I’ve elected to use a wide vegetable peeler.  I located the flattest portion of the zucchini and begin at the stem top down in one peel.  This will produce a ribbon of about 1-inch in width.  I continue peeling on this side until I begin seeing seeds.  I then rotate the zucchini and begin peeling on the opposite side.  You can produce as many ribbons as the zucchini will make until it begins to reach tender inner flesh that won’t support a single ribbon peel.

With the long ribbons of zucchini made, I lay them out on a sheet pan lined with parchment paper.  I then brush each ribbon lightly with olive oil before placing on the grill.  Since my grill is set up for two zone cooking, the zucchini pan will go on the side with no direct heat meaning all burners on that side are off, while my wood chunks are smoking in the smoker box on the direct heat side.  These will only take about 12-15 minutes to flavor with smoke and they do not require any flipping.  Just a quick rotation of the pan about halfway through the cooking process.

Tasting Notes:

Remember, zucchini has a lot of water content which makes it ideal of attracting smoke vapor.  That means, you need to use hardwoods that are more mild or medium in boldness so the intensity of the smoke flavor is pleasant and not bitter.  I like maple, ash, alder, and cherry either alone or in combination.

A Creamy Filling for our Zucchini Rolls

Making the creamy filing

While the zucchini ribbons are cooking with wood flavor, I begin working on the filling for my ribbon rolls.  I start by placing 1 cup of whole milk ricotta cheese in a sieve over a bowl to remove any excess liquid.  Once transferred to a bowl, I work on chopping some fresh basil from my garden, until I end up with about 3 tablespoons worth.  I add that to the ricotta bowl along with 2 tablespoons of chopped garlic.  A drizzle of white truffle oil and some fresh ground pepper go in next.  Finally, about a ¼ cup of grated Parmesan is added and mixed in well.

Tasting Notes:

You can substitute many other fillings for the one I’ve included.  Other ingredients that would work well include goat cheese, chives with some chopped nuts for crunch.  Even a dried fruit like cranberry or golden raisins would be a great addition. 

Time to Roll

Zucchini Ribbons on the grill with wood chunks using a two zone cooking technique

With our filling well mixed, it’s time to return to the grill and remove our ribbons in preparation for filling.  If the ribbons are still oily, simply take a paper towel and wipe the residual oil away.  You don’t want the ribbons too wet or they won’t hold up when placed back on the grill.  Working with a single ribbon at a time, lay a generous dab of the filling in the center of the ribbon and spread to within ½ inch of each end.  Starting on one end, gently roll the zucchini ribbon until you have a small spiraled log.  Place on a parchment lined sheet pan leaving 1-inch spacing between rolls.  Continue with the rest of the ribbons until all are filled.  Then return the pan to the grill just to heat the filling up.

I will tell you that you can grill smoke the ribbons to the consistency you prefer you just need to ensure that they stay flexible enough to roll.  It is sometimes beneficial to dry these out a bit more before grilling so making the ribbons a day ahead of the actual grill-smoking is helpful.  Once tender and warmed inside, remove from the grill and serve.  I prefer to place mine on a base of vodka sauce with some fresh basil leaves.  These are slightly smoky, creamy and easy to eat.  They can be served easily as an appetizer or a side dish to your choice of animal protein.  I like these served with a rich short rib or a nice flaky fish like snapper or sea bass.  Oh, and don’t forget about that leftover zucchini you’ll have after you’ve made the ribbons.  I like to matchstick cut my leftover zucchini and add the remaining cheese filling with a bit of sauce and make this for another side dish or healthy lunch.

What’s your favorite zucchini recipe from the grill?  Leave us a comment to opine and subscribe to get all our postings on tips, techniques and recipes.  Bringing innovation to wood fired cooking with recipes, techniques and the science behind the fire, smoke, and flavor. That’s SmokinLicious®.

Tuesday, June 23, 2020

DURING STAY AT HOME, DON’T QUARANTINE YOUR TASTE BUDS

During stay at home or Quarantine doesn't mean you should place your taste buds on hold!
During stay at home or Quarantine doesn’t mean you should place your taste buds on hold!

Stay at Home


You’ve committed to a stay-cation.  Lists of games to play, tasks to complete, books to read, and movies and shows to see have been compiled.  Now its time to give some thought to the food that will sustain you during this time.

Don’t compromise taste because your afraid to make too much work out of cooking.  Using the grill is a super easy way to keep your foods and meals highly flavorful.  Let’s give you some ideas that will provide options for everyone to feel satisfied and pleasantly full.

The Breakdown


I think the easiest way to view meal preparation when you focus on the grill as your primary method of cooking is to breakdown foods by categories.

Fruits: 


This group of food can make some of the best grilled items.  Already sweet in flavor, grilling them produces more vibrant flavor as the heat caramelizes the natural sugars and produces a char to the outside of the fruit.  When selecting fruits for the grill, be sure they are ripe but not over-ripened to where they present as soft, or they will have tendency to break apart on the grill.  Keep the pieces of fruit large when placing on the grill to maintain as much cell structure as possible.  Brush the fruit pieces lightly with a high heat oil like coconut, avocado, or grape seed.  The key is to leave the pieces untouched for at least 3 minutes before flipping to get great char and flavor infusion.  Perfect fruits for the grill: banana, avocado, apple, mango, peach, papaya, pineapple, peach, pear, plum, grapes, cranberry, eggplant, kiwi, raspberry, blackberry, blueberry, tomato.

Vegetables: 


You likely are already aware of popular vegetables to grill like corn on the cob, peppers, and onions, but there are so many more that pair perfectly with the grill.  In fact, I would go as far as saying ANY vegetable is appropriate for the grill, you just need to control those that should be exposed to direct heat versus indirect.  The easy method of determining heat level is the thicker the skin on the veggie, the more tolerant to direct heat.  All vegetables can cook on the grill in less than 10 minutes so time really isn’t a factor.  Always remember to avoid moving the vegetables on the grill until they have cooked for at least 3-4 minutes.  For preparation to the vegetables, most require just quartering or slicing in half, with some going on whole like tomatoes and smaller mushrooms.  Basting with high heat tolerant oils is also recommended.

Nuts and Seeds:


These are foods that react with a super boost in flavor when exposed to the heat of a grill and flavor of wood on the grill.  Any seed or nut can be grilled by using a disposable foil pan or griddle pan designed for grilling.  These items take about 15-20 minutes and should be stirred every 5-8 minutes to prevent scorching.

Baked Items:


Anything you normally would bake in an oven can be done on the grill.   This includes cookies, cakes, breads, pies, tarts, and pastry.  Just remember, like vegetables, these items can be a bit more fragile.  Using a two-zone cooking set up on the grill – baked item placed on the unlit side of the grill while the heat is on the opposite side – produces a radiant heat that will cook the item evenly and without any direct hot spots.  I will say that baked items tend to do best on a LP/Gas grill versus charcoal unit.

Animal Proteins:


Of course, animal proteins are well known as a grilled food item.  My recommendation here is to marinate items with either wet or dry rubs for 8 hours to ensure great moisture in the finished product.

As a final note, grilled foods store very well and don’t lose any of their flavor when refrigerated.  Plus, it’s easy to grill a variety of items at the same time.  Any meal – breakfast, lunch, dinner – can be done exclusively on a grill.  For those that love even more char flavoring, think about adding wood chunks either in a smoking box or directly on grates or heat shields.  You can learn more about this technique for the gas grill here.

Do you plan to take a stay-cation?  Leave us a comment and subscribe to get our latest tips, techniques, recipes and the science behind the fire and smoke, for all live fire cooking methods. That’s SmokinLicious!

Thursday, April 16, 2020

HOW TO KEEP FOOD INTERESTING, PRESERVED & SAFE DURING QUARANTINE

How to keep food interesting
How to keep food interesting during the quarantine

You may be one of the unlucky families faced with the task of social distancing or voluntary/involuntary quarantine.  Without question, this will test the limits of each family member’s patience, flexibility, and cooperation.

Not only are you responsible for ensuring everyone’s safety, you’re tasked with keeping them entertained and fed.  Right now, with internet and utilities intact, you have the option to stream programs, movies, videos, etc., as well as use electrical and gas appliances.  This helps to keep our sanity.  But have you paused to plan for when those items become interrupted or permanently halted?

I’m going to list for you some ways of ensuring you can remain comfortably fed while also enjoying some foods that you consume when you’re not quarantined.

#1 Wood Fired Treats:

Part of the reason we go out to eat is we order items that wouldn’t be commonly prepared at home.  Often, this includes foods that are live fired such as grilling over charcoal and/or wood or smoked with hardwood.  This is where those larger cuts of meat come in handy.  You can fire up the grill with a two-zone set up and some hardwood for added flavor, cooking enormous quantities of meat that can be used for many meals.  Think pork shoulder, full racks of pork ribs, whole chicken and turkey, beef roasts and brisket.  There are so many options including whole fish.  Obviously, if we lose gas and electric services, you’ll need an alternative grill like a charcoal unit, fire pit, wood burning fireplace, or butane-using equipment.  Or, you can make your own using bricks or rocks and a grate from another unit or simply place cast iron right in the coal bed.  Even a charcoal chimney starter can be used in a pinch as a grill.

#2 Foods That Never Expire:

Powdered milk, dried beans, Spam, whole grains, honey, dried pasta.  These are the items you’ll want to have on hand for the “when it happens” scenario as they last forever.  Powdered milk can easily be mixed with other ingredients to make sauces, milk, and treats.  Spam is one of those canned meats that can be a go to for emergency needs but what likely isn’t know is just how versatile it can be in recipes.  This is a perfect item to grill or even smoke as substitute for fresh meats like sausage, bacon, ground meats.  It can be sliced for making sandwiches and sliders, cubed and diced to be used with eggs, rice, quinoa, and pasta.  Dried beans and pasta are also perfect for cooking on a grill even though they need a longer time in water to cook tender.  Use grill-safe cookware on your grill, fire pit, or wood burning fireplace and you’re on your way to a great meal.

#3 Hot Smoking:

Preserving meat can be a challenge if you don’t have refrigeration for storing.  That’s where hot smoking becomes a skill set that could possibly save you from going without animal protein.  You need to make a hot coal bed that produces a lot of smoke not flames.  That means you’ll need green hardwood to produce the smoke, which is wood containing about 20% moisture.  Collect hardwoods like maple, oak, hickory, cherry, etc., and make a racking or hook system that will allow the meat to hang in an enclosure (a wood clothes drying rack works great for this purpose).  A modified smokehouse made from a tarp that is anchored to the ground works just fine, if the enclosure can hold the smoke around the meat and maintain a temperature of 150°F. The better your enclosure the better it will retain heat and will require far less wood. Meat smoked for 12 hours will be preserved for about 1 week, while meat smoked for two days can last 14-28 days depending on the type and cut.

#4 Outdoors:

One benefit of getting to be home is the option to engage in outdoor cooking.  Take advantage of doing as much as you can in the outdoors, whether on a standard LP/Gas grill, charcoal grill, fire pit, outdoor fireplace, or other outdoor equipment.  It provides an opportunity to enjoy the air and feel less like a prisoner.  Also, keep in mind that the more options you give yourself for cooking, the more food you can produce.  For instance, you might have a pork shoulder smoking with wood on one grill, while doing a sheet pan of vegetables on another unit, while making a sauce or flavored butter in a saucepan on the side burner or a butane cooker.  Just remember, if you are using wood and/or charcoal, once the heat is reduced to hot embers, use that to do additional foods like potatoes, peppers, onions, or even  put a covered Dutch oven in the hot bed to cook another day’s meal.  You can cook any meal on outdoor equipment so begin to experiment and get a comfort zone, and you will be a survivor in any situation.

If you’re quarantined, what type of cooking are you doing?  Leave us a comment and subscribe to get our latest tips, techniques, recipes and the science behind the fire and smoke, for all live fire cooking methods.  That’s SmokinLicious!

Thursday, April 9, 2020

PICKING YOUR IDEAL FIRE SETUP FOR COOKING

Picking the ideal fire set up for cooking depends on circumstances- this is the cabin Style

We are so lucky to have so many options for cooking our foods, not to mention the option to not cook at all!  This got me thinking about the fact that we do rely on our outdoor equipment and cookware when it comes to outdoor cooking.  Even if you’re a person who has experience campfire cooking, you likely do this style of cooking with one type of fire setup .

Let’s look at some of the options for setting up an outdoor fire that don’t include purchased equipment, just the natural elements found outdoors – rock, tinder, kindling, and logs/wood.  As I always like to remind you, though you may not use this information immediately, you should read it and keep a reference handy for when a situation may arise that you need it, such as a natural disaster, power grid emergency or other such catastrophic event.

Setup #1: Trench Fire

Trench style fire Set up
One of the best reasons for learning this type of fire set up is it works particularly well in windy conditions.  The key is to dig a trench that is large enough to acquire oxygen to keep it going.  Best sizing is 12 inches wide by 36 inches long by 12 inches deep.  Find rocks to add to the bottom of the trench that are hard and porous-free.  Be sure the 12-inch depth is AFTER the rocks are added.  Now build your fire on top of the rocks.  You can secure tree branches to act as postings for supporting a spit or layer green branches (not dried branches) over the top of the pit for placing your foods.  Of course, if you have a grill grate, place over the hole for direct grilling.

Setup #2: Dakota Fire Hole 

The Dakota Hole fire set up
The Dakota Fire Hole measure 12-inches deep by 12-inches wide with a channel that is 6-inches wide off to one side of the main fire area.  There should be a 12-inch space between the chimney opening and the channel.  The channel is dug at an angle meeting at the base of the fire pit area 12-inches down.  Build a fire at the base of the chimney area which draws air in from the side channel producing a draft for outtake at the top of the fire pit.  This is another cooking method that burns wood efficiently and produces very little smoke.  Plus, if you should need to keep yourself concealed, no one can see the glow of the burning fire because it is concealed underground.

Setup #3: Bushcraft Fire

This is an ideal fire setup when you know you can remain in a specified area for a longer time period.  It is perfect for sustaining a fire for days as it includes flat rocks for cooking on, a rock surround for maintaining a safe fire area, and a keyhole channel made of rock that allows you to place larger logs for continuous burn.  This produces a great bed of coals for cooking and if made against a rock barrier or tree stump, it can also provide the heat output necessary to keep you warm.  Plus, you can simply push the long log pieces into the fire circle when additional wood is need for heat and/or coals.  No need to keep splitting wood.

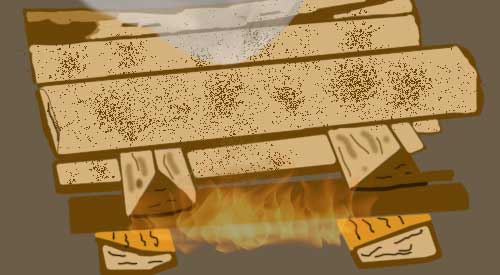
Setup #4: Log Cabin Style

This is a familiar fire set up in the camping world.  It is easy to do as you simply alternate pieces of wood from vertical positioning to horizontal, like building a Lincoln Log set, with tinder and kindling placed inside the base.  This is a setup that produces a great bed of coals so it is perfect for cooking but depending on the amount of time you need for cooking, may require replenishment of wood.

The Upside Down Fire

This setup is essentially a log cabin style setup in reverse.  Instead of tinder placed under the base of the logs, it is placed on top.  This is also known as a top-down fire.  Although you can use this for cooking, I’ve found it doesn’t produce the best coal bed.  It does, however, burn a long time.

Other Fire Setups

There are some additional fire setups that you may be familiar with but are not considered ideal for cooking. These include:

Tepee Fire: burns very hot and fast producing more ash than usable coals
Teepe Style fire Set up
Lean To: although ideal for windy conditions, this setup does not produce any uniform coal bed and very limited heat

The Star Fire: Although this can produce a very long burn, because of the extension of longer pieces of log in a star-shape to the center of the fire, a true cooking coal bed is not formed, just a lot of ash.

Additional Tips

As a final reminder when it comes to cooking by outdoor fire, you are not cooking with flame or for that matter, direct heat.  Use the hot coals that are produced from the fire to cook with.  That includes placing heat tolerant cookware on or in the hot coals, or even burying within the coals.  The rocks are an energy absorber, producing a lot of heat.  Clean, large rocks can be used like a griddle surface and have foods cooked directly on their surface.  Remember, they get very hot so any unclean quality to them will be burned off with the heat.

A final note, always have fire proof gloves available to grab log pieces in the fire or cookware placement and removal.  A coal shovel is ideal as well for moving hot coals around.  Don’t forget, when you’re finished with the fire you made, ensure that all hot embers and coals are extinguished.

Do you have a favorite method of stacking wood for a cooking fire?  Leave us a comment to let us know.  We welcome all types of questions and encourage you to follow and subscribe to our social channels so you don’t miss anything.  We look forward to providing you with additional tips, techniques, recipes, and the science for all things wood-fired cooked.

Thursday, July 19, 2018

HOT TREND MAY NOT BE THE SAFEST BET


Recently, I came across a great article on the new hot trends in cold cuts and smoked meats.  The article stressed how the $200 million in sales was the result of companies offering such things as chorizo, pepperoni, salami, and smoked bacon with bolder flavors and cleaner ingredients.  So, why do I have a problem with this?

What About the Smoke

The article went on to explain that the No. 1 trend in smoked and processed meats is products that are “uncured” or “no-nitrates added”, stating that this is due to the new health-conscious consumer.  This got me thinking about smoked products in general.  No one seems to be asking about the smoking process used to get that bacon hickory smoked!

If people are so sensitive to the ingredients in their foods, why haven’t we become concerned about the smoke component used for the actual process?

Demanding Label Changes

There are so many companies investing in the repackaging of their products to include such labels as “no-sugar-added”, “dairy-free”, and “gluten-free”.  Consumers are label readers and keenly interested in how products are made, how animals are raised, how products are preserved, and the percentage of fat in the processing.

One factor in food preparation that doesn’t seem to have been included in labeling is the actual smoking process for food products like smoked bacon, fish, or beef jerky.
Why doesn’t anyone seem concerned enough to ask what are they smoking with?  Is it actual wood or the wood-flavored vapor that is used to make liquid smoke, hardly an ingredient that would be considered chemical-free?

Wood Should Be a Food Ingredient Hot Trend

Let’s examine why wood should be looked at as a food ingredient when used for hot or cold smoking or wood-fired cooking in general.

First, not all companies selling wood products under the guise of smoking, identify what components of the tree are manufactured in the product.  Nor do they give any indication if the wood used in the manufacture of products started for only the purpose of food application. To clarify this point, let’s review one common seller of wood products found on Amazon.com.

This popular choice in wood chips started as a hickory and mesquite manufacturer of log products by a single owner back in 1986.  Originally, they sold logs to locals around their area.  Eventually, they branched out to wood chips and wood chunks in retail packaging when BBQ became so popular.
The company was sold to a fire log company who uses recycled wood sawdust and agricultural fibers to produce fireplace log products.  With the change in ownership, the company began selling other woods; pecan, post oak, and mesquite that are native to their home state of Texas, and the rest of the offerings which are brought in from other suppliers and locations.  There is no bark removal, there is no separation of wood layers.  Much of the product lies in open areas on the ground exposed to the southwestern sun as well as to anything else that may make contact.  The product is left uncovered in outdoor areas awaiting packaging, even after it has been kiln dried which is the only reference made to any preparation of the wood.

Here is one concern with the current ownership – keep in mind, with a primary business of manufacturing charcoal and fire log products, this business was originally connected to a cedar and basswood pencil business.  For those who don’t know woods, cedar and basswood are both softwoods, something that can be toxic if used for cooking food.

No Wood Regulations

There are no regulations that specifically state that you must guarantee that the wood packaged is clean, pure, and 100% of what it says it is on the label.  Just about anyone can start to package wood, whether hardwood or softwood or a combination of both, as a “cooking”, “grilling”, “smoking” or “BBQ” wood.  There are no regulations that it must be kiln dried or heat treated.  It is a free-for-all!

There may be claims that we are label readers, but it appears when it comes to wood used for cooking, we don’t have a clue.  This may be the oldest method of cooking in existence, but it certainly doesn’t have to contain the same risks as what the earliest homo sapiens endured.

The next time you see packaging that bacon, jerky, deli meat is of a smoked variety, look at the label and ask the question, “How was this smoked?”  You will be amazed that little or no answers are provided.  I hope you enjoyed our topic “Hot Trend” and the argument for better food labeling!

Thursday, June 7, 2018

ROOTING FOR GLAZED SMOKED TURNIPS

The Finished Glazed Smoked Turnips are garnished and ready to be served


It may not be the preferred choice in vegetable but it is one you should get to know as the health benefits noted from turnips are amazing.  Known to improve bone health, protect your heart, and be an active cancer fighter, turnips are also known to reduce inflammation and optimize digestion.
Turnips are a root vegetable.  The best part is they are available throughout the year.  We are going to fire up the stovetop smoker and bring some hickory flavor to our turnip cuts before letting them take a swim in a glaze that will balance out the smoky flavor with some sweetness.


Prep Your Turnips and Smoker


Take a trip to the grocery store and select 6-8 medium-size turnips.  You are looking for ones that are consistent in color whether white or purple, with vibrant greens if left attached, and no bruises or brown spots.  Wash and pat dry the turnips, then slice horizontally in half then quarter the halves.  Dice into bite-size pieces.

Adding SmokinLicious® Minuto® Wood Chips to the Nordic Ware stove top smoker.Time to set up the stovetop smoker.  For the smoker, you’ll need to have microchips.  You can purchase these from SmokinLicious® under the Minuto® and Piccolo® Wood Chip listing.  Any of those sizes will work,  today I’m using Minuto® Wood Chip size #6.  Place about ¼ cup of the wood chips in the base of the pan which has been set over a burner.  Place the drip pan on top of the chips.  Ignite the burner to allow the chips to begin heating up.  Now place your cut turnips into the smoker pan making sure that the turnips are spread out evenly.  Add that pan to the smoker and place the lid on, keeping the vent just slightly open.  Be sure your range hood vent is on to prevent smoke from traveling around the kitchen or room.


45 Minutes Then Glaze


Our Dr Smoke clock indicates you should smoke for 45 minutes, then glaze. I am preparing these turnips to act as a side dish which means I will smoke them until fork tender.  That will take about 45 minutes.  As I get to the final 10 minutes of smoking time, I begin preparing the glaze.

Place 2 tablespoons of butter, 1 tablespoon of ground cinnamon, a pinch of nutmeg, 3 tablespoons agave or maple syrup, salt, and pepper into a saucepan.  Combine over a medium heat until a low boil begins.  Shut the heat off and add the tablespoon of tahini.  Now remove your smoked turnips from the stovetop smoker pan and place in the glaze tossing to coat.  Place in a serving bowl and sprinkle with fresh, chopped parsley.  Remember, this is just one way to use smoked turnip.  Don’t forget to try pureeing your smoked outcome and adding butter, cream, salt and pepper for a fresh take on a mashed turnip.  Please try Glazed Smoked Turnips as a side dish for your next function.

Thursday, March 1, 2018

THE HISTORY OF FIRE COOKING PART I

The history of fire cooking part I

For thousands of years, it was the only way to cook.  Many believe that this discovery separated man from the other animals.  Fire.

Estimated to have been discovered some 2 million years ago, the discovery of fire and more importantly, the discovery of how to tame fire, resulted in man’s brain development, value of food, changes in our body, and social structure.  It gave us survivability.  It extended our life by improving daily calories and nutritional needs by allowing us to cook poisonous plants and meats.

So how did fire cooking get discovered?  That is the million dollar question.  Here are some of the hypotheses out there regarding the discovery of fire for cooking:

Nature Provides Ignition

There are some scientists who believe that fire cooking was found by accident.  A lightning strike or grass fires that sprung up due to the excessive dry conditions exposed to the hot sun.  Many don’t feel man did anything to “discover” fire other than observe the characteristics of fire: it produces abundant heat, light, and when it traps an animal within its flames, it produced a more tender meat, easier to digest food source, and more pleasing aroma to the meat.

Tool Construction

There are others who believe that early humans realized the importance of tools.  By sharpening stones to produce spears, cutting tools, etc., these early beings observed spark.  Either through intention or perhaps with Mother Nature’s assistance, these sparks caught twigs, brush, fruit, and/or grains on fire.  Remember, early human life did not involve a developed brain.  A discovery of fire, however, would help advance not only our brains, but our bodies into the erect beings we are today. 

The Earliest Cave Cooking

In South Africa’s Northern Cape province, a dwelling known as Wonderwerk Cave, contains the earliest evidence that our ancestors and apelike ancestors were using fire.  Compacted dirt showed evidence of ashes, carbonized leaf and twig fragments, and burnt bits of animal bones.  Scientists were then able to analyze this material and determine that the fragments were heated between 750 and 1300°F, which is the heat level of a small fire made of twigs and grasses.

If indeed our earlier species learned to harness fire for cooking, this would account for the advancement of our brains and our ability to become erect beings walking on two legs.  Cooking on fire allowed for easier chewing and digestion and produced extra calories to fuel our brains. Fire also warded off nighttime predators, allowing for sleep on the ground or in caves rather than in the trees.

It’s All About Energy

Raw food diets have been popularized as a method of losing weight and of being healthier.  However, only a fraction of the calories in raw starch and protein are absorbed by the body via the small intestine.  As a result, the remainder passes into the large bowel, where it is broken down by the organ’s high population of microbes, which consume the majority for themselves.  However, cooked food is mostly digested by the time it enters the colon. For the same amount of calories ingested, the body gets roughly 30 percent more energy from cooked oat, wheat or potato starch as compared to raw, and as much as 78 percent from the protein in an egg.  In experiments, animals given cooked food gain more weight than animals fed the same amount of raw food.

Cooking breaks down collagen (connective tissue in meat) & softens the plants’ cell walls to release their storage of starch & fat.  The calories to fuel the bigger brains of successive species of hominids came at the expense of the energy-intensive tissue in the gut, which was shrinking at the same time.  If you look at early imagery of apes, you’ll see how we morphed into narrow-waisted Homo sapiens.

Coming up in The History of Fire Cooking: Part II, learn more about why cooking foods by fire made us who we are today.  In conclusion, did we provide you with new information you didn’t know?  Additionally, leave us a comment and subscribe as we bring recipes, tips, techniques, and the science behind the fire and smoke.
 

Thursday, January 18, 2018

INFUSING WOOD SMOKE INTO BRUSSELS SPROUTS

Infusing cherry wood smoke into Brussels sprouts using the gas grill is simple and easy and adds a very flavorful touch to this hearty vegetable.
A favorite of the cabbage family, Brussels sprouts came to the United States via French immigration in the 18th century.    They are dominantly grown in California and available June thru January making them a Fall and holiday menu favorite.  SmokinLicious® will take the flavors up a notch and add wood smoke into Brussels sprouts for two upcoming recipes.  We’ll do this on the gas grill fit with wild cherry wood chunks to bring subtle smokiness to the finish sprouts.  First purchase 3 lbs. of Brussels sprouts and get two cherry single filet chunks, and you’re ready to fire up the grill and get smoking.

The Easy Grill Method

Bringing the flavor of wood smoke into Brussels sprouts is so easy.  To start, gather about 3 lbs. of Brussels sprouts, some cooking oil, butter, and a heavy-duty skillet. I prefer a nut oil like walnut or almond. For a skillet I’ll be using cast iron.  I’ve trimmed the ends on about half the sprouts and for the other half, I’ve trimmed the ends and cut them in half.  That’s it!  Fire up the grill and get ready for a quick method of adding great wood-fired flavor.


It only takes a couple of pieces of wood chunk to bring fabulous flavor to the grill.  I set up a cast iron pan on one side and place two cherry wood chunks on the heat shields of the far burner.  Let the pan heat up for about 5 minutes then pour in a couple of tablespoons of oil and heat.  Right before I add the Brussels sprouts, I add a couple of tablespoons of butter.  In go the whole Brussels sprouts and the lid comes down.  Leave untouched for about 5 minutes before turning.

Flavor Finish

The cooking time for this recipe is approximately 20 minutesAs I have two recipes in mind I’m cooking two batches of Brussels sprouts: one batch whole and one batch halved.  After leaving for 5 minutes, I stir them to ensure that all surfaces are infused with wood flavor.  I maintain a temperature of 350-375° F which will make this a quick cooking method.  The first 5 minutes, the lid is down but once stirred, you can finish the cooking with lid up.  Remember, cast iron will retain heat, so you can turn the heat off and let sit for about 5 minutes.

After stirring a couple of times, both the whole and halved Brussels sprouts are ready in about 20 minutes time.  I simply remove them from the heat and bring them in to be added to my favorite recipes.

I have two recipes I’ll be working on: Smoky Brussels Sprout Gratin and Tortellini with Lemon and Smoked Brussels Sprouts.  These truly are the most flavorful Brussels sprouts! For those of you thinking about a holiday meal with them, well, the grill will give you that extra oven room you need.  Take advantage of the long harvest season and try these mini cabbages on your grill.  Check in for our recipes soon so we can get you started on how to use your prized sprouts.

Thursday, December 14, 2017

OPEN PIT COOKING FIRE BUILDING: PART I

Open Pit cooking fire We built by using Smokinlicious ash wood to develop great coals for our ember cooking of Peppers
Build an open pit cooking fire for grilling and ember cooking! Is easier than you may think follow our steps below!
SmokinLicious® receives a lot of questions about wood-fired cooking and one of the most repetitive concerns the building of the fire for cooking.  We’ve developed this series to address how to build the  fire by equipment and technique.  For Part I, we cover the open pit cooking fire.

Get Organized

The first step is to know where you will build the fire.  Are you planning on using an outdoor fireplace, a fire pit, or will you construct a temporary fire location?

When using an existing fireplace located outdoors, you must ensure that the firebox is clean of previous ash and wood.  The same is true for a open pit cooking fire pit.  If you will set up a temporary location for the fire, consider what you will use for materials to secure the area.  It is never recommended to use your patio, paved driveway or lawn because a hot fire is sure to damage them or, at the very least, mar their appearance (thin charcoal black coating the surface).  Using large stones, interlocking bricks, or a metal fire ring work great at securing the area to contain your fire.

Once you’ve decided on the location, you’ll need to collect some supplies to make the cooking safe and fun.


picture of Smokinlicious Double filet wood chunks make a perfect source for developing the perfect cooking fire▪ material to contain the fire like stones, bricks or a cast iron/wrought iron ring.  You can use an outdoor fireplace or open pit cooking fire pit whether permanent or portable


▪ water, shovel, dirt, and/or fire extinguisher to deal with potential fire spread or wayward embers


▪Smokinlicious® smoking wood chips for quick lighting


▪ small twigs or small pieces of hardwood to create a tepee around the wood chips (we like our Smokinlicious® smoking double or single filet chunks)


▪ larger hardwood pieces to create a 2nd tepee around the first (Smokinlicious®1/4 cut logs work great for that)
 

▪ rolled newspaper or fire starters


▪ have additional hardwood for producing more coals for cooking as needed


▪ a coal rake, fireplace tongs for moving and relocating wood pieces, spray bottle of water to tame flames near food, instant read thermometer (you can also use a traditional wrought-iron log holder to make the fire – the hot coals will fall through and then you rake them to the cooking side)

The Perfect Fire

Always take note of the day’s temperature, wind conditions/direction, and conditions of your wood (dry or wet, fresh cut or aged) before you start.  You want to be sure you set up and start the fire where the wind direction won’t cause smoke to enter house windows or the dining area.  Keep those locations upwind.
stack the wood into a teepee shape to maintain the flame and burning processIn your fire safe area, pile up a few handfuls of hardwood chips (you can use newspaper but I like to try to stay with wood in its natural state).  Make a small tepee around the wood chips using small wood pieces (our single filet wood chunks work great) or twigs.  Make a second tepee of larger wood pieces around the first one.  You’ll see that you’re graduating from small wood pieces to larger as you build but you’re also ensuring good oxygen pockets to help feed the fire to the next level.  This is what ensures even combustion and even coals.  Now, light the wood chips at the center and allow everything to ignite.  Don’t add any additional wood until you see the outside wood ablaze.

Fire for Fuel, Coals for Cooking

The purpose of your shovel other than as protector of wayward fire, is to take those hot coals and move them to the cooking area.  Remember, the fire area is not where you are going to cook.  That location is nearby but not with the flames.  You should never cook over direct flame as it will overcarbonize the foods and result in bitter tastes.

Ideally, you want to cook over coals that have a white colored ash over them.  Now, here’s how to determine temperature of those coals: hold your hand over the coals the distance your foods will be.  If you can only hold your hand for a count of 2 seconds before you need to pull it away, that is high heat.  3-4 seconds is medium-high, 5-6 seconds is medium and 7-8 seconds is low heat.

Bring on the Food!

We have burnt down the ash single fillet into a bed of hot coals. Ash wood is a perfect coaling wood to useOnce your coals are at the perfect temperature for the foods you want to cook, it’s all about cooking!  Remember, you can set up different heat areas to cook different foods.  That’s what makes the experience with wood cooking, specifically with coals, so exhilarating.

Thursday, December 7, 2017

SMOKED POTATO CURRY SMOKINLICIOUS® STYLE!

This smoked potato curry smells and tastes awesome! Try this around a holiday to just add a small smoky flavor to a favorite vegetable.
Whenever we reach the transition between Winter and Spring, I like to start transitioning my meals from hearty comfort foods to a bit more health conscious to prepare for the “less clothes” season coming.  Since I’m in the southwestern portion of New York State, our warmer temperatures can be a long way away from the calendar date of the first day of Spring.

That’s when I love to do dishes like Indian curries!

Hearty and filling, but loaded with healthy vegetables, I’m taking the traditional potato curry to a new level with my smoked potato!

Despite the many ingredients, this is still a very simple dish.

Ingredient List:

Gather together the following ingredients:
  • 2 cups smoked potato (see are previous posting on how to smoke the potatoes)
  • 1 cinnamon stick
  • Clove, cardamom, fennel seeds, curry, turmeric, chili powder, coriander, cumin
  • 1 large red onion
  • 4 garlic cloves
  • 1 green chili
  • 2 tablespoons tomato paste
  • 1 can butter beans
  • 2 medium tomatoes
  • 2 tablespoons butter
  • 1 cup water
  • 1 teaspoon kosher salt
  • 2 tablespoons high heat oil

Building Flavors

The first ingredients to incorporate will be the cinnamon stick and fennel seeds.  fennel seeds.  Heat the 2 tablespoons of high heat oil – I’m using coconut oil –  in a pan.  I’m using cast iron for the even heat distribution and retention of heat.  Once hot, add the cinnamon stick and fennel seeds and stir to keep the seeds from burning.  While infusing these flavors, mix together 2 teaspoons of curry, 2 teaspoons of cardamom, and 1 teaspoon of cumin.  Add these dry ingredients to the oil mixture and stir well.

You’ll start to smell the wonderful aromatics of these spices.

Vegetables and Spice Are Always Nice

Continuing to build on our flavors, I chop 4 garlic cloves and add to the spiced oil as well as 3 green chili slices, mixing well.  Allow these ingredients to tenderize for a few minutes then add your diced red onion.  But be sure you stir well to allow everything to incorporate.  Allow this mixture to cook on medium heat until the onion has become very tender and begins to darken in color, meaning it is sweating.  Now, get ready to add even more spice flavors.

Kicking Up The Flavors

Once the garlic, chili, onion mixture has tenderized, it’s time to add more spice.  Then, mix 1 teaspoon each of coriander, turmeric, clove, and chili powder together.  Add to the onion mixture in the pan stirring well.  Now we are ready for the 2 cups of the previously smoked potatoes.  Mix everything together well.  As the potatoes tenderize, you can break them apart into smaller pieces if desired.  Then add 1 cup of water and allow the mixture to simmer.  At this point I turn my heat down to medium-low.

Getting A Meaty Texture

Let’s add some additional meatiness to this dish by first incorporating 2 tablespoons of tomato paste.  Next, 2 diced tomatoes and the can of butter beans which if you don’t know, are white Lima beans, a great cholesterol lowering legume and rich in fiber!  Mix well and allow to simmer.  At this stage, you will see the ingredients thicken.  If you would rather more of a thick soup consistency rather than gravy consistency, feel free to add additional water.

After simmering for about 8 minutes on medium-low temperature, I add 2 tablespoons of butter to the mix.  If you’re dairy free, feel free to eliminate the butter and you’ll still have a wonderful dish.
I like to serve my smoked potato curry with chopped fresh green onion on top and brown rice on the side.  Taziki or Greek yogurt adds a nice touch as well for those looking for a “cooling” affect to the dish.

Now, dig in and see how versatile this dish can become.  Think about changing the smoked potato for a grilled or smoked eggplant, zucchini or yellow squash.  All wonderful options for this vegetable hearty dish.

Thursday, November 16, 2017

ACORN SQUASH- SWEET & SMOKY

The three stages of preparing acorn squash on the grill-propped-cooking over wood-finished product!
The stages of cooking acorn squash on the grill-stuffing with brown sugar-cooking over wood on the gas grill-finished product!
cherry wood placed on the diffuser of the gas grill to add a smokey flavorOne of the most popular winter squash that can be found pretty much anytime of the year, acorn squash is rich in fiber and potassium.  Time to take this squash favorite and smoke it on the gas grill with cherry wood chunks.  But first, we’ll give it some flavorful stuffing to make this exceptionally sweet.

Clean the Acorn Squash

cut off the top and then scoop out the seeds to provide a great vessal for the sugar and spicesMost acorn squash weigh between 1-2 pounds.  After cleaning the outside under running water, cut off the pointed end and ensure the bottom is flat so the squash won’t tip while cooking.  Now, scoop out the seeds and membrane until clean, just like you would do with a pumpkin.  The seed-free squash is going to be our ingredient vessel that will make the acorn squash so sweet and full of goodness.

Sweeten Things Up

into the cavity of the squash add 3/4 stick of butterOnce the acorn squash is clean of seeds and membrane, it’s time to stuff it.  The ingredients are simple: brown sugar mixed with cinnamon and butter.  That’s it!
First put approximately ¾ stick of softened butter into the acorn squash center.  Then pack in the brown sugar-cinnamon mix.  And I mean pack it in!  Be sure to press down so the butter and brown sugar mix combine.  Once filled, I sprinkle a bit extra of the sugar mixture on the cut top.  Now place the acorns in a pan that will be heat safe on the gas grill.  Time to prepare the gas grill.

Smoking on the Gas Grill

the pan with the squash is placed on the non heated side of the grill, while the heated side has the double filet cherry wood chunksI’ve turned two burners to “on” of my 4-burner grill.  I add two SmokinLicious® Single Filet Cherry Wood Chunks to one of the heat shields on my grill.   Next, I add the acorn squash to a roasting pan and set it on the grate of the grill that has the burners turned “off”.   This is known as an indirect method of cooking.  The squash will cook until tender all the way through.  Depending on the size of the squash, this will take between 1-1/2 to 3 hours.  Then get ready for the sweet, buttery smooth squash meat!

A Side Dish or Dessert

Even though the butter was placed to the bottom of our squash and the brown sugar mix on top, the lighter weight of the butter will rise to the surface while the brown sugar mix sinks to the base.  These ingredients will mix during cooking to sweeten the squash meat.  Once tenderized, remove and allow to cool before handling.  Then scrap out the squash meat with the cooked butter-brown sugar mix, combine, and enjoy.  This is sweet so you can enjoy it as a side dish or as a dessert – a spoonful on pound cake or puffed pastry is define.

Thursday, October 5, 2017

PEACHES GO SMOKY FOR A FLAVORFUL GAZPACHO

Smoking/grilling with wood is a great way to enhance the flavor of peaches. Add as an ingredient in soup to add a special flavor touch on a hot summer day. Try our recipe!
One of the easiest techniques to do with fruit on a gas or charcoal grill is wood firing peaches.  Take advantage of the season with this fruit by bringing different flavors and textures for great recipe.  Why not start with my recipe for a summer gazpacho that will cool you off during the hot season.  It’s time to take advantage of the summer harvest with fresh peaches and yellow tomatoes for fabulous summer cuisine

Fresh Is Key

Peaches are one of those fruits that performs perfectly on the grill, whether you use charcoal or gas for the actual cooking process.  To start, purchase fresh, in season peaches.  Wash and pat dry.  Then pass a knife through the center until you just hit the peach pit and cut through the flesh in a circular motion.  Remember, the pit will stay in place.   Take your hands and grip each side of the peach turning your hands in opposite directions to open the peach.  This will result in the pit separating from the peach flesh of one half of the peach.  Take a spoon and gentle insert the side around the pit and loosen until the pit is released from the peach flesh.  You now have 2 equal sized peach halves.  You may do as many peaches as you like but know for the gazpacho recipe you will need at least 3-4 good sizes peaches.

Releasing Sweet Smoky Flavor

Once all the peaches are cut in half they are ready for the grill.  I am going to use my charcoal smoker for this recipe but you can easily use a gas grill with wood chunks as well.  Just see our posting on how to add wood chunks to the LP grill.

I’m going to set up an indirect method of cooking the peaches to keep them from getting too soft.  That means my hot coals will be in one half of the grill while I do the actual cooking of the peaches on the half without hot coals.  Keeping the lid on will ensure that the heat is collected in the grilling area for an even cook.

Flavor In No Time At All

I have the benefit of being able to use the SmokinLicious® charwood product which is a blend of charred and uncharred wood. It allows for a lot of smoke vapor. I place my peaches with the skin side down on the grate, keeping all the peach halves on the non-coal side of the grill.  I’ll let them cook for about 10 minutes and then rotate them so the flesh side is on the grate.  Once cook through, I will remove and place them on the skin side to cool.

Seasonal Fresh Ingredients

With the peaches wood fired and ready, it’s time to collect the other ingredients for the gazpacho:
  • 3 cups wood fired peaches
  • 3 medium yellow tomatoes, chopped
  • 1 medium sweet yellow pepper, chopped
  • 1 medium cucumber peeled and chopped – I’m using 3 mini cukes
  • ½ cup chopped sweet onion
  • 1 garlic clove, minced
  • 1/3 cup lime juice
  • 2 tablespoons rice vinegar
  • 1 tablespoon marinade for chicken
  • 1 teaspoon salt
  • 2 teaspoons sugar
  • ¼ teaspoon hot pepper sauce (optional)
  • Reserved chopped peaches, cucumber and yellow tomatoes for topping/garnish
  • You will also need a food processor or blender

Blending Your Way To Fabulous Flavor

Time to bring all the ingredients together starting with the wood fired peaches, yellow tomatoes, yellow pepper, cucumber, sweet onion and garlic.  Process all these items until thoroughly blended.  Now add the lime juice, vinegar, marinade, salt, sugar, and pepper sauce if you are including this.
Time to refrigerate for at least 4 hours or preferably overnight.  You must wait for everything to blend and make the most fabulous gazpacho ever!

With the smoky tang of the wood fired peaches meeting up with the coolness of the tomatoes and cucumber, this gazpacho has just the right amount of tang, kick, and sweet to make this a summer favorite.  Once the soup has chilled, place in serving bowls and top with chopped smoked peach, cucumber, and tomato.  All the fabulous seasonal ingredients the season can offer in one bowl!