Showing posts with label food. Show all posts

Thursday, November 5, 2020

MARINATING: THE MYTHS AND TRUTHS TO GUIDE YOU

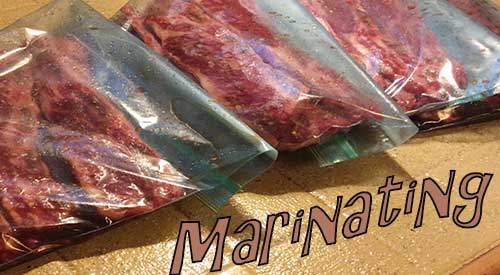
Marinating our Riblets
Marinating our Riblets in Zip Lock bag

 Marinating-At one time or another, I’m sure you’ve either purchased a prepared marinade or constructed your own to use with some type of animal protein.  Likely, your goal was to either add flavor or to tenderize or both.  But, let me ask you: do you really know what marinades do for specific foods and do you know how to use them?

My intention is to debunk the myths, get at the truth of what marinades can do and provide a guide on marinade amounts and ideal marinating times for specific foods.

Let’s get started!

PART I: Myth to Truth

How Deep Do Marinades Go?

One of my favorite myths is that of the depth that marinades penetrate in meat.  The tale is that once a meat is exposed to a marinade, it will get completely thru but this is far from the truth.

Marinades are a surface to few millimeters below surface benefit no matter what the content of the soaking liquid.  The oil, herbs, seasonings and spices only add flavor to the exterior of the food with no ingredient ever penetrating to the center of the meat.

Are Bottled Dressings a Marinade?

We all look for ways to cut corners and one of the myths out there is that bottled dressings work just fine as a substitute marinade.  The truth, however, is bottled dressings have high levels of acidity which when exposed to meat protein tend to break down the meat molecules too far resulting in a mushy texture.  Additionally, bottled dressings are loaded with unwanted ingredients like sweeteners (sugar), gums, and stabilizers and lack ingredients that give any real flavor.

How Long Should You Marinate Meat?

As mentioned above, since marinades don’t penetrate deeply into meat, a longer marinating time doesn’t mean more tender or flavorful meat.  In fact, the opposite becomes true.  Marinating too long will allow the protein bonds in the meat to weaken resulting in a mushy exterior which can prevent the meat from holding on to moisture.  That means you end up with a dry piece of meat.

Doesn’t the Acid in a Marinade Tenderize Meat?

When you’re looking to tenderize meat what you are really doing is breaking down connective tissue in the meat which is what produces tough cuts. Connective tissue is made up of collagen and fiber which can be weakened by an acidic ingredient like vinegar, wine, citrus juice, etc.  The problem again is this affect is surface only and cannot penetrate to the core of the meat.  Best advise is to use these ingredients sparingly and for shorter marinating times.

Can You Use a Marinade on Any Meat?

Since you’ve learned that marinades benefit the surface of the meat only, it is best for them to be used with thinner cuts of meat, like chicken breasts, cutlets, chunked meats, steak, and chops.  Larger cuts of meat do best with a wet rub or spice paste.

PART II: Marinating Tips for High Flavor and Juiciness

Tip #1 Flavorings and Seasonings: Use a lot of these ingredients in marinades and be sure to watch the salt or it will inhibit the absorption of other herbs, spices, and seasonings.

Tip #2 Score the Meat: To achieve as much penetration as possible, score the meat’s surface with a knife or prick the surface with a fork.

Tip #3 Reactivating the Marinade: I personally like to marinate in a storage bag but you can use chaffing dishes or other similar large baking dishes covered with plastic wrap.  When using a storage bag, ensure that all the air is out of the bag before sealing.  Halfway through the marinating time, flip the storage bag or stir the meat in a dish to ensure everything is getting even soaking time.

Tip #4 Refrigeration: One risk with marinating is the development of microorganisms since you are dealing with raw meat.  You can reduce this risk but getting your marinated meat in the refrigerator as quickly as possible to avoid the temperature danger zone of 40-140°F when bacteria can spread rapidly.

Tip #5 Wipe Off Excess and Discard Leftover: Remember, you’ve just marinated raw meat so never keep used marinade.  It needs to be discarded immediately.  If you feel you want to offer some of the marinade to go on the cooked food, simply keep a small amount separate from the marinating meat.  Also, so you don’t get excessive flare-up on the grill, wipe off excess marinade from the meat before grilling.

PART III: Can you Marinate too long?

Guide to Marinating Foods

This guide is intended to provide a starting point for specific foods on the quantity of marinade needed and the timing of the marinating process.

Smokinlicious marinating table, providing marinating time by food tryupe
Smokinlicious marinating table

By following these tips and guidelines, you’ll be sure to keep your foods moist, flavorful and promote a great mouth-food experience texture-wise.

Do you have favorite marinade ingredients?  Leave us a comment to opine.  Making you an informed consumer through valuable articles like this one.   Leave us a comment and follow us or subscribe for more great recipes, techniques, tips, and the science behind the flavor and fire.  That’s SmokinLicious®.

Thursday, September 24, 2020

ZUCCHINI ROLLS (WOOD-FIRED) THAT’S EASY TO MAKE ANYTIME!

Our Finished Zucchini Rolls, Rolls that are easy to prepare, prepare your appetite for this great vegetable!
Our Finished Zucchini Rolls, Rolls that are easy to prepare, prepare your appetite for this great vegetable recipe!

 Zucchini Rolls– For those of us who love to grow zucchini you know just how heavy a harvest you can end up with.   Then the question is: what to do with all those zucchinis?  Let me offer up a suggestion.  Zucchini ribbon rolls are a super easy way to make a quick appetizer or a great side dish.  In fact, if you don’t need the fanciness of the ribbons, you can modify this recipe which I’ll cover in this posting.  I’ll be taking the zucchini ribbons to the gas grill which I’ve equipped with wood chunks and provide a subtle smokiness to the zucchini before filling with a flavorful ricotta-basil-Parmesan mixture that easily could be smoked as well.  Pick out some of your larger zucchini and get ready to make a super appetizer or side dish with your harvest.

Become a Ribbon Maker

As you likely know, zucchini grows on a vine so when you start, you will find an end that has a growth nub and then a rounded bottom.  Both ends need to be trimmed after the entire zucchini has been washed and pat dry.

Making the Zucchini RibbonsAlthough you can make the ribbons on a mandolin, I’ve elected to use a wide vegetable peeler.  I located the flattest portion of the zucchini and begin at the stem top down in one peel.  This will produce a ribbon of about 1-inch in width.  I continue peeling on this side until I begin seeing seeds.  I then rotate the zucchini and begin peeling on the opposite side.  You can produce as many ribbons as the zucchini will make until it begins to reach tender inner flesh that won’t support a single ribbon peel.

With the long ribbons of zucchini made, I lay them out on a sheet pan lined with parchment paper.  I then brush each ribbon lightly with olive oil before placing on the grill.  Since my grill is set up for two zone cooking, the zucchini pan will go on the side with no direct heat meaning all burners on that side are off, while my wood chunks are smoking in the smoker box on the direct heat side.  These will only take about 12-15 minutes to flavor with smoke and they do not require any flipping.  Just a quick rotation of the pan about halfway through the cooking process.

Tasting Notes:

Remember, zucchini has a lot of water content which makes it ideal of attracting smoke vapor.  That means, you need to use hardwoods that are more mild or medium in boldness so the intensity of the smoke flavor is pleasant and not bitter.  I like maple, ash, alder, and cherry either alone or in combination.

A Creamy Filling for our Zucchini Rolls

Making the creamy filing

While the zucchini ribbons are cooking with wood flavor, I begin working on the filling for my ribbon rolls.  I start by placing 1 cup of whole milk ricotta cheese in a sieve over a bowl to remove any excess liquid.  Once transferred to a bowl, I work on chopping some fresh basil from my garden, until I end up with about 3 tablespoons worth.  I add that to the ricotta bowl along with 2 tablespoons of chopped garlic.  A drizzle of white truffle oil and some fresh ground pepper go in next.  Finally, about a ¼ cup of grated Parmesan is added and mixed in well.

Tasting Notes:

You can substitute many other fillings for the one I’ve included.  Other ingredients that would work well include goat cheese, chives with some chopped nuts for crunch.  Even a dried fruit like cranberry or golden raisins would be a great addition. 

Time to Roll

Zucchini Ribbons on the grill with wood chunks using a two zone cooking technique

With our filling well mixed, it’s time to return to the grill and remove our ribbons in preparation for filling.  If the ribbons are still oily, simply take a paper towel and wipe the residual oil away.  You don’t want the ribbons too wet or they won’t hold up when placed back on the grill.  Working with a single ribbon at a time, lay a generous dab of the filling in the center of the ribbon and spread to within ½ inch of each end.  Starting on one end, gently roll the zucchini ribbon until you have a small spiraled log.  Place on a parchment lined sheet pan leaving 1-inch spacing between rolls.  Continue with the rest of the ribbons until all are filled.  Then return the pan to the grill just to heat the filling up.

I will tell you that you can grill smoke the ribbons to the consistency you prefer you just need to ensure that they stay flexible enough to roll.  It is sometimes beneficial to dry these out a bit more before grilling so making the ribbons a day ahead of the actual grill-smoking is helpful.  Once tender and warmed inside, remove from the grill and serve.  I prefer to place mine on a base of vodka sauce with some fresh basil leaves.  These are slightly smoky, creamy and easy to eat.  They can be served easily as an appetizer or a side dish to your choice of animal protein.  I like these served with a rich short rib or a nice flaky fish like snapper or sea bass.  Oh, and don’t forget about that leftover zucchini you’ll have after you’ve made the ribbons.  I like to matchstick cut my leftover zucchini and add the remaining cheese filling with a bit of sauce and make this for another side dish or healthy lunch.

What’s your favorite zucchini recipe from the grill?  Leave us a comment to opine and subscribe to get all our postings on tips, techniques and recipes.  Bringing innovation to wood fired cooking with recipes, techniques and the science behind the fire, smoke, and flavor. That’s SmokinLicious®.

Thursday, July 19, 2018

HOT TREND MAY NOT BE THE SAFEST BET


Recently, I came across a great article on the new hot trends in cold cuts and smoked meats.  The article stressed how the $200 million in sales was the result of companies offering such things as chorizo, pepperoni, salami, and smoked bacon with bolder flavors and cleaner ingredients.  So, why do I have a problem with this?

What About the Smoke

The article went on to explain that the No. 1 trend in smoked and processed meats is products that are “uncured” or “no-nitrates added”, stating that this is due to the new health-conscious consumer.  This got me thinking about smoked products in general.  No one seems to be asking about the smoking process used to get that bacon hickory smoked!

If people are so sensitive to the ingredients in their foods, why haven’t we become concerned about the smoke component used for the actual process?

Demanding Label Changes

There are so many companies investing in the repackaging of their products to include such labels as “no-sugar-added”, “dairy-free”, and “gluten-free”.  Consumers are label readers and keenly interested in how products are made, how animals are raised, how products are preserved, and the percentage of fat in the processing.

One factor in food preparation that doesn’t seem to have been included in labeling is the actual smoking process for food products like smoked bacon, fish, or beef jerky.
Why doesn’t anyone seem concerned enough to ask what are they smoking with?  Is it actual wood or the wood-flavored vapor that is used to make liquid smoke, hardly an ingredient that would be considered chemical-free?

Wood Should Be a Food Ingredient Hot Trend

Let’s examine why wood should be looked at as a food ingredient when used for hot or cold smoking or wood-fired cooking in general.

First, not all companies selling wood products under the guise of smoking, identify what components of the tree are manufactured in the product.  Nor do they give any indication if the wood used in the manufacture of products started for only the purpose of food application. To clarify this point, let’s review one common seller of wood products found on Amazon.com.

This popular choice in wood chips started as a hickory and mesquite manufacturer of log products by a single owner back in 1986.  Originally, they sold logs to locals around their area.  Eventually, they branched out to wood chips and wood chunks in retail packaging when BBQ became so popular.
The company was sold to a fire log company who uses recycled wood sawdust and agricultural fibers to produce fireplace log products.  With the change in ownership, the company began selling other woods; pecan, post oak, and mesquite that are native to their home state of Texas, and the rest of the offerings which are brought in from other suppliers and locations.  There is no bark removal, there is no separation of wood layers.  Much of the product lies in open areas on the ground exposed to the southwestern sun as well as to anything else that may make contact.  The product is left uncovered in outdoor areas awaiting packaging, even after it has been kiln dried which is the only reference made to any preparation of the wood.

Here is one concern with the current ownership – keep in mind, with a primary business of manufacturing charcoal and fire log products, this business was originally connected to a cedar and basswood pencil business.  For those who don’t know woods, cedar and basswood are both softwoods, something that can be toxic if used for cooking food.

No Wood Regulations

There are no regulations that specifically state that you must guarantee that the wood packaged is clean, pure, and 100% of what it says it is on the label.  Just about anyone can start to package wood, whether hardwood or softwood or a combination of both, as a “cooking”, “grilling”, “smoking” or “BBQ” wood.  There are no regulations that it must be kiln dried or heat treated.  It is a free-for-all!

There may be claims that we are label readers, but it appears when it comes to wood used for cooking, we don’t have a clue.  This may be the oldest method of cooking in existence, but it certainly doesn’t have to contain the same risks as what the earliest homo sapiens endured.

The next time you see packaging that bacon, jerky, deli meat is of a smoked variety, look at the label and ask the question, “How was this smoked?”  You will be amazed that little or no answers are provided.  I hope you enjoyed our topic “Hot Trend” and the argument for better food labeling!

Thursday, December 7, 2017

SMOKED POTATO CURRY SMOKINLICIOUS® STYLE!

This smoked potato curry smells and tastes awesome! Try this around a holiday to just add a small smoky flavor to a favorite vegetable.
Whenever we reach the transition between Winter and Spring, I like to start transitioning my meals from hearty comfort foods to a bit more health conscious to prepare for the “less clothes” season coming.  Since I’m in the southwestern portion of New York State, our warmer temperatures can be a long way away from the calendar date of the first day of Spring.

That’s when I love to do dishes like Indian curries!

Hearty and filling, but loaded with healthy vegetables, I’m taking the traditional potato curry to a new level with my smoked potato!

Despite the many ingredients, this is still a very simple dish.

Ingredient List:

Gather together the following ingredients:
  • 2 cups smoked potato (see are previous posting on how to smoke the potatoes)
  • 1 cinnamon stick
  • Clove, cardamom, fennel seeds, curry, turmeric, chili powder, coriander, cumin
  • 1 large red onion
  • 4 garlic cloves
  • 1 green chili
  • 2 tablespoons tomato paste
  • 1 can butter beans
  • 2 medium tomatoes
  • 2 tablespoons butter
  • 1 cup water
  • 1 teaspoon kosher salt
  • 2 tablespoons high heat oil

Building Flavors

The first ingredients to incorporate will be the cinnamon stick and fennel seeds.  fennel seeds.  Heat the 2 tablespoons of high heat oil – I’m using coconut oil –  in a pan.  I’m using cast iron for the even heat distribution and retention of heat.  Once hot, add the cinnamon stick and fennel seeds and stir to keep the seeds from burning.  While infusing these flavors, mix together 2 teaspoons of curry, 2 teaspoons of cardamom, and 1 teaspoon of cumin.  Add these dry ingredients to the oil mixture and stir well.

You’ll start to smell the wonderful aromatics of these spices.

Vegetables and Spice Are Always Nice

Continuing to build on our flavors, I chop 4 garlic cloves and add to the spiced oil as well as 3 green chili slices, mixing well.  Allow these ingredients to tenderize for a few minutes then add your diced red onion.  But be sure you stir well to allow everything to incorporate.  Allow this mixture to cook on medium heat until the onion has become very tender and begins to darken in color, meaning it is sweating.  Now, get ready to add even more spice flavors.

Kicking Up The Flavors

Once the garlic, chili, onion mixture has tenderized, it’s time to add more spice.  Then, mix 1 teaspoon each of coriander, turmeric, clove, and chili powder together.  Add to the onion mixture in the pan stirring well.  Now we are ready for the 2 cups of the previously smoked potatoes.  Mix everything together well.  As the potatoes tenderize, you can break them apart into smaller pieces if desired.  Then add 1 cup of water and allow the mixture to simmer.  At this point I turn my heat down to medium-low.

Getting A Meaty Texture

Let’s add some additional meatiness to this dish by first incorporating 2 tablespoons of tomato paste.  Next, 2 diced tomatoes and the can of butter beans which if you don’t know, are white Lima beans, a great cholesterol lowering legume and rich in fiber!  Mix well and allow to simmer.  At this stage, you will see the ingredients thicken.  If you would rather more of a thick soup consistency rather than gravy consistency, feel free to add additional water.

After simmering for about 8 minutes on medium-low temperature, I add 2 tablespoons of butter to the mix.  If you’re dairy free, feel free to eliminate the butter and you’ll still have a wonderful dish.
I like to serve my smoked potato curry with chopped fresh green onion on top and brown rice on the side.  Taziki or Greek yogurt adds a nice touch as well for those looking for a “cooling” affect to the dish.

Now, dig in and see how versatile this dish can become.  Think about changing the smoked potato for a grilled or smoked eggplant, zucchini or yellow squash.  All wonderful options for this vegetable hearty dish.

Thursday, November 30, 2017

EMBER FIRED EGGPLANT & FETA TARTS

Ember Fired Eggplant on the rack cooking above a bed of hot coals. This technique provides the heat for cooking and the aroma of the wood smoke


You’ve heard me mention before how great it is to ember or coal fire certain foods, with a good majority of those items falling in the fruit category.  One of the best fruits to use this technique with is eggplant.

we selected two nice and plump eggplants for our ember cooking Not of Nutritional Value

Eggplant, also called aubergine, is part of a flowering plant grown for its edible fruit.  This is a thick-skinned fruit that has a meaty quality to its flesh.  In fact, it can make for a filling meal.  Eggplant contains a lot of water – 92% to be specific!  It is not known to be a contributor for daily nutritional intake.  Despite all that, Eggplant remains a favorite ingredient to cook with.

Nestling is Key

When cooking in the coals, it is best to use medium sized eggplant.  It doesn’t matter what variety you select, the technique for cooking in the coals will remain the same.

Starting the fire

preparing the hot coals for the eggplant. you want these to burn down leaving only the heat and no flame to burn the eggplant. Ember cooking is only over hot coals.First, you need to start with a good wood fire, using clean hardwood.  In order to do this technique successfully, you need to ensure that there are no flames left in the fire, just hot coals.  You’ll know the coals are ready for the cooking when they are completely grayed over.  If your grilling area is large enough, you can stage a couple of burning wood pieces to provide additional heat to the area.  Just don’t cook directly in those flames.
When the coals are ready, make sure the embers are in an even layer and then place the eggplants side by side in the embers.  I like to use a fine screen in the bottom of my charcoal area to aide in heat retention.  Now, leave these untouched for about 10 minutes.  After that time, you can turn the eggplant to ensure all sides get evenly charred.  If you make a large enough fire, you can bury the eggplant completely in the hot coals and not have to do any turning.  That technique will require about 30 minutes of cooking time.

Blackened, Charred Skin Makes It Ready

Once the Ember Fired Eggplant has tenderized in the coals, it’s time to carefully remove it. Cool the eggplant, so it won’t burn and can be handled.  Then, slice each eggplant open from end to end, and gently scoop out the flesh.  Be sure to leave all the charred skin behind.  If you’re ready to use this in a recipe, then no need to do anything more to the eggplant.  If you plan on using it later, you must prevent the eggplant flesh from turning dark by incorporating 1 tablespoon of lemon juice and enough water to cover the flesh.  When finished, it’s best to store the Ember Fired Eggplant in a glass jar, bowl, or other container.

6 Needed Ingredients

To make the Ember Fired Eggplant with Feta Tarts, you’ll need a muffin pan and the following food ingredients:
  • Flesh from 1 medium size coal-fired eggplant
  • ¾ cup crumbled feta cheese (about 3 ounces)
  • ¼ cup roughly chopped pistachios, plus 2 tablespoons for topping the tarts
  • ¼ teaspoon ground coriander
  • ¼ teaspoon red-pepper flakes
  • 1 tablespoon fresh mint leaves, finely chopped
  • 5 sheets frozen phyllo dough, thawed
  • Extra virgin olive oil for brushing dough and preparing muffin pan

removing any char from the fire and then chopping up the eggplant to be added as the tart fillingWood Flavored Eggplant Mixture

Roughly chop the wood fired eggplant.  Then transfer to a medium bowl and add feta, 3 tablespoons chopped pistachios, coriander, red-pepper flakes, and mint.  Season with salt and fresh ground pepper and stir gently to combine.

Making the Tarts

showcasing the finished product! Our ember roasted eggplant within the feta tart- yummyLightly oil the muffin pan cups.  Lay 1 sheet of phyllo dough on a board and lightly brush with oil.  Stack 4 more phyllo sheets on top, brushing each with oil.  Cut the stacked sheets into 6 equal squares.  Carefully, pick up each square and place in a muffin cup, gently pressing in place.  Fill each dough cup with about ¼ cup of eggplant mixture.  Gently fold over the corners of the dough to enclose the filling as a tart.  Brush tops with oil and sprinkle with crushed pistachios.  Then Bake until golden brown, about 30 minutes.  Let cool for 5 minutes, then serve.


Thursday, November 9, 2017

SMOKING FOODS IN FOIL: PROS & CONS

We discuss the pros and cons for foiling or NOT- your foods, in particular your BBQ and how it can affect the food.

“Does cooking something in foil still allow the wood flavor to penetrate?”

 It is a common question heard when it comes to hot smoking.  In fact, there is even a technique called the Texas Crutch that relies on wrapping meats like ribs, pork shoulder, and brisket in foil with 1-2 ounces of liquid into the foil and then sealing all ends tightly so no liquid or steam escapes.  This process tenderizes and speeds the overall cooking process, which with hot smoking, can be quite lengthy.

Here’s the thing – when you use this technique, you do so after the meat product has cooked to about 135-150°F.  That means a great deal of smoke flavor has already penetrated.  What about if you start out cooking in foil?  Let’s look at the pros and cons of cooking in foil, information you can use for traditional oven cooking as well.

Con #1

Aluminum leaches into foods that are wrapped in it.  Current research indicates that the average person can tolerate about 2400mg of aluminum exposure per day due to our body’s ability to excrete the small amounts of this metal efficiently.  Therefore, any ingestion levels over this would be considered a health risk by the World Health Organization.

Pro #1

Aluminum foil is disposable so it is a convenience.  There is no clean up when you cook foods in foil and often there are recycling programs that accept used foil.  It can save on degrading your cookware and grill grates.

Con #2

Aluminum is found in other items like corn, yellow cheese, salt, herbs, spices, tea, cooking utensils, and in over-the-counter medications like antacids.  A derived from aluminum is also used during the purification process of drinking water.  These all must factor into the recommended daily intake of this metal, meaning you need to assess whether cooking in foil will put you over the daily recommended limit.

Pro #2

Aluminum foil aides in producing a convection heat as it is an excellent heat conductor.  Thus, cooking times can be significantly reduced when foods are placed in foil.

Con #3

Foods with higher levels of acid have a higher rate of leaching aluminum into them.  This is true whether the acidic ingredient is in solid or liquid form.  In fact, acidic liquids have a higher leaching rate than solids.  Give this consideration when working with foods such as tomatoes, vinegar and citrus items.

Pro #3

Using aluminum foil can tenderize tougher cuts of meat when you include an ounce or two of liquid.  Additionally, aluminum foil is leak proof when you seal all ends.

Con #4

When cooking in foil using acidic ingredients both the appearance and taste of the foods can be altered by the reaction to aluminum.  Often, the tastes are described as metallic.

Smoking Considerations

From the smoking perspective, if you start the foods on the grill grates without any aluminum foil, cook until 135-150°F internal temperature, and then wrap in foil to finish, you likely will find very little change in taste.  Ingredients containing acid would have cooked down and not be at a level that would interact as aggressively with the aluminum.

If you do elect to cook on the smoker, charcoal grill or LP grill with foil, know that you can see firsthand the reaction of the aluminum with food ingredients and even the wood molecules by the smoke vapor particles that develops on the outside surface of the foil.  As foil is a heat conductor, it also is somewhat of a sponge and will steal some of the smoke vapor particles from the food.

Remember, one of the key benefits to using aluminum foil is its ability to seal tightly whether preventing spillage to a piece of cookware or sealing in liquids for cooking.  Cooking smoked items wrapped in foil from start to finish will not allow for full penetration of the smoke vapor particles that account for the unique color, texture, and taste to smoked foods.  Plus, you likely will increase your risk of health issues with repeated exposure to high aluminum levels.

Friday, July 14, 2017

Flank Steak Pinwheels with Ember Roasted Asparagus

Flank steak pinwheels with ember roasted asparagus – just one of the wonderful ways to use fresh asparagus this season.

Great recipe idea with the use of Ember cooked Asparagus and Flank Steak.  While the pinwheels can be cooked on the Charcoal/LP-Gas grill or even in the oven!

Ingredients:
  •         Ember cooked Asparagus (see previous blog)
  •         2-3 lbs of Flank Steak
  •        4 oz of Spinach leaves
  •         Olive Oil or Pesto
  •         4 oz of Mozzarella cheese
  •          Pepper and Sea Salt for taste
If grilling on Charcoal or LP/Gas grill use Double Filet Wood Chunks to add some additional flavor!

Preparing the Flank Steak

The ideal is to pound out the flank steak with a meat mallet to help tenderize it.  I like to coat my flank steak with olive oil, fresh ground pepper and kosher salt and place in plastic wrap to marinate for at least 6 hours but I prefer marinate overnight.  Once marinated, I can begin to assemble with the other ingredients.

Assembling the Pinwheels

Lay out the flank steak and place the spinach leaves overlapping them as you go.  Now take the halved asparagus stalks and layer them next.  Last, load on the mozzarella cheese and then season with salt and pepper.  Remember, if the mozzarella is not fresh, it will have some salt to it so be careful when adding additional salt. Now, staring on the long end of the steak, begin rolling inward, tucking in the filling as you go.  Once completely rolled, take 6 inch lengths of pre-cut meat twine and tie around the rolled flank steak about every 2-inches.  These sections will become the individual serving sizes.  Cut the steak between the twine ties and lay each cut piece of steak on a baking sheet.

Cooking the Pinwheels

Cook the pinwheels on a baking sheet or pan for approximately 30 minutes.  Flank steak will render a lot of juice so you may want to use a roasting rack in the pan.  Once the mozzarella cheese becomes golden brown, you’ll be ready to remove from the oven.  Let sit for 5-10 minutes then serve.

Serve!

This is just one combination of flavors that work well with the flank steak and ember roasted asparagus.  Other winning combinations include artichoke heart, roasted red peppers, kale, even quinoa if you want to added a grain texture.

Thursday, June 29, 2017

I WOULDN'T GRILL WITH MOLDY WOODS- HERE'S WHY

Learn why moldy hardwood is unfit for cooking and smoking food
There are many opinions out there in the BBQ world when it comes to the wood used for smoking and grilling.  Some people preach it doesn’t matter where the wood comes from as long as it isn’t a treated lumber.  Comments include, “don’t worry if there are bugs or bug holes – if they’re in there, they’ll just burn up,” or “fires are hot so anything on the wood just burns.”

But you should worry.  Here’s why.

In the USA, we try hard to re-purpose items so our landfills aren’t overflowing.  What we fail to do, however, is ponder the history of that re-purposed item.  Let’s take the common wooden pallet for example.

Wooden pallets have enjoyed a rebirth with the DIY generation.  Everything from headboards and wine racks, to dining tables and wedding guest books have been constructed from the used wooden pallet.  What should be widely discussed, is the potential for toxic exposure to this wood item.  Wood pallets, just like scrap woods, can harbor mold spores as well as chemical residue if they were used to transport items containing or exposed to chemical toxins.  Use these discarded items for cooking wood and you introduce a whole host of new risks.

A Primer on Mold

Mold growth is stimulated by three specific needs:

#1 Moisture: Mold spores need moist or damp locations to grow

#2 Food Source: Mold spores need food to survive and they love porous materials

#3 Optimal Temperature: Mold spores can thrive in temperatures from 32° to 120°F and have the highest stimulation rate in temperatures of 70-90°F.  Yes, even at the freezing mark, mold spores don’t die, they simply go dormant.

The Look of Mold

Mold has a range of appearances but on wood is mostly reveals itself as a fuzzy or discolored layer on the surface of the wood.  Molds are a type of fungus and they grow on wood when the three conditions mentioned above combine.  Molds feed on the wood nutrients (cellulose, hemicellulose, and lignin compounds) without weakening the wood itself.

Why is Mold a Risk

Molds produce millions of microscopic spores that can be carried in the air.  Mold spores are around us everywhere.  They search for the ideal surfaces to land on and grow.  When they increase in concentration, allergic reactions are triggered in sensitive individuals.   Expand this concentration to multiple locations and you can become highly sick.

Cooking with Moldy Wood

You now know the 3 parameters needed for mold spores to concentrate and thrive.  Why would cooking with moldy wood be of concern if you’re simply throwing them into hot coals or exposing them to gas fueled heating elements?

Because mold spores can survive combustion!

Molds can produce mycotoxins, toxic chemicals that are present on spores and small fragments of mold and fungus that are released in the air.  When moldy wood is introduced to fire, these toxins are released into the air and can cause anyone around the equipment to experience coughing, sneezing, eye and throat irritation.  If a preexisting condition like asthma is present, symptoms will be worse.  This can lead to a compromised lung health and disease.

Remember, mold looks for moisture environments so if you are cooking with moldy wood, you take the risk of the airborne spores taking harbor on the food being cooked over that wood.  The moist surface of the food is a perfect visiting ground.

Appearances Can Be Deceiving

The biggest challenge is it is almost impossible to distinguish toxic molds from non-toxic which is why I recommend that you never use moldy woods for cooking.  Some types of molds won’t reveal themselves on the outside of the wood but will be present within the interior wood cells.  It is always best to err on the side of caution and dispose of moldy wood or burn it in an outdoor setting not being used for cooking.

Get Rid of Ash

I highly recommend that you safely dispose of all ash from previous wood-fired cooking to decrease the risk of mold spores and fragments.  As mentioned above, mold spores can survive combustion and so they can remain active in ashes.  Don’t leave old ash laying around and certainly not within the equipment.

Finding hardwoods at the ideal moisture level, storing the woods in a well ventilated area, and rotating wood to circulate air exchange are good practices to help you stay safe during the outdoor cooking season and maintain healthy lung function for life.

Friday, June 23, 2017

Smoked Strawberry Napoleon

A New Flavor Twist- Smoked Strawberry Napoleon

SMOKED STRAWBERRY NAPOLEON WITH PROSECCO CREAM

Take advantage of the short, fresh strawberry season by using your harvest in unique and flavorful recipes.  Up first, this take on strawberry shortcake that is in a league of its own!

INGREDIENT LIST

 Here’s what you’ll need:
  • Packaged Won-Ton wrappers
  • Frying oil (be sure to use one for high heat)
  • 1 quart of smoked strawberries smoked with Minuto® chips (reserve about 6 whole strawberries for garnish)
  • ¼ cup of sugar
  • 1 teaspoon vanilla extract
  • 1/3 cup sliced almonds
  • ¾ cup cold Mascarpone cheese
  • 1/3 cup cold heavy cream
  • ¼ cup cold Prosecco
  • 1/8 teaspoon ground red pepper

PREPARING THE WON-TONS

In a large skillet, heat 1 cup of high heat oil.  When ready, reduce the heat to medium-high and begin adding won-ton wrappers one at a time without crowding the pan. I usually can fit about 4 at a time. This step will take you a bit to do enough wrappers to ensure you have 3 per Napoleon serving. 

I like to cook the entire package of won-ton wrappers as these make excellent snacks either alone or for dipping salsa, guacamole or your favorite dip.  Plus, they make a great sweet snack when sprinkled with cinnamon/sugar or powdered sugar. When cooking the won tons, watch for a tan hue and bubbles to begin on the wrapper. Turn once and remove to a paper towel lined plate about 20 seconds after turning, as the won-ton holds a lot of heat and will continue to cook out of the pan.

PREPARING THE STRAWBERRY FILLING

Placed the quartered smoked strawberries in a large bowl with 2 tablespoons of sugar and the vanilla; toss to coat.  Set aside until we are ready to assemble everything.

PREPARING THE PROSECCO CREAM

Preheat the oven to 375° F.  Spread the almonds on a baking sheet and bake until golden about 5-7 minutes.  Set aside.

Combine the mascarpone, heavy cream, the remaining 2 tablespoons of sugar, ground red pepper, and the prosecco in a medium bowl.  Beat with a mixer on medium speed until soft peaks form, about 2 minutes.  Be sure not to over beat.  Refrigerate briefly to bind everything.

ASSEMBLING THE NAPOLEON

Place one cooked won-ton on a serving plate.  Top with a large dollop of Prosecco cream and then cover with smoked strawberries. Repeat this process 2 more times so you have three won-ton layers per plate.  Top with almonds and a whole smoked strawberry on top plus a little extra of your smoked strawberries.

THE ULTIMATE TREAT THAT ISN’T TOO SINFUL!

With the sweetness of the Prosecco cream, the hint of smoke in the strawberries, and that crispy crunch of the won-ton layers, this is a one of kind napoleon that you and your guests won’t soon forget.  Feel free to experiment with different cream fillings and fruits.  I like cannoli cream as well with a hint of cinnamon.  And don’t forget to take picture of your masterpiece and send along to us at SmokinLicious®.

Thursday, June 8, 2017

GRILLING: THE WOMAN'S GUIDE

Woman ‘Man’-ing the Grill- Tools are Essential

It’s long been the equipment associated with the guys.  Perhaps it’s due to the primal start of cooking over live fire which initially was a man’s skill.  Hunt the animal and cook it on fire and hot coals.
Recently, the trend has begun to turn around in favor of more women grilling components of a meal on the grill.  In fact, it’s not just the traditional LP/gas grill but charcoal grills as well, as women take their new recipe and technique finds out of the traditional indoor kitchen and to the outdoors.

Just Because It’s Outside Doesn’t Change The Purpose

There is no question that outdoor grilling equipment has evolved into something of fantasy.  We now have choices beyond the standard LP, natural gas, charcoal, and electric grills.  Many brands are now featuring dual fuel cooking, meaning they may have gas or electric assist but use wood and/or charcoal for heat and flavor!

What does this mean for the ladies who want to do more outdoor cooking on the grill?

Versatility!  It is so easy to cook an entire meal on the grill without it taking several hours or more.

Accessorize!

The key to ensuring that an entire meal can be cooked on the grill is to have the right tools and that includes some accessory items.  Let’s look at each recommended item and answer the question why it’s important to the woman’s full meal grill event.

#1 Grill Grate Accessories:

First up, the grill pan, grill basket or grill topper.  These are perfect for vegetables and fruits making it so easy to ensure that the food doesn’t stick to the grill grates and that every piece gets cooked evenly.  Plus, since many grills are now sold with a side burner, you can always steam or par boil tougher vegetables first, then transfer to the grill pan/basket/topper.  Or, use that side burner to make rice for a healthy starch side.  Don’t have a side burner on your grill or are using a charcoal grill?  Then buy a butane burner!  These are so inexpensive yet give you another cooking option to get everything ready at the same time.

#2 Easy Charcoal Lighting:

If you don’t know what a chimney starter is, time to learn.  The charcoal chimney starter is the best way to light a charcoal fire.  Although these traditionally use newspaper at the bottom (for ignition) and load charcoal chunks (can be briquettes or lump) into the body of the unit, I take a simple method of lighting my chimney.  I load with my favorite charcoal and use a butane torch under the unit to light – no newspaper needed.  This allows me to leave the butane on auto fire for a few minutes to ensure the lower coals are lit.  Simply pull the torch out, shake the chimney while wearing fire gloves, and return to a heat safe surface until the top coals turn white-gray.  Oh, and you can always light the chimney off that side burner too!

#3 Purchase 2 Thermometers

Stop guessing at when things are done!  You need to invest in 2 quality thermometers; one for the grill/smoker and one instant-read for the food.  Be sure the thermometers you invest in can take a reading in 5 seconds or less, have at least a 4-inch probe for thicker cuts of meat, and have cables that are durable (if you don’t go with a wireless), especially for equipment thermometers that are placed through venting holes or under lids.

#4 Silicone

Anything made from silicone will become a lifesaver at the grill.  Silicone pot handle covers, spatulas, heat resistant tongs – you get the idea.  This material can handle the high heat of grills so stock up on those items you’ll need and use the most.  Suggestions? Tongs, pot handle covers, spatulas, spoons, mat.

Diversify!

Grilling does not necessarily mean you must put all foods on the grill grates.  Use high heat cookware to help you out.  Think cast iron or high heat clay and enamels meant for the grill.  These are perfect for starting one pot wonders like legumes, pasta dishes, even sauces.  With a roomy enough grill, you can fit many different items – grill pan/basket, Dutch oven, and rib racks.  Don’t forget most grills come equipped with a lower and upper grill rack so more fragile items that need less heat can go to the top.  Here’s some tips on food to cooking equipment match:

Tip #1: Cast Iron and Charcoal

Cast iron is, without question, the best material for cooking directly in the coals.  Here’s a tip – if you have an outdoor fireplace or even a fire pit that uses wood, you can do this method of cooking by placing your cast iron skillet or Dutch oven directly in the coals.  Keep in mind, I said coals, not flame.  Coals have a very high BTU rating and can cook foods within cast iron as if they are in the oven.  Just be sure to pack the hot coals around the cast iron after placing the pan in the coal bed.  Perfect items to try: vegetable medley, roasted potato, curry dishes, au gratin dishes.

Tip #2: Cast Iron and LP/Gas Grill

Just like having the side burner on a grill, cast iron on the grill is like having an extra pot on the stove.  Cast iron comes in lots of sizes and cookware type: saucepan, skillet, Dutch oven.  Anything you would traditionally make in cookware on the stove can be done on the grill.  The key is to ensure that you have this on a section of the grill that isn’t set to “high”, as cast iron holds heat.

Tip #3: The Upper Grill Rack

Though small in overall size, the upper grill rack is designed for those fragile items or for items that require simple warming.  Think melting butter for vegetables, heating sauces, warming bread and rolls.  Use it!  It can be of great value to keep you from needing anything indoors.

Tip #4: The Rotisserie

If you have a grill with a rotisserie, use it!  Keep in mind, as that item turns on that rod, the meat or poultry renders some fantastic juices.  Catch them!  Put a high heat pan under the food item with some great vegetables and use the drippings to add superb flavor to the cooking process.

Flavor It Up!

Now, let’s be clear!  Unless you’ve invested in a dual fuel or hybrid grill, one that allows you to use charcoal and/or smoking wood, most standard LP grills are just that: grills not smokers.  If you don’t have a hybrid but want to get some smoking woods flavoring to your foods, then start thinking of adding charcoal and wood chunks!

Yes, you heard me right.  Wood Chunks vs. woodchips which was the product of choice for years with LP grills.

Why Smoking Wood Chunks?

Most grills today are designed with covers for the gas burners to diffuse the heat more evenly.  They go by a lot of names: heat distributors, flame tamers, heat plates, burner shields, flavorizer bars.  The addition to the traditional LP grill is the reason why you can use smoking wood chunks.  Simply place a few small wood chunks under the grill grate right on top of the heat diffuser.  Be sure you only put chunks on a burner you will ignite.  Replace the grill grate and you’re ready to go!  And, yes, you will get real wood smoke vapor to flavor whatever you’re cooking on the grill.  I promise!

Final Points

"Man”-ing the grill is no different than planning a meal in your conventional kitchen.  Pick out the components of the meal and decide what needs to cook where on the grill: directly on the grate, on the rotisserie, in cast iron, on the coals.  If doing a meat, be sure to marinate 6 hours or best, overnight, to ensure a moist outcome and to reduce cooking time.
Have everything prepped including the grilling tools you will need and this is a walk in the park for the woman that is use to planning daily meals for her family.  The best part, you can enjoy more of those great warm days and not sweat in the confines of the hot summer kitchen!

Thursday, May 11, 2017

SMOKING POTATOES

Smoked Potatoes- A New Flavor Twist
Look at these scrumptous smoked grilled potatoes with a wood flavor
Savory Smoked/Grilled Potatoes
As the #1 crop in the world, available all year, potatoes are a favorite for a variety of reasons.  Get the nutritional benefit of this abundant vegetable by adding flavor in a different way – cooking it over charcoal and hardwood! 

Ingredients:


Simple Preparation For a Simple Vegetable

I’m using small red and white potatoes.  You’ll need a knife and cutting board, as I like to cut these small potatoes in half to allow for maximum wood fire flavoring.  I’m going to use a vegetable grill pan but you can use any heat safe pan whether foil, glass, heat safe ceramic, or cast iron.  Cut each potato in half, and place in the grill pan.


Seasoning and Oil Bring Out the Best

Just 3 simple ingredients are needed before the pan is placed on the grill.  Drizzle three tablespoons of oil over the halved potatoes, then add coarse salt and fresh pepper.  The oil can be grapeseed, walnut, almond, vegetable, or canola, anything you have and prefer.  Mix well to ensure each potato is coated, then let rest to allow the seasonings to penetrate before adding to the hot grill. 


Charcoal Grill Set Up

Time to get the grill ready.  I’ll be using a combination of charcoal and wood – charcoal as the fuel for heat and wood chunks and chips for flavor.  Keeping my intake vents open on the kettle grill, I start a chimney full of charcoal.  Just one chimney will be needed for the actual cooking.  I lay a small line of unlit coals down both the right and left side of the charcoal grate to keep my temperature stable through the cook.  I pour the hot coals in the middle then add two Sugar Maple wood chunks and a handful of Wild Cherry Grande Sapore® wood chips on top of the hot coals.  On goes the food grate and then my vegetable pan of halved seasoned potatoes.


Depth of Flavor Through Smoke

Once the wood is set up and the food grate is on, the pan of potatoes is added.  Put the grill cover on and adjust the lid outtake vent to 1/3 open position.  Now, adjust the lower intake vent to ½ open position.    Let the potatoes cook for about 25 minutes prior to stirring.  You’ll see the golden hue from the maple and cherry smoke vapor.  Be sure to rotate the potatoes on the bottom to the top so that there is even color and flavor to each piece.  The total cook time will be close to an hour but each grill and charcoal will perform differently so be sure to watch closely after the first 35 minutes.  Remove when the potatoes can be pierced easily with a toothpick or knife tip.


Full Flavor With All the Nutrition Intact
With all the nutritional value still intake, these golden, smoky potatoes are ready to eat as is or you can include them in your favorite potato recipes.  I’ll be giving a smoky edge to my interpretation of a potato curry in our next recipe feature.  Take advantage of this popular comfort vegetable and the ease of using a charcoal/wood grill for cooking and give your meals a memorable flavor enhancement.

By Donna J. Grant, M.S., Lead Wood Specialist at SMOKINLICIOUS®. For additional information regarding this article or other wood cooking questions, please contact her at 1–800–941–5054 or at info@smokinlicious.com.