Showing posts with label smoked vegetables. Show all posts

Thursday, July 29, 2021

ZUCCHINI & RICOTTA GALETTE- Ember Fired!

Ember roasted zucchini & Ricotta Galette is a superb recipe to entertain your guests palette
Ember fired zucchini & ricotta galette is a superb recipe to entertain your guests palette

We are going French with a zucchini & ricotta galette that is simply out of this world. With ember fired zucchini we previously cooked on our charcoal grill with straight wood, this is one recipe worth making any time of year. Get 2 zucchini ember cooked and prepare yourself for the ultimate in wood fired flavors featuring summer zucchini!

Gather the Ingredients

For our zucchini & ricotta galette, there are two separate ingredient lists needed; one for the pastry and one for the galette’s filling.

For the pastry:

  • 1-1/4 cups flour, chilled in the freezer for 30 minutes
  • 1/8 teaspoon salt
  • 8 tablespoons cold butter, cubed
  • ¼ cup sour cream
  • 2 teaspoons lemon juice
  • ¼ cup ice water

For the zucchini & ricotta galette filling:

  • 2 ember fired zucchini sliced into ¼ inch thick rounds
  • 1 tablespoon + 1 teaspoon olive oil
  • 1 garlic glove, minced
  • Ricotta cheese- ½ cup
  • Grated Parmesan- ½ cup
  • Shredded mozzarella- ¼ cup
  • 1 tablespoon slivered basil leaves

Egg Wash:

  • 1 egg yolk and 1 teaspoon water combined

Don’t Let the Word Pastry Scare You

Pastry is the first step and our recipe is very simple, so no need to get scared by the word “pastry”. For the pastry dough, combine the flour, salt, and then cut in the butter. My technique is to use 2 butter knives to produce even mini chunks of butter.

Mix the sour cream, lemon, and water in a separate bowl, then add to the flour mixture until just combined. Be sure not to overwork the dough. Now refrigerate for 1 hour.

Cheesy, Creamy Goodness

While the dough chills, let’s get the filling ingredients ready that include our ember fired zucchini rounds.

First, we’ll need to combine the olive oil and garlic so we have an infused oil to add to our cheese filling. Next, mix the ricotta, Parmesan, and mozzarella cheeses together. Add one teaspoon of the garlic oil and season with salt and pepper. You can set this mixture aside as you wait on the dough to finish chilling.

Next up, get the rolling pin at the ready, as the dough will be rolled into the galette shape.

Perfect Balance Comes Together

With our dough chilled and then rolled into a 12-inch round, it’s time to start assembling our galette. Place the dough on parchment lined baking sheet. Spread the ricotta mixture over the dough leaving a 2-inch border. The ember fired zucchini slices are next, which I add in a layered “wheel” formation, followed by a generous drizzle of garlic oil. It’s important that everything stay even for our dough to fold over and hold in all that fabulous filling.

With the cheese filling, ember fired zucchini and garlic oil added, the final ingredient of fresh basil strips is placed on top. Time to fold over the dough to trap all the filling inside the pastry while it cooks. A brushing of egg wash to the pastry will ensure everything gets golden during the 40-minute cook time. Into a 400° oven, setting the timer for 25 minutes to rotate the baking tray. That will guarantee a consistent color to our galette.

So Good, You May Not Want to Share

With the smoky, char flavor of our coal fired zucchini, the creamy filling of 3 cheeses plus basil and garlic oil, it doesn’t get any better than this! Our buttery galette pastry adds that sweet undertone that perfectly balances out the flavors.

Whether you serve this as an appetizer, snack or even a lunch or entrĂ©e, you’ll love how the zucchini becomes the star without tasting overly smoked. Feel free to add a side of marinara sauce for an acid kick.

We would love to hear about your version of this recipe or even learn what you do with coal fired zucchini! Leave a comment, like us, and subscribe, as we bring you recipes, tips, techniques, and science behind wood fired cooking technique.


 

Thursday, November 26, 2020

ADDING A SMOKE COMPONENT TO SMOKEY SWEET POTATOES

Try our technique on Smokey Sweet Potatoes for a great addition to your BBQ!


We introduced you to smoked potatoes some time ago giving you an easy method of smoking cubed potatoes .  Now, we look at sweet potato, a very popular root vegetable that does particularly well on the grill.  This time, we’ll smoke the potatoes whole to allow for versatility for recipes.

Get 5 or 6 sweet potatoes selected, preferably of equal size, and let’s get to the grill!

Choose Your Equipment

I’m going to use two pieces of equipment today to demonstrate how easily it is to work with what you own to add a smoke component. 

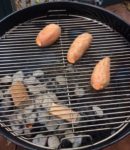
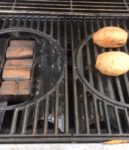
For my gas grill, I’ll be using a smoker box equipped with 3-4 wood chunks in double filet size.  For the charcoal grill, I’m incorporating both lump charcoal and briquet for the fuel and adding double filet wood chunks for flavor.  My charcoal grill is a traditional kettle grill.  Both these units are set up for two-zone cooking which means the fuel is on one side – in the case of the gas grill, burners are lit on one side only, for the charcoal grill, charcoal is banked to one side of the grill, using both lit and unlit coals to sustain the heat level.  All cooking will be done on the side that does not have any direct heat.

Our Smokinlicious wood chunks on the coals providing great smokey flavor for these smokey Sweet Potatoes
#woodchunks

With a target cooking temperature of 325-350°F, these sweet potatoes will cook up and get smoky in no time!

Tasting Notes: Preparation of the sweet potatoes prior to smoking is simple.  Wash the potatoes well, pat dry, and then trim off the two ends.  Using a knife, pierce the ends one time and the sides several times to provide injection areas for the smoke vapor.  This will ensure an even smoke flavor.

No Work Grilling & Smoking Smokey Sweet Potatoes

Once the grill of your choice is set up, it’s just a matter of placing the whole potatoes on the grill grate, indirect side, and allowing them to tenderize.  This will take about 75 minutes total.  There is no need to do any rotation of the potatoes; just allow to infuse with flavor. 

Our double filet wood chunks in the smoker box on the gas grill providing the flavor for our smokey sweet potatoes
#twozonecooking

If you’ve followed our recommendation for the charcoal grill – placing unlit charcoal/briquets on the direct side of the grill, lighting a chimney starter of charcoal, and pouring over the unlit coals when glowing hot, then adding the wood chunks – you’ll have plenty of fuel for the entire cook time.

Once tender, remove from the grill and set aside to use in your favorite sweet potato recipe.  I’ll be making a smoked sweet potato and chipotle soup with mine, which we will post the recipe soon.

One important point is to know that the boldness of the smoke will be much greater from a charcoal grill than a gas/LP unit.  You can see the difference on the skin of the potatoes that I’ve grilled today.  Nevertheless, grilled and smoked sweet potatoes are full of sweet, smoky flavor you’ll want to enjoy all year long.

What’s your favorite sweet potato recipe?  Leave us a comment to opine and subscribe to get all our postings on tips, techniques and recipes.  Bringing innovation to wood fired cooking with recipes, techniques and the science behind the fire, smoke, and flavor. That’s SmokinLicious®.


Thursday, September 24, 2020

ZUCCHINI ROLLS (WOOD-FIRED) THAT’S EASY TO MAKE ANYTIME!

Our Finished Zucchini Rolls, Rolls that are easy to prepare, prepare your appetite for this great vegetable!
Our Finished Zucchini Rolls, Rolls that are easy to prepare, prepare your appetite for this great vegetable recipe!

 Zucchini Rolls– For those of us who love to grow zucchini you know just how heavy a harvest you can end up with.   Then the question is: what to do with all those zucchinis?  Let me offer up a suggestion.  Zucchini ribbon rolls are a super easy way to make a quick appetizer or a great side dish.  In fact, if you don’t need the fanciness of the ribbons, you can modify this recipe which I’ll cover in this posting.  I’ll be taking the zucchini ribbons to the gas grill which I’ve equipped with wood chunks and provide a subtle smokiness to the zucchini before filling with a flavorful ricotta-basil-Parmesan mixture that easily could be smoked as well.  Pick out some of your larger zucchini and get ready to make a super appetizer or side dish with your harvest.

Become a Ribbon Maker

As you likely know, zucchini grows on a vine so when you start, you will find an end that has a growth nub and then a rounded bottom.  Both ends need to be trimmed after the entire zucchini has been washed and pat dry.

Making the Zucchini RibbonsAlthough you can make the ribbons on a mandolin, I’ve elected to use a wide vegetable peeler.  I located the flattest portion of the zucchini and begin at the stem top down in one peel.  This will produce a ribbon of about 1-inch in width.  I continue peeling on this side until I begin seeing seeds.  I then rotate the zucchini and begin peeling on the opposite side.  You can produce as many ribbons as the zucchini will make until it begins to reach tender inner flesh that won’t support a single ribbon peel.

With the long ribbons of zucchini made, I lay them out on a sheet pan lined with parchment paper.  I then brush each ribbon lightly with olive oil before placing on the grill.  Since my grill is set up for two zone cooking, the zucchini pan will go on the side with no direct heat meaning all burners on that side are off, while my wood chunks are smoking in the smoker box on the direct heat side.  These will only take about 12-15 minutes to flavor with smoke and they do not require any flipping.  Just a quick rotation of the pan about halfway through the cooking process.

Tasting Notes:

Remember, zucchini has a lot of water content which makes it ideal of attracting smoke vapor.  That means, you need to use hardwoods that are more mild or medium in boldness so the intensity of the smoke flavor is pleasant and not bitter.  I like maple, ash, alder, and cherry either alone or in combination.

A Creamy Filling for our Zucchini Rolls

Making the creamy filing

While the zucchini ribbons are cooking with wood flavor, I begin working on the filling for my ribbon rolls.  I start by placing 1 cup of whole milk ricotta cheese in a sieve over a bowl to remove any excess liquid.  Once transferred to a bowl, I work on chopping some fresh basil from my garden, until I end up with about 3 tablespoons worth.  I add that to the ricotta bowl along with 2 tablespoons of chopped garlic.  A drizzle of white truffle oil and some fresh ground pepper go in next.  Finally, about a ¼ cup of grated Parmesan is added and mixed in well.

Tasting Notes:

You can substitute many other fillings for the one I’ve included.  Other ingredients that would work well include goat cheese, chives with some chopped nuts for crunch.  Even a dried fruit like cranberry or golden raisins would be a great addition. 

Time to Roll

Zucchini Ribbons on the grill with wood chunks using a two zone cooking technique

With our filling well mixed, it’s time to return to the grill and remove our ribbons in preparation for filling.  If the ribbons are still oily, simply take a paper towel and wipe the residual oil away.  You don’t want the ribbons too wet or they won’t hold up when placed back on the grill.  Working with a single ribbon at a time, lay a generous dab of the filling in the center of the ribbon and spread to within ½ inch of each end.  Starting on one end, gently roll the zucchini ribbon until you have a small spiraled log.  Place on a parchment lined sheet pan leaving 1-inch spacing between rolls.  Continue with the rest of the ribbons until all are filled.  Then return the pan to the grill just to heat the filling up.

I will tell you that you can grill smoke the ribbons to the consistency you prefer you just need to ensure that they stay flexible enough to roll.  It is sometimes beneficial to dry these out a bit more before grilling so making the ribbons a day ahead of the actual grill-smoking is helpful.  Once tender and warmed inside, remove from the grill and serve.  I prefer to place mine on a base of vodka sauce with some fresh basil leaves.  These are slightly smoky, creamy and easy to eat.  They can be served easily as an appetizer or a side dish to your choice of animal protein.  I like these served with a rich short rib or a nice flaky fish like snapper or sea bass.  Oh, and don’t forget about that leftover zucchini you’ll have after you’ve made the ribbons.  I like to matchstick cut my leftover zucchini and add the remaining cheese filling with a bit of sauce and make this for another side dish or healthy lunch.

What’s your favorite zucchini recipe from the grill?  Leave us a comment to opine and subscribe to get all our postings on tips, techniques and recipes.  Bringing innovation to wood fired cooking with recipes, techniques and the science behind the fire, smoke, and flavor. That’s SmokinLicious®.

Thursday, July 9, 2020

TAKE TART TO THE SMOKEY SIDE WITH FRESH RHUBARB (SMOKED)!

Our finished Smoked Rhubarb
Our Finished Rhubarb (Smoked)

Rhubarb (Smoked) – I will make a confession: I don’t like rhubarb, a spring to early summer perennial vegetable, on its own, likely due to the very tart flavor.  I do, however, enjoy this vegetable smoked and then blended with a sweet fruit.

This is likely why you may not have realized that rhubarb is a perennial vegetable since this is so widely used for dessert items. The rhubarb stalks are suitable to eat but the leaves are poisonous meaning they should never be eaten or added to a smoothie.  Since this is a tart vegetable, I am going to first smoke it to change the balance of that tartness.  Later, I plan to use these smoked stalks in combination with some smoked strawberry to make a strawberry-rhubarb fool, a delicious treat or dessert.

For now, let’s get about a pound of fresh rhubarb, hopefully from a garden or a fresh market, and meet at the smoker for an easy method of infusing wood flavoring to this tart stalk vegetable.

Selecting and Preparing

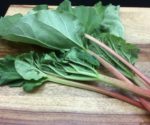
Our fresh Rhubarb picked from the garden- or buy at the Farmers Market
Rhubarb is a perennial vegetable that prefers cold conditions to thrive.  When first planted, you won’t be able to harvest any of the stalks until the second year, similar to growing asparagus.  When ready to harvest, you’re looking for stalks 12 to 18-inches in length with good girth to them.  If the stalks are too thin, that means the plant does not have enough nutrients.

Once harvested, clean well under water and pat dry.  Trim all the leave ends from the stalks as these are poisonous, and discard. Note you can compost the leaves as the poisonous oxalic acid breaks down quickly when decomposition begins.

I prefer to cut my stalks into 3-4-inch lengths.  That’s it!  Likely one of the easiest vegetables to prepare for the smoker.  Speaking of the smoker, time to prepare ours.  I’ll be using an electric smoker today since smoking rhubarb takes very little time.

Tasting Notes: Whether to cut the stalks is dependent on what you plan to do with the rhubarb so adjust this step according to your planned recipe.

Fire Up the Smoker!


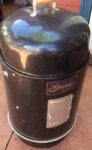
I’ll be using a standard vertical electric smoker that uses lava rocks as the radiator of the heat as well as an electric element as the fuel/heat source.  My electric smoker allows me to use wood chunks so I have an assortment of small sizes that total about 6 ounces of hardwood.  The double filet wood chunk size is ideal and as a tip, if you note to SmokinLicious® the need for thin chunks, these can be provided.
The Electric Smoker for our Rhubarb (smoked) technique
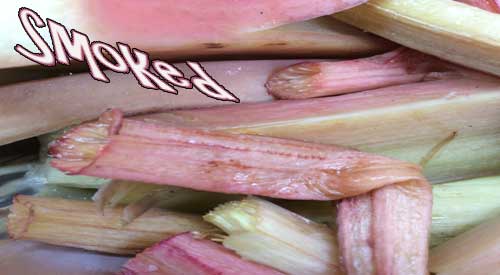
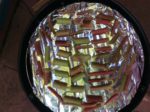
My set up is simple: I wrap one of my grill grates in aluminum foil, place my element on the lava rocks and insert wood chunks between the element’s spaces.  I’m using a combination of maple and cherry hardwood.  I add my water pan with about 2-inches of hot water so energy from the unit isn’t wasted heating up the water.  On goes my tray of pre-cut rhubarb that are spaced to allow the smoke to penetrate all around.  Leave these untouched on the smoker for about 20-25 minutes or until the thickest stalks are fork tender.

The best part about rhubarb on the smoker is it takes very little effort.  Trim, clean, and cut to size then place on the grate and smoke.  In about 15 minutes time, you’ll see a golden hue come out of the rhubarb pieces.  That means the smoke has penetrated its great flavor.  Using a fork or the tip of a paring knife, I check the thickest stalk to be sure I can easily pass the metal tip thru.  If so, then the rhubarb is tender and ready to come off the smoker.
Cut up Rhubarb pieces in the smoker
If your plans are to prepare this for rhubarb pie, then just continue with your favorite recipe.  This step is simply to provide another flavor level and begin the cooking process. Check in with us soon as we release our version of the strawberry-rhubarb fool featuring this smoked rhubarb and smoked strawberry.

What’s your favorite method of cooking rhubarb?  Leave us a comment to opine and subscribe to get all our postings on tips, techniques and recipes.  Bringing innovation to wood fired cooking with recipes, techniques and the science behind the fire, smoke, and flavor. That’s SmokinLicious®.

Thursday, April 16, 2020

MARRYING FLAVORS FROM INDIA WITH SMOKED BROCCOLI

Marrying smoked Broccoli with flavors from India finished dish

So far, we’ve shown you how to cook and flavor broccoli on the gas grill using wood chunks and a direct method of cooking.  That is a very fast means of cooking and charring broccoli quickly and is convenient for most of us who own a gas grill.

My second method of cooking and wood flavoring broccoli is using a stove top smoker.  I enjoy using my Nordic Ware Kettle Stove Top Smoker as this is one little unit that packs a punch when it comes to infusing smoke flavoring.  Plus, using this process, I don’t have to babysit the smoker.  Just set it up on the stove, turn on the overhead stove vent, and come back in about 20 minutes and the broccoli will be tender and full of flavor.  That means, it’s ready for all your recipes.

Now that the broccoli is ready, I’m going to make an India-type curry using tomato, potato, onion and smoked broccoli.

Tasting Notes: I’ve only mentioned two methods of smoking the broccoli but note you can also do this on a portable grill, charcoal grill, traditional smoker and electric smoker.  You can also use a handheld food smoker if you don’t want complete penetration of the smoke vapor into the broccoli.  Note that the stove top and charcoal methods will provide the boldest smoke flavors.


A Tomato Sauce

the ingredients for our smoked broccoli with india spices  
The first thing to prepare for our curry dish is the tomato sauce that will flavor the dish along with the smoke flavors.  To start, I take two tomatoes – I’m using vine tomatoes – and dice them.  To the diced tomato, I add one teaspoon of salt, ½ teaspoon garam masala, ½ teaspoon cumin powder, ½ teaspoon chili powder, and ¼ teaspoon cayenne pepper.  This mixture needs to be mashed down which you can either do with a food processor or food masher.  Be sure the mixture is smooth as this will be the sauce or gravy type quality to our dish.

I’ve elected to use a mini food processor for my tomato mixture.  This sauce mixture can be set aside until the other vegetables are ready.

Tasting Notes: Another ingredient that I like for this sauce is and Asian garlic-chili sauce.  If you elect to go with a tablespoon of so of this ingredient, eliminate the minced garlic clove and cayenne pepper.


Developing a Curry


To make the actual curry contents, you can use a skillet or a Dutch oven.  I’ll be using a Dutch oven as I prefer the ease of being able to heat up the cast-enamel which retains heat well.  Be sure you are comfortable with regulating the temperature setting on the Dutch oven if you chose to use this cookware as it does retain heat well.

Place one tablespoon of safflower or olive oil in your cookware and allow to heat.  Add one small chopped onion, two cloves of garlic which you’ve minced.  Allow these to sweat and tenderize.  Be sure you don’t burn the garlic so stir often.  To this add one medium size chopped potato.  You can decide if you want the skin on for extra nutritional value or peeled.  Stir these contents well and frequently, adjusting the heat of the Dutch oven if using this cookware (I went from a medium-high setting to a low setting by the time the potato had cooked for just a few minutes).   After tenderizing the potato for a few minutes, add one head of chopped smoked broccoli.
mixing the spices
Now add in your tomato sauce mixture stirring well.  Here’s the important part of the dish – be sure you don’t allow the mixture to dry out.  Add water intermittently as needed to maintain moisture and convection.  For those who like wine flavor infusion, you can also add about ¼ cup of red wine of your choice.


Tasting Notes: Don’t get hung up on the exact quantities of any given ingredient.  If you like spice, think about increasing the cayenne pepper or adding a garlic-chili paste to this.  You can also alter the type of chili powder used.  Use this recipe as a guide and make the end result your own.


A Beautiful Finish


Essentially you can have this dish cooked in 30 minutes following the 20 minutes smoking process of the broccoli.  However, I prefer to keep the pot on low and cook for a couple of hours to intensify the flavors.  Just be sure you add water as needed to keep everything moist and only in small quantities to prevent the vegetables from becoming mushy.

This is a vegan menu option but you can certainly alter the basic recipe to make this your own.  The nutritional value of these vegetables using very little oil makes it a healthy smoked alternative than traditional barbecue.

Now when you ask

Can you smoke broccoli?

Chef Bert discussing with Tom how flavorful charring is to vegetables.
Absolutely! Whether grilled, charred or smoked, this awesome vegetable favorably responds to wood-fired cooking with a rich, smoke kissed, nutty-like flavor. It’s very easy and the results are mouth-watering!  While pleasing the palate, smoked broccoli is very good for you; it is loaded with an array of vitamins and nutrients that support healthy food choices.

What’s your favorite broccoli recipe?  Leave us a comment to opine and subscribe to get all our postings on tips, techniques and recipes.  Bringing innovation to wood fired cooking with recipes, techniques and the science behind the fire, smoke, and flavor. That’s SmokinLicious®.
#chefbertandtom

Thursday, March 28, 2019

PAN COOK ZUCCHINI ON THE GRILL WITH WOOD FLAVOR

Try our pan cook zucchini on the gas grill with wood chunks for a flavoring twist


I’ve got a one pan dish that is easy to construct with the best part being you can do the entire recipe on your LP/Gas grill.

Grab your prized zucchini and get to the grill and I’ll show you how easy this technique and recipe are for a great meal.


Zucchini Prep


Preparing the zucchini is very simple for this recipe as we want all the nutritional value of the skin as well.  After washing, patting dry, and trimming off the ends, cut 1-inch thick rounds and then cut each round into smaller pieces.  For the smaller rounds, you should get 4 pieces and the larger 9.  Place all the cut zucchini pieces into a disposable foil pan.  There’s no need to spray the pan or add any liquid as zucchini has a 95% water content and when cooked, produces 6 oz. of water per every cup.  This will naturally steam away while in our grill pan while tenderizing the zucchini for our dish.  Plus, the high-water level will attract the smoke vapor for great flavor.
Diced zucchini in a disposable pan ready for the two zone cooking method
The grill set up is the easiest part.  Simply lite the burners on only half the grill.  Place wood chunks either directly on the heat shields located under the grill grate or in a smoker box placed on top of the grill grate of the lit burners.  Allow to heat up for about 10 minutes.  Then place the pan of cut zucchini on the unlit side of the grill and close the lid.

Tasting Notes: You do have an option to slice your zucchini lengthwise into quarters and grill directly on the grate.  Know this will produce stronger wood flavoring to the finished product and you will still need to cut the zucchini down into bite-size pieces.


Ragout Ingredients

Although ragout in Italian traditional means a sauce made from root vegetables and fruits, I felt it was a suitable term for our tomato-jalapeno based sauce.  In addition to your zucchini, you’ll need the following ingredients:
  • 3 large tomatoes, diced
  • 1 jalapeno, diced
  • 1-1/2 cups pasta sauce
  • Basil- 2 tablespoons
  • 2 tablespoons oregano
  • 2 tablespoons parsley
  • 1 tablespoon garlic powder
  • Fresh ground pepper
  • 10 oz. tortellini
  • ¼ cup shaved Parmesan and Asiago cheese
After the zucchini has cooked for about 30 minutes, add the diced tomato and jalapeno.  Let that cook for 15 minutes and then add the pasta sauce, basil, oregano, parsley and garlic powder.

Tasting Notes: This can be a spicy dish so if you only like a mild kick add ¾ cup of ricotta cheese when the pasta sauce and herbs are added.


Finale

All this made in one pan!
all our spices added to the panThe final step to our grilled zucchini with tomato pepper ragout is to add the tortellini.  You may wonder how tortellini will cook without any water.  Essentially, you only need a little liquid with heat to produce enough steam to cook the tortellini.  The best part is you won’t have any pasta that is soggy and unable to hold its form.

After adding about 10 ounces of tortellini – mine happens to be filled with spinach – the ¼ cup of shaved asiago and parmesan cheese are added.  Everything is mixed well and left on the grill until the tortellini are tender.  That’s it!  Everything completely made on the grill and absorbing the great wood flavor from our SmokinLicious® chunks.  This is a great starter recipe that you can easily modify to fit your taste.

Now you need to try to Pan Cook Zucchini on the gas grill with wood!

Tuesday, February 26, 2019

SMOKED FAVA BEANS MAKE THE PERFECT DIP OR CONDIMENT

Our smoked Fava Beans were smoked in our Tips and Technique blog, now we make a perfect dip!
Our Smoked Fava Beans were smoked in our Tips and Technique blog, now we make a perfect dip!

If you visited our article on smoking fava beans and gave our technique a try, hopefully, you have enough beans leftover to make this recipe.  I thought I would introduce you to a dip that can be used as a condiment to your favorite sandwich – think veggie or animal protein burger, grilled chicken, breakfast bread, or vegetarian.  I’ll be offering the recipe and giving you suggestions on what to serve with it.

Simple Ingredients


Once you have your fava beans smoked, you’ll need about 2 lbs. of the beans, there are some simple ingredients to gather for this recipe.
    Our arrangement of simple ingredients
  • 4oz. goat cheese softened
  • 3 tablespoons extra-virgin olive oil
  • Chopped fresh tarragon- 1 teaspoon
  • Fresh lemon juice- 1 tablespoon
  • 1 tablespoon lemon zest – I prefer fresh
  • 2 tablespoons water
  • sea salt & fresh ground pepper
You’ll also need a food processor or blender to combine all the ingredients.

Tasting Notes: I prefer a little kick to this recipe so I add 3 or so drops of hot sauce.

Pulsing to Flavor

Blending ingredients in the food processorWith a blender or food processor, add all the ingredients except the water.  Pulse only to blend and produce the chunky texture desired.  Be sure to scrape down the sides of the blending container at least once.  With all the ingredients, add the water and mix in by hand; do not process or blend.  Adjust the consistency to the finished mixture by adding water as needed.  Usually, I find 2-3 tablespoons of water is perfect.


Tasting Notes:  if using a blender, be sure you have a pulse control or you could blend this recipe too smooth which will limit its use with certain foods

Multiple Uses

Once you have the consistency you like, transfer the mixture to a serving bowl.  I like to chill this briefly before serving.  If using as a dip, suggested items to accompany the dip include sweet mini peppers, cucumber slices, radish, carrot slices, cherry or grape tomato, baguette, naan, won-ton shells.

This is also great with a firm toasted bread, tomato slice, fresh basil leaves, and poached or fried egg.  Let your imagination go and find more uses for this super flavorful dip and spread.

Thursday, February 21, 2019

ODE TO THE GRILLED FAVA BEAN

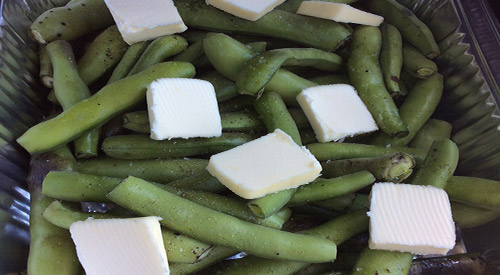
Fresh Fava Beans with Butter ready to become Grilled Fava Bean with a smoky flare!


I love when the ideal weather comes around when at the same time there are so many options for fresh produce either at the Farmer’s Market or local grocery store.  I tend to lean toward my grill and smoker for most of my cooking when the weather turns hot and steamy.

Beans are one of those vegetables that are spectacular on the grill but they get even better when you add a few wood chunks.  I’ll show you how to prepare Fava Beans for the grill and give you my easy, fool-proof technique for incorporating wood chunks for flavor.


Grill Set Up


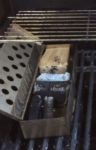
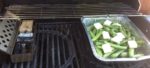
Smoker box preheating on the gas grill with double filet wood chunks Before preparing the Fava beans, get the gas grill heated by turning on only half the grills’ burners which will be the side that radiates out the heat and holds the smoker box.  For the smoker box, I’m using a stainless-steel model that has a hinged lid.  I place 3 double filet wood chunks from SmokinLicious® in the box in a combination of woods.   I’m using hickory, white oak and sugar maple to give me a great smoke balance to the beans.  This will ensure I don’t overpower with the smoke vapor.  By placing the smoker box with chunks on the grill grate as it preheats, it will be smoking by the time you have the beans ready.


Simple Bean Prep

There is little to do with the Fava beans before they go on the grill.  Wash them to start to make sure all the dirt and debris is removed.  Pat dry with a paper towel and then move them to the cutting board.  Remove any leaves and cut just the stem end to remove the stem.  Place in a disposable foil pan, spread out evenly, and add roughly 6 tablespoons of butter to the beans, as well as salt and fresh ground pepper.  That’s it.  Leave the bean pods intact as they are going to act like a miniature steamer to cook the beans and ensure they don’t become over smoked.


The Grill Act

grilling fava beans on the gas grill with smoker box and single filet wood chunksWith the grill heated and the wood chunks smoking in the smoker box, place the pan of beans on the unlit side of the grill and close the cover.  Check that your grill temperature steadies out at about 375°F.  If lower, simply increase the heat setting on the active burners.  Too high, decrease the heat setting.  Leave the beans untouched for about 30 minutes.  Return to the grill, stir the beans and check the wood chunks.  If the chunks are still emitting smoke, close the grill lid and leave for an additional 10 minutes or so, or until fork tender.  Remove the pan from the grill and allow to cool for about 10 minutes.


Buttery, Smoky Finish

finished Fava beans with the smoky appearance to the outside podsAfter the beans have cooled enough to be handled, take each pod and push the beans out one end into a bowl.  You may keep the empty pods to use for making broth or for puree in a sauce or smoothie.  These Fava beans are now ready for you to enjoy as is or use in your favorite recipe.   Now, I’m taking my Fava beans and making a dip with goat cheese, lemon and tarragon.