Thursday, July 25, 2019

THE DIFFERENCE BETWEEN $3.99 WOOD CHIPS FOR SMOKING AND THE SMOKINLICIOUS® BRAND

Caution- When selecting wood chips for smoking know the wood source!

If you’ve ever looked at the wood chips for smoking products available at most discount retail stores, you’ll notice that they seem to have consistent pricing in the $3.99 or less bracket.  Yet, you look at the SmokinLicious® brand and come up with a price that’s close to twice the cost.  What’s the deal with the price difference?

There are many factors involved in determining the retail price of wood chips many of which I’m sure the average consumer hasn’t considered.  What exactly are you paying for when you select a specific wood chip brand?

Let me give you some insight.


Let’s Start with the Raw Material

The raw material is by far the largest cost factor with selling wood chips for grilling, smoking, and cooking in general.  I’ll make the comparison to cotton purchased by a t-shirt manufacturer.  There are grades of cotton.  Higher grades of cotton go into more expensive cotton clothing.  Purchase a $5 t-shirt and you’re guaranteed a lower grade cotton was used. This means you likely won’t get more than a year of consistent wearing and washing out of that $5 t-shirt!

The same is true for wood chips.  There are 8 different grades of wood or lumber for purposes such as cabinet making, flooring, construction, and pallets.    Only one culinary wood company specifically purchases raw lumber material for cooking wood manufacture only.  That would be SmokinLicious®.

Other companies will do one of three things; have a primary business in one of the areas listed above and use the waste product for producing the wood chips, or, purchase another company’s waste product to market as a wood chip grilling and smoking wood, or, have the company with waste product package a private label brand of grilling and smoking chips and deliver to a centralized distribution warehouse for the brand, something commonly done by equipment manufacturers who feel a need to offer a wood chip to go with the equipment.


Cleanliness of the Manufacturing Process

Another key factor in cost is the handling of the material during the manufacturing process.  Now I understand that we are talking about wood and not a food item.  However, if you are using a wood to add flavoring to food through smoke vapor from burning wood, then I see the wood as an ingredient.  As with any ingredient, I would prefer to use something that is clean and pure since I will be eating this.

Since I’ve already pointed out that many companies use materials that are labeled as waste wood, you have no idea how the waste material was collected, stored, moved, and processed.  You also don’t know what’s in that waste wood (treated lumber pieces, a mix of woods, some softwoods) or how old that material is which directly affects the moisture level.  Remember, moisture is needed to smolder the wood and produce smoke vapor.

SmokinLicious® is the only culinary wood manufacturer that is Kosher certified, attesting to the steps taken to ensure the culinary products are clean, clean stored, and preserved.


Varieties and Availability

One means of keeping cost down is to offer chips that have not been debarked, have not had any mold spores removed, or for that matter dirt and debris.  The entire log piece may be placed in a grinding unit which will generate an assortment of chip sizes as well as the dust that comes with this single equipment use.  Honestly, you can’t be sure you are getting 100% of the wood listed on the package when these locations are generating extreme volumes of rough grind chip product.  The company may simply call it a hardwood chip and not state what hardwood is in the mix.  Remember, only specific hardwoods should be used in grilling and smoking.

Of course, the variety of wood also can increase the cost.  Remember, there are many uses for a wood including the export demand to other countries outside of North America.  As with any commodity, higher demands translate to higher cost.  Hickory is one of those hardwoods that has become very expensive in the market as the wood is used for railroad ties, utility company pavers to get into mountain ranges, and heavily purchased by the Asian market for a purpose that is not clear.


Cost of Manufacturing

Both the labor involved making the chip product and the location that the chips are manufactured in play a role in determining the cost of the final product.  Again, if the chip product is the result of another manufacturing level of the wood like making cabinets, then by using the scrap wood for the “chip” product, the overall cost of the chip product will be lower as labor and manufacturing costs can be covered by the initial cabinet making.

If, however, there is no other manufacturing purpose for the wood other than a wood chip production, all manufacturing costs are directed to that chip product.  Then there is the question of where the chips are manufactured.  Here are some minimum wage costs by the state that will certainly play a role in the final product cost: New York State $10.40, New Jersey $8.60, Texas $7.25, Florida $8.25, Wisconsin $7.25, Michigan $9.25.

Other costs that factor in include: how the chips are packaged, the moisture level of the product which directly determines the weight, how the wood is treated for both drying and for pest control, and if there is a screening of the chips to remove wood dust and make the chips more uniform.
SmokinLicious® developed over a 3-year period a specialized screen process which allows us to offer 7 different grind levels of wood chips, all bark-free, all from the heartwood of the hardwood only, and all dust free.

Perhaps it’s time you take a closer look at that package of $3.99 wood chips and see where it is manufactured, who manufactures it, what the contents of the bag include, and what weight there is to the product.  Now that you’re educated on how to assess the value of your next wood chip purchase, the choice will be up to you.

Thursday, July 18, 2019

WINTER SQUASH WITH CUMIN WOOD GRILLED

Our winter squash sliced and seasoned with Cumin and ready for the grill!

Full of color, flavor and packed with nutrients, winter squash makes for exceptional seasonal dishes, whether soups, casseroles, or desserts.  Harvested in the approaching Fall, they are available all winter long due to their firm shells.  With varieties such as sugar pumpkins, acorn squash, butternut squash, spaghetti squash, buttercup, and red kuri, sweetness level is always present.

Naturally low in fat and calories, yet rich in vitamins A, B6, C, and E, you can’t go wrong with any variety you select.

Today, I’ve elected to make cumin squash on the grill using confetti squash, so called due to the beautiful multi-skin coloring.  Note, you may substitute any rounded winter squash available near you for this recipe.


Two-Zone Cooking


Smoke coming from our wood chunks! Using a two zone cooking methodTo allow for slow roasting on the grill, I recommend a two-zone cooking set up.  Lite half the burners on your gas grill – if an odd number of burners, decide how many you need for the cooking temperature. The lit burners should be set to medium to obtain a cooking temperature of about 375°F.  Add wood chunks to the lit burner side either directly on the heat shields or in a smoker box.  My smoker box accommodates three double filet wood chunks easily.  The prepared squash will go on the unlit side of the grill.

Tasting Notes: Your choice of hardwood will determine the boldness of the smoke infusion.  I find that the skin of the squash will take most of the smoke vapor so really any hardwood or combination of hardwoods will do.  Be sure to keep extra pieces in case you need to replace halfway through the roasting process.


Seasoning the Squash


Our mixture of seasoning and spices.To start our recipe, first wash and dry off your squash.  Then cut in half and remove the seeds.  Slice the squash into 1-inch slices and place in a high heat tolerant pan.  Once sliced, prepare to toast 3 tablespoons of sesame seeds in a skillet over medium-high heat until golden brown.  If you’re able to locate cumin seeds, toast 1-1/2 teaspoons of cumin seeds with the browned sesame seeds.  Transfer the seeds to a bowl and allow to cool.

Now prepare the squash seasoning by combining 1 teaspoon ground cinnamon, 1 teaspoon ground coriander, 1 teaspoon ground nutmeg, 1-1/2 teaspoons coarse salt, and ¼ teaspoon fresh ground pepper.  If you didn’t have cumin seeds, then include 1-1/2 teaspoons ground cumin.  Drizzle 3 tablespoons of extra virgin olive oil on the squash slices and sprinkle with squash seasoning.  Toss to coat all the way around the slices.


Grill-Roasting with Wood

With the grill preheated, the wood chunks smoking, and the temperature gauge reading close to 375°F, I place the trays of prepared squash on the grill grates and close the lid.  I allow this to roast for 30 minutes, then I return to the grill, check the wood chunks and add more wood if needed. Briefly toss the squash to ensure even cooking and close the lid again.
Our pan of squash roasting on the gas grill
Once tender and bronze in color, I remove the squash from the grill and plate to a serving platter.  Total cooking time is about one hour though this is dependent on the thickness of your slices and quantity of squash you’ve added to the pan. Remember, the rind of squash is loaded with nutritional value as well and will be very tender so there is no need to discard it. Consume the entire slice.

Roasting winter squash on the grill with wood is the perfect way to usher in the cooler weather and enjoy all this great flavor.

Tasting Notes:  You can serve this as is or feel free to process the slices into a puree for use in soups or as a filler to pasta or even desserts.  There are many options with grill roasted winter squash.

Thursday, July 11, 2019

WOOD ROASTED ONIONS TO DIE FOR!

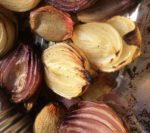
Our finished wood roasted onions!

One vegetable that is available throughout the year is the onion.  Although you’re likely accustomed to using this in recipes as an added natural flavor when you wood-fire the onion, something magical happens to its cell structure that turns these into the buttery, melt-in-your-mouth gems that you’ll want to use in even more recipes.

Onions are high in vitamin C, can aid in weight loss, and have reduced certain cancer risks, especially those associated with the digestive tract.

Our onion assortment, White, Sweet and Shallots 
Whether you elect to do the standard yellow onion, the sweet red onion, or shallots, you will love how smoke vapor works to bring out the best in any variety.


Preparing for the Grill

Before preparing the onions for the grill, let’s get the grill started by lighting the burners on only half the grill.  This is referred to as two zone cooking.  On the lit burner side, I place 2 wood chunks – I’m using the Single Filet size from SmokinLicious® – directly on the heat shields of my hot burners.  This will provide the wood flavoring to the onions.  My burners are set to medium-low which usually produces a cooking temperature of about 300°F.  Simply adjust your burner setting to reach this temperature.

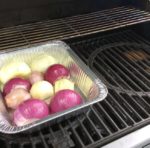
For the onions, I simply cut the tops of, slice in half and remove the skins.  I place the halves cut side down in a roasting pan and add about ¼ cup of oil to the pan.   With my pan ready, I place it on the unlit side of the grill and close the lid.  In about 75 minutes, these will slightly charred, tender, and juicy.

Tasting Notes:  Although I used avocado oil since you are not grilling over direct heat, you can use other oils such as olive, almond, walnut, grapeseed, coconut, sesame, canola, etc.  Remember, some varieties of onion are considered herbs so doing an assortment of types will give you an abundance of flavors.


The Longer the Wood Roast the More Flavor


Onions on the grill with wood chunk over the flavor barYou’ll find as these onions cook and absorb both the smoke vapor and oil, the scales of the onions will separate and caramelize.  The results are tender, juicy and flavorful with a hint of woodsy from the charred edges.

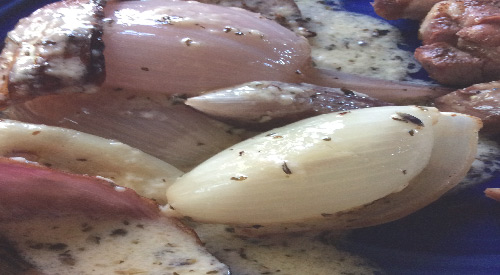
I decided to make a simple sauce of butter, cheese, parsley, and pepper for my onion mix and served these alongside a pork steak, also cooked on the grill with a two-zone method.

The best part is onions are available year-round so I can do this method even in the dead of winter, as remember, the gas grill still functions even in the cold!  For those who like to freeze produce, this freezes very well so grill a lot keep them so they’re ready for the winter days you don’t feel like lighting the grill.   Just think what an onion soup will taste like when you wood-fire the onions first!

Finished wood roasted onions ready for serving 
Tasting Notes:  If using a charcoal grill, still use a two-zone cooking set up meaning charcoal on only one side of the grill.  Be sure you only cook with hot coals, no flames.  This type of grilling can have more challenges to steady temperature so make sure you check the onion pan more frequently.

Thursday, July 4, 2019

WOOD GRILLED VERSION OF CHEF WATERS’ GOAT CHEESE SALAD

The finished- WOOD GRILLED VERSION OF CHEF WATERS’ GOAT CHEESE SALAD

Taking a page from Chef Alice Waters, we are making our version of the baked goat cheese salad by wood baking the goat cheese rounds on the grill using a two-zone cooking method and wood chunks for smoky flavor.  Then making garlic crostini for the croutons on the charcoal grill to serve alongside this fabulous salad dish.   A recipe that can be a salad course or an entrĂ©e on its own, we also give you an easy way to make this into an appetizer.  Purchase 12 ounces of quality goat cheese in log form and let’s get grilling.


Marinate to Start

Goat CheeseThis dish requires at least 8 hours of marinade time though I like to do mine overnight.   It’s the marinade of oil and fresh herbs that give the goat cheese great flavor.  Cut the goat cheese log into ½-inch rounds.  In the bottom of a glass dish, sprinkle chopped fresh herbs of your choice; today I’m using oregano but most any fresh herb will do.  Place the goat cheese rounds into the dish and pour over a ¼ cup of olive oil.  Turn the cheese rounds over to coat both sides.  Place fresh herb sprigs over the top of the rounds, cover with wrap and marinate in the refrigerator.
Fresh herbs


Tasting Notes: Other fresh herbs work great with this recipe but note that stronger herbs like thyme and rosemary likely don’t need the layers of chopped herbs at the bottom of the dish.  Simply lay the fresh herb springs on top of the goat cheese rounds and marinate in the refrigerator.


Grilling with Wood Chunks


Once the goat cheese has marinated, it’s time to coat it in a mixture of ½ cup plain breadcrumbs and two teaspoons dried herb of your choice.  I’ll be using oregano but other good options include thyme, basil, marjoram, rosemary.  Once coated on both sides, place the cheese rounds on a lightly greased shallow pan.  I’m using mini sheet pans as they work well on the grill, even for a two-zone cooking method.
Trays of goat cheese on the grill!As this is a cheese dish it is important that a two-zone cooking method is used which means the cheese will be going on the unlit side of the grill.  I’m using a smoker box with three hardwood chunks to provide the smoke flavor to the cheese, with the box placed on the hot side of the grill.  Total time to cook will be about 20 minutes.  You’ll know the cheese rounds are ready once browned and bubbly.

While the cheese is on the grill, prepare the vinaigrette by combining ¼ cup red wine vinegar, salt, and fresh ground pepper.  Whisk in ½ cup of olive oil and set aside.


Greens and Garlic Crostini


Crostini with garlic butter To go with the goat cheese rounds and salad vinaigrette, I’m making garlic crostini on the charcoal grill.  Using ½-inch slices of a day-old baguette, brush both sides of each slice with melted butter.  Place on a high heat tolerant sheet over hot coals only, no active flames.  Allow the slices to brown and slightly char before turning over.  Once browned on both sides, remove from the grill and brush with the cut side of a garlic clove.  I cut these crostini slices in half at the diagonal to go with the salad.

Tasting Notes:  An assortment of fresh greens can be used for the salad though I like to use a combination of bitters with more savory greens.


Assembling to Enjoy

With all the components made its time to assemble our salad.  Start by mixing the vinaigrette with the greens.  I like to place the garlic crostini on the outside of the salad and the wood-baked cheese rounds in the center of the greens.  This is best served while the cheese is warm.  Here’s another suggestion: this can make for the perfect appetizer if you cut each round in half so they fit on a garlic crostini.  For that recipe, prepare the same but place a few leaves of salad on the garlic crostini and top with a wood baked goat cheese half round.  There you have it!  A super easy salad or appetizer with that signature wood flavor that takes Chef Waters’ recipe to a new level.