Thursday, April 30, 2020

SMOKED MEATBALL ON THE KETTLE GRILL GREEK STYLE

Our Finished Greek Style Smoked Meatballs done on a Kettle Grill!

Although I love Italian-style meatballs with traditional red sauce as a sandwich, I’m going to change up the flavors by making a Greek version.  Then I’ll smoke my meatballs on the charcoal grill using charwood, which is a partially charred hardwood from SmokinLicious® that still retains a core of uncarbonized material to release wood flavorings.

My Greek-style meatball will feature feta cheese, oregano, and parsley, and will be finished with a Greek-yogurt cucumber sauce.  I’ll swap traditional sub-style bread for a pita pocket that will make this the perfect meatball sandwich that’s lighter on the belly but not light on flavor and satisfaction

Tasting Notes: Feel free to use any type of equipment for the cooking and smoking of the meatballs.  Just remember to use wood for added flavor to the finished meatball product.


It Starts with Quality Meatball Ingredients

our mixture of ingredients before we make into the meatballs  
Obviously, meatballs start with the meat.  We’ll be using ground chuck for this recipe.  Taking two pounds of ground chuck, I add one cup of crumbled feta cheese.  To that, I add two tablespoons fresh oregano, two tablespoon fresh chopped flat leaf parsley, ½ teaspoon of crushed red pepper, 1 large beaten egg, 1 teaspoon kosher salt, and ½ teaspoon fresh ground pepper.  Mix all the ingredients well until evenly combined.  This recipe will make approximately 32 meatballs that are 1-inch in diameter.


Lighting the Grill


As with all our recipes, you can elect the type of equipment you want to do the actual smoking and cooking on as well as the charcoal and hardwood choices.  Today, I’ll be using my Weber kettle as this is an ideal grate size for my sheet pan.

our Greek Style meatballs cooking on the grill over charwoodAfter mixing and forming the meatballs, I’ve placed them on a foil lined sheet pan over direct heat. 

There is no need to turn these meatballs as due to their small size, they will crust all the way around on their own.  In 20-30 minutes, these will have reached 160° F and be ready for eating.  For the record, my intake vent is open half way and the outtake is wide open.

Tasting Notes: Keep in mind, when you use any type of metal pan with direct heat and wood product on a grill, some level of creosote will develop on the bottom of the pan.  I’ve found that if I spray a small quantity of oven cleaner on these areas while the pan is still hot, in 5 minutes I can simply wipe away with a wet cloth or sponge.


Greek-Yogurt-Cucumber Sauce


When eating Italian meatball sandwiches, the sauce is traditionally red tomato.  For Greeks, it is a light, tangy cucumber-Greek yogurt sauce that accompanies the meatball.   Here’s our rendition of this sauce.
making our yogurt Cucumber Sauce for the sandwich
Start with one cucumber, peeled, seeded and grated.    Be sure to squeeze the extra water from the grated cucumber so the sauce does not become watery.  Add 1-1/2 cups of whole milk Greek yogurt, followed by three tablespoons fresh, chopped mint, one tablespoon fresh, chopped dill, ½ teaspoon lemon zest, one tablespoon fresh lemon juice, ½ teaspoon salt and ½ teaspoon fresh ground pepper. 

Mix well and refrigerate until ready to use.  This will make about 1 cup of sauce.


Make a Pita to Your Liking!

Now comes the fun!  Assembling our Greek-Style Meatball Pita!

our completed sandwich with greak style smoked meatballs and yogurt cucumber sauce I’m using whole wheat pita but any blend of grain can be used.  I start by adding shredded lettuce to each pita pocket half.  I prefer a bit of moisture both at the base of the pita as well as on top of the final ingredient.  I add a tablespoon or so of the yogurt-cucumber sauce to the shredded lettuce, then top with sliced red onion and tomato slices.  Next, in go the smoked meatballs.  I prefer to slice the meatballs in half to make eating the pita easier since each bite will be quite substantial.  After adding about three meatballs worth of meat, another dollop of sauce goes on top and we’re ready to eat!

Obviously, this is a recipe to make your own with the type of fillings you love.  That may include more spice from jalapeno or banana peppers, or more saltiness from black or green olives.  Change up the lettuce leaves to kale or spinach.  The options are limitless but the flavors will always be fresh and balanced.

What are your favorite pita or sandwich fillers?  Leave us a comment to opine and subscribe to get all our postings on tips, techniques and recipes.  Bringing innovation to wood fired cooking with recipes, techniques and the science behind the fire, smoke, and flavor. That’s SmokinLicious®.

Tuesday, April 21, 2020

THE USA IS NOT ALONE: ITALY’S OLIVE TREES FALL TO BACTERIUM

Olive Trees of Italy are facing the same Bacterium invasion as the USA
Italy’s Olive Trees

I am a wood geek.  I love the living cells of trees and the hundreds of compounds that produce the various aromatics, tannins and flavors that make trees so valuable for medicinal, cosmetic, and flavoring uses.  Whenever I’m in the woods, I always feel like these giants are breathing with me.
Then my joyful thoughts turn sad.  Observing over the years how our lifestyle and explorative ways have changed our atmosphere which in turn changes the natural order of things.  One of those things is our trees.

But North America is not alone!  Battles over the loss of various hardwoods and softwoods continue as we fight to save the forest giants as well as orchard soldiers around the globe.


Prepare for Higher Olive Oil Pricing


It’s called Xylella fastidiosa and it’s a deadly bacterium that is gaining attention as it takes mark on the olive trees and groves of Italy since 2013.  In 2016, this bacterium was blamed for the death of some one million olive trees in Southern Italy most of which were cut down to stop the deadly bacterium from spreading.  But it hasn’t stopped.  Even with netting and routine pruning, olive trees continue to suffer and eventually die or are cut down. 

We know that the bacterium starts somewhere within the heart of the tree and then travels towards the roots and branches.  This is the reason pruning can sometimes be beneficial.  Research has also shown that there are specific varieties of olive trees that are more susceptible to Xylella resulting in growers moving toward varieties with less risk when they replace or add new growth areas.

There is a pest, the meadow spittlebug, that is the carrier of Xylella and the reason it is necessary to net the trees to prevent this pest from traveling and spreading this major bacterium concern to other areas and other countries.

Much like our North American Emerald Ash Borer pest that is responsible for tens of millions of ash tree death and destruction, the meadow spittlebug and the Xylella bacterium it can carry results in loss of olive production to those damaged branches.  Although the olive oil pressed from the olives research shows does not carry any disease or risk, the bacterium has significantly reduced the volume of olives available to produce oil.  Thus, pricing goes up as availability of olives depletes.


It’s Not Just an Olive Concern


You might think this is just an olive tree issue but you’d be deadly wrong.  Xylella is a strain of bacterium that is considered one of the most dangerous plant bacteria in the world.  It causes a tree to die of thirst from the inside out by blocking the xylem or transport tissue of the tree responsible for moving water and nutrients from the roots upwards to other parts of the tree. Xylella is then carried from tree to tree by the spittlebug who latch on to the tree’s xylem tubes sucking out liquid.  When they travel to the next tree to feed, the bacterium they’ve picked up is passed into that tree’s xylem when they go to feed again.  With no cure, the plant or tree stays infected for life, until it dies. 

There have been strains of Xylella fastidiosa in citrus as well as pear, peach and plum.  There is also a potential new strain in Southern California that could affect the grape production which could decimate the wine production something not needed after all the years of wildfires.

Continents currently affected by this bacterium include North America, Europe, and Asia but more are expected.


What’s Next?


In my opinion, the focused concern is on the specific market of product whether it be olive oil, wine, or fruits and not on the tree destruction that is occurring all around us.  I’m wondering how much longer we have to witness century old trees dying and family businesses evaporating from what appears to be nature taking back or returning to the soil what she feels is rightly hers.  I can’t help but think that these pests that are invading our largest plants on our planet are likely the result of our own actions or even inaction.

How concerned are you about the North American trees?  Leave us a comment and subscribe to get our latest tips, techniques, and recipes, plus, the science behind the fire and smoke. 

Thursday, April 16, 2020

HOW TO KEEP FOOD INTERESTING, PRESERVED & SAFE DURING QUARANTINE

How to keep food interesting
How to keep food interesting during the quarantine

You may be one of the unlucky families faced with the task of social distancing or voluntary/involuntary quarantine.  Without question, this will test the limits of each family member’s patience, flexibility, and cooperation.

Not only are you responsible for ensuring everyone’s safety, you’re tasked with keeping them entertained and fed.  Right now, with internet and utilities intact, you have the option to stream programs, movies, videos, etc., as well as use electrical and gas appliances.  This helps to keep our sanity.  But have you paused to plan for when those items become interrupted or permanently halted?

I’m going to list for you some ways of ensuring you can remain comfortably fed while also enjoying some foods that you consume when you’re not quarantined.

#1 Wood Fired Treats:

Part of the reason we go out to eat is we order items that wouldn’t be commonly prepared at home.  Often, this includes foods that are live fired such as grilling over charcoal and/or wood or smoked with hardwood.  This is where those larger cuts of meat come in handy.  You can fire up the grill with a two-zone set up and some hardwood for added flavor, cooking enormous quantities of meat that can be used for many meals.  Think pork shoulder, full racks of pork ribs, whole chicken and turkey, beef roasts and brisket.  There are so many options including whole fish.  Obviously, if we lose gas and electric services, you’ll need an alternative grill like a charcoal unit, fire pit, wood burning fireplace, or butane-using equipment.  Or, you can make your own using bricks or rocks and a grate from another unit or simply place cast iron right in the coal bed.  Even a charcoal chimney starter can be used in a pinch as a grill.

#2 Foods That Never Expire:

Powdered milk, dried beans, Spam, whole grains, honey, dried pasta.  These are the items you’ll want to have on hand for the “when it happens” scenario as they last forever.  Powdered milk can easily be mixed with other ingredients to make sauces, milk, and treats.  Spam is one of those canned meats that can be a go to for emergency needs but what likely isn’t know is just how versatile it can be in recipes.  This is a perfect item to grill or even smoke as substitute for fresh meats like sausage, bacon, ground meats.  It can be sliced for making sandwiches and sliders, cubed and diced to be used with eggs, rice, quinoa, and pasta.  Dried beans and pasta are also perfect for cooking on a grill even though they need a longer time in water to cook tender.  Use grill-safe cookware on your grill, fire pit, or wood burning fireplace and you’re on your way to a great meal.

#3 Hot Smoking:

Preserving meat can be a challenge if you don’t have refrigeration for storing.  That’s where hot smoking becomes a skill set that could possibly save you from going without animal protein.  You need to make a hot coal bed that produces a lot of smoke not flames.  That means you’ll need green hardwood to produce the smoke, which is wood containing about 20% moisture.  Collect hardwoods like maple, oak, hickory, cherry, etc., and make a racking or hook system that will allow the meat to hang in an enclosure (a wood clothes drying rack works great for this purpose).  A modified smokehouse made from a tarp that is anchored to the ground works just fine, if the enclosure can hold the smoke around the meat and maintain a temperature of 150°F. The better your enclosure the better it will retain heat and will require far less wood. Meat smoked for 12 hours will be preserved for about 1 week, while meat smoked for two days can last 14-28 days depending on the type and cut.

#4 Outdoors:

One benefit of getting to be home is the option to engage in outdoor cooking.  Take advantage of doing as much as you can in the outdoors, whether on a standard LP/Gas grill, charcoal grill, fire pit, outdoor fireplace, or other outdoor equipment.  It provides an opportunity to enjoy the air and feel less like a prisoner.  Also, keep in mind that the more options you give yourself for cooking, the more food you can produce.  For instance, you might have a pork shoulder smoking with wood on one grill, while doing a sheet pan of vegetables on another unit, while making a sauce or flavored butter in a saucepan on the side burner or a butane cooker.  Just remember, if you are using wood and/or charcoal, once the heat is reduced to hot embers, use that to do additional foods like potatoes, peppers, onions, or even  put a covered Dutch oven in the hot bed to cook another day’s meal.  You can cook any meal on outdoor equipment so begin to experiment and get a comfort zone, and you will be a survivor in any situation.

If you’re quarantined, what type of cooking are you doing?  Leave us a comment and subscribe to get our latest tips, techniques, recipes and the science behind the fire and smoke, for all live fire cooking methods.  That’s SmokinLicious!

MARRYING FLAVORS FROM INDIA WITH SMOKED BROCCOLI

Marrying smoked Broccoli with flavors from India finished dish

So far, we’ve shown you how to cook and flavor broccoli on the gas grill using wood chunks and a direct method of cooking.  That is a very fast means of cooking and charring broccoli quickly and is convenient for most of us who own a gas grill.

My second method of cooking and wood flavoring broccoli is using a stove top smoker.  I enjoy using my Nordic Ware Kettle Stove Top Smoker as this is one little unit that packs a punch when it comes to infusing smoke flavoring.  Plus, using this process, I don’t have to babysit the smoker.  Just set it up on the stove, turn on the overhead stove vent, and come back in about 20 minutes and the broccoli will be tender and full of flavor.  That means, it’s ready for all your recipes.

Now that the broccoli is ready, I’m going to make an India-type curry using tomato, potato, onion and smoked broccoli.

Tasting Notes: I’ve only mentioned two methods of smoking the broccoli but note you can also do this on a portable grill, charcoal grill, traditional smoker and electric smoker.  You can also use a handheld food smoker if you don’t want complete penetration of the smoke vapor into the broccoli.  Note that the stove top and charcoal methods will provide the boldest smoke flavors.


A Tomato Sauce

the ingredients for our smoked broccoli with india spices  
The first thing to prepare for our curry dish is the tomato sauce that will flavor the dish along with the smoke flavors.  To start, I take two tomatoes – I’m using vine tomatoes – and dice them.  To the diced tomato, I add one teaspoon of salt, ½ teaspoon garam masala, ½ teaspoon cumin powder, ½ teaspoon chili powder, and ¼ teaspoon cayenne pepper.  This mixture needs to be mashed down which you can either do with a food processor or food masher.  Be sure the mixture is smooth as this will be the sauce or gravy type quality to our dish.

I’ve elected to use a mini food processor for my tomato mixture.  This sauce mixture can be set aside until the other vegetables are ready.

Tasting Notes: Another ingredient that I like for this sauce is and Asian garlic-chili sauce.  If you elect to go with a tablespoon of so of this ingredient, eliminate the minced garlic clove and cayenne pepper.


Developing a Curry


To make the actual curry contents, you can use a skillet or a Dutch oven.  I’ll be using a Dutch oven as I prefer the ease of being able to heat up the cast-enamel which retains heat well.  Be sure you are comfortable with regulating the temperature setting on the Dutch oven if you chose to use this cookware as it does retain heat well.

Place one tablespoon of safflower or olive oil in your cookware and allow to heat.  Add one small chopped onion, two cloves of garlic which you’ve minced.  Allow these to sweat and tenderize.  Be sure you don’t burn the garlic so stir often.  To this add one medium size chopped potato.  You can decide if you want the skin on for extra nutritional value or peeled.  Stir these contents well and frequently, adjusting the heat of the Dutch oven if using this cookware (I went from a medium-high setting to a low setting by the time the potato had cooked for just a few minutes).   After tenderizing the potato for a few minutes, add one head of chopped smoked broccoli.
mixing the spices
Now add in your tomato sauce mixture stirring well.  Here’s the important part of the dish – be sure you don’t allow the mixture to dry out.  Add water intermittently as needed to maintain moisture and convection.  For those who like wine flavor infusion, you can also add about ¼ cup of red wine of your choice.


Tasting Notes: Don’t get hung up on the exact quantities of any given ingredient.  If you like spice, think about increasing the cayenne pepper or adding a garlic-chili paste to this.  You can also alter the type of chili powder used.  Use this recipe as a guide and make the end result your own.


A Beautiful Finish


Essentially you can have this dish cooked in 30 minutes following the 20 minutes smoking process of the broccoli.  However, I prefer to keep the pot on low and cook for a couple of hours to intensify the flavors.  Just be sure you add water as needed to keep everything moist and only in small quantities to prevent the vegetables from becoming mushy.

This is a vegan menu option but you can certainly alter the basic recipe to make this your own.  The nutritional value of these vegetables using very little oil makes it a healthy smoked alternative than traditional barbecue.

Now when you ask

Can you smoke broccoli?

Chef Bert discussing with Tom how flavorful charring is to vegetables.
Absolutely! Whether grilled, charred or smoked, this awesome vegetable favorably responds to wood-fired cooking with a rich, smoke kissed, nutty-like flavor. It’s very easy and the results are mouth-watering!  While pleasing the palate, smoked broccoli is very good for you; it is loaded with an array of vitamins and nutrients that support healthy food choices.

What’s your favorite broccoli recipe?  Leave us a comment to opine and subscribe to get all our postings on tips, techniques and recipes.  Bringing innovation to wood fired cooking with recipes, techniques and the science behind the fire, smoke, and flavor. That’s SmokinLicious®.
#chefbertandtom

Thursday, April 9, 2020

PICKING YOUR IDEAL FIRE SETUP FOR COOKING

Picking the ideal fire set up for cooking depends on circumstances- this is the cabin Style

We are so lucky to have so many options for cooking our foods, not to mention the option to not cook at all!  This got me thinking about the fact that we do rely on our outdoor equipment and cookware when it comes to outdoor cooking.  Even if you’re a person who has experience campfire cooking, you likely do this style of cooking with one type of fire setup .

Let’s look at some of the options for setting up an outdoor fire that don’t include purchased equipment, just the natural elements found outdoors – rock, tinder, kindling, and logs/wood.  As I always like to remind you, though you may not use this information immediately, you should read it and keep a reference handy for when a situation may arise that you need it, such as a natural disaster, power grid emergency or other such catastrophic event.

Setup #1: Trench Fire

Trench style fire Set up
One of the best reasons for learning this type of fire set up is it works particularly well in windy conditions.  The key is to dig a trench that is large enough to acquire oxygen to keep it going.  Best sizing is 12 inches wide by 36 inches long by 12 inches deep.  Find rocks to add to the bottom of the trench that are hard and porous-free.  Be sure the 12-inch depth is AFTER the rocks are added.  Now build your fire on top of the rocks.  You can secure tree branches to act as postings for supporting a spit or layer green branches (not dried branches) over the top of the pit for placing your foods.  Of course, if you have a grill grate, place over the hole for direct grilling.

Setup #2: Dakota Fire Hole 

The Dakota Hole fire set up
The Dakota Fire Hole measure 12-inches deep by 12-inches wide with a channel that is 6-inches wide off to one side of the main fire area.  There should be a 12-inch space between the chimney opening and the channel.  The channel is dug at an angle meeting at the base of the fire pit area 12-inches down.  Build a fire at the base of the chimney area which draws air in from the side channel producing a draft for outtake at the top of the fire pit.  This is another cooking method that burns wood efficiently and produces very little smoke.  Plus, if you should need to keep yourself concealed, no one can see the glow of the burning fire because it is concealed underground.

Setup #3: Bushcraft Fire

This is an ideal fire setup when you know you can remain in a specified area for a longer time period.  It is perfect for sustaining a fire for days as it includes flat rocks for cooking on, a rock surround for maintaining a safe fire area, and a keyhole channel made of rock that allows you to place larger logs for continuous burn.  This produces a great bed of coals for cooking and if made against a rock barrier or tree stump, it can also provide the heat output necessary to keep you warm.  Plus, you can simply push the long log pieces into the fire circle when additional wood is need for heat and/or coals.  No need to keep splitting wood.

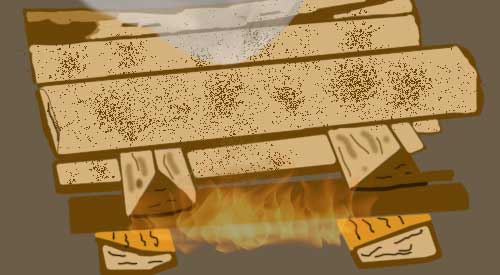
Setup #4: Log Cabin Style

This is a familiar fire set up in the camping world.  It is easy to do as you simply alternate pieces of wood from vertical positioning to horizontal, like building a Lincoln Log set, with tinder and kindling placed inside the base.  This is a setup that produces a great bed of coals so it is perfect for cooking but depending on the amount of time you need for cooking, may require replenishment of wood.

The Upside Down Fire

This setup is essentially a log cabin style setup in reverse.  Instead of tinder placed under the base of the logs, it is placed on top.  This is also known as a top-down fire.  Although you can use this for cooking, I’ve found it doesn’t produce the best coal bed.  It does, however, burn a long time.

Other Fire Setups

There are some additional fire setups that you may be familiar with but are not considered ideal for cooking. These include:

Tepee Fire: burns very hot and fast producing more ash than usable coals
Teepe Style fire Set up
Lean To: although ideal for windy conditions, this setup does not produce any uniform coal bed and very limited heat

The Star Fire: Although this can produce a very long burn, because of the extension of longer pieces of log in a star-shape to the center of the fire, a true cooking coal bed is not formed, just a lot of ash.

Additional Tips

As a final reminder when it comes to cooking by outdoor fire, you are not cooking with flame or for that matter, direct heat.  Use the hot coals that are produced from the fire to cook with.  That includes placing heat tolerant cookware on or in the hot coals, or even burying within the coals.  The rocks are an energy absorber, producing a lot of heat.  Clean, large rocks can be used like a griddle surface and have foods cooked directly on their surface.  Remember, they get very hot so any unclean quality to them will be burned off with the heat.

A final note, always have fire proof gloves available to grab log pieces in the fire or cookware placement and removal.  A coal shovel is ideal as well for moving hot coals around.  Don’t forget, when you’re finished with the fire you made, ensure that all hot embers and coals are extinguished.

Do you have a favorite method of stacking wood for a cooking fire?  Leave us a comment to let us know.  We welcome all types of questions and encourage you to follow and subscribe to our social channels so you don’t miss anything.  We look forward to providing you with additional tips, techniques, recipes, and the science for all things wood-fired cooked.

Thermal Heating Process is Why You Shouldn’t Be Concerned About Receiving a SmokinLicious® Package

Our 75-75 rule for our Thermal Heating process

You’re limiting your time in stores and other public places.  You’ve taken to online shopping as well as searching for ways to keep your meals interesting and flavorful.  You’re ready to do more grilling in order to keep the family in the household yard, getting some fresh air and UV light when available.  The only concern you have is, how safe is it to receive all these packages at home?   

Won’t they be hosts to the virus as well?

Your concern is certainly a valid one and most definitely has basis.  Let’s examine this concern further and explain how the SmokinLicious® procedures protect you.

Why our Thermal Heating Process Makes a Difference

Since 2005, every product manufactured by SmokinLicious® undergoes our Thermal heating process that is a 4-probe computerized system to ensure optimum function of our chamber.  Because we know some fungi spores are only killed at 60°C/140°F, mold spores at 56°C/133°F, and listeria at 74°C/165.2°F, we exceed any regulation for heat level and duration in order to protect the food chain system.  Currently, we use a temperature of 75°C/167°F for a sustained duration of 75 minutes.  We also developed a re-hydration process within our chamber to ensure the hardwood is not depleted of all moisture enabling it to be used for a variety of live fire cooking methods.

The SmokinLicious® Packaging Process

Except for a few micro wood chip products, all the SmokinLicious® online products are packaged in cardboard boxes.  Our Packaging Team adheres to strict disinfectant procedures and utilizes gloves during the packaging process.  We also have automated package loading systems in place for specific products that result in a product no-touch scenario.  Additionally, science believes COVID-19 has a survival capability of 24 hours on cardboard if it is not immediately disinfected.  We recommend upon receiving your carton, you either spray or wipe down the carton with an approved anti-bacterial, anti-viral disinfectant to ensure no risk of host transfer if the carton should become contaminated during the delivery process.  Note, the chances of a viral host surviving on shipped cardboard packages is low due to the variant temperature and humidity the package encounters while in transit. 

This makes the package you receive from SmokinLicious® even less of a risk.  For ultimate in safety, disinfect the carton upon arrival, place the product in another container that allows for airflow, and discard the packaging carton.

Thermal Evolution Is the Question

At this stage, we simply don’t have the science about every bacterium and virus that can enter our world.  We do suspect that temperature and more specifically humidity, will play a factor in slowing the infectious rate. The exact temperatures that kill germs/viruses depends on the microbe and how long it stays in the heat. This is the unknown.  This is the waiting game to determine if eradication is possible before the anti-viral becomes available.

While we wait, enjoy the pure, clean flavors of SmokinLicious® and get outside and cook for peace and comfort.

Are you making more online purchases?  Leave us a comment and subscribe to get our latest tips, techniques, recipes and the science behind the fire and smoke, for all live fire cooking methods.

That’s SmokinLicious!  Keeping you safe and informed.