Thursday, December 31, 2020

Smoking color

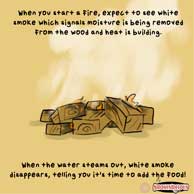
Smoking color is correct when white smoke is present

 You smell it before you see it!  The aroma of foods being cooked outdoors.  When those foods involve cooking over wood – hardwood to be specific – well, it is a flavor experience that is in a league of its own.

Recently, our cartoon friends, Tom and Bert, had an exchange about what the color of smoke means.

Smoke Color Means…

Chef Bert and Neighbor Tom are grilling buddies

Bert couldn’t be more right!  Hardwoods are the woods to use for cooking but not every hardwood is ideal.  That’s why they produce different colors and aroma/flavors when burnt.  Don’t just pick up any old hardwood.  Be sure to use only those that are know to be ideal choices when cooking: Alder, Ash, Beech, Cherry, Hickory, Pecan, Oak.

The Four Colors of Smoke

Chef Bert discussing color of smoke and what it does to BBQ

You might believe there is nothing complicated about cooking with wood.  How wrong you are!  As Bert mentions, the flavor is directly related to the hardwood selection as is the color of the smoke.  Select a wood that is not considered ideal for smoking and you’ll likely have to throw away your meal!  Let’s cover the 4 colors of smoke Bert mentions.

 Black smoke is a sign of impurities and is not good for cooking  

Black Smoke

Bert is spot on with his description and cause of black smoke.  You never want to put foods on a grill or smoker that is emitting black smoke.  Black smoke means no oxygen, which means you have an airflow issue.  Be sure to read up on how to achieve proper airflow here.

 Gray smoke is a sign of dirty wood 

Gray or Brown Smoke

When unclean wood is used for cooking, Bert knows you’ll get a gray or brown colored smoke.  Always be hesitant to place food over this smoke as you can be sure something isn’t clean.  It may be something dripped on the wood, was a treatment applied to the wood including pesticide application, or it may not even be a hardwood.  Clean out the smoker and start over!

 White smoke is a sign that mositure is leaving the woood 

White Smoke

I love how Bert recognizes that white smoke is a natural process in the stages of combustion.  This tells you that any water remaining in the wood is heating up and steaming out.  Once the wood is dry enough, that white smoke will disappear, and you can start to cook!

Blue smoke is ideal for cooking over  

Invisible or Blue Smoke

You may have read that the goal when smoking is to have a blue tint to your smoke.  That is great in theory but not usually the reality.  Truth is that a clean output from your vent in the form of a nearly invisible smoke is achievable by most of us.  Do not be fooled into thinking that you can simply use dry wood to get to this level faster.  Compounds responsible for ideal smoke color and flavor can only be found in hardwoods with some moisture, usually around the 20% level.  Wood that is too dry will only produce heat and not flavor.

Have you achieved the perfect smoke color for maximum flavor?  Leave us a comment and subscribe to get our latest tips, techniques, recipes and the science behind the fire and smoke, for all live fire cooking methods.  That’s SmokinLicious®!


Thursday, December 24, 2020

SMOKED BACON ICE CREAM WILL BECOME YOUR NEW FAVORITE!

Our homemade Smoked Bacon Ice Cream is absolutely delicious!

 As promised, we have a bacon ice cream recipe that will have you craving this as your new favorite flavor.  To complete this recipe, be sure to visit our posting on making your own smoked bacon which by itself, is super easy using the grill of your choice.

Then save just 1-1/2 cups of the bacon for the ice cream recipe and enjoy the rest in recipes or just crisped up.  Though I warn you, you’ll want to reserve more for making additional ice cream.  This creamy, salty flavor with just a hint of rum that will remind you of praline or brittle.   Get out your ice cream maker – you’ll need at least a quart size one –  and your smoked bacon and let’s make the most memorable ice cream flavor ever.

Make the Creamy Base

After smoking the 3-pound pork belly, I reserve about 6 slices and dice the bacon to produce 1-1/2 cups of micro cubes.  Here’s where you can decide how you want the final ice cream to be.  If you prefer a less sweet version, then be sure to crisp up the bacon slices before dicing and these will be added as is to the finish ice cream as it comes out of the ice cream maker.  If you want a sweeter, more praline type of finish, then you’ll proceed to our directive on making the sugar caramel base that the diced bacon will be added to.

Measuring out the cream for the recipe
#cream

First, we need an ice cream base so collect salted butter, vanilla, dark brown sugar and dark rum.  To start, melt 3 tablespoons of salted butter in a heavy saucepan.  Add ¾ cup dark brown sugar, 1 teaspoon vanilla, and ¼ cup dark rum stirring for about 2 minutes to combine.  Whisk in 3 cups of cold, heavy whipping cream to the mixture and bring to a simmer.  Remove from the heat.  Get 6 large egg yolks separated into a bowl as we will begin the tempering process of the eggs to produce a rich ice cream base.

Bringing up the mixture to thickness for our smoked bacon ice cream
#eggs

With the 6 egg yolks placed in a bowl, begin whisking them until pale yellow in color.  Tempering eggs means you are slowly adding a hot liquid to eggs in a slow stream and constantly whisking in order to prevent the eggs from scrambling.  I prefer to pour the hot cream mixture from the saucepan to a large measuring cup in order to have a spout for controlling the amount of liquid added to the whisked eggs.  Once the cream mixture is completely added to the egg yolks, place the combination back into a saucepan over low heat, stirring constantly until the mixture thickens.  You’ll know it is ready when the mixture coats the spatula and you can run your finger thru the coated cream and it doesn’t run back.  Remove from the heat.

Straining the mixture
#strainer

Once the egg-cream mixture has been thickened and removed from the heat, it’s time to remove any solids.  Start by getting a large bowl full of ice and a second smaller bowl to place on top of the ice bowl.  Using a sieve, pour the egg-cream mixture into the sieve that has been placed over the smaller bowl.  I like to pour the egg-cream mixture from the saucepan to a spouted pitcher to make accuracy of the pour.  Once the mixture has passed through the sieve, you’ll see some solids collected.  Those can be discarded.   Refrigerate this mixture for a least 2 hours.  We’re now ready to start working on the bacon filling.

Sweet or Savory Filling

Here’s the point in our recipe where you need to make a decision.  If you want a sweeter smoked bacon ice cream, then proceed with this step to make a bacon praline.  If you prefer a more subtle sweetness, then simply crisp up your bacon before dicing and that can be added as is to the ice cream maker.

Our Praline with smoked bacon added for the Smoked Bacon Ice Cream
#praline #baconpraline

For the praline, start by lining a sheet pan with a piece of parchment paper.  Place 1 cup of granulated sugar in a heavy saucepan and pour ¼ cup of water over the sugar – do not stir!  Turn the heat to medium-low and bring the sugar-water mixture to a boil.  Continue to boil the mixture until it turns amber in color which takes about 15 minutes.  Add the 1-1/2 cups of diced smoked bacon and stir quickly.  Remove from the heat and pour the mixture onto the parchment-lined sheet pan to cool.  Be sure to smooth the mixture into a thin layer.  Once set, break the praline into large chunks, then process in a food processor until coarse crumbs result.

While you were making that luscious bacon praline, our ice cream base was cooling in the refrigerator getting ready for the ice cream maker.  You’ll need a least a quart size ice cream maker for the finish to our recipe.  This is where you follow the directions for your specific ice cream maker.

Pouring the ice cream mixture into the ice cream maker!
#icecreammixture

While the ice cream maker is running, pour in the cooled ice cream into the maker.  My maker takes 25 minutes to produce the ice cream consistency.  Just a few minutes before the ice cream is ready, I add the smoked bacon praline or if your using only the bacon, the diced smoked bacon pieces.  Just mix for a few turns then turn off the maker and immediately pour the mixture into a freezer safe container.   Place the container into the freezer preferable overnight before scooping out and enjoying this creamy, salty combination.  Remember, this only becomes the best smoked bacon ice cream when you make your own smoked bacon.

Our mixture in the ice cream maker
#icecream #icecreammaker

A creamy, rich ice cream with a twist you’ll find becomes a favorite flavor fast.

What’s your favorite recipe featuring homemade smoked bacon?  Leave us a comment to opine and subscribe to get all our postings on tips, techniques and recipes.  Bringing innovation to wood fired cooking with recipes, techniques and the science behind the fire, smoke, and flavor. That’s SmokinLicious®.


Thursday, December 17, 2020

WOOD SAFETY AND OUR EFFORTS TO PROTECT YOU!

image of wood safety and our 75-75 rule
Our 75 degree c for 75 minutes is for wood safety product to protect your health and the environment.

You’re likely giving thought to many more potential hosts for the COVID-19 in an effort to keep everyone important to you safe and healthy.  Without question, everything you touch has the potential to be a host for the virus that is spreading so rapidly around the world.  It is without question, a scary time.  What you likely don’t realize is SmokinLicious® has always been committed to protecting our customers from the transfer of potential contaminants.

Not Just Any Wood Supplier

In our previously published article titled, DEMYSTIFYING TERMS USED FOR SELLING SMOKING & GRILLING WOOD we attempted to explain what the varying words used to describe preparation to wood sold for grilling and smoking actually meant.  The important point to take from this article is that these various “labels” don’t relate to what can assure bacterium and viral agents don’t survive if they grab onto the wood to ride as a viral or bacteria host.  In the end, we are the only current supplier who not only sells hardwood only for the purpose of cooking, but utilizes a heat treatment process that is at a level to ensure no microbial or viral agent can latch on to the wood and infect the user.

Even though we use an intense heat level of 75°C/167°F, we developed a method to ensure the hardwood is not dried out to to where it would be classified as firewood, something we never want to be compared with.

Remember, we know some fungi spores are only killed at 60 °C/140 °F, mold spores at 56 °C/133 °F, and listeria at 74 °C/165.2 °F. Although there is no confirmed data on the heat level that COVID-19 dies, we do know that sunlight results in the viral agent only surviving a few hours, given the intensity of the ultraviolet rays.  This suggests that heat does play an important role in reducing the virus surviving.

The current regulations in place for wood just don’t make assurances to safety.  Our efforts reinforce that potentially fatal bacterium cannot enter our food chain.  You can handle our packaging and cook with our products knowing we’ve done our part to ensure no transfer of bacterium or infectious agent.

Can your local firewood or other wood supplier make the same claim?  SmokinLicious® – the brand that’s pure, clean, and safe for cooking.

Do you plan to grill and/or smoke more at home with the recent COVID-19 scare?  Leave us a comment and subscribe to get our latest tips, techniques, recipes and the science behind the fire and smoke, for all live fire cooking methods.  That’s SmokinLicious®!
 

Thursday, December 10, 2020

HOMEMADE SMOKED BACON

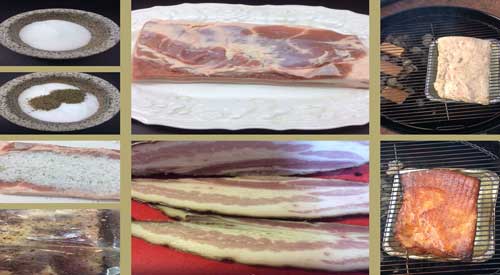
Steps to make Homemade smoked Bacon

Just about everyone I know loves bacon, even if it’s the store-bought type.  There are so many foods that have been designed around bacon including a chocolate chip cookie recipe featuring caramelized bacon pieces and a bacon ice cream! (which we’ll offer a recipe for soon).

One thing most bacon lovers don’t know is just how easy it is to make your own bacon at home, even the smoked type.  You’ll be amazed at how different the taste and texture are with bacon you make at home.  Just know, my technique will require you to cure the pork belly for a minimum of 7 days so be sure you have refrigerator room and time to wait.  I know – when it comes to bacon it’s sooooo hard!  But it will be worth the wait!

Quality Meat a Must for Homemade Smoked Bacon

Our fresh butchered pork belly  begining our homemade smoked Belly steps

When making homemade bacon, you’ll need a slab of pork belly, which is a relatively inexpensive cut of pork.   Since this process is a time investment, consider purchasing a quality cut of belly which would be labeled “organic”.  This cut normally comes from heritage breeds like Kurobuta and Berkshire.  This investment will result in richer, meatier, and cleaner flavors to the finished product.

Although a full pork belly will weigh around 12 lbs., you only need about 3 lbs. to give you a sizeable quantity of bacon.  Also, some belly will come with the skin still intact while others will already have the skin removed.  Note, you will need to remove the skin before curing so you likely will want to ask the butcher to do this for you.  If you’re doing skin removal yourself,  simply separate the skin from the fat layer at one corner by inserting a knife point.  Grab hold of the skin and begin making horizontal cuts with the knife in short sections, pulling the skin back as you go.  Leave as much fat layer as you can.  Once removed, it’s time to rub and cure.

Rub and Cure to Flavor

Curing is preserving the meat.  This is done not only by the ingredients in our rub but also by the process of hot smoking which contains antimicrobial benefits.  Remember, when we are done with the smoking process, your bacon will be ready to eat as is, though you will be able to crisp it up if you want in a pan.

For my rub, I’ll be combining the following:

  • 1 cup of maple sugar, coconut sugar or regular sugar
  • ½ cup kosher salt
  • 1 tablespoon cracked black peppercorn
  • 2 teaspoons minced fresh thyme
  • ¾ teaspoon pink salt also known as Prague Powder #1
  • 1 crumbled bay leaf
  • 1 teaspoon ground coriander
Our seasoning mixture over the pork belly moving along for homemade smoked bacon

Now cover every area of the pork belly with your rub.  Place the rubbed pork belly in either a 13×9 baking dish covered with plastic wrap or in a storage bag.  I prefer the jumbo size bags.  Just be sure to remove all the air from the bag before sealing.

Place the belly in the refrigerator.  Now starts the curing process.  As it cures, the meat releases liquid.  You’ll need to flip the meat every other day to ensure the cure is evenly distributed.  Begin checking after 7 days if the belly is fully cured.  You’ll know the pork belly is ready to be smoked when the meat feels firm to the touch but is still pliable.  Rinse the pork belly under cold water to remove any excess cure or the outcome will be too salty.  We are ready to smoke!

Make It Smoke!

Even if you don’t own a traditional smoker, you can still smoke the pork belly. Here’s the technique:

Charcoal Grill:

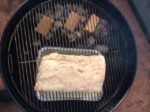
You will set up the charcoal grill using a two-zone cooking method.  Start by loading about 3 lbs. of briquets or hardwood charcoal on one side of the charcoal fuel area.   Place a water pan filled with water about 2-inches deep on the non-charcoal side. Then fill a chimney starter ½ full of briquets or hardwood charcoal.  Lite and allow to burn to hot coals, then pour the hot coals over the top of the unlit charcoal in your charcoal grill.  Add a couple of hardwood chunk pieces to the hot coals and allow to start smoking before you add the pork belly.  Once the chunks are smoking, place the cured pork belly on the unlit side of the grate fat side up.  Put the lid on and allow to smoke for about an hour without disturbing.  Keep in mind, your intake vent should be open ½ way as well as the outtake vent at ½.  A 3lb. pork belly will take about 1-1/2 to 2 hours to reach 150°F internal temperature.  By using both hot and cold charcoal, you should not need to replenish the coal bed, just may need to add another chunk or two of hardwood.

Our Pork Belly on the charcoal grill for our homemade smoked bacon

Gas Grill:

Place a smoker box of small wood chunks directly on your heat shield or on the grill grate.  Turn on only ½ the burners on your gas/LP grill and set to medium temperature setting.  Place a small pan of water on the warming grate to keep a moisture rich environment during the cooking process.  Allow the grill to reach 225°F and to have the wood chunks begin smoking.  Place the cured pork belly fat side up on the unlit side of the grill.  Allow the pork belly to cook until it reaches an internal temperature of 150°F.  Replenish the wood chunks in the smoker box as needed.

Traditional Smoker:

Set up your smoker as normal targeting a 225°F cooking temperature.  Be sure to include a water pan if your smoker doesn’t include one (a disposable foil pan works great).  Again, use 2-3 hardwood wood chunks for the flavor.  Place the pork belly fat side up and cook until the internal temperature reaches 150°F.

Ready to Eat!

Once the pork belly has reached 150°F internal temperature, it is ready to eat as it is fully cooked!  Remember, smoke has an antimicrobial quality which helps to make this consumable at this temperature level.  I recommend you allow the bacon to cool to room temperature on a wire rack set over a sheet pan.  Then wrap in plastic wrap and refrigerate for at least 4 hours.  This will set all those great flavors.

By slicing it paper thin, you can consume this cold and enjoy a more prominent smoke flavor.  However, you may pan fry this like traditional store-bought bacon or oven cook this on a rack over a foiled lined sheet pan for those who prefer a healthier, more rendered fat version.   This method also allows you to do a lot more bacon at one time then pan frying allows.  

Refrigerated homemade bacon will last 5-7 days while frozen will keep for several months.  Once you sample your own homemade smoked bacon, you’ll never purchase prepackaged again! 

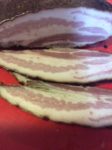
Our finished homemade smoked bacon sliced

 What’s your favorite method of smoking bacon?  Leave us a comment to opine and subscribe to get all our postings on tips, techniques and recipes.  Bringing innovation to wood fired cooking with recipes, techniques and the science behind the fire, smoke, and flavor. That’s SmokinLicious®.

Thursday, December 3, 2020

SMOKEY SWEET POTATO AND CHIPOTLE SOUP

We smoked the Sweet potatoes first for our Smokey Sweet Potato and Chipotle Soup recipe
Smokey Sweet Potato and Chipotle Soup is wonderful on cold day!

Let’s make Smokey Sweet Potato and Chipotle soup with our Smoked Sweet Potatoes!

You did it!  You stepped outside the norm and you smoked sweet potatoes.  Congratulations!  You now have a flavor level to a root vegetable that can only be achieved from wood smoke infusion.  Now, what do you make with this flavorful root vegetable?

Why not start with our easy, flavorful soup featuring a kick of spice to balance the creamy sweetness of the potatoes.  You’ll need about 5 medium sized sweet potatoes that have been smoked and tenderized.  You can visit our previous article on smoking sweet potatoes which includes directive on the gas grill as well as the charcoal grill application.

Get your smoked sweet potatoes to the kitchen as we start the makings of a great soup you’ll treasure any time of the year.

Fresh off the smoker our Sweet potatoes are ready for Smokey Sweet Potato and Chipotle Soup

#smokedSweetpotato

Prep Time

When you smoke sweet potatoes with the skin on, you’ll find versatility for your recipes.  For our soup, simply peel the skin away and slice each potato in half lengthwise, then cut into cubes.  You’ll need about 2 lbs. total of cubed, smoked sweet potato which will be 4-5 whole smoked potatoes, dependent on the size.

Chop one medium white onion and preheat a tablespoon of oil in a medium saucepan.  Add the chopped onion, some salt and fresh ground pepper and allow to cook until brown around the edges.

Sweeting down the onions and spices for the Smokey Sweet Potato and Chipotle Soup

#onion#saucepan

Once the onions have begun to brown, it’s time to spice things up.  Start by adding 2 teaspoons of ground cumin and 2 garlic cloves that have been minced to the onion mixture.  Stir to combine.  Now add 7 cups of low sodium chicken broth and 1 chopped chipotle chile in adobo sauce.  Allow these flavors to cook and marry for 15 minutes.

Blending to a Silky Finish

Whenever you make a smooth soup, you start with a softened main ingredient and then add a liquid base to it in stages.  That means start adding your cubes smoked sweet potatoes into the blender container until filled about ½ way.  Begin blending the potatoes.

Our Smoked Sweet potatoes in the blending ready to be liquified into Smokey Sweet potatoe and Chipotle Soup

#sweetpotato

Add a ladle full of the broth mixture and begin processing again.  If you have a blender equipped with a lid that has a pour opening, you can simply ladle in additional liquid base to reach the desired consistency of the soup.  I like mine to be about the consistency of a smoothie but you can alter the finish thickness by simply adding chicken broth.  Do the pureeing process in batches, returning each batch to a soup pot for a final heating.  I’ve done my puree process in three batches.

Once the finished puree is reheated, you’re done!  The sweetness of the potatoes and the slight kick of the chile combine so well to produce a balanced, silky texture and flavor.  Once ladled into a serving bowl, add a touch of sour cream or cream fraiche for a final swirl of perfection.

We are adding the Creme Fraiche to our Smokey Sweet Potato and Chipotle Soup

#cremefraiche

Honestly, this is one soup that could be enjoyed cold as well as hot, it’s that delicious either way.  Smoked sweet potato and chipotle soup.  Surely a favorite to make during fall but a cold cellar storage will help you enjoy for the whole year!

What’s your favorite recipe featuring sweet potatoes?  Leave us a comment and subscribe for more great recipes, techniques, tips, and the science behind the flavor, that’s SmokinLicious®.


Did you love this recipe?  Then please, share it!

Thursday, November 26, 2020

ADDING A SMOKE COMPONENT TO SMOKEY SWEET POTATOES

Try our technique on Smokey Sweet Potatoes for a great addition to your BBQ!


We introduced you to smoked potatoes some time ago giving you an easy method of smoking cubed potatoes .  Now, we look at sweet potato, a very popular root vegetable that does particularly well on the grill.  This time, we’ll smoke the potatoes whole to allow for versatility for recipes.

Get 5 or 6 sweet potatoes selected, preferably of equal size, and let’s get to the grill!

Choose Your Equipment

I’m going to use two pieces of equipment today to demonstrate how easily it is to work with what you own to add a smoke component

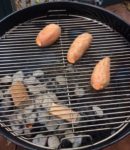
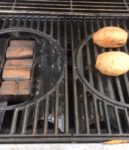
For my gas grill, I’ll be using a smoker box equipped with 3-4 wood chunks in double filet size.  For the charcoal grill, I’m incorporating both lump charcoal and briquet for the fuel and adding double filet wood chunks for flavor.  My charcoal grill is a traditional kettle grill.  Both these units are set up for two-zone cooking which means the fuel is on one side – in the case of the gas grill, burners are lit on one side only, for the charcoal grill, charcoal is banked to one side of the grill, using both lit and unlit coals to sustain the heat level.  All cooking will be done on the side that does not have any direct heat.

Our Smokinlicious wood chunks on the coals providing great smokey flavor for these smokey Sweet Potatoes
#woodchunks

With a target cooking temperature of 325-350°F, these sweet potatoes will cook up and get smoky in no time!

Tasting Notes: Preparation of the sweet potatoes prior to smoking is simple.  Wash the potatoes well, pat dry, and then trim off the two ends.  Using a knife, pierce the ends one time and the sides several times to provide injection areas for the smoke vapor.  This will ensure an even smoke flavor.

No Work Grilling & Smoking Smokey Sweet Potatoes

Once the grill of your choice is set up, it’s just a matter of placing the whole potatoes on the grill grate, indirect side, and allowing them to tenderize.  This will take about 75 minutes total.  There is no need to do any rotation of the potatoes; just allow to infuse with flavor. 

Our double filet wood chunks in the smoker box on the gas grill providing the flavor for our smokey sweet potatoes
#twozonecooking

If you’ve followed our recommendation for the charcoal grill – placing unlit charcoal/briquets on the direct side of the grill, lighting a chimney starter of charcoal, and pouring over the unlit coals when glowing hot, then adding the wood chunks – you’ll have plenty of fuel for the entire cook time.

Once tender, remove from the grill and set aside to use in your favorite sweet potato recipe.  I’ll be making a smoked sweet potato and chipotle soup with mine, which we will post the recipe soon.

One important point is to know that the boldness of the smoke will be much greater from a charcoal grill than a gas/LP unit.  You can see the difference on the skin of the potatoes that I’ve grilled today.  Nevertheless, grilled and smoked sweet potatoes are full of sweet, smoky flavor you’ll want to enjoy all year long.

What’s your favorite sweet potato recipe?  Leave us a comment to opine and subscribe to get all our postings on tips, techniques and recipes.  Bringing innovation to wood fired cooking with recipes, techniques and the science behind the fire, smoke, and flavor. That’s SmokinLicious®.


Thursday, November 19, 2020

GRAPE FLATBREAD SAVORY MEETS SWEET WITH A TOUCH OF LIVE FIRE

Our Delicious Smoked Grape Flatbread with Brie and a little fresh Rosemary

Smoked Grape Flatbread-  Even if you aren’t the biggest fan of Concord Grapes, this recipe completely changes the flavor of this variety of grape to produce a very pleasing outcome.  I’ve gone to my own personal grapevines and selected grapes at their peak for a flatbread recipe that is super easy and scrumptious.  It all starts with the grapes so go to your own vines, a neighbor’s, a farmer’s market or fresh market, and pick up a quart or two to bring to the grill for wood flavor infusion to make the ultimate in flatbread.  Remember, any grape you find will work for this recipe, so go ahead and pick your favorite.

Grape Prep & Wood Infusion

The first steps to our recipe are related to the grapes.  I’ve visited my grapevines and selected grapes that our deep purple and firm.  Bringing them to the kitchen, I remove them from the vine, ensuring all stems are out, rinse under cold water and pat dry with a paper towel.  I’ve started my grill by lighting only one burner.  To that side, I’ve prepared a metal smoker box with wood chunks.  My grill needs to heat up to 250-275°F.  While it’s heating, I prepare a sheet pan with a single layer of clean grapes.  Then we’re ready to add wood flavor.

Two zone cooking on a grill or smoker is the easiest since the temperature will remain steady and you won’t need to constantly watch the grill.  After achieving a 250°F temperature, I place the sheet pan of prepared grapes on the unlit side of the grates.  The smoker box of chunks should be releasing a consistent smoke at this stage. Put the lid down and allow the grapes to infuse for about 20 minutes.  I then return to the grill and rotate the pan, lid down again, and allow to smoke for an additional 10-15 minutes.

Tasting Notes: There is no rule regarding the type of wood you should use for the smoking.  Just be sure it is only hardwood and not a completely dried out piece of wood or you’ll find it will burn up almost immediately.  Remember, you want smoke not flames from the wood.  Positioning as close to the burner as you can get is best for the placement of the smoker box.

Dough Time

With the grapes smoking on the grill, I’m going to starting the dough for the flatbread.

Taking 2 cups of unbleached bread flour, I add it to a stand mixer bowl with a ½ teaspoon of kosher salt, whisking together.  In a measuring cup, I place 1 cup of warm water that is between 110-115°F.  I sprinkle into the water 1-1/2 teaspoons active dry yeast and wait 5 minutes for it to bloom.  Fitting my stand mixer with a dough hook, I start the mixer on low speed and gradually add in the bloomed water/yeast mixture from the measuring cup.  Turning up the speed on the mixer, I continue to knead the dough until it begins to ride up the dough hook, pulling away from sides of the bowl.

Taking a large bowl, I add 1 tablespoon of olive oil to the bottom and place some bread flour on a clean work surface to roll the dough out.

Removing the flatbread dough from the mixer bowl, I place the dough on the floured surface and begin to hand knead the dough into a ball.  I place the ball of dough into the oiled bowl, rolling the dough in the oil and up the sides of the bowl to ensure everything is nonstick.  Place the dough in the bottom of the oiled bowl, cover with a towel and place in a warm place to rise until double in size which will take about an hour.  Once risen, prepare a sheet pan with two tablespoons of oil, coating the pan’s surface with the oil using your fingers.  The oil will ensure the bottom of the flatbread crisps while cooking.

Simple Fresh Ingredients

Punch the dough down and place on the oiled sheet pan, stretching the dough out on the pan until it almost touches the sides.  Time for the fresh ingredients.  Start by slicing then tearing into pieces Brie cheese, placing over the top of the flatbread dough.  Sprinkle with fresh rosemary leaves.  Press the smoked grapes into the dough’s surface until all three ingredients cover most every spot of the dough.  Cover the dough with a cloth and allow the flatbread to rise a second time for another 20 minutes.  Then bake at 400°F until the cheese is bubbly and the bread surface is golden brown.  Remember, the grill works great for the flatbread cooking as well and for additional wood-fired flavor, use wood chunks at this stage as well.

Tasting Notes: Feel free to use other seasonal fruits and even vegetables from the wood-fired grill for this recipe.  Swap out the herb and cheese based on the main ingredient and you’ll have a versatile recipe for any seasonal food.

What’s your favorite flatbread recipe and featured flatbread item?  Leave us a comment to opine and subscribe to get all our postings on tips, techniques and recipes.  Bringing innovation to wood fired cooking with recipes, techniques and the science behind the fire, smoke, and flavor. That’s SmokinLicious®.

Love this post?  Then please share!


Thursday, November 12, 2020

SMOKED PEACH RELISH-PERFECT FOR SEAFOOD

Our perfect Smoked Peach Relish which is perfectly paired with Shrimp for a tasty dish!

Peach season!  One that lends so many different options to your food experience.  Whether consumed raw or used in entrees or desserts, I aim to bring another flavor level to this much anticipated seasonal fruit by adding wood-fired flavoring.  Then I’ll take these flavorful peach halves and introduce you to a peach relish that is perfect for topping fish and seafood.

Visit your favorite farm stand, fresh market, or your own peach tree and pick three firm, fresh peaches and bring them to the kitchen for preparation before hitting the wood-fired grill.  Oh, and we have plans for additional recipes with smoked peaches so do some extras while you have the grill or smoker going.

Easy Prep for the Grill or Smoker

Skinning our freshly harvested peaches

Although yellow is the most common peach available, know that there is a white variety as well.  Both have easy to remove pits that make them easy to prepare for your favorite recipes.

Start by peeling the skin from the peaches, you’ll need 3 for this recipe, though I’m doing a full sheet pan for additional recipes.  Once peeled, using a paring knife, slice thru the center of the peach along the pit.  Gently separate into two halves then remove the pit.  Place the pitted and peeled peach half cut side down on a sheet pan.  Continue with the remaining peaches.  I’ll be using my gas grill set up with a smoker box of wood chunks to bring a smoky flavor to the fruit.  I’ve placed my smoker box directly on my heat diffuser to get the wood hot and smoldering quickly.  My pan of peach halves is placed on the unlit side of the grill.  Lid down on the grill and allow these peaches to tenderize slightly and infuse the smoke flavor.  I’ll check on them in about 15 minutes.

our tray of smoked peaches on the gas grill using a two zone cooking method to add wood smoke flavor.

  Tasting Notes: Keep in mind, flavors from wood on a gas grill will not be as intense as those on a charcoal unit.  Keep this in mind when you select the equipment to infuse the smoke flavor into the peaches.

Relish Ingredients for Smoked Peach Relish

Adding our wet ingredients to the pepper mix

While the peaches are absorbing all that great hardwood flavor on the grill, let’s get started on the base for our peach relish.  To begin, I’ll get my mortar although you can also use a mini food processor.  Place one minced garlic clove into the mortar.  Add one chili pepper (serrano, jalapeno, & Hungarian make good choices) that has been seeded and minced.  To that, add 2 tablespoons of light brown sugar.  Using your pestle or the processor, pound or pulse until a paste is formed.  Remember, fresh ingredients will make for the best relish flavors.

With the base paste made to our peach relish, it’s time to add the liquids to balance the spicy and sweet flavors.  Start by adding 2 tablespoons of water, 2 tablespoons of lime juice and 3 tablespoons of oyster sauce.  Transfer the relish base to a large bowl.  Now return to the grill and remove the peach halves.  These should be browned from the smoke infusion.  Remove 6 halves and dice each.  Add them to the bowl with the base.  Let’s get ready for the final flavors.

The Ultimate Relish Flavors

Adding fresh herbs added to our rice

The final flavors are the fresh herbs that need to be added right before serving.  This includes ¼ cup of fresh, chopped cilantro and 2 tablespoons of fresh mint.  As peaches tends to be a delicate fruit meat, it’s important to gently mix everything together; don’t over combine.  Serve immediately with your favorite fish or seafood.   In fact, this is even great with just some toasted bread.  I’ve served mine today with brown rice and simple seasoned shrimp with a side of yellow waxed beans. Delicate yet full of balanced flavors that will surprise you coming from a smoked fruit.

What’s your favorite recipe using smoked or grill peaches?  Leave us a comment to opine and subscribe to get all our postings on tips, techniques and recipes.  Bringing innovation to wood fired cooking with recipes, techniques and the science behind the fire, smoke, and flavor. That’s SmokinLicious®.


Thursday, November 5, 2020

MARINATING: THE MYTHS AND TRUTHS TO GUIDE YOU

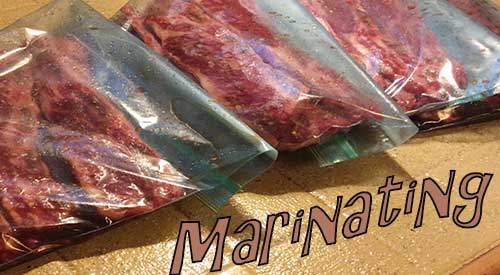
Marinating our Riblets
Marinating our Riblets in Zip Lock bag

 Marinating-At one time or another, I’m sure you’ve either purchased a prepared marinade or constructed your own to use with some type of animal protein.  Likely, your goal was to either add flavor or to tenderize or both.  But, let me ask you: do you really know what marinades do for specific foods and do you know how to use them?

My intention is to debunk the myths, get at the truth of what marinades can do and provide a guide on marinade amounts and ideal marinating times for specific foods.

Let’s get started!

PART I: Myth to Truth

How Deep Do Marinades Go?

One of my favorite myths is that of the depth that marinades penetrate in meat.  The tale is that once a meat is exposed to a marinade, it will get completely thru but this is far from the truth.

Marinades are a surface to few millimeters below surface benefit no matter what the content of the soaking liquid.  The oil, herbs, seasonings and spices only add flavor to the exterior of the food with no ingredient ever penetrating to the center of the meat.

Are Bottled Dressings a Marinade?

We all look for ways to cut corners and one of the myths out there is that bottled dressings work just fine as a substitute marinade.  The truth, however, is bottled dressings have high levels of acidity which when exposed to meat protein tend to break down the meat molecules too far resulting in a mushy texture.  Additionally, bottled dressings are loaded with unwanted ingredients like sweeteners (sugar), gums, and stabilizers and lack ingredients that give any real flavor.

How Long Should You Marinate Meat?

As mentioned above, since marinades don’t penetrate deeply into meat, a longer marinating time doesn’t mean more tender or flavorful meat.  In fact, the opposite becomes true.  Marinating too long will allow the protein bonds in the meat to weaken resulting in a mushy exterior which can prevent the meat from holding on to moisture.  That means you end up with a dry piece of meat.

Doesn’t the Acid in a Marinade Tenderize Meat?

When you’re looking to tenderize meat what you are really doing is breaking down connective tissue in the meat which is what produces tough cuts. Connective tissue is made up of collagen and fiber which can be weakened by an acidic ingredient like vinegar, wine, citrus juice, etc.  The problem again is this affect is surface only and cannot penetrate to the core of the meat.  Best advise is to use these ingredients sparingly and for shorter marinating times.

Can You Use a Marinade on Any Meat?

Since you’ve learned that marinades benefit the surface of the meat only, it is best for them to be used with thinner cuts of meat, like chicken breasts, cutlets, chunked meats, steak, and chops.  Larger cuts of meat do best with a wet rub or spice paste.

PART II: Marinating Tips for High Flavor and Juiciness

Tip #1 Flavorings and Seasonings: Use a lot of these ingredients in marinades and be sure to watch the salt or it will inhibit the absorption of other herbs, spices, and seasonings.

Tip #2 Score the Meat: To achieve as much penetration as possible, score the meat’s surface with a knife or prick the surface with a fork.

Tip #3 Reactivating the Marinade: I personally like to marinate in a storage bag but you can use chaffing dishes or other similar large baking dishes covered with plastic wrap.  When using a storage bag, ensure that all the air is out of the bag before sealing.  Halfway through the marinating time, flip the storage bag or stir the meat in a dish to ensure everything is getting even soaking time.

Tip #4 Refrigeration: One risk with marinating is the development of microorganisms since you are dealing with raw meat.  You can reduce this risk but getting your marinated meat in the refrigerator as quickly as possible to avoid the temperature danger zone of 40-140°F when bacteria can spread rapidly.

Tip #5 Wipe Off Excess and Discard Leftover: Remember, you’ve just marinated raw meat so never keep used marinade.  It needs to be discarded immediately.  If you feel you want to offer some of the marinade to go on the cooked food, simply keep a small amount separate from the marinating meat.  Also, so you don’t get excessive flare-up on the grill, wipe off excess marinade from the meat before grilling.

PART III: Can you Marinate too long?

Guide to Marinating Foods

This guide is intended to provide a starting point for specific foods on the quantity of marinade needed and the timing of the marinating process.

Smokinlicious marinating table, providing marinating time by food tryupe
Smokinlicious marinating table

By following these tips and guidelines, you’ll be sure to keep your foods moist, flavorful and promote a great mouth-food experience texture-wise.

Do you have favorite marinade ingredients?  Leave us a comment to opine.  Making you an informed consumer through valuable articles like this one.   Leave us a comment and follow us or subscribe for more great recipes, techniques, tips, and the science behind the flavor and fire.  That’s SmokinLicious®.

Thursday, October 29, 2020

UPSIDE DOWN CAKE WITH SMOKED PEACHES

Our Cast Iron pan on the gas grill with double filet wood chunks flavoring our smoked peaches into the upside down cake!

Hopefully, you enjoyed our previous segment on adding smoke flavor to seasonal peaches.  We sure have had fun providing you with different techniques to add the natural flavor of wood. Now is the fun part where you take those smoked fruit pieces and turn them into something great.

I’m going to introduce you to a super flavorful and balanced peach cake done in the style of the traditional pineapple upside down cake – only with peaches!  For this recipe you’ll need three peaches but don’t waste the perfect time to do some extras so you can make all our great smoked peach recipes.

 Skillet Cooking

Our cast Iron pan on the grill

Be sure you follow our posting on how to smoke peaches on a grill with wood or on a traditional smoker.  Our cake recipe starts with 3 tablespoons of butter.  Melt the butter and coat a cast iron skillet with it.  Be sure to get the butter up the sides of the pan as this will be the non-stick guarantee for removing the cake.  Place a ¼ cup of sugar evenly on the bottom of the pan and allow to brown for about 3 minutes.  While the sugar is browning, slice the peach halves into ¾-inch thick slices.  Once the butter/sugar mixture is ready, arrange the peaches around the edge of the pan on top of the sugar.  Then fill the center of the pan with the remaining peach slices.  Cook just for a few minutes until the peaches are sweetened by the butter and sugar mixture.  Remove the skillet from the heat.  Now, time to prepare the cake batter.

 Tasting Notes: Keep in mind, we will be cooking the cake on the grill which means you must use a high heat tolerant cookware.  Cast iron is ideal for this purpose but feel free to use another piece of cookware that will tolerate a grill or smokers heat.

Our upside down cake on the wood fired grill set up for a two zone cooking method.

Upside Down Cake Batter

Our dry ingredients ready to become the dough

The cake batter starts with the dry ingredients.  You’ll need a medium bowl for these ingredients.  Start by whisking 1 cup of coarse yellow cornmeal with ¾ cup all-purpose flour.  Keep in mind, you can use polenta if you prefer.  Add 1 teaspoon baking powder, 2 teaspoons chopped fresh lavender or 1-1/2 teaspoons of dried lavender, and 1 teaspoon salt in a medium bowl.  Mix well and set aside.  Next, we’ll work on the wet ingredients for our batter.

It’s important to mix the wet ingredients separate from the dry to ensure each ingredient is mixed well.  Start by getting a large bowl.  Add 6 tablespoons of softened butter and ¾ cup sugar to the bowl.  With a hand mixer, beat the sugar and butter until pale and fluffy.  Get 3 large eggs and add one egg to the batter at a time, beating well after each addition.  The batter will slowly become thinner.  Mix in ½ teaspoon vanilla extract and ½ cup heavy cream.  Now, taking the medium bowl of cornmeal mixture, add ½ the dry cornmeal mixture to the large bowl of wet ingredients.  Be sure to use a low setting on the mixer and scrap down the sides of the bowl to get a complete mix.  With the batter ready, we’ll be adding batter to our cast iron pan loaded with peaches.

A Beautiful Finish

Our upside down cake baking in the cast iron pan on the gas grill

What’s great about making cakes in a cast iron pan is generally, the batter is dropped into the pan rather than poured.  Using a large spoon, drop the prepared batter over the peaches and spread with a spatula.  Time to add flavor to the entire cake by cooking it on the grill with wood chunks in a smoker box.

Cook until a tester inserted in the center comes out clean; this should be 20-25 minutes with a steady grill temperature of 350°F.  Transfer the skillet to a wire rack and let stand for 10 minutes.  Run a knife or spatula around the edge of the cake and invert onto a serving platter.  Tap the bottom of the skillet to release the cake and remove the skillet slowly.  Let cool slightly, then serve.

Although this is a sweet cake, I like to add a bit of unsweetened freshly whipped heavy cream.  Feel free to change the fruit in the cake to something else that is in season like plums, strawberries, blueberries – you get the picture.  For all you camp cooking lovers, this is one to try at the camp as well.  Just gather some hot coals and place your cast iron near those coals and you’re on your way!

What’s your favorite iron skillet dessert?  Leave us a comment to opine and subscribe to get all our postings on tips, techniques and recipes.  Bringing innovation to wood fired cooking with recipes, techniques and the science behind the fire, smoke, and flavor. That’s SmokinLicious®.

Thursday, October 22, 2020

Coffee Smoked Foods: A New Flavor Craze

Guest Blog- Kylee Harris on Coffee Smoked Foods!

Kylee Harris on Coffee Smoked Foods– At one point, all foods had an element of smoke; everything was cooked over an open fire before gas and electric stoves came about. It’s thought that the smell and imparted taste of smoke is programmed into mankind as a result, which is why smoked foods are popular all over the globe. Meat, seafood, and even smoky desserts like fruit pies, are still flavored with a variety of wood smoke. Recently, professional and home cooks alike have begun to wonder about the hidden potential of another thing close to their hearts: coffee. Smoking food with a combination of wood and coffee beans could be the next big taste revolution.

Coffee Varieties for Smoking Foods

Just as there is a variety of options when it comes to smoking food with wood, there are a few choices in coffee as well. For flavor profile, darker and richer bean varieties pair best with red meat, while more mild varieties are better sampled with poultry and seafood. There’s also the question of regular or decaffeinated types of coffee. No, smoking with coffee won’t caffeinate your food (though wouldn’t that be interesting), but there can be a difference in flavor here as well. Regular has a higher level of acidity and thus bitterness, while decaf is less so. Rule of thumb: if you like the bitter tang of a certain coffee, then you will probably like the flavors it lends to smoked food.

Beans, Grounds, and Pellets

Of course, flavor is one thing- this is open to individual tastes- but what about what works best for the actual smoking process? Ground coffee is great as a marinade or rub for meat, but it burns up too quickly to be very useful for smoking. Coffee beans are better for the process, as they can burn more slowly. A combination of wood chips with coffee beans (a 3:1 ratio) is a good balance, allowing the coffee beans to add their subtle flavors without becoming too smoky and overpowering. There’s also the option of coffee pellets, which are coffee grounds and saw dust pressed into compact pellets used as a fuel for both cooking and heating. These are said to have a much more subtle flavor when used for cooking and work particularly well, according to fans, for flavoring smoked corned beef.

Pre-Roasted Versus Green Coffee Beans

While both grounds and pellets have their place, most people prefer smoking food with whole coffee beans, which then poses the question: raw and green, or already roasted? The answer really depends on personal preference, once again. Green coffee beans will give off much more smoke, which can be a good thing if that’s the flavor you’d like to try. Pre roasted, on the other hand, will smoke less, but may need to be soaked in water first in order to be able to smolder for a longer time to produce a sustained smoking processes. 

As you can see, there are quite a few choices you can make to customize your coffee-smoked food experience. Experimenting with flavors and methods is what really makes cooking the art form that it so clearly is. The options are plentiful, and the vision (or taste, as it is) is all up to you.

Thursday, October 15, 2020

SPATCHCOCK CHICKEN IS THE WAY TO MOISTURE & HARDWOOD FOR FLAVOR

Our Cooked Spatcock Chicken with Fresh Curry
Our Cooked Spatchcock Chicken with Fresh Curry

Spatchcock Chicken– One of the questions I field the most is how do you keep chicken moist when you grill?

Today’s feature is intended to answer that question with both method of preparation to allow the chicken to cook evenly and method of wood firing to get exceptional wood flavoring yet be able to walk away from the grill.  I’ll be offering my version of spatchcock chicken with a curry flavor cooked two-zone set up on a gas grill.  Once you try this method of cooking, you’ll want to grill chicken this way all the time, even during the coldest months of the year.  And it will come out perfectly moist and cooked evenly every time.

Go pick up your ideal whole chicken, preferably fresh, and let’s learn the simplest method of cooking and flavoring whole chicken.

Flatten to Even Cooking

The chicken needs to be flatten, so some knife skills will be required

Spatchcocking, by definition, is the removal of the backbone in a chicken so you can flatten it for cooking.  This ensures an even cooking of dark and white meat in the bird, while also guaranteeing moisture is maintained.

To start, you’ll need a whole chicken with the organs and neck removed.  Turn the chicken so the breast is down on the cutting board.  Locate the backbone and cut along one side of the bone with kitchen shears.  Then cut along the other side until the entire backbone is removed.  Turn the chicken back around so the breast is facing up.

With the backbone removed, I prepare a sheet pan lined with foil for cooking.  I place the palm of my hand on the breastbone of the chicken and push downward to break the cartilage.  The chicken will now lie completely flat.  I remove the chicken from the cutting board and place on my prepared sheet pan breast side up.  Be sure to wash all cutting tools and boards at this stage to remove any contamination of the raw poultry.  Let’s get ready to make our curry sauce for the spatchcock chicken.

Tasting Notes: If fresh whole chicken is not available, you may substitute frozen whole chicken.  Just be sure it is completely defrosted and pat dried before starting this recipe.

 Curry Sauce & Wood Infusion

Fresh curry from our garden

Although I’m referring to this as a Curry Chicken recipe, note this is not a recipe that cooks for hours like a traditional Indian Curry.  It is fast but highly flavorful.  It all starts with 1 stick of butter melted in a saucepan over medium heat.  To that I add about 2-3 tablespoons of curry powder.  Then 3 tablespoons of Dijon mustard and 3 tablespoons of honey.  Whisk until well combined ensuring the butter does not separate.  I then remove from the heat and grind fresh black pepper into the mix.  I also have fresh curry on hand that I will be topping my sauced chicken with for added fresh curry flavor.

Time to take our great sauce and begin coating our spatchcocked chicken.  Using a basting brush, add a liberal amount of sauce to the entire chicken, ensuring you get under the wings and legs.  Be sure all crevices are coated.  Then top with fresh curry leaves.  While I’m completing the sauce step, I’ve been preheating my grill to 300°F using burners on only one side of the grill.  On that hot side, I’ve added a smoker box that contains four wood chunks.  I’ve used a combination of hardwoods including cherry, maple and ash.  With the grill hot and the wood chunks smoking, it’s time to grill!

Tasting Notes: Fresh curry can be difficult to find so feel free to eliminate this step if it’s not available.  Remember, when two-zone cooking on a grill, the total number of burners will determine how many to turn on.  If the unit is only a three burner, just turn one burner on.  For a four-burner grill, turn on just two burners.

Ready in a Flash!

With our prepared spatchcock curry chicken readied, the sheet pan is added to the grill and the lid is closed.  I leave this to cook on its own for about an hour before returning to rotate the pan and coat on some additional sauce.  I also change out the wood chunks as you’ll find that they have completely charred, which means they no longer are giving off smoke flavor.  I only add 2 new wood chunks to finish the grilling.  Another 20-30 minutes and this should be cooked to 165°F internal temperature.   I then remove from the grill and begin carving.

Our finished curry chicken from the grill

I remove the leg quarters first, then the wings.  Then I slice the breast meat and serve everything on a platter.  You’ll find a small amount of meat will clings and become pulled chicken.  That’s it!  I like to serve mine with rice using the residual juices as flavor for the rice.  This is absolutely a full proof way to get moist flavorful chicken from the grill in a relatively short period of time.

What’s your favorite spatchcock chicken recipe?  Leave us a comment to opine and subscribe to get all our postings on tips, techniques and recipes.  Bringing innovation to wood fired cooking with recipes, techniques and the science behind the fire, smoke, and flavor. That’s SmokinLicious®.

Thursday, October 8, 2020

HOW SEASONS AND EQUILIBRIUM MOISTURE CONTENT AFFECT WOOD STORAGE

The four season has an affect on wood storage and its cooking or smoking potential

Wood Storage-I recently had a lovely telephone conversation with a new customer who had previously lived in the Carolinas and now was dealing with the great variability of climate in the state of Colorado.  This customer had the fortitude to think about the altitude, humidity and temperature differences in Colorado and how they might affect hardwood purchased from us and stored in his new home state.

This got me thinking about the information we currently offer regarding hardwoods.  We’ve provided you with information on differences of hardwoods and which are ideal for cooking, on why moisture is important for certain methods of cooking, and how to store hardwood.  I think what’s missing is maintaining the stability of hardwoods in different climates.  To do this, you need to know Equilibrium Moisture Content (EMC) for each state and for each season.

Let me first state some facts about hardwood and wood storage. 

The Ideals for Wood Storage

Wood at or above the fiber saturation point – which I define as the point in the drying process when only bound water in the cell walls remain with all free water removed from cell cavities -will lose moisture when exposed to any relative humidity below 100 percent. The average fiber saturation point is 26%. 

Totally dry (oven dried) wood will absorb moisture when exposed to any relative humidity except when at zero. At a constantly maintained temperature and relative humidity, any wood will reach a point where it neither loses nor gains any moisture. When wood is in moisture balance with the relative humidity of the air surrounding it at a given temperature, the wood has reached its equilibrium moisture content (EMC). Put another way, in an environment maintained at a constant relative humidity and temperature, the wood will come to a moisture content that is in equilibrium with the moisture of the air.  I believe the ideals for relative humidity are 37 to 53% and temperature 66° to 74° F.  Keep in mind, relative humidity is much more important to EMC than temperature.

Why is knowing EMC important when it comes to hardwood or in this case, cooking hardwood?

Knowing this information can provide an indication of how fast the cooking wood might dry out or the likelihood that a wood might regain some moisture during specific seasons and in specific states in the USA.

EMC Averages in the USA for Wood Storage

There are five designations I am giving to the outdoor conditions for wood storage: arid (having little or no rain), dry (low relative humidity with little moisture), moist (air with high relative humidity), damp (air with moisture), and wet (air with high water vapor).  As you’ll see, some states have no variation in condition based on season and others see significant variation.  I’ll be listing the average EMC for season and the condition designation per season.  Keep in mind, each hardwood responds to these conditions slightly differently based on the density of the wood and the conditions it grows in.

  • Alaska:

Winter: average EMC = 13.9; Designation = Wet

Spring: average EMC = 12.9; Designation = Wet

Summer: average EMC = 14.6; Designation = Wet

Fall: average EMC = 15.6; Designation = Wet

  • Alabama:

Winter: average EMC = 13.6; Designation = Damp

Spring: average EMC = 13; Designation = Damp

Summer: average EMC = 13.8; Designation = Damp

Fall: average EMC = 13.6; Designation = Damp

  • Arkansas:

Winter: average EMC = 13.6; Designation = Damp

Spring: average EMC = 13; Designation = Damp

Summer: average EMC = 13.3; Designation = Damp

Fall: average EMC = 13.4; Designation = Damp

  • Arizona:

Winter: average EMC = 9.8; Designation = Dry

Spring: average EMC = 7.2; Designation = Arid

Summer: average EMC = 7.9; Designation = Arid

Fall: average EMC = 8.4; Designation = Arid

  • California:

Winter: average EMC = 12.7; Designation = Wet

Spring: average EMC = 11; Designation = Moist

Summer: average EMC = 10; Designation = Dry

Fall: average EMC = 11.4; Designation = Dry

  • Colorado:

Winter: average EMC = 11; Designation = Wet

Spring: average EMC =8.9; Designation = Moist

Summer: average EMC = 8.6; Designation = Dry

Fall: average EMC = 9.4; Designation = Dry

  • Connecticut:

Winter: average EMC = 12.6; Designation = Wet

Spring: average EMC = 11.6; Designation = Moist

Summer: average EMC = 12.4; Designation = Dry

Fall: average EMC = 13; Designation = Dry

  • Delaware:

Winter: average EMC = 12.3; Designation = Wet

Spring: average EMC = 11.8; Designation = Moist

Summer: average EMC = 12.2; Designation = Dry

Fall: average EMC = 13.1; Designation = Dry

  • District of Columbia (DC):

Winter: average EMC = 11.9; Designation = Wet

Spring: average EMC = 11.8; Designation = Moist

Summer: average EMC = 12.2; Designation = Dry

Fall: average EMC = 12.8; Designation = Dry

  • Florida:

Winter: average EMC = 13.9; Designation = Wet

Spring: average EMC = 13; Designation = Moist

Summer: average EMC = 14.4; Designation = Dry

Fall: average EMC = 14.3; Designation = Dry

  • Georgia:

Winter: average EMC = 13; Designation = Wet

Spring: average EMC = 12.3; Designation = Moist

Summer: average EMC =13.2; Designation = Dry

Fall: average EMC = 13.5; Designation = Dry

  • Hawaii:

Winter: average EMC = 13.5; Designation = Wet

Spring: average EMC = 13; Designation = Moist

Summer: average EMC = 12.5; Designation = Dry

Fall: average EMC = 13; Designation = Dry

  • Idaho:

Winter: average EMC = 14.5; Designation = Wet

Spring: average EMC = 10.3; Designation = Moist

Summer: average EMC = 7.9; Designation = Dry

Fall: average EMC = 10.7; Designation = Dry

  • Illinois:

Winter: average EMC = 14.7; Designation = Wet

Spring: average EMC = 12.9; Designation = Moist

Summer: average EMC = 13.2; Designation = Dry

Fall: average EMC = 13.5; Designation = Dry

  • Indiana:

Winter: average EMC = 15.1; Designation = Wet

Spring: average EMC = 12.8; Designation = Moist

Summer: average EMC = 12.9; Designation = Dry

Fall: average EMC = 13.7; Designation = Dry

  • Iowa:

Winter: average EMC = 14.8; Designation = Wet

Spring: average EMC = 13.1; Designation = Moist

Summer: average EMC = 13.6; Designation = Dry

Fall: average EMC = 13.7; Designation = Dry

  • Kansas:

Winter: average EMC =13.2; Designation = Wet

Spring: average EMC = 12.3; Designation = Moist

Summer: average EMC = 12; Designation = Dry

Fall: average EMC = 12.2; Designation = Dry

  • Kentucky:

Winter: average EMC = 13.9; Designation = Wet

Spring: average EMC = 12.3; Designation = Moist

Summer: average EMC = 13.3; Designation = Dry

Fall: average EMC = 13.1; Designation = Dry

  • Louisiana:

Winter: average EMC = 14.5; Designation = Wet

Spring: average EMC = 13.9; Designation = Moist

Summer: average EMC = 14.4; Designation = Dry

Fall: average EMC = 13.9; Designation = Dry

  • Maine:

Winter: average EMC = 13.5; Designation = Wet

Spring: average EMC = 12.2; Designation = Moist

Summer: average EMC = 13.1; Designation = Dry

Fall: average EMC = 14.3; Designation = Dry

  • Maryland:

Winter: average EMC = 12.2; Designation = Wet

Spring: average EMC = 11.5; Designation = Moist

Summer: average EMC = 12.1; Designation = Dry

Fall: average EMC = 12.8; Designation = Dry

  • Massachusetts:

Winter: average EMC = 12.4; Designation = Wet

Spring: average EMC = 11.6; Designation = Moist

Summer: average EMC = 12.2; Designation = Dry

Fall: average EMC = 12.9; Designation = Dry

  • Michigan:

Winter: average EMC = 17.3; Designation = Wet

Spring: average EMC = 12.8; Designation = Moist

Summer: average EMC = 13.2; Designation = Dry

Fall: average EMC = 14.7; Designation = Dry

  • Minnesota:

Winter: average EMC = 14.7; Designation = Wet

Spring: average EMC = 12.8; Designation = Moist

Summer: average EMC = 13.6; Designation = Dry

Fall: average EMC = 14.4; Designation = Dry

  • Mississippi:

Winter: average EMC = 14.2; Designation = Wet

Spring: average EMC = 13.4; Designation = Moist

Summer: average EMC = 13.9; Designation = Dry

Fall: average EMC = 13.7; Designation = Dry

  • Missouri:

Winter: average EMC = 14; Designation = Wet

Spring: average EMC = 13; Designation = Moist

Summer: average EMC = 13.3; Designation = Dry

Fall: average EMC = 13.3; Designation = Dry

  • Montana:

Winter: average EMC = 13.8; Designation = Wet

Spring: average EMC = 10.9; Designation = Moist

Summer: average EMC = 9.4; Designation = Dry

Fall: average EMC = 11.4; Designation = Dry

  • Nebraska:

Winter: average EMC = 13.5; Designation = Wet

Spring: average EMC = 12.3; Designation = Moist

Summer: average EMC = 12.3; Designation = Dry

Fall: average EMC = 12.3; Designation = Dry

  • Nevada:

Winter: average EMC = 11.4; Designation = Wet

Spring: average EMC = 8.5; Designation = Moist

Summer: average EMC = 6.5; Designation = Dry

Fall: average EMC = 8.4; Designation = Dry

  • New Hampshire:

Winter: average EMC = 13; Designation = Wet

Spring: average EMC = 11.6; Designation = Moist

Summer: average EMC = 12.4; Designation = Dry

Fall: average EMC = 13.5; Designation = Dry

  • New Jersey:

Winter: average EMC = 12.5; Designation = Wet

Spring: average EMC = 11.5; Designation = Moist

Summer: average EMC = 12; Designation = Dry

Fall: average EMC = 12.8; Designation = Dry

  • New Mexico:

Winter: average EMC = 9.7; Designation = Wet

Spring: average EMC = 6.8; Designation = Moist

Summer: average EMC = 8.5; Designation = Dry

Fall: average EMC = 9.2; Designation = Dry

  • New York:

Winter: average EMC = 13.9; Designation = Wet

Spring: average EMC = 11.6; Designation = Moist

Summer: average EMC = 12.6; Designation = Dry

Fall: average EMC = 13.7; Designation = Dry

  • North Carolina:

Winter: average EMC = 13; Designation = Wet

Spring: average EMC = 12.4; Designation = Moist

Summer: average EMC = 13.7; Designation = Dry

Fall: average EMC = 13.6; Designation = Dry

  • North Dakota:

Winter: average EMC = 15.1; Designation = Wet

Spring: average EMC = 13.2; Designation = Moist

Summer: average EMC = 12.7; Designation = Dry

Fall: average EMC = 13.6; Designation = Dry

  • Ohio:

Winter: average EMC = 14.9; Designation = Wet

Spring: average EMC = 12.7; Designation = Moist

Summer: average EMC = 12.8; Designation = Dry

Fall: average EMC = 13.7; Designation = Dry

  • Oklahoma:

Winter: average EMC = 13; Designation = Wet

Spring: average EMC = 12.5; Designation = Moist

Summer: average EMC = 12.4; Designation = Dry

Fall: average EMC = 12.6; Designation = Dry

  • Oregon:

Winter: average EMC = 16.4; Designation = Wet

Spring: average EMC = 13; Designation = Moist

Summer: average EMC = 10.7; Designation = Dry

Fall: average EMC = 13.4; Designation = Dry

  • Pennsylvania:

Winter: average EMC = 13.4; Designation = Wet

Spring: average EMC = 11.4; Designation = Moist

Summer: average EMC = 12.6; Designation = Dry

Fall: average EMC = 13.4; Designation = Dry

  • Rhode Island:

Winter: average EMC =12.2; Designation = Wet

Spring: average EMC = 11.5; Designation = Moist

Summer: average EMC = 12.3; Designation = Dry

Fall: average EMC = 12.8; Designation = Dry

  • South Carolina:

Winter: average EMC = 12.8; Designation = Wet

Spring: average EMC = 13.3; Designation = Moist

Summer: average EMC = 13.2; Designation = Dry

Fall: average EMC = 13.2; Designation = Dry

  • South Dakota:

Winter: average EMC = 14.2; Designation = Wet

Spring: average EMC = 12.9; Designation = Moist

Summer: average EMC = 12.5; Designation = Dry

Fall: average EMC = 12.8; Designation = Dry

  • Tennessee:

Winter: average EMC = 13.7; Designation = Wet

Spring: average EMC = 12.6; Designation = Moist

Summer: average EMC = 13.4; Designation = Dry

Fall: average EMC = 13.4; Designation = Dry

  • Texas:

Winter: average EMC = 12.9; Designation = Wet

Spring: average EMC = 12; Designation = Moist

Summer: average EMC = 12.1; Designation = Dry

Fall: average EMC = 12.5; Designation = Dry

  • Utah:

Winter: average EMC = 14.2; Designation = Wet

Spring: average EMC = 9.7; Designation = Moist

Summer: average EMC = 7.2; Designation = Dry

Fall: average EMC = 10.2; Designation = Dry

  • Vermont:

Winter: average EMC = 13.4; Designation = Wet

Spring: average EMC = 11.9; Designation = Moist

Summer: average EMC = 12.2; Designation = Dry

Fall: average EMC = 13.7; Designation = Dry

  • Virginia:

Winter: average EMC = 10; Designation = Wet

Spring: average EMC = 11.9; Designation = Moist

Summer: average EMC = 13; Designation = Dry

Fall: average EMC = 13.1; Designation = Dry

  • Washington:

Winter: average EMC = 16.9; Designation = Wet

Spring: average EMC = 12.7; Designation = Moist

Summer: average EMC = 11.2; Designation = Dry

Fall: average EMC = 14.2; Designation = Dry

  • West Virginia:

Winter: average EMC = 13.8; Designation = Wet

Spring: average EMC = 12.4; Designation = Moist

5; Designation = Damp

Fall: average EMC = 14.2; Designation = Damp

  • Wyoming:

Winter: average EMC = 11.7; Designation = Wet

Spring: average EMC = 10.5; Designation = Moist

Summer: average EMC = 8.9; Designation = Dry

Fall: average EMC = 10.2; Designation = Dry

So, what do you take from these numbers?  Locations in what we call the dry climates of the US Southwest exhibit the lowest EMCs, with Nevada posting the lowest annual EMC.  Locations considered coastal or near coastal like Alaska, the Gulf coast, and Northwest have the highest EMCs, with an island in Alaska having the highest annual EMC of over 19%.  Of course, for the lower states, Washington state has the highest EMC of over 17%.

The largest variability in EMC occurs in the states of eastern Washington, eastern Oregon, and Idaho.  Those states with the smallest variability include the deep South with Texas leading the list.  For 48% of the country, the range of monthly EMC variability is between 2 and 4%.

When it comes to times of the year with the highest EMC, its no surprise that December leads for most of the Midwest, western and northern states.  The south tends to show the most variability in September, with April and May demonstrating the most stability for 58% of the country.

Without question, certain locations will find it more challenging to purchase hardwood for cooking and maintain its stability.  Hopefully, this guide will assist you selecting the best season to purchase or to maintain a sizable inventory of product.

What challenges have you found with wood storage for cooking and barbecue?  Let us know in the comments and don’t forget to follow us on all platforms.  Providing tips, techniques, recipes, and the science behind the flame and fire to improve your skills with wood-fired cooking! That’s SmokinLicious®!