Thursday, October 25, 2018

FIRE ROASTED PEPPER MAKE THE PERFECT SALAD

Our fire Roasted Pepper make the perfect Salad with these white beans!


If you are a follower or subscriber of ours, then you’ve likely seen our recommendations for charring peppers on the hot coals using an open pit, fireplace, charcoal grill or even gas grill.  It’s so easy yet gives such a flavorful outcome to use in all types of recipes.

I’m giving you a salad recipe that is hearty enough to be a salad entrée or the perfect side for your favorite protein.

Gather Simple Ingredients


Simple ingredients make this wonder salad

I truly believe anyone can do both the charred pepper technique and make this salad without any difficulty.  Here are the ingredients you’ll need to bring the salad to life:

  • 6 charred peppers, skinned, seeded, and quartered
  • 2 anchovy fillets packed in olive oil, minced
  • 1 clove garlic, minced
  • 2 teaspoons sherry vinegar
  • 3 tablespoons extra-virgin olive oil
  • ¼ cup chopped flat leaf parsley
  • 1 (15 oz.) can white beans, drained and rinsed
  • ¼ ounce Parmesan cheese, grated
  • 1 cup packed spicy baby greens like arugula or watercress

In addition to the ingredients, you’ll need salt, pepper, a bowl, and whisk.

Vinaigrette Is Key


Making the VinaigretteYou’ll want to get any larger pepper slices cut down into thinner slices.  Once the peppers are evenly sized, it’s time to season them with salt and fresh ground pepper.  Do this by laying them out on a platter.  Taking a small bowl, it’s time to make the vinaigrette. Start putting the anchovies, garlic, vinegar, oil, and parsley in the bowl and whisk together.  Add the beans and toss to coat with the vinaigrette.  Season the mixture with salt and fresh ground pepper.  You can taste and adjust the vinegar and seasonings until it fits your taste.  Now prepare the serving dish to assemble the salad.

Simple Layers of Flavor

With the peppers charred and vinaigrette made, it’s time to assemble the salad.  Start by laying out the peppers on a platter or serving dish.  Spoon the bean mixture over the top of the peppers and top with spicy greens like baby arugula or watercress.  Sprinkle with Parmesan cheese.  That’s it!
our finished pepper and bean salad
This is a perfect side with a great steak, ribs, chicken or fish.  It’s hearty enough to use as a main entrée as well for those looking for a healthier meal.  It’s especially refreshing during the warmer seasons.  Remember, char extra peppers and freeze them so you can pull them out for this fabulous recipe any time of the year.

Thursday, October 18, 2018

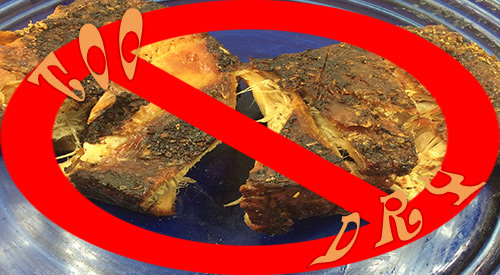
WHY IS MY BARBECUE MEAT DRY??

Our suggestive tips to avoid WHY IS MY BARBECUE MEAT DRY
The best way to keep meat moist while smoking is to follow the recommended cooking temperatures for meats!


You thought you timed the meat perfectly on your smoker or grill.  When it came time to cut it, all you found was a gray, dry former piece of meat staring back at you.


What went wrong?

Don’t fall into your old habits when it comes to outdoor cooking, whether you’re using a traditional wood or electric smoker, charcoal grill or gas grill.  Learn some easy tips to keep your foods juicy and enticing this outdoor cooking season.


Tip #1: Own a Good Meat Thermometer

There is no way around it!  You need to own a good meat thermometer.  That is truly the only way to know when meats are done before you keep them on the grill or smoker too long.  There is no one internal temperature that is good for all meats either!  Don’t think because you cook chicken until 160°F that this is the ideal temperature for beef, lamb, fish, pork, and sausage.


Tip #2: Know Ideal Food Temperatures

It is vital that you know when to pull the meat off a grill or smoker.  All chicken and turkey need to cook until 160°F (71°C).  Ham, sausage and hot dogs should have a minimum temperature of 140°F (60°C).  Pork including ribs and shoulder need to register 145°F (63°C) while pork steak, chops, roasts can have a range based on doneness preference: 120-130°F (49-54°C) for rare, 130-135°F (54-57°C) for medium-rare/medium, 145-155°F (63-68°C) for medium-well, and 155°F (68°C) and above for well-done.  Beef, lamb, and venison range 120-130°F (49-54°C) for rare, 130-145°F (54-63°C) for medium, 145-155°F (63-68°C) for medium-well, and over 155°F (68°C) for well-done.


Tip #3: Flip, Flip, Flip

When you grill over high heat, it becomes vital that you learn to flip more often.  The results will be better flavor, better color to the food, even doneness and a quicker cooking time.  The flip ensures that only even heat levels get in instead of too high which results in a burnt, charred mess.


Tip #4: Moist Burgers Every Time

Burgers can become extremely dry due to the higher heat level they are cooked over.  To keep as much moisture into the meat, here are a couple of tricks.  The first is to add 1-2 tablespoons of either mayo or Greek yogurt to your ground meat or turkey.  Mix well then form into your burgers. I sometimes like to mix in ricotta cheese!  Or you can add an herb-butter patty to the center of the burger to add moisture.  Be sure to follow Tip #3 with burgers!


Tip #5: Consider Marinating

Although you can now purchase cuts of meat in most stores pre-marinated, I beg you to do this step yourself to control the additives and preservatives that are commonly found in the prepackaged items.  Marinating cuts of meats, especially thinner cuts, produces great flavors and can make for a moister experience as the liquid finds the cracks and crevices on the meat.  It helps to make small slices in the cut of meat to help with the marinade absorption.  There really is no need to marinate overnight though you can do that.  Just know that a couple of hours for meat in a marinade is enough to produce a great outcome.  Plus, marinated foods reduced the unhealthy chemical compounds that can form when you use a hot grilling technique.


Tip #6: Considering Brining

A brine is a wet, salty, slightly sweet mixture that you soak your meat in.  The salt and sugar react with the protein in meats to help retain moisture.  It’s like having a protective moisture-shield around the meat.


Tip #7: Use an Indirect Method of Cooking

An indirect or two-zone cooking method refers to using one side of your equipment for heat while the other side is used for the actual food placement.  By keeping the lid on the grill or smoker, you will retain the heat and radiate it throughout the grill.  If you want to produce a crust on your food, you can easily move it to the direct fireside for a few minutes to accomplish that.  On a gas grill, you would lite the burners on only one side of the grill.  On a charcoal grill or smoker, you would place and lite the charcoal on just one side of the charcoal area.


Tip #8: Foil Wrap

Aluminum foil, the heavy-duty kind, works wonders at keeping foods moist.  By adding 1-2 ounces of liquid to the foil with the meat placed inside and any other ingredients you want to incorporate flavors from, you allow steam to be produced inside the packet and keep everything super moist.   Just be sure you crimp the foil tightly around the food so nothing escapes.


Tip #9: Extend the Cooking Time

If you’re able to plan out your outdoor cooking event, then consider doing a combination of a two-zone cooking method with lower level temperature cooking.  Any time you can cook at a lower temperature for a longer time, you allow the collagen in meat to breakdown producing a gelatin that releases great flavor.  The two-zone cooking method will allow the meat to receive heat in every direction at an even level.

Thursday, October 11, 2018

SMOKED BONE BROTH FOR HEALTH & FLAVOR

Our Smoked Bone Broth starts with Great Beef bones trimmed on the gas grill


Know up front, that making broth from bones has been in our human history for a very long time.  It’s not new but I will say that over the past several years, it has gained in popularity for its health benefits and ability to cleanse the body.

Here’s what has been reported to improve when you consume bone broth: ease joint pain, reduce or prevent degenerative joint disease, promote hair and nail growth, enrich the blood, aid in digestion, build muscle, boost the immune system, and improve memory.

Bone broth is all about depth of flavor.  I am going to dig deeper into the flavor option and smoke the bones rather than roast them to bring an umami-type flavor to my broth.  Warning: you will need about 12-14 hours for the entire process so be sure to plan for this timing.


Grill Set Up

The gas grill I’m using is equipped with 4 burners and heat shields over those burners.  I’ll be preheating my grill using all 4 burners then shutting off the two burners on the left side and reduce the heat level to medium-low on the right side.  I add two wood chunks to the heat shields on the lit side of the grill.  Then on to my bones on the left side grill grate, where the burners are turned off.  These will stay on the grill for about 3 hours, with one turning of the bones at the halfway point.  Then off the grill and into a stock pot go my smoked bones for the start of the broth.


Simmering We Go

Our Smoked beef bones in the pot simmering with vegetables!
The extra depth of the smoke flavor will be gently revealed in our broth and does not overpower or obsolete the benefits of the broth.  To start the broth process, place the bones in the pot and fill the stockpot with cold, clean water.  Be sure the water is about four inches above the bones.  Allow the bones and water to come to a rapid boil, then reduce the heat to a simmer.  The bones should simmer for a least 6 hours.  During that time, you can check and skim off any impurities from the top with a spoon.  While they are simmering you can prepare the vegetables, herbs, and spices that will be added to the mix.


Mirepoix and More

Now it’s time to add even more nutritional value to our broth.  Start by selecting the aromatic vegetables for your mirepoix.  I’ve taken leeks, carrot, celery, Napa cabbage, and a few broccoli stems.  To this, I’ve also included about 8 cloves of garlic, thyme, basil leaves, and a ¼ cup cider vinegar.  Place everything in the pot and stir to mix and submerge.  Cover the pot and allow this to simmer for about 8 hours.  Enjoy the great smell that will fill your home!


Strain and Portion

You’ve been smelling this awesome bone broth for nearly 14 hours so now it’s time to strain it and prepare to portion it out for future use.
Straining out the cooked vegetables leave a clear broth
If you’ve used a large stockpot, you may need a couple of additional pots for the straining as the contents get heavy to pour.  Once the clear broth is extracted with all the great nutritional value intact, remove the strainer and feel free to compost your vegetable/herb mixture.  Allow the broth to cool and skim off any settled fat from the top layer.  Then portion out the broth and get ready to enjoy its health benefits anytime.

This can be consumed as it for maximum detox benefit, in soups, or to make sauces – any way you can use broth.  I’m starting off by making a bowl of pho with sprouts, soba noodles, mushrooms, spring onion, and of course, my piping hot, flavorful, smoked bone broth.

Serving our smoked Bone Broth for a very satisfying meal!Stater Ingredients for Bone Broth

  • 6-8 lbs. of beef bones
  • 1 lb. celery
  • 2 lbs. onion
  • 1 lb. carrot
  • 4-6 bay leaves
  • 8 cloves garlic
  • ¼ bunch fresh thyme
  • 2 teaspoons sea salt
  • 1/4 cup cider vinegar

Thursday, October 4, 2018

YOU ARE WHAT YOU EAT – APPLIES TO WOOD COOKING

"You are what you eatII" saying is more true today than it was years ago!
“You are what you eat” saying is truer today than it was years ago!


We’ve all heard it, likely from our mothers.  You are what you eat.  If you truly understand the meaning of the statement, you know that we extract necessary nutrients from the foods we ingest to energize and stabilize our bodies.  The nutritional content of what we eat determines the composition of our cell membranes, bone marrow, blood, and hormones.  Every day we lose cells which is why the foods we consume are so vital to our body’s health.

Like Any Other Food Choice

If you’ve been a follower of my writings then you are aware of the stress I put on recognizing the wood used to cook foods is just as important an ingredient as the cut of meat, choice of spices, quality of oil, etc.  There has been a lot of focus on the origin of food and how important it is to source locally both as a means of supporting local business and to control what you’re putting in your body. 

From our perspective, you want to know that the wood used for cooking is sourced close to the growing area.   This ensures that there is knowledge about how the wood is processed before it gets to you and it assures the freshest product.

Minimal Processing

Just as with the clean food concept which focuses on minimally processed foods and as direct from nature as possible, SmokinLicious® holds to the same approach.  Sourcing wood from forest regions (direct from nature) that are in close proximity to our manufacturing facility, provides us with the unique advantage to process into the various cooking products the hardwoods harvested that meet our strict criteria: 100% bark-free (we don’t allow any bark-on product to cross our threshold), 100% heartwood (no outer cores of the tree cross our threshold), harvested hardwood that is less than 6 months of age (ensures this is still a “green” product), chemical-free (no pesticide or growth enhancement techniques employed), and in raw state to allow us to process it into a suitable cooking wood size.

The Risks

If you love foods that are cooked with wood, then you should know a few specifics to keep you on the path to health and long life.

Hardwoods only!

  • Softwoods or coniferous woods should never be used for cooking as they have elevated sap levels and more air in their cell structure. This causes them to burn fast, produce lots of sparks, and unpleasant flavors that are not ideal for flavoring foods. These include pine, redwood, cedar, fir, spruce, hemlock, larch, cypress.

Toxicity Risks:

  • There are many known toxicities in certain species of wood with softwoods containing the highest risk. Other woods have the potential to cause sickness and in some cases death if a person’s system is already compromised. Most of the risks are associated with the cooking process rather than the ingestion of the actual wood-fired food. But know that if a balance of the wood-tar creosote is not found, then the ingestible risks of the food heighten.  One of the best means of obtaining a balance is by starting with hardwoods that are considered safe for cooking, are clean, are bark-free, and derive from the inner cores rather than outer of the wood, where more impurities lurk.

Cooking Technique Influence Risk:

  • At some point, I’m sure you’ve read about heterocyclic amines (HCAs) and polycyclic aromatic hydrocarbons (PAHs). These are the chemicals that form when meats, poultry, and fish are cooked using higher temperature methods like grilling. Why does this pose a health risk?  Because these chemicals cause changes in DNA and when you change DNA and they are metabolized by specific enzymes in the body, you can increase the risk of cancer associated with these compounds.  There is no definitive link between HCA and PAH exposure from cooked meats and cancer in humans.  There is no way to differentiate between other exposures to the chemicals from the food exposure.
HCAs are found to only be associated with meat cooked at high temperatures. While PAHs can be found in other smoked foods.  Remember, PAHs are also in cigarette smoke and fumes from car exhaust.  A recommendation is to remove any charred portions of meat, continuously turning meat over the high heat source, and avoiding direct exposure of meat to the open flame to reduce exposure.  Here’s a tip that can also reduce the risk of forming HCAs – marinate your foods for at least 10 minutes.

Thursday, September 27, 2018

SMOKED STRAWBERRY MARINADE

Our smoked strawberries work perfectly to make a smoked strawberry marinade for our pork or any other meat!


If you’re like me, you love strawberries for the incredible juice they contain.  One of my favorite ways to capture the essence of that juice is to smoke the strawberries on a grill.  Not only do you end up with phenomenal smoked strawberries but the juice the grilling/smoking process renders is a must-have ingredient for so many recipes.  I took a batch of the smoked juices and made a fabulous marinade for fish, chicken, turkey, pork, lamb, and goat.


The Simple Grilling Method

Strawberries on the gas grill with the double filet on the lite burnerWhether you elect to use a standard gas grill or a charcoal grill, you’ll want to use wood chunks from SmokinLicious® to bring clean smoke flavors to the strawberries.  You can visit our previous articles on smoking on a gas or charcoal grill in Dr. Smoke’s Tips and Technique.

For me, I’m using a gas grill equipped with single filet wood chunks.  I prefer to use more mild hardwoods when smoking fruits like Ash, Alder, Cherry, and Maple.
 
I simply lay out my fresh strawberries on a sheet pan or disposable foil tray after cleaning and trimming the stems.  I place the pan on the unlit side of my grill using a medium heat setting on the burners that are on the opposite side.  It will take less than 30 minutes to bring the strawberries to the smoky side.  After the strawberries are tenderly smoked and the juices have rendered, I carefully remove the tray and all the strawberries to cool slightly.  I then transfer the juice to a bowl to be used in my marinade.


The Smoked Strawberry Marinade Recipe

This marinade is so simple yet really packs great flavor.  Of course, the longer you marinate your protein, the better the outcome.  For one cup of marinade you’ll need:
  • 1 cup of smoked strawberry juice
  • Juice of 2 limes
  • 2 tablespoons blueberry balsamic vinegar or similar fruity flavor
  • ¼ cup Cajun seasoning
  • 1 tablespoon ground chipotle pepper
In a large bowl, combine all the ingredients.  Select your protein: I recommend chicken, turkey, pork, lamb, or goat.  Place the protein in the bowl and coat completely with marinade.  Place the marinated protein in a resealable food storage bag, pouring the remaining marinade into the bag, and seal tightly.  Refrigerator for a minimum of 2 hours but preferably overnight


Our pork roast and smoked strawberry marinade
Now you can choose the cooking method to bring all the flavors together.  Grill, oven roasting or even smoking.  Once you’ve selected your cooking method, remove the marinated meat from the bag and cook until done.  Remember, the marinade has been used on raw meat so you cannot reuse it as it will contain some bacteria.

Thursday, September 20, 2018

WILDFIRE SMOKE TAINT IS THE BBQ COOK’S UMAMI

WILDFIRE SMOKE TAINT grapes may add some bold tastes

I came across a fascinating article in Wine Spectator (June 15, 2018) that made me salivate.  The article focused on the wildfires of California, specifically Northern California, in October 2017 that had vineyards struggling with grapes that had not yet been harvested for wine production and were exposed to the fire’s smoke.

Smoke taint.  That is the smoky flavors grapes will pick up from traveling smoke gases and particles
that become airborne with the wind.  Even if a vineyard did not experience the fire directly, it can be affected by the traveling smoke.  That is the key though: a vineyard may or may not contain smoke taint in the grapes.


Lab Research

There were many California wineries that sent grape and juice samples to labs for analysis to determine if compounds indicative of smoke exposure existed (probability is said to be 70% with testing).  Specifically, they test for the primary volatile phenols present in smoke.  This research and technique have its base in extensive research done in Australia who experience bushfires more commonly than Californians experience wildfires.

If these volatile phenols are found in the sample, this means the waxy cuticle of the grape skin absorbed the compounds forming glycosides.  At this stage, the phenols are not detectable by smell or taste.  Once the fermentation begins, the acids break down the bond making the phenols volatile again.  Additionally, our own mouths can breakdown remaining glycosides releasing the smoky flavors when the wines are consumed.


What to Do

Though there is a risk to white wines, these tend to be less susceptible to smoke taint since most are not fermented on their skins.   Wines fermenting in tanks and barrels during the fires also appear protected by the layer of carbon dioxide that forms.

For those wines found to have the smoke taint, the vineyard is faced with options:
  • minimize the skin contact by adjusting the grape press
  • use lighter toasted oak barrels for the fermentation
  • bottle the tainted wine under a different label
  • sell the wine on the bulk market to be blended into an inexpensive wine
  • sell the wine to distilleries


BBQ Umami

I have another idea!  Along the lines of selling the wine to another user, why not market this to Chefs, cooks, and barbecue enthusiasts who understand and desire those charry undertones.  Think about the sauces, marinades, glazes, and assorted other uses these tainted wines could be used in.

Think about how many people use handheld food smokers to get a smoky undertone to liquids, whether a cocktail, syrup, juice, even water.  With a bottle of this tainted wine, blooming with an ashy component, you have ready-made umami for those of us searching for the perfect ingredient to bring a balanced smoky undertone to a recipe.

Here’s my suggestion: think about contacting one of these vineyards to see if they would be willing to sell you some unmarked bottles.  They wouldn’t have to label them with their pristine brand, just sell it as is to those of us who love that undertone.

Some of the vineyards with tainted wine: The Hess Collection, Jackson Family Wines, Jarvis Wines.

I don’t know about you, but I’m sure going to try to get my hands on at least a couple of bottles of the smoke-tainted wine as my recipes are just waiting for this special ingredient!

Thursday, September 13, 2018

CHARRED PEPPER DIP

Our Ember roasted peppers make an awesome Charred Pepper Dip


Peppers are one of those thick-skinned vegetables that release their ultimate flavor when they are introduced to hot coals.  Many people think that you need special equipment to cook foods in hot coals but really, it’s as easy as having a disposable pan available and a grill.  I’ll give you some options for roasting the peppers and then provide a great recipe to be used as a dip or topping that is quick and so easy.


Multiple Charring Methods


The ember cooking of our sweet peppersAlthough you will see me using an open pit method of charring my sweet peppers, you can do this on a gas grill set up with either a disposable foil pan or a cast iron pan or skillet.  You can also use a charcoal grill, lighting a fire and allowing it to reduce to simple hot embers.  A portable fire pit works if you clean out all previous ash and wood pieces to keep the final flavors clean.

Here’s the key to making perfect charred peppers, whether sweet or hot.  You must only use hot embers and you need to have additional hot embers available to keep a consistent temperature and a full bed of coals.

Because peppers are loaded with water, it is easiest to clean the skins and seeds from them once they are fire roasted.  If you cover the charred peppers placed in a bowl with plastic wrap, the skins will pull away easily.  Then you’re ready for your favorite recipes.


Fresh Ingredients Make This Dip

What makes this recipe so great is that there are only a few flavorful ingredients that balance out the charry, smoky flavor of the peppers.  For this recipe, you’ll need the following:

    the simple ingredients need
  • 6 charred peppers
  • 1 cup golden raisins, coarsely chopped (6 ounces)
  • ¼ cup plus 2 tablespoons extra virgin olive oil
  • 3 tablespoons salt-packed capers, rinsed and well drained
  • 1-1/2 teaspoons coarsely chopped fresh oregano
  • A coarse salt such as sea salt
  • 1 tablespoon Red-wine vinegar
Once the peppers are charred, I like to quarter them before placing in a food processor.  You can use a blender as well if you have a control to pulse the ingredients as you don’t want to thin them too much.  After pulsing the 6 charred peppers, add the raisins, oil, capers, and oregano.  Pulse to combine everything.  Season with salt and vinegar.  This dip can be refrigerated for one day prior to use.


Endless Uses

This dip/topping made from ember-roasted sweet pepper contains all vegan ingredients so its super flavorful while being healthy too.  Here’s the best part – it has so many uses and can be altered for a specific taste.  Use it as a topping for fish, chicken filet sandwiches, or sausage patties and links.  It can be heated providing an option to use it as a hot appetizer or cold.  I’ve served this will flatbread or Naan slices for a snack, appetizer, or lite lunch.  Want some kick to it?  You can add ember fired hot peppers as well or just add a few drops of hot sauce to the mix.  Because this is oil based, it is best to use up any leftovers within a few days, keeping it refrigerated until gone.