Thursday, June 14, 2018

WHAT WOOD TO USE FOR SMOKING: A PRIMER


I see the question asked so many times and in so many ways.  What is the best wood to use for smoking? What is the best wood to use for smoking (fill in the blank with your favorite food)?
I’m going to shake things up a bit by stating there is no rule book saying a specific wood must be used with a specific food.  There are, however, some basic things you should know to reduce the risks of toxicity, damage to your equipment, and overall ruining your barbecue.  Use the wrong hardwood and you can bitter any food you expose to that wood’s smoke.

Absolutely No Softwoods

Right up front, let me tell you, only smoke with hardwood.  Softwoods or coniferous woods should never be used for cooking because they have elevated sap levels and more air in their cell structure.  This causes the wood to burn fast, hot, produce lots of sparks, and produce unpleasant flavors not ideal for flavoring foods.  Let’s be clear on what a softwood is: pine, redwood, cedar, fir, spruce, hemlock, larch, cypress.
I realize that cedar has been a popular softwood used for plank cooking or wrapping foods.  If you want to learn more about the risks associated specifically with cedar, see my earlier article  and learn why you should discontinue this practice.

Meet the North American Hardwoods for what wood to use for smoking

Now, meet the North American Hardwoods!  Known as deciduous trees that produce broad leaves, produce a fruit or a nut, and generally go dormant in the winter, hardwoods are the woods to use for cooking and makeup roughly 40 percent of all trees in the United States.  However, not all hardwoods are created equal when it comes to flavoring foods.  Let’s examine some of the specific hardwoods of North America.  I am referencing our key to the boldness of the wood’s flavor (
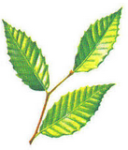
= Mild = Medium = Strong)

 Alder:

Part of the Birch family of hardwoods, Alder is a relatively soft hardwood of medium density.  It is most commonly used to smoke fish but can be used with mild poultry cuts, pork, vegetables, fruits and spices for natural wood flavoring/smoking.  The flavor profile is mild on our scale of boldness.  Alder provides a neutral coloring to the outer skin of foods and is the preference for those who like to cold smoke.
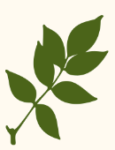
Ash:

Ash hardwood is part of the Oleaceae family or olive family of hardwoods and can be used with any food for natural wood flavoring/smoking.  The flavor profile is on the light side making it ideal for most any food but in particular, it works great with wood-fired pizza as it can lose moisture quickly providing for a great bed of coals.  Ash provides a neutral coloring to the outer skin of foods.

Aspen:

Considered a lightweight hardwood, Aspen is known to have “wet pockets” which can lead to some difficulty with using this as a cooking wood due to its tendency for bacteria development.  Variations in moisture can result in temperature variation during cooking which is directly opposite the goal when fire cooking.

   Basswood:

This hardwood is known as the preferred wood for carving.  It grows commonly with red oak, white ash, and sugar maple trees.  This wood is soft and light which makes it a quick burner.  It does not have any notable odor or taste which makes it a poor choice as a cooking wood.

American Beech:

This hardwood grows in large stands and mixes in with many of the other dominate hardwoods.  It is a popular filler wood for making charcoal so you know it burns long and evenly.  It is classified as moderate in flavor boldness.

Birchwood:

This can be an ideal firewood choice due to the prevalence of the varieties of birch and the strength of the wood itself.  However, it is not a highly flavorful hardwood for cooking and burns too hot.  If used for fire cooking, you will have a challenge controlling the cooking temperature.

Buckeye:

This hardwood produces a poisonous nut as well as twigs.  For that reason alone, it is not recommended as a smoking/cooking wood.
  

Butternut:

This hardwood belongs to the genus that includes walnut though it is not as weight-heavy a wood as walnut.  Don’t let the name confuse you.  There is no buttery taste to this wood.  In fact, it does not offer any balanced qualities when used for cooking and for that reason, is not recommended.

Cherry:

Like Oak, there are many species within the genus of cherry.  It has an obvious fruity aroma and tends to light easily producing a steady burn and flavor.  Wild or forest grown cherry is very different from orchard cherry which can have bitter undertones which may in part, be due to the chemical application commonly applied to nursery trees.  Feel free to use it with poultry, beef, pork, lamb, even vegetables, as it is a workhorse when it comes to flavoring foods.  Be sure to use a meat probe when cooking with cherry wood as this wood provides a reddish-pink hue to the meat that can easily be mistaken for under-cooking.

  Chestnut:

This is a very hearty hardwood that is resistive to decay so it is not necessarily an easy lighting wood.  It can be used for smoking though I certainly feel there are better choices out there.

  Cottonwood:

This hardwood is part of the genus that contains the aspens and poplars.  As such, like its siblings, it does not make for a good smoking wood.  In fact, when it becomes wet, it produces a sour odor which can transfer to food.

  Elm:

Although this is a dominant hardwood in the USA it is a hardwood that has no characteristic odor or taste.  For that reason, it does not make for an ideal cooking wood.

  Gum (Sweetgum):

A very heavy hardwood that holds moisture for indefinite periods of time which causes it to be a poor choice for pleasant smoke flavors.  This can produce musty aromas that can transmit to foods.

  Hackberry:

This is a moderately hard wood that has a yellow to grayish heartwood that does not make it the best choice for smoking.  The benefits of exposing food to this wood are not well documented and for that reason, is not an ideal choice.
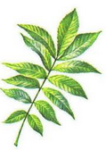
  Hickory/Pecan:

Since these hardwoods are part of the same genus they share similar qualities: dense wood that is strong, can be difficult to lite, but produce a lot of color and flavor to foods.  What should be noted here is that not all the species are the same.  Some hickory varieties are very bold and can have bitter undertones.  It is important to learn the differences between varieties before selecting one for cooking.

   Maple:

There are over 120 species of maple so let’s clarify some of the terms.  Sugar maple and black maple are also called hard maple.  Silver maple, red maple, and boxelder are called soft maple.  These maples make for excellent smoking and cooking woods producing beautiful even coloring and a moderate flavor level.

   Persimmon:

This is not a heavily populated hardwood in the USA and it is a slow grower.  It can be confused with Hickory due to similar coloring.  However, it does not produce the same flavors as hickory.

  Poplar:

An extremely light hardwood that does not hold any ideal moisture for smoldering to produce a clean smoke.  Poplar burns too quickly to be an ideal choice for cooking.

  Sycamore:

Although this hardwood has a medium weight and can burn evenly and for good length, it does not do anything for coloring foods or adding any pleasant flavor.  For this reason, it is not recommended for cooking.

  Red Oak:

The oaks are the one hardwood that worldwide dominates with the greatest number of species.  This is a heavy wood that can be difficult to light but once it ignites, it produces intense smoke and flavoring that is easy to distinguish when consuming foods cooked over it.  Red oak has a strong aroma and flavor, requiring a trained hand to use it.

  Walnut:

One of the heaviest hardwoods available, it belongs to the same genus as hickory and pecan.  If classified as smoking, it is on the bold side and should be used in small quantities.  The wood produces a very dark outer “bark” coloring.

  White Oak:

Similar in structure to Red Oak, the white variety tends to be less strong aromatically though it still produces an obvious bold flavor to foods.  Because it is a heavy, dense wood, it holds moisture for a long time making it more ideal for hot smoking and grilling rather than for cold smoke application.
There you have a quick guide on the hardwoods of North America and those considered ideals for fire cooking.  Experiment and keep a written log of what works with the other ingredients you use in your wood cooking.  Hope you enjoyed our discussion of what wood to use for smoking!

Thursday, June 7, 2018

ROOTING FOR GLAZED SMOKED TURNIPS

The Finished Glazed Smoked Turnips are garnished and ready to be served


It may not be the preferred choice in vegetable but it is one you should get to know as the health benefits noted from turnips are amazing.  Known to improve bone health, protect your heart, and be an active cancer fighter, turnips are also known to reduce inflammation and optimize digestion.
Turnips are a root vegetable.  The best part is they are available throughout the year.  We are going to fire up the stovetop smoker and bring some hickory flavor to our turnip cuts before letting them take a swim in a glaze that will balance out the smoky flavor with some sweetness.


Prep Your Turnips and Smoker


Take a trip to the grocery store and select 6-8 medium-size turnips.  You are looking for ones that are consistent in color whether white or purple, with vibrant greens if left attached, and no bruises or brown spots.  Wash and pat dry the turnips, then slice horizontally in half then quarter the halves.  Dice into bite-size pieces.

Adding SmokinLicious® Minuto® Wood Chips to the Nordic Ware stove top smoker.Time to set up the stovetop smoker.  For the smoker, you’ll need to have microchips.  You can purchase these from SmokinLicious® under the Minuto® and Piccolo® Wood Chip listing.  Any of those sizes will work,  today I’m using Minuto® Wood Chip size #6.  Place about ¼ cup of the wood chips in the base of the pan which has been set over a burner.  Place the drip pan on top of the chips.  Ignite the burner to allow the chips to begin heating up.  Now place your cut turnips into the smoker pan making sure that the turnips are spread out evenly.  Add that pan to the smoker and place the lid on, keeping the vent just slightly open.  Be sure your range hood vent is on to prevent smoke from traveling around the kitchen or room.


45 Minutes Then Glaze


Our Dr Smoke clock indicates you should smoke for 45 minutes, then glaze. I am preparing these turnips to act as a side dish which means I will smoke them until fork tender.  That will take about 45 minutes.  As I get to the final 10 minutes of smoking time, I begin preparing the glaze.

Place 2 tablespoons of butter, 1 tablespoon of ground cinnamon, a pinch of nutmeg, 3 tablespoons agave or maple syrup, salt, and pepper into a saucepan.  Combine over a medium heat until a low boil begins.  Shut the heat off and add the tablespoon of tahini.  Now remove your smoked turnips from the stovetop smoker pan and place in the glaze tossing to coat.  Place in a serving bowl and sprinkle with fresh, chopped parsley.  Remember, this is just one way to use smoked turnip.  Don’t forget to try pureeing your smoked outcome and adding butter, cream, salt and pepper for a fresh take on a mashed turnip.  Please try Glazed Smoked Turnips as a side dish for your next function.

Thursday, May 31, 2018

WOOD FIRED GUACAMOLE

Wood fired guacamole by grilling the avocado's before you make the guacamole will excite your taste buds! Your quests will wonder how you did this simple recipe by adding only one small step!
Wood fired guacamole by grilling the avocado’s before you make the guacamole will excite your taste buds! Your quests will wonder how you did this simple recipe by adding only one small step!


The single seeded berry, fleshy fruit we know as avocado is loaded with healthy fats, 4 grams of protein, and 975 milligrams of potassium which is nearly twice as much as a banana.  With 18 of the amino acids recommend in daily consumption, you’ll want to include avocado in your diet.
We thought we would take this fruit favorite and add a flavor level for your avocado recipes by wood-firing the avocado.  This simple step will bring all the nutritional benefits of the fruit with a bold new taste.


7 Fresh Ingredients

Once you’ve wood fired your avocados on a gas or charcoal grill (see our posting on this technique), you need to gather the following ingredients:
  • 3 wood fired avocados
  • 1 finely grated garlic clove
  • 1 finely chopped Serrano or jalapeno pepper
  • ¼ of a white onion, finely chopped
  • 2 tablespoons of freshly squeezed lime juice
  • 1 tablespoon chopped cilantro
  • 1 teaspoon kosher salt
In addition to the above ingredients, you’ll need a blender or a mortar and pestle.  I prefer the mortar and pestle so I can control the level of “mash” that occurs to each ingredient.


Layering on the Flavors

First up, you need to mash up the wood fired avocado flesh.  The best guacamole has some chunky quality to it so keep this in mind when you are mashing the flesh.  Once the avocado is mashed up, add the pepper and combine that as well.  You can select the pepper based on whether you want heat or not.  If you prefer a guacamole that has no spice, then add a sweet pepper.

Once the grilled avocado and pepper are mixed, time to add the other ingredients.  First in, chopped onion followed by lime juice, cilantro and salt.  Combine everything well ensuring that any chunks are not too big for any of the ingredients.  Soon you’ll get the aroma of all the fresh ingredients and have an idea just how this is going to taste.


PREPARE TO SERVE THE WOOD FIRED GUACAMOLE!

The best part about wood fired guacamole is just how simple it is to make yet the flavors are so fresh and intense.  Select your favorite serving piece.  Once all the ingredients are combined, scrape all the contents from the mortar and place in the serving dish or bowl.  I like to top my guacamole with some smoked paprika so it has a bit of color to the top. Keep in mind, you don’t need to just use this with taco chips.  This is a great topping for a burger or grilled chicken sandwich and even works well with salad greens.  You’ll love how the wood flavor adds another dimension to this favorite food.

Thursday, May 24, 2018

6 TIPS FOR A HEALTHY OUTDOOR COOKING SEASON

This bucolic photo can be yours if you follow our 6 TIPS FOR A HEALTHY OUTDOOR COOKING SEASON
Follow our 6 tips for a healthy outdoor cooking season in 2018!


 Everyone seems to be so much happier during the seasons that allow for outdoor cooking and entertaining.  Whether it’s a planned cooking event or spur of the moment decision, these cooking events turn into an opportunity to relax, kick back and truly enjoy life.

There are steps you should take to ensure that the foods you enjoy outdoors remain safe.  What follows are the top tips for making this your best outdoor cooking season ever, no matter what you elect to cook.


Tip #1

There are times when you want to marinate meats and poultry before cooking on your grill or smoker.  Know that foods will only remain safe if you marinate in the refrigerator in a covered container, not with the marinated foods laying out on the kitchen counter.  Also, if you plan to incorporate some of the marinades into a sauce, be sure to reserve some before it is applied to the raw foods.  If there is marinade leftover from the raw food marination, be sure you boil it before using as anything that has contact with the raw food can carry bacteria.


Tip #2

You can grill a variety of foods on the same equipment but to know when everything is cooked, you will need to have thermometers.  It’s best to use a different thermometer, marked by color, for each type of food: beef, pork, chicken, fish.  The thermometer should be placed in the thickest part of the meat or poultry to get an accurate internal temperature reading.  Here is a guide on temperatures:
  • Beef, Pork, Lamb, & Veal (steaks, roasts, and chops): 145°F/62°C
  • Ground meats & sausage: 160°F/71°C
  • Whole poultry, poultry breasts, & ground poultry: 165°F/74°C
  • Hot dogs: Cook until steaming hot
Remember, thicker cut meats and poultry will need to be placed closer to the fire or heat.  Utilize the upper grill grate for those items that are more fragile like thinner fillets of fish, vegetables, fruit, or for heating sauces.


Tip #3

You cannot partially cook meats and poultry by parboiling or microwaving and then placing in the refrigerator for grilling the next day.  Although you may think this will lessen the cooking time on the grill, what you’re doing is introducing the potential for everyone to become sick.  The reason?  Partial cooking does not eliminate all bacteria growth.  The reality is, you would be allowing bacteria to continue to grow.


Tip #4

Take the time to properly clean your grill or smoker at the start of the outdoor cooking season.  It’s common to close vents on the grill or smoker when you cover it up for the winter season but these aides in stimulating mold growth on the grill grate and/or inside cover and walls.  For that reason, it’s important to scrub down the interior of the grill or smoker using a cleaning mixture; 1 part vinegar to 3 parts water or a bleach to water blend if you’re not opposed to the more toxic bleach.


Tip #5

Be sure you start with a hot grill or to cooking temperature smoker.  That means, preheat.  Preheat your grill 15 to 25 minutes before you start cooking to make sure it reaches the right temperature to ensure all bacteria is killed.   Your grill should be 400-450°F for high, 350-400°F for medium-high, 300-350°F for medium and 250-300°F for low heat.   By having a properly heated grill, you will guarantee a moist outcome for your meat and poultry.


Tip #6

There are many of us we prefer a good charcoal grill versus gas.  It is important that you understand that there are many more influencers to altering the flavor of what you’re cooking when you cook over charcoal.  Be sure to use an additive-free lump charcoal, which is charred wood.  Conventional briquettes, which are easy to find, may contain wood scraps and sawdust as well as coal dust, sodium nitrate, borax and additives like paraffin or lighter fluid. As for lighter fluid, NO!  Lighter fluid can release volatile organic compounds (VOCs) into the air, leave an unpleasant flavor to foods, and pose a serious danger if used improperly.  Skip it altogether.

Without question, our 6 TIPS FOR A HEALTHY OUTDOOR COOKING SEASON should help you on your way to a healthy, memorable outdoor cooking season.  Likely, the best ever!


Thursday, May 17, 2018

WOOD-FIRED APPLES MAKE THE BEST CAKE

WOOD-FIRED APPLES MAKE THE BEST CAKE BECAUSE OF THE UNIQUE FLAVOR BROUGHT OUT BY THE SMOKING PROCESS!
Wood Fired Apple


As the second most consumed fruit in the USA, apples are loaded with antioxidant benefits and have been found to have extensive benefit to the colon due to the high level of gut bacteria present in its polyphenols.  Plus, this is a fruit that is readily available all year long making it an ideal choice for cooking.

We are taking the Gala variety and putting them over a coal fire for wood-fired flavor in our apple pie cake.  Pick your favorite variety of apple and get out the charcoal grill for this fun and simple technique and recipe.

Fire Up the Grill


Fire up the Stok grillAfter purchasing 12 apples of your choice, get the charcoal grill going, so the flames can reduce to hot coals.  That’s all needed for our apple cooking!  Any size charcoal grill will do, including the small portable grill.  I use a chimney started to lite charwood from SmokinLicious® as this is my preferred product when I do a short cook fruit or vegetable item.  The reason?  It is not fully carbonized, so it still releases plenty of flavonoids from the hardwood.  You certainly can use a standard hardwood charcoal but add a chunk or two of SmokinLicious® double filet wood chunks to be sure you get a wood flavor.

While the chimney starter is burning down to hot coals, I peel and thinly slice 12 apples.  I use a Gala variety for my recipe and a StĂ´k charcoal grill, equipped with an insert system.  I place my sliced apples in the insert vegetable basket for this simple method of wood firing the apples.  Just be sure to spray the basket with non-stick cooking spray to ensure the apples don’t stick.

A Cake by Name

With my hot SmokinLicious® charwood producing steady heat, my 12 Gala apples peeled and sliced thin, I’m ready to place the vegetable basket over the hot coals.  Remember, apples have a lot of water content, so they will steam initially.  The water will attract the smoke vapor and bring great color and flavor.  After approximately 10 minutes, I shake the apple slices in the basket to allow them to rotate for even cooking and color.  You’ll see the edges become bronzed as they cook.   In 20 minutes, these will be ready to go.

wood-fired apples make the best cake

Adding the Ingredients & Cook Time


After the apples are removed from the grill and cooled slightly, add a teaspoon of cinnamon and 2 teaspoons of fresh lemon juice to maintain color until baked in the oven.  Set those aside and gather together 2 cups flour, 1 cup packed light brown sugar, 1 teaspoon cinnamon and 2 sticks of cold butter cut into 8 cubes.
Our wood fired apples and dry ingredients mixed in the pan ready for baking
Start by combining 2 cups of flour, 1 cup of packed light brown sugar, and 1 teaspoon of cinnamon.  Taking one piece of cold butter at a time, add to the flour mixture, cutting each piece using either an electric hand mixer, 2 knives or a pastry cutter.  You want to have pea-size pieces of butter mixed into the flour mixture.  Press 2/3 of this mixture into a 9-inch spring form pan then add the wood-fired apple slices, spreading evenly in pan.


With the wood fired apple slices nestled in the simple cake batter of flour, brown sugar, and cinnamon, it’s time to top the apples with the remaining 1/3 flour mixture.  Be sure all areas are covered.  Set the spring form pan on the foil lined sheet pan and place in a 350°F oven for 75 minutes.  Once cooked, remove from the oven and allow to sit in the spring form pan until cool.  Just run a knife along the edge of the cake to ensure it will separate from the pan’s ring once removed.  Remove the ring when the cake has cooled then sift a ¼ cup powdered sugar on the surface of the cake.

Cake Perfection


Our finished wood fired apple pie cake nicely golden brown
After giving Gala apple slices the lick of smoke from our charwood grill, mix together flour, brown sugar and cinnamon with butter for a great cake batter, and baking everything together, the ultimate in apple pie cake is born.  With a light coating of powder sugar, the wood-fired apple slices pile high for perfection in the single bite.  More like a cobbler batter than cake, you’ll love the simplicity of the construction and the unique flavor a wood fire gives to apples.  Perfect anytime of the year, just like apples are, you’ll be the envy of your neighborhood when you fire up the grill for wood infusion to apples.  Now you must also prove that Wood-Fired Apples make the best Cake – Enjoy!

Thursday, May 10, 2018

MUSHROOMS GO SMOKY-WOOD FIRED

Mushrooms Go Smoky- baby bellas, cremini and shiitake mushrooms are stove top smoked and served over toast with a dolop of ricotta cheese.
Mushrooms Go Smoky with Ricotta cheese on toast


Looking for a great smoky appetizer or snack but don’t want to go to the trouble of firing up the charcoal or gas grill?  Then think stove top smoker and prepare to bring the best out of mushrooms when they get wood fired for full flavor.  I’ll bring you the easy stove top smoker technique that takes less than 30 minutes and then offer up a super easy but full of flavor smoked mushroom toast with kale and ricotta.


Stove Top Smoking

Stove top smokers are a great way to get authentic wood fired flavors into foods in an easy, quick method.  There are many options for read-made units though you certainly can use what’s available in your kitchen (see our blog on “The Kitchen Find“).  I’ll be using the unit made by Nordic Ware® that has everything included expect the wood chip product.  For that item, just visit SmokinLicious® and select your favorite hardwood in the Minuto® wood chip product line.  I’m using about 35 grams of my own custom mix of both species and chip sizing.  Equal parts of Red Oak #8, Sugar Maple #6, and Wild Cherry #6 will bring the perfect balance to my fungi selections.

After placing the base of my smoker on the burner, I add the 35 grams of wood chip custom mix.  I line the drip pan with foil to make clean up easier since the mushrooms will render some of their water.  This is placed on top of the wood chip pile.  Then into the grill pan go my favorite gourmet mushrooms – oyster, cremini, baby bella, shiitaki, porcini.  In just 20 minutes, these will be tender and full of smoky flavor that I can use in my toast recipe.

Savory Ingredient Prep

While the mushrooms are smoking on the stove top, it’s time to prepare the other ingredients for the recipe that will follow.   First, I’ve purchased a hearty country bread that just needs to be sliced and placed on a sheet pan for toasting.  Once the bread is ready for the oven, I wash and dry about 2 cups of kale leaves and then tear them into bite size pieces.  Next, I season 1-1/4 cups of ricotta cheese with kosher salt and fresh ground pepper.  Other ingredients that are at the ready include one garlic clove minced, 2 tablespoons of white wine vinegar, and 1 dry Arbol chili that I reduce almost to powder to add that hot undertone.  You can also use a Fresno chili or other similar hot chili.  For cooking the toast topping, you’ll also need 2 tablespoons of olive oil and a skillet.


Making Toast Topping

With our mushrooms perfectly smoked, I remove them from the smoker pan and set aside.  Into a skillet I place the 2 tablespoons of olive oil and allow to heat.  Once hot, I add the minced garlic and allow to brown for a few minutes.  Next, the smoked mushrooms go in the pan.   Allow these flavors to blend for about 6 minutes, breaking up the larger mushroom pieces.  Finally, add the cleaned kale and chili pepper.  Toss to mix.  In goes the salt, fresh ground pepper, and white wine vinegar.  While that is sitting on low temperature, toast the previously prepared bread slices.  When the toast is done, it will be time to assemble this highly flavorful mushroom toast.


The Ultimate Toast Comes Together

With our bread toasted, mushroom-kale mixture infused with garlic and chili, and the ricotta seasoned, it’s time to assemble the toast.  First, take a generous spoonful of the ricotta and spread on the toast.  Then spoon on the mushroom-kale mixture on top of the ricotta.  That’s it!  Don’t let the simplicity of the assembly fool you.  This is one super flavorful appetizer or snack for those of us who go beyond chips and popcorn.  Pick your favorite gourmet mushrooms, favorite country bread, and let the fun begin.  Wood Fired Mushroom Toast with Kale and Ricotta.  This is soon to be your go to appetizer or gourmet snack.

We hope this recipe inspires you to try smoking more ingredients to add a balance of flavor. We’d love to hear what you think of our recipe so leave us a comment and subscribe to get all our postings on techniques, tips and recipes.  Bringing innovation to wood fired cooking with recipes, techniques and the science behind the fire, that’s SmokinLicious®. Hope you enjoyed our Mushrooms Go Smoky blog!

Thursday, May 3, 2018

HOT SEARED SCALLOPS!

Scallop is just one of many bivalve mollusks with a similar appearing shell like the clam, mussel, or oyster.  They tend to be found in clear waters where there is sand or fine gravel.  There are variations in sizing depending on how they will be used in a recipe.  Today, we are featuring a simple stove top cooking and smoking technique that produces exceptional wood-flavor and searing to the scallop.  This will be finished off with an orange-lime vinaigrette.

Easy Ingredients for an Easy Technique

If you follow our recipes and techniques, then you know we love to use the plancha on our stovetop with various wood products.  I’ll be using SmokinLicious® Smokin’ Dust® in Alder to bring a complimentary wood flavoring to the scallop while they sear on the plancha.  Here’s what you’ll need for the cooking technique:
  • A plancha or hot griddle surface on the stove top
  • Your choice of Smokin’ Dust® flavor – about 3 tablespoons
  • 1-1/2 pounds of scallop medium to large in sizing
  • High heat oil
  • 3 tablespoons butter
  • Salt and pepper

The Hot Sear-FOR HOT SEARED SCALLOPS!

As with any protein that you want to sear, it’s important to remove as much water as possible.  To start, lay out the scallop on a paper towel lined sheet pan and cover the scallop with additional paper towel.  Gently press down on the paper towel covering and then allow to sit for 10 minutes.

While the scallop dry, prepare the plancha by placing three tablespoons of your choice of Smokin’ Dust® on the plancha.  Place the lid on and allow to heat to at least a registered temperature of 300°F on the thermometer.  Remember, the plancha surface will be hotter than that.  When ready, remove the paper towels from the scallops and sprinkle both sides of the scallop with salt and pepper.

Place one tablespoon of oil on the cooking area of the plancha.  Only add the number of scallops that can fit comfortably on the plancha without crowding each other.  Cook the scallop for 1-1/2 to 2 minutes until browned.  It is important that you stay with the plancha, as this is a very hot unit that cooks quickly, much like cooking in a wok.  Additionally, be sure you use the vent hood on your range as well to reduce the smoke vapor.

When you turn the scallops, add a tablespoon of butter to the plancha and baste the scallops.  You will cook the scallops on the plancha until firm in the center an opaque in color.  Remove the cooked scallop to a large plate and tent loosely with foil.  Now continue cooking the remaining scallops in the same manner.  Keep in mind, the plancha will need additional oil after the first two cooks of scallop to keep them from sticking.  There is no need to add additional Smokin’ Dust®.  Just three tablespoons will add plenty of wood flavoring.  When all the scallops are cooked, keep them warm on the tented plate or move to a warming drawer or low temperature oven.  Now on to the Orange-Lime Vinaigrette.

Vinaigrette Ingredients

For the Orange-Lime Vinaigrette you’ll need the following ingredients to produce a ½ cup of vinaigrette:
  • 3 tablespoons orange juice
  • 2 tablespoons lime juice
  • ½ small shallot, minced
  • 1 tablespoon minced fresh cilantro
  • 1/8 teaspoon red pepper flakes
  • 2 tablespoons vegetable oil
  • 2 tablespoons extra virgin olive oil
  • fine salt
Make the vinaigrette by combining the orange juice, lime juice, shallot, cilantro, and pepper flakes in a bowl.  Slowly whisk in the oils.  Season as needed.

Perfection!

With the scallops seared and smoked to perfection on the plancha and the vinaigrette made, it’s time to plate the flavors.  If you are serving as an appetizer, spread a small amount of the vinaigrette on a plate and add a scallop.  If serving as a first course, spread a small amount of vinaigrette on the plate, add 2-3 scallops, and drizzle with a tablespoon more of vinaigrette.  As an entrĂ©e, you get to decide how many of these beautiful scallops will grace the plate.

These flavors work great served with a light pasta like angel hair or with orzo mixed with parsley, feta cheese, and the oil.  The pairings are endless.  Plancha Seared Scallop infused with Wood Flavoring – an explosion of flavor you won’t soon forget.  You must try our HOT SEARED SCALLOPS recipe.